Isuzu KB P190. Manual — part 1114
7A3-2 ON-VEHICLE SERVICE (JR405E)
DESCRIPTION
Before performing on-vehicle service on the automatic
transmission, check that the engine idling speed and
general engine condition are normal.
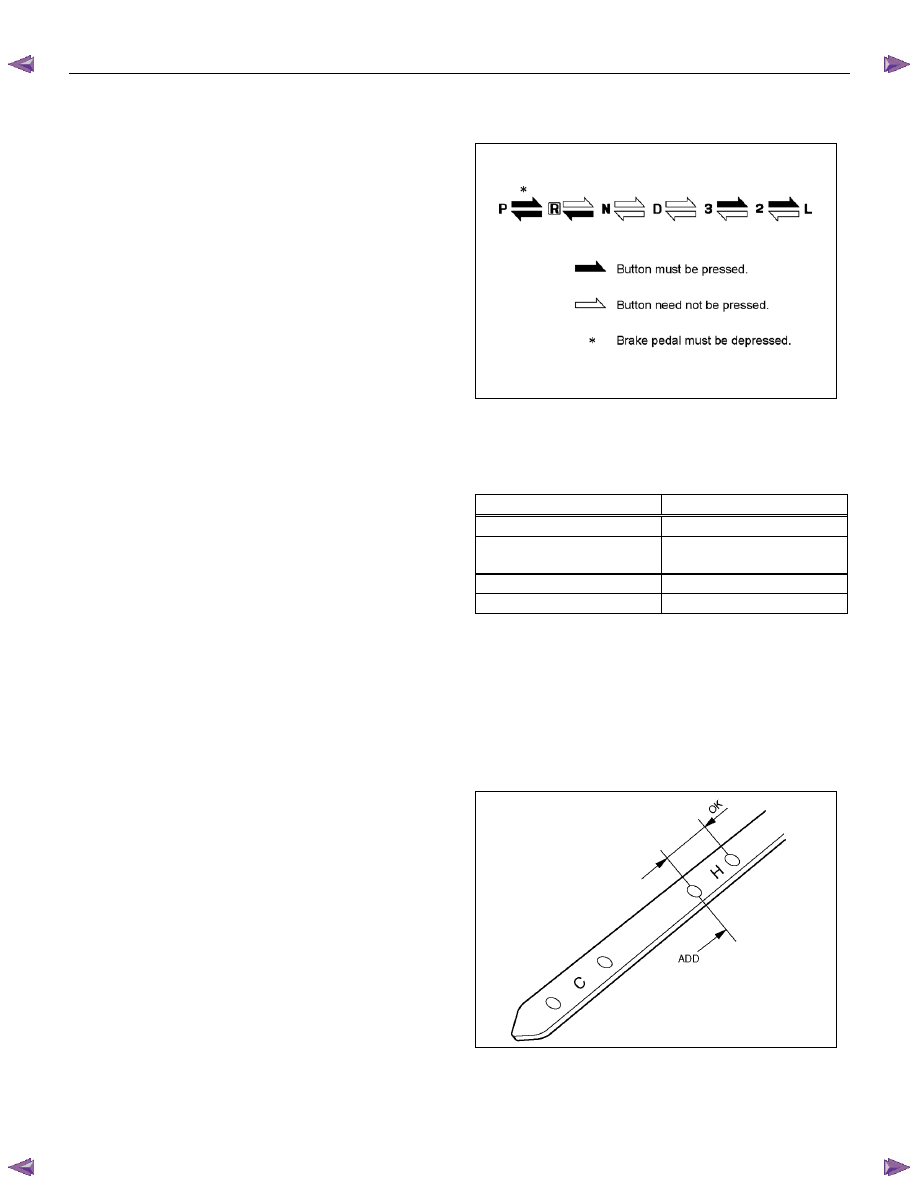
For shift interlock function, if the ignition key is out of
“LOCK” position, the shift lever select button can not be
pushed. (shift lever can not be operated.)
RTW77ASH000901
AUTOMATIC TRANSMISSION FLUID (ATF)
Inspect
Remove the transmission dipstick to check the condition
of the ATF.
Check the color and smell of the ATF.
If the ATF is abnormal color or smells burnt, replace it
and investigate the cause of trouble.
Coloor of ATF
Condition
Clear red
Normality
Blackish discoloration
Defects of power train
parts (clutches)
White turbidity
Include water
Discoloration of red brown Deterioration of ATF
ATF LEVEL
Inspect
Hot Level
1. Warm up the engine and the transmission by driving
the vehicle on the road so that the temperature
reaches around 80
°C (176°F).
Do not turn the engine off.
2. Park the vehicle on a level surface.
3. Apply the parking brake firmly.
4. Let the engine run at idle.
Move the select lever slowly through all the gear
positions.
Stop in each gear position just long enough for the
transmission to engage.
5. Return the select lever to either “P” or “N”.
6. Remove the ATF level dipstick.
7. Wipe the dipstick clean with a paper towel.
8. Reinsert the dipstick and wait several seconds.
9. Remove the dipstick.
The ATF level should be inside the “H” range on the
dipstick.
242R300001
If the ATF level is below the “H” range, ATF must be
added.
ON-VEHICLE SERVICE (JR405E) 7A3-3
Cold Level
The vehicle must not have been driven so that the
temperature reaches around 20
°C (68°F) before the
cold level check is made.
1. Park the vehicle on a level surface.
2. Apply the parking brake firmly.
3. Start the engine and allow it to warm up.
The engine coolant temperature gauge needle
should be midway between the “C” mark and “H”
mark.
4. Let the engine run at idle.
Move the select lever slowly through all the gear
ranges.
Stop in each range just long enough for the
transmission to engage.
5. Return the select lever either “P” or “N”.
6. Remove the ATF level dipstick.
7. Wipe the dipstick clean with a paper towel.
8. Reinsert the dipstick and wait several seconds.
9. Remove the dipstick.
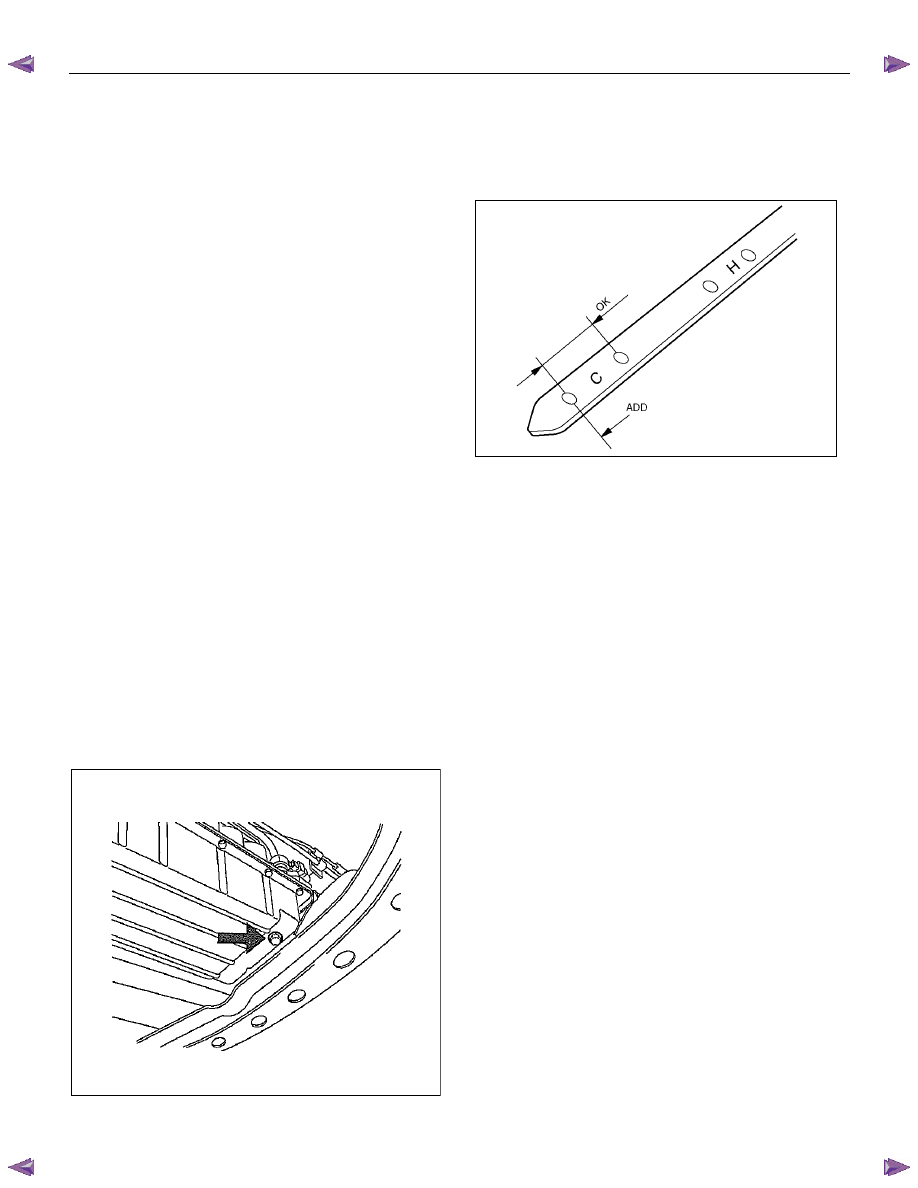
The ATF level should be inside the “C” range on the
dipstick.
If the ATF level is below the “C” range, ATF must be
added.
242R300002
ATF CHANGE
1. Park the vehicle on level ground and block the rear
wheels.
2. Start the engine and allow it to idle until the ATF
reaches a temperature of 40-50
°C (104-122°F).
3. Stop the engine.
4. Raise the front to the vehicle and support with
suitable safety stands.
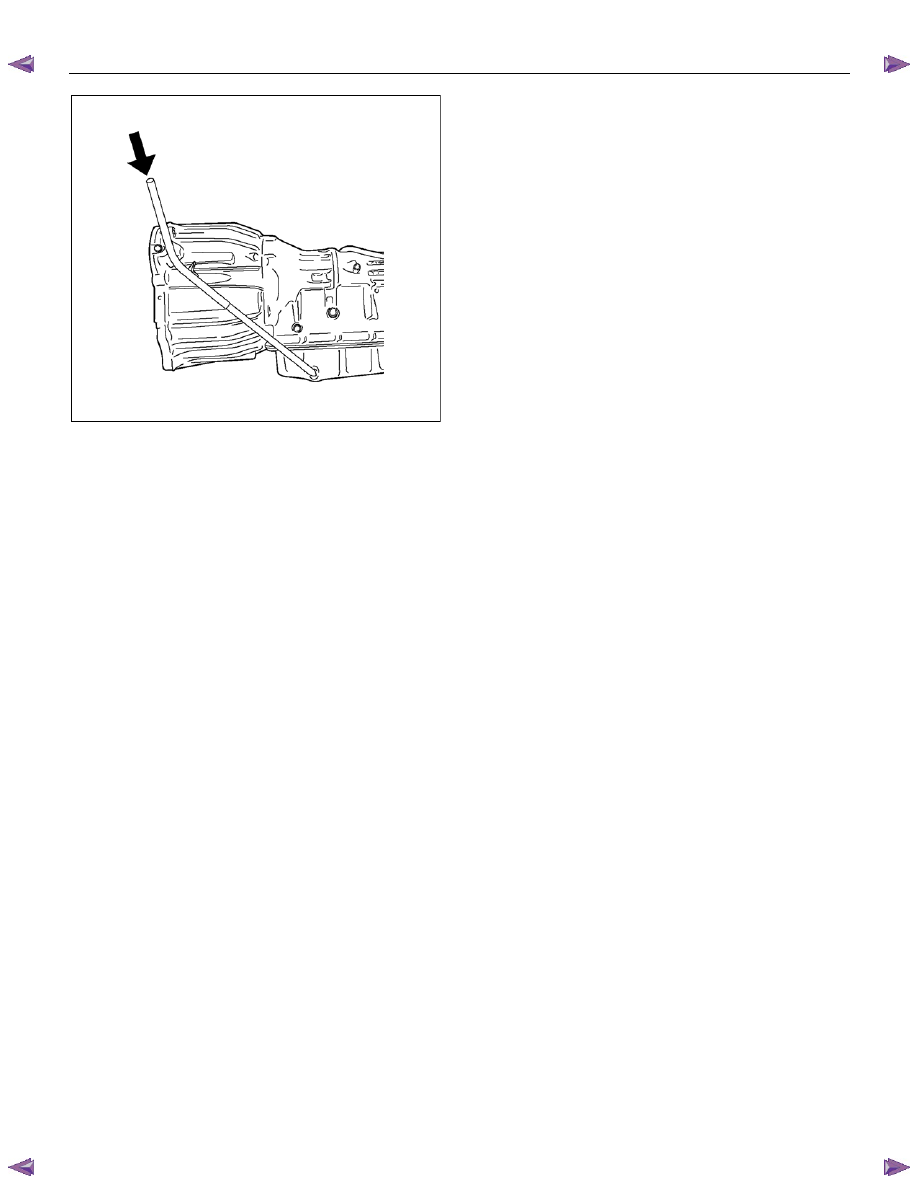
5. Remove the drain plug from the oil pan and drain the
ATF (approximately 6 liters).
6. Remove the oil pan.
7. Inspect the oil pan (details written below).
8. Install the oil pan.
Note:
Use a new gasket. Clean the oil pan and magnet.
Oil pan bolt torque : 8 N
⋅m (0.8 kgf⋅m/69 lb⋅in)
9. Replace the gasket and install the drain plug.
Drain plug torque : 35 N
⋅m (3.6 kgf⋅m/26 lb⋅ft)
Note:
Do not reuse the old washer (gasket).
Clean the drain plug (especially the threaded section).
10.Remove the safety stands and wheel blocks.
11.Pour about 5 liters of new ATF.
12. Start the engine. With your foot on the brake, move
the shift lever through each gear range, and shift to
“P” range.
13.Check the ATF level. Add more ATF carefully as
necessary using the dipstick. Refer to “ATF LEVEL”
preciously in this section.
Note:
Keep the engine idle (do not stop it) during the ATF level
adjustment.
7A3-4 ON-VEHICLE SERVICE (JR405E)
RTW07ASH000101
Inspect
1. Check the drain plug tip for adhesion of foreign
substances.
2. Check the drained ATF for color, smell and inclusion
of foreign substances.
3. Check the oil pan bottom and magnet for adhesion of
foreign substances.
If a problem is discovered during those checks, the
Automatic transmission must be overhauled.
Note:
The torque converter and the oil strainer need replacing
with new ones if the drained ATF contains large
amounts of metallic or facing flakes.
In addition, flush the ATF cooler circuit.
ON-VEHICLE SERVICE (JR405E) 7A3-5
TRANSMISSION CONTROL MODULE (TCM)
RTW37ALF001901
Remove and Disconnect
1. Disconnect the negative battery cable.
2. Remove the connectors.
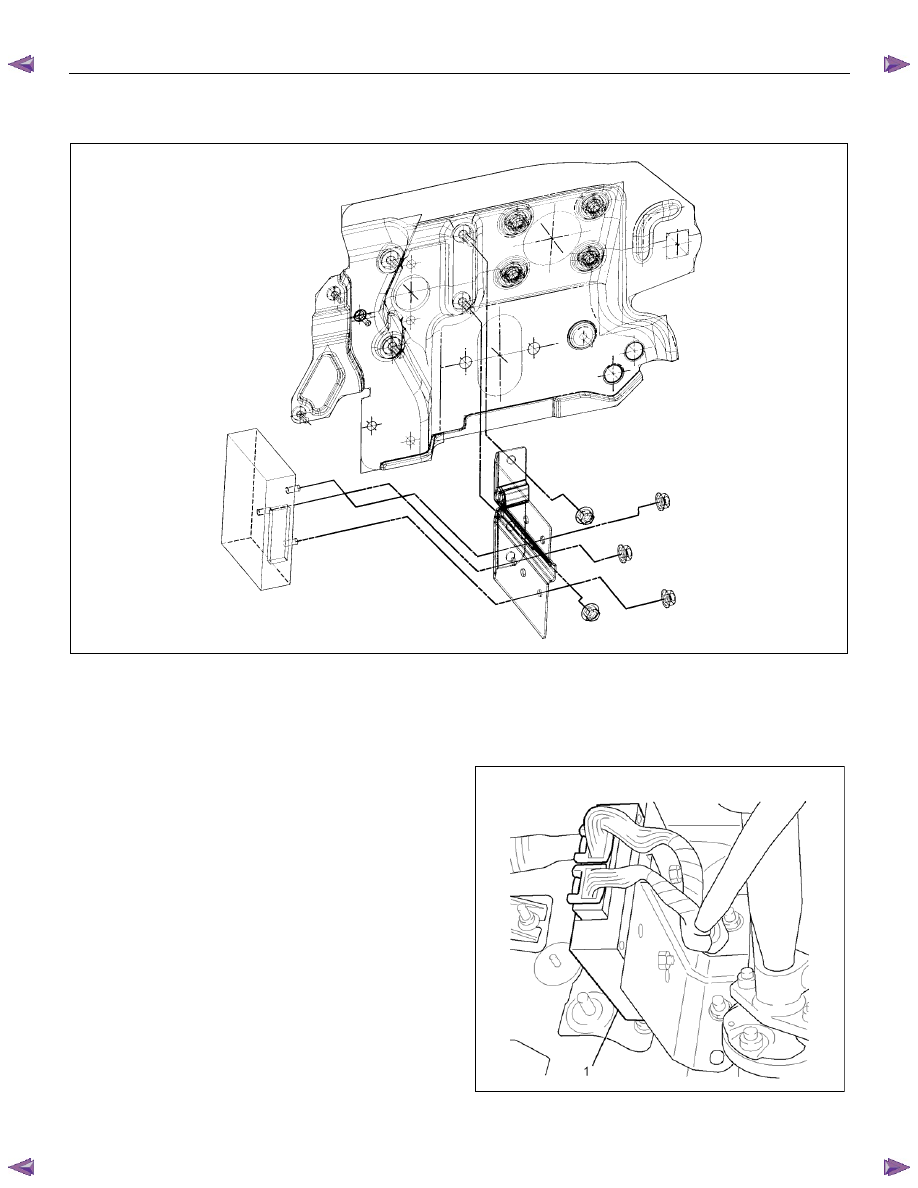
3. Remove the fixing nuts and remove the TCM (1)
from the bracket.
Note:
The TCM is fitted under the instrument panel of the
driver’s compartment via three stud bolts.
Install or Connect
Follow the removal steps in the reverse order. Be
absolutely sure that the connectors are securely
fastened.
RTW77ASH000801
Нет комментариевНе стесняйтесь поделиться с нами вашим ценным мнением.
Текст