BMW 3 (E46). Manual — part 205
of window outer sealing lip.
If necessary, replace side window
trim.
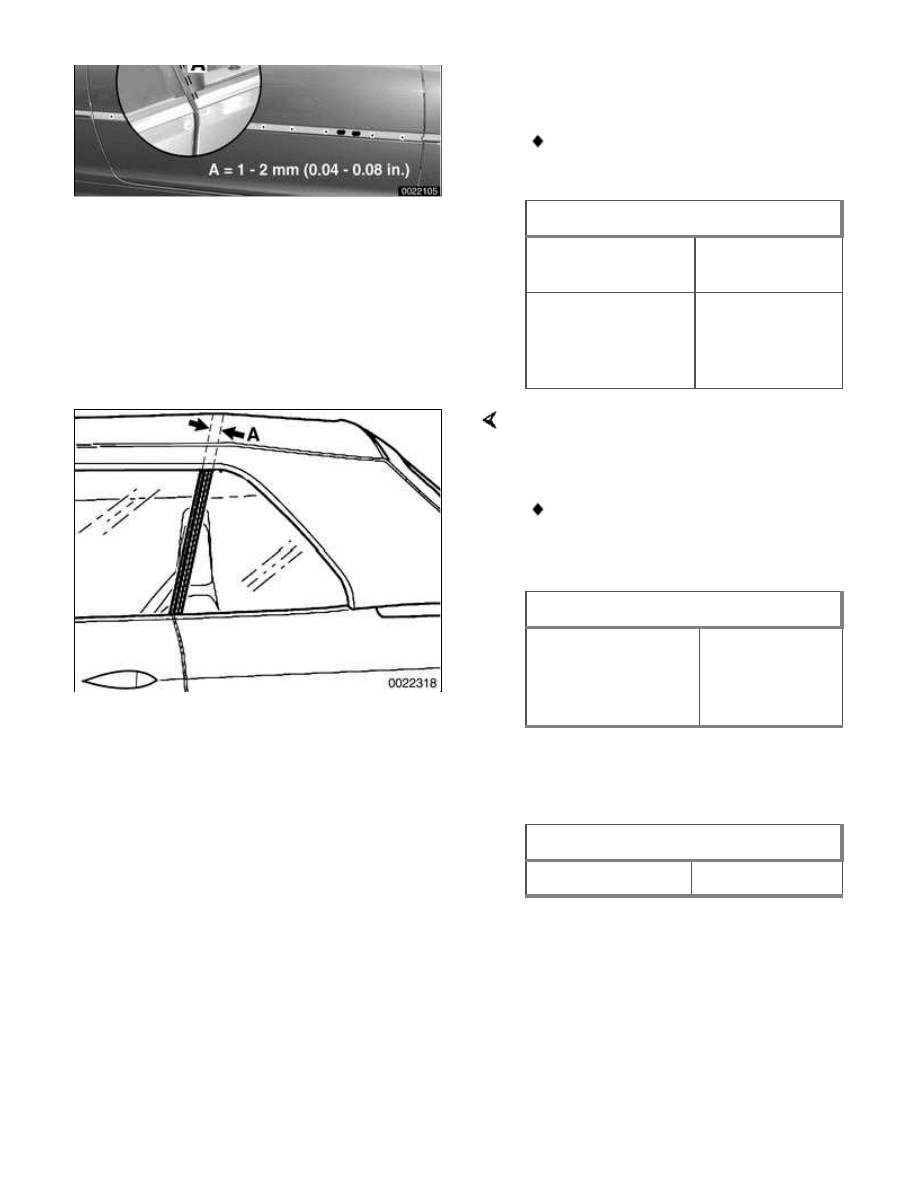
Window longitudinal adjustment
Dimension A
1 - 2 mm
(0.04 - 0.08 in.)
Door window rear
edge to side
window seal
(Coupe)
6 ± 0.75 mm
(0.24 ± 0.03 in.)
Convertible models: When all the way
up, measure door window gap to side
window trim.
Gap A is measured from edge of
door window to rear of side
window seal.
Window longitudinal adjustment
Door window rear
edge to side
window seal
(Convertible)
25 mm (1 in.)
-
Tighten longitudinal adjustment
screws.
Tightening torque
Window to guide
8 Nm (71 in-lb)
Pretension
Note:
Window pretension can also be thought
of as the inward rake of the window.

-
Remove outer door trim strip as
described earlier.
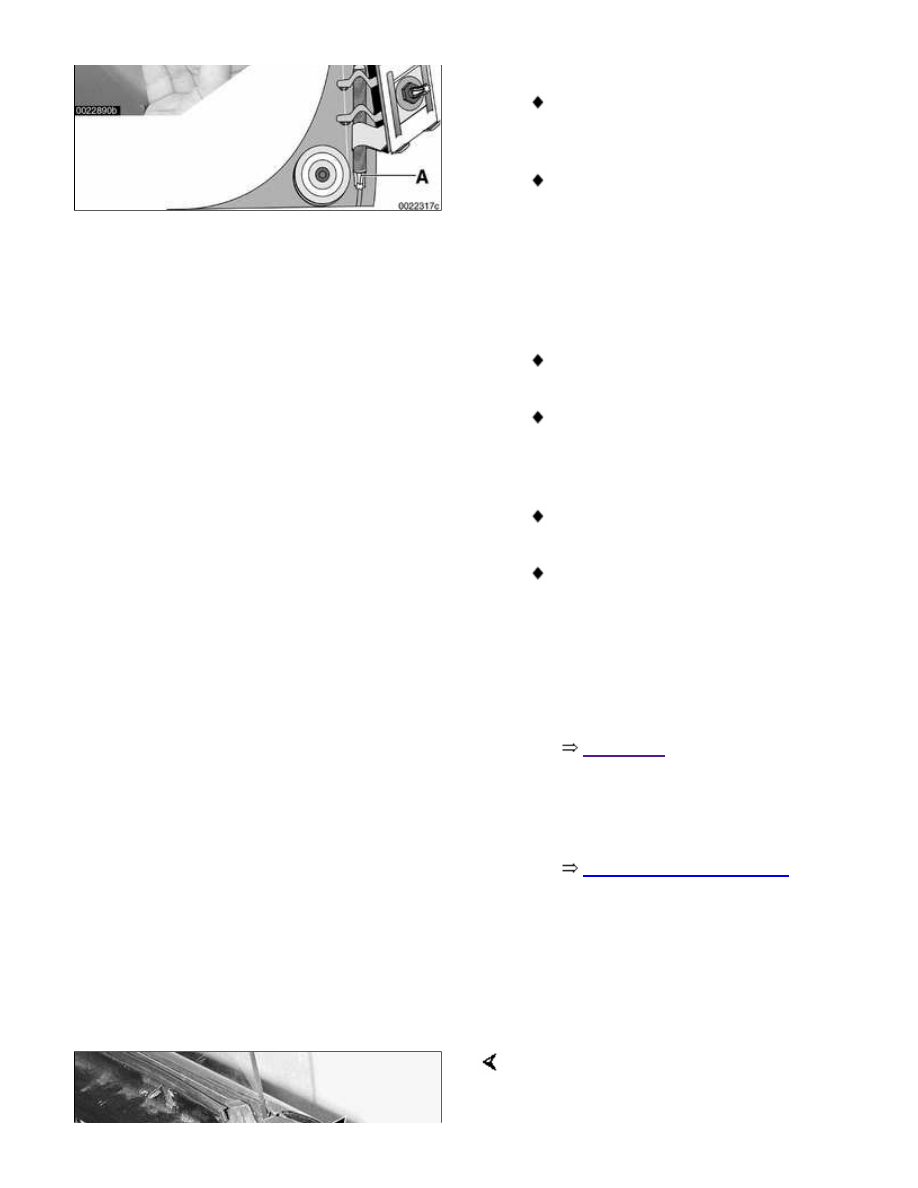
Latch door to first catch of door lock
(A). Check that top of window rests on
rubber door seal (B).
Reach through rear bore in door with
BMW special tool 41 6 120 or
equivalent ratchet wrench.
Loosen window adjustment Torx
screw (A) 180° counterclockwise.
Turn slider adjustment nut (B)
until it is hard to move.
Continue loosening window
adjustment Torx screw and
tightening slider adjustment nut
(see previous step) until correct
window rake is reached.
Tighten window adjustment screw.
Tightening torque
Window to guide
8 Nm (71 in-lb)
Vertical adjustments
Note:

Adjusting the depth that the window
retracts into the door seal insures that
wind noise and water leakage past
window is kept to a minimum.
Parallelism. Top edge of door window
must be parallel to contour of water
drain in roof.
Note:
Window parallelism is also referred to
as window tilt.
Retraction depth. With door closed,
raise window to top.
Use BMW special tool 51 3 080 or
equivalent device to measure
depth of window in rubber seal.
Window retraction
At A-pillar or roof
line (arrows)
3 - 4 mm
(0.12 - 0.16 in.)
-
Window protrusion. When all the
way down, measure door window
glass protrusion above top edge of
door.
Window protrusion
Door window
above top of door
max. 2 mm (0.08
in.)
To adjust:
Lower door glass.
Pry out rubber plugs at base of
door.
Starting at rear of door, reach
through bore in door to turn Torx
screw (A).
Note:
Torx screw size is T20.
Repeat at front bore.
Raise window and check for
parallelism and correct depth of
retraction.
Repeat as necessary.
Reinsert rubber plugs.
Front door window, removing
and installing (2-door models)
-
Remove interior door panel. See
411 Doors
.
-
Disconnect negative (-) cable from
battery. Then remove airbag unit
and vapor barrier from door. See
721 Airbag System (SRS)
.
WARNING!
Prior to disconnecting the battery,
read the battery disconnection
cautions given at the front of this
manual on page viii.
Detach door corner rubber seal
mounting clips (arrows). Remove seal
by pulling up in direction of curved
Нет комментариевНе стесняйтесь поделиться с нами вашим ценным мнением.
Текст