BMW 3 (E46). Manual — part 139
If necessary, loosen and remove
stabilizer bar link mounting nut (arrow)
from strut. Detach link from strut
housing.
Note:
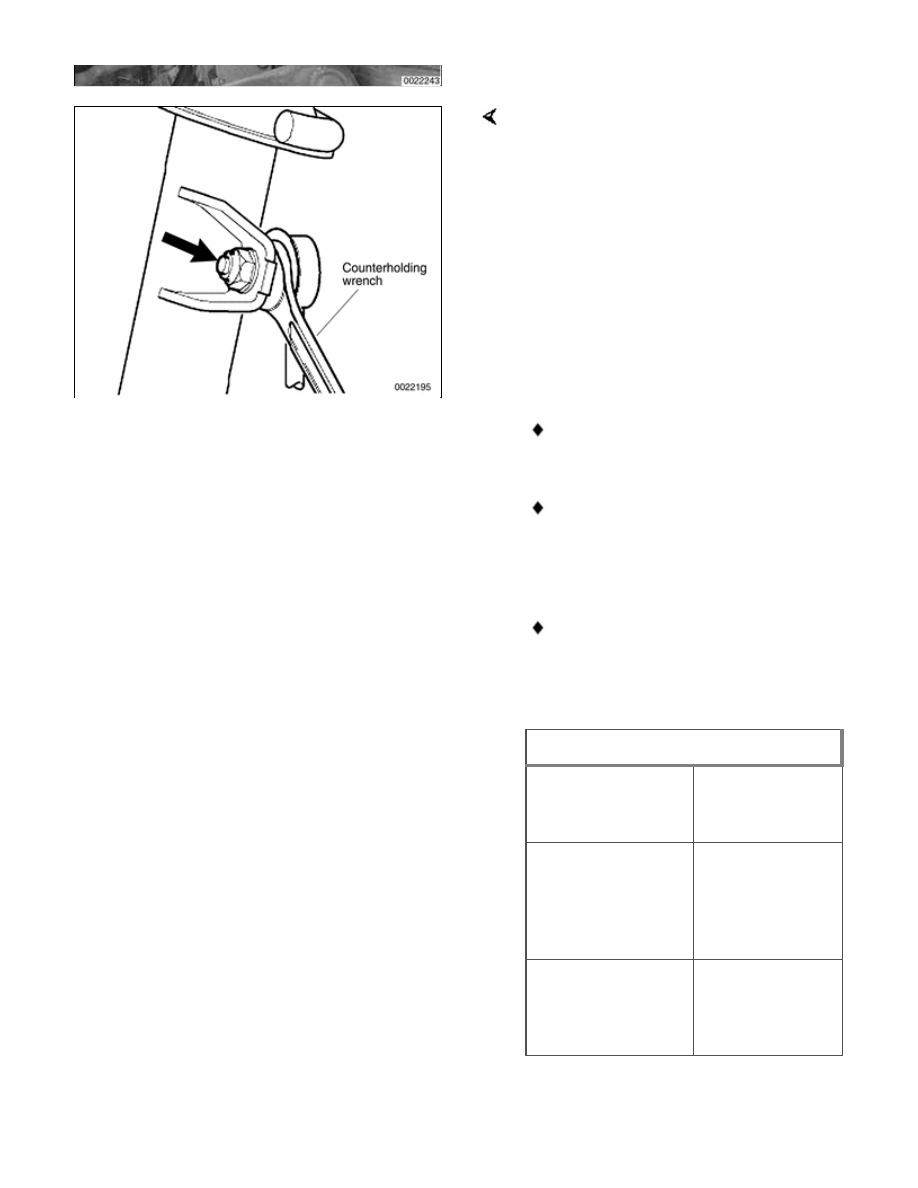
Use a thin wrench to counterhold shaft
of stabilizer bar link ball joint while
removing mounting nut.
-
Installation is reverse of removal,
noting the following
Use new self-locking nuts on
connecting links.
When attaching stabilizer link to
strut or bar, use a thin wrench to
counterhold ball joints on link
while tightening nut.
Installation of stabilizer bar is
easiest with car level (front wheels
at the same height) and as near to
normal ride height as possible.
Tightening torques
Stabilizer bar
bushing brackets
to subframe
22 Nm (16 ft-lb)
Stabilizer bar link
to stabilizer bar
M10 self locking
nut (always
replace)
65 Nm (48 ft-lb)
Stabilizer bar link
to strut M10 self
locking nut (always
replace)
65 Nm (48 ft-lb)
310-6
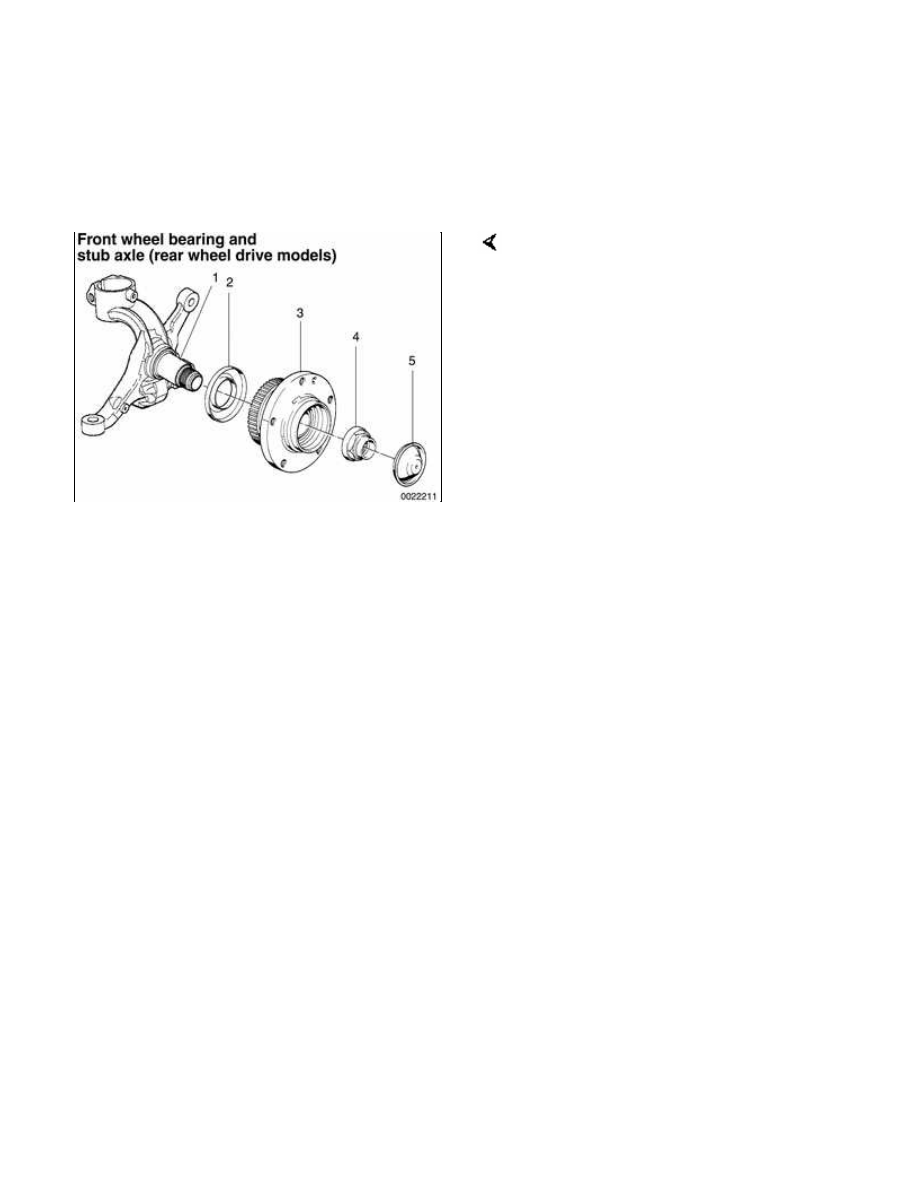
Front Wheel Bearings
The front wheel bearings are
permanently sealed and require no
maintenance.
On rear wheel drive models, the
bearing is integral with the wheel hub
and ABS pulse wheel and pressed on
the steering arm stub axle.
1 - Steering arm and stub axle
2 - Dust guard
3 - Wheel hub, bearing and ABS
pulse wheel
4 - Stub axle collar nut -tighten to 290
Nm (214 ft-lb)
5 - Dust cap
On all wheel drive models, the front
wheel bearing is pressed into the
steering arm. The wheel hub is
pressed into the bearing and the outer
CV joint stub axle is pressed into the
hub.
The ABS front pulse wheel in all wheel
drive models is the inner (ridged) seal
of the front wheel bearing.
Special press tools are required to
replace the front wheel bearings. Read
the procedures through before
beginning the job.
Front wheel bearing, replacing
(rear wheel drive models)
-
Raise car and remove front wheel.
WARNING!
Make sure that the car is firmly
supported on jack stands designed
for the purpose. Place the jack
stands beneath a structural chassis
point. Do not place jack stands
under suspension parts.
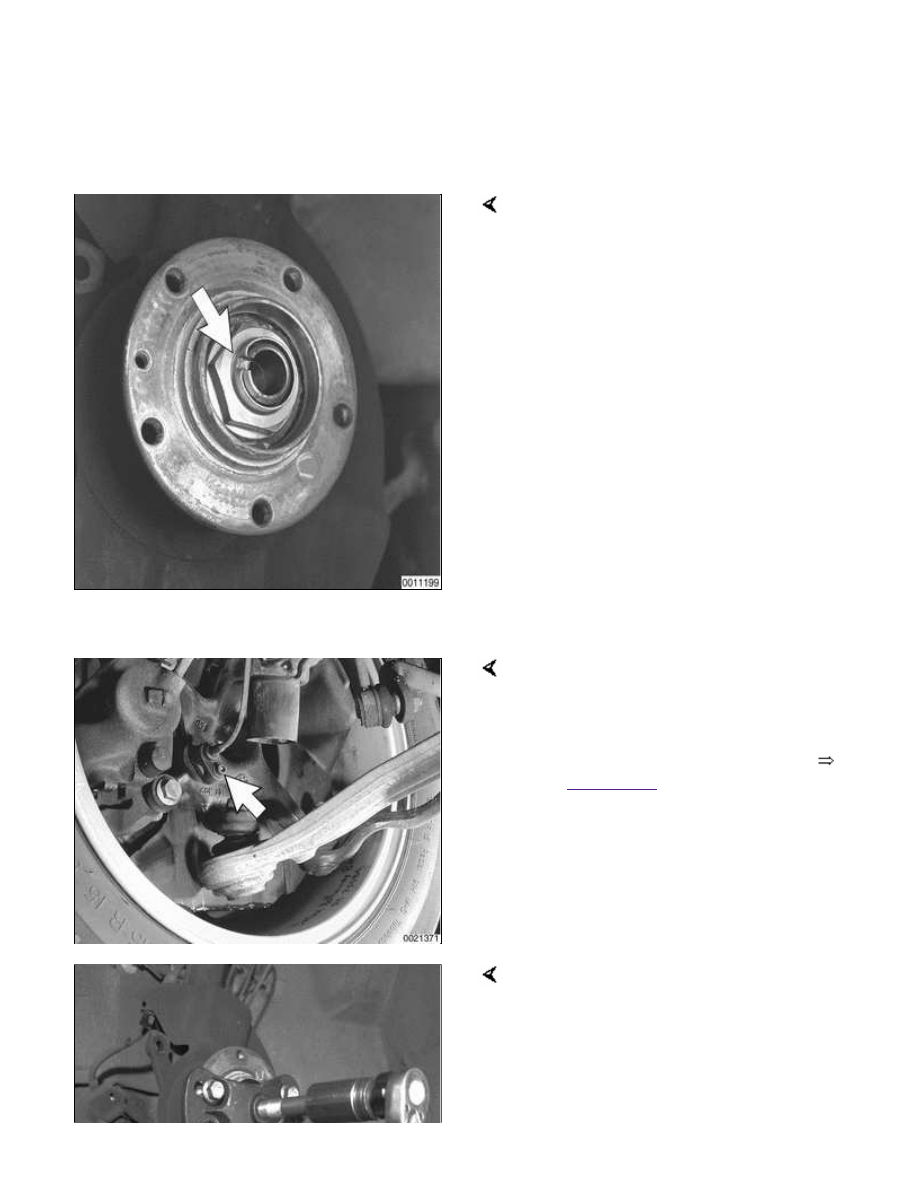
Pry off dust cap from center of wheel
hub. Bend back staked part (arrow) of
wheel hub (axle) collar nut.
-
Remount wheel and lug bolts.
-
Lower car to ground. With an
assistant applying brakes, loosen
collar nut. Do not remove
completely.
CAUTION!
The wheel hub collar nut is tightened
to a torque of 290 Nm (214 ft-lb).
Make sure the car is firmly on the
ground.
-
Raise car and remove wheel.
Remove ABS wheel speed sensor
(arrow).
-
Remove brake caliper assembly
and brake rotor as described in
340 Brakes
. Leave brake hose
connected to caliper. Suspend
caliper assembly from chassis
using stiff wire.
-
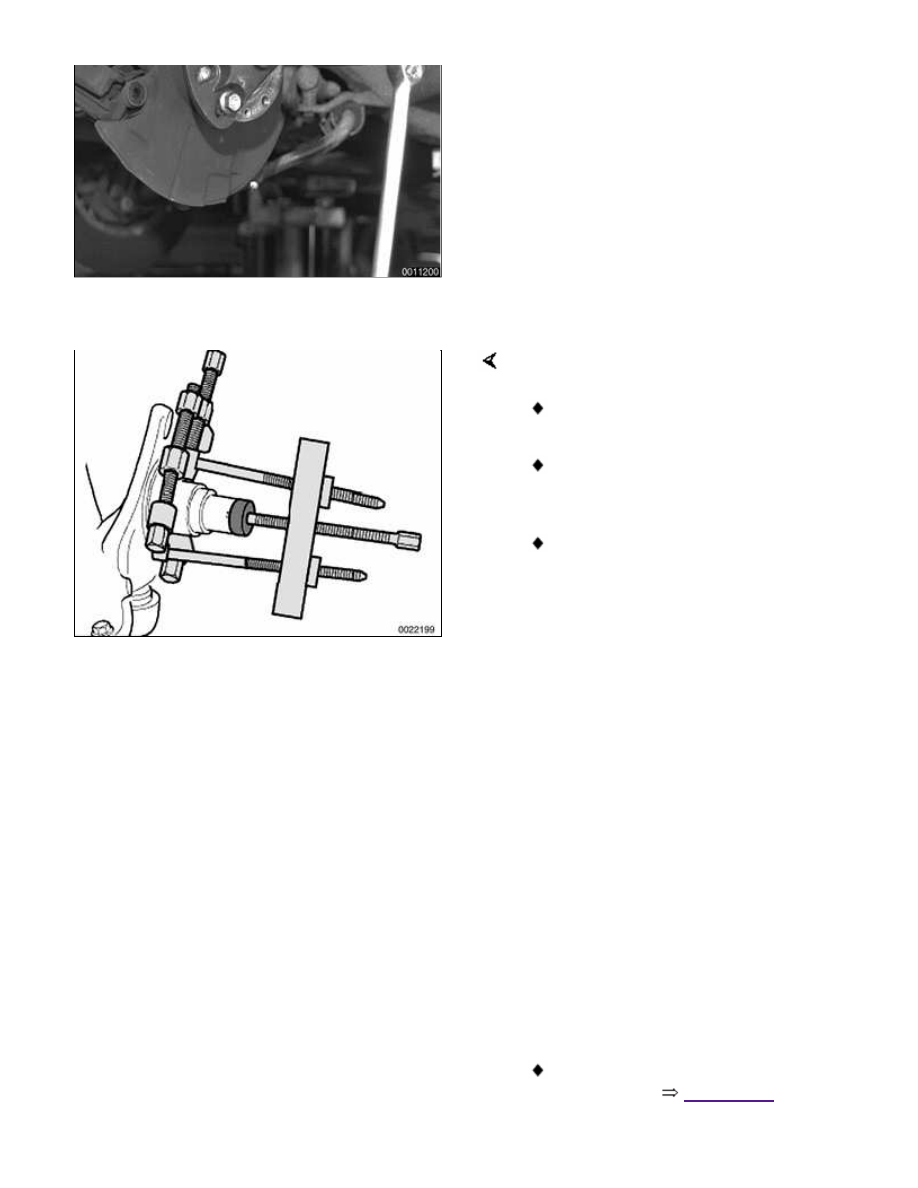
Remove wheel hub collar nut.
Remove wheel hub with integral wheel
bearing from steering arm using a slide
hammer puller (BMW special tools 33 4
201, 33 4 202, 33 4 203 and 33 2 116)
or conventional puller as illustrated.
-
If outermost bearing inner race
stays on steering arm stub axle,
use BMW special tool set 33 4 400
or two-jaw puller to remove race.
CAUTION!
Do not reuse a wheel bearing
assembly once it has been removed.
The removal process destroys the
bearing.
To remove innermost inner race:
Unbolt brake rotor dust shield.
Bend back wheel bearing dust
guard.
Use BMW special tools 00 7 500
and 31 2 106 to pull race off stub
axle.
-
Install splash guard and new dust
shield behind bearing. Press new
wheel hub/bearing assembly on
stub axle using BMW special tool
31 2 110 or equivalent.
CAUTION!
The BMW special tool insures that
only the inner bearing race is used to
press on the hub and bearing
assembly. The bearing is damaged if
it is not pressed on using the inner
race.
-
Install new collar nut. Do not
tighten nut to its final torque at
this time.
Install brake rotor and brake
caliper. See
340 Brakes
.
Нет комментариевНе стесняйтесь поделиться с нами вашим ценным мнением.
Текст