BMW 3 (E46). Manual — part 190
airbags in the front doors and as an
option on 4-door models. When
servicing doors on cars with front
side-impact airbags, always
disconnect the negative (-) battery
terminal. See
721 Airbag System
(SRS)
for cautions and procedures
relating to the airbag system.
-
Close door window completely.
-
Disconnect negative (-) battery
cable.
CAUTION!
Prior to disconnecting the battery,
read the battery disconnection
cautions given at the front of this
manual on page viii.
-
Remove interior door panel as
described later.
-
Where applicable, remove
side-impact airbag from door. See
721 Airbag System (SRS)
Remove door vapor barrier.
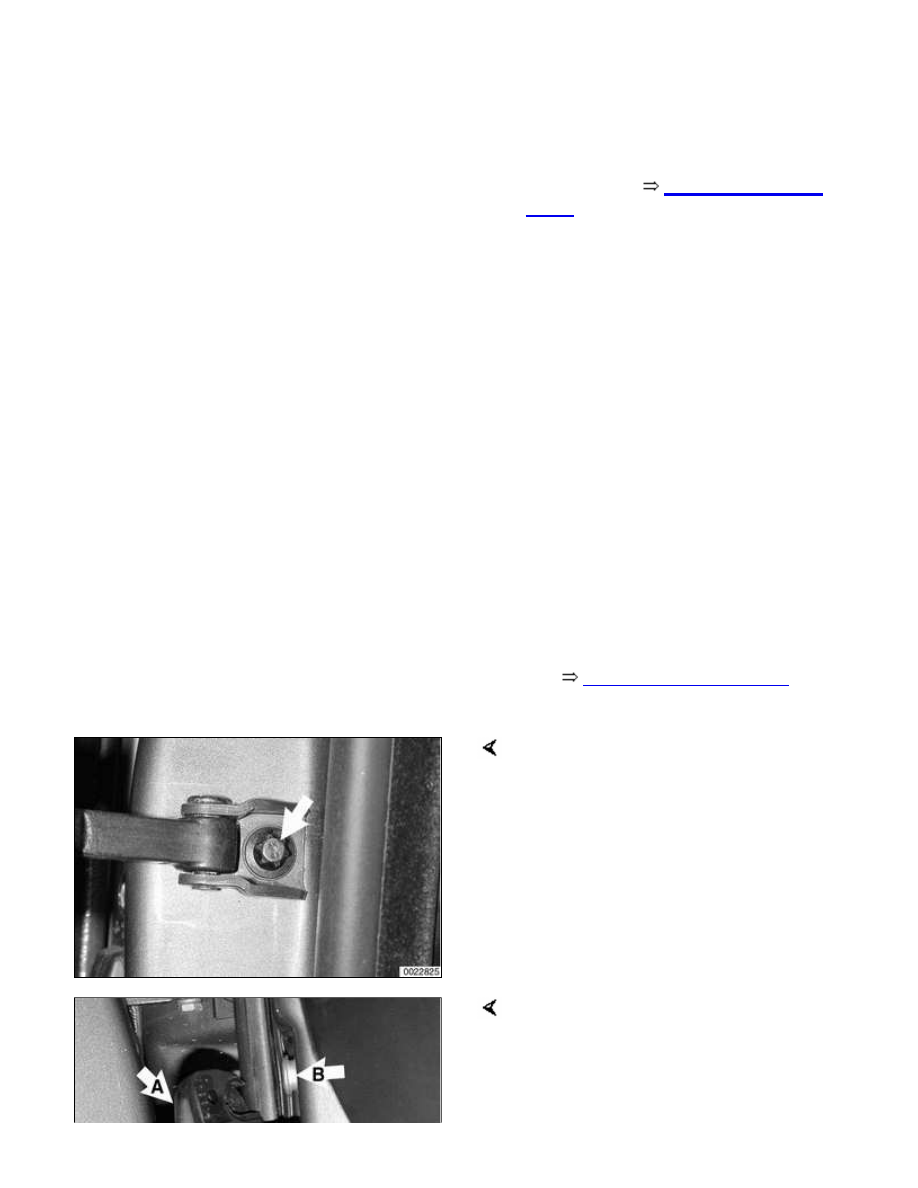
Remove door check mounting bolt
(arrow).
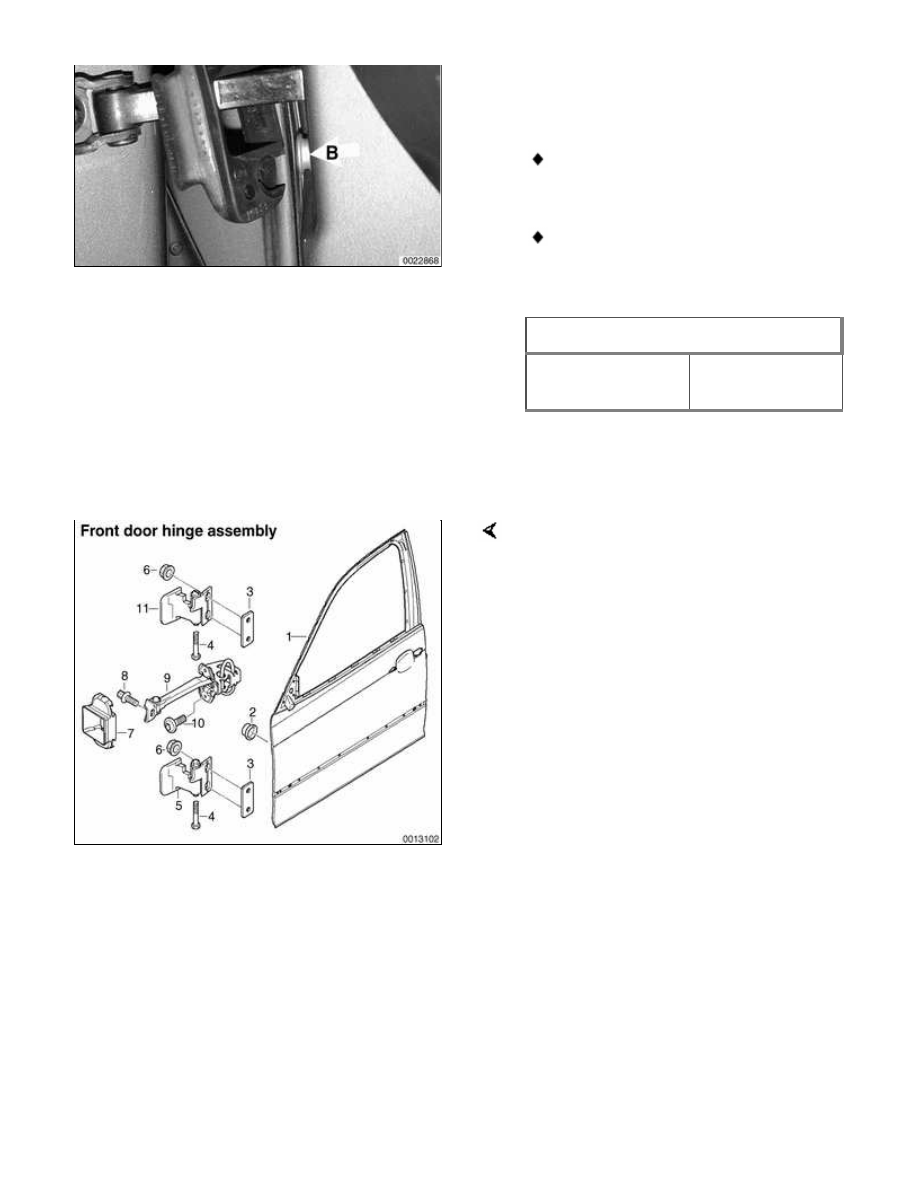
Remove rubber cover (A) and bolts (B)
from door check lockplate on door.
-
Remove door check from inside
door.
-
Installation is reverse of removal.
Lubricate door check before
installing.
Use new mounting bolts when
reinstalling the side-impact airbag
to the door (where applicable).
Tightening torque
Door check to
door
24 Nm (16 ft-lb)
Door hinge adjustment
If the installed door is uneven or out of
parallel, shims can be used to correct
its position. The shims are placed
behind the hinge plate and are
available in two different thicknesses
(0.5 mm and 1.0 mm).
1 - Door
2 - Protective cap
3 - Spacer plate
4 - Hex bolt
5 - Lower door hinge
6 - Hex nut with plate
7 - Door check gasket
8 - Torx bolt with washer
9 - Door check
10 - Torx bolt
11 - Upper door hinge
Front and rear doors are similar.

Tightening torques
Door hinge to door
20 Nm (15 ft-lb)
411-3
Door Panels
WARNING!
E46 cars are fitted with side-impact
airbags in the front doors and as an
option on 4-door models. When
servicing doors on cars with front
side-impact airbags, always
disconnect the negative (-) battery
terminal. See
721 Airbag System
(SRS)
for cautions and procedures
relating to the airbag system.
Door trim panel, removing and
installing
-
Disconnect negative (-) battery
cable.
CAUTION!
Prior to disconnecting the battery,
read the battery disconnection
cautions given at the front of this
manual on page viii.
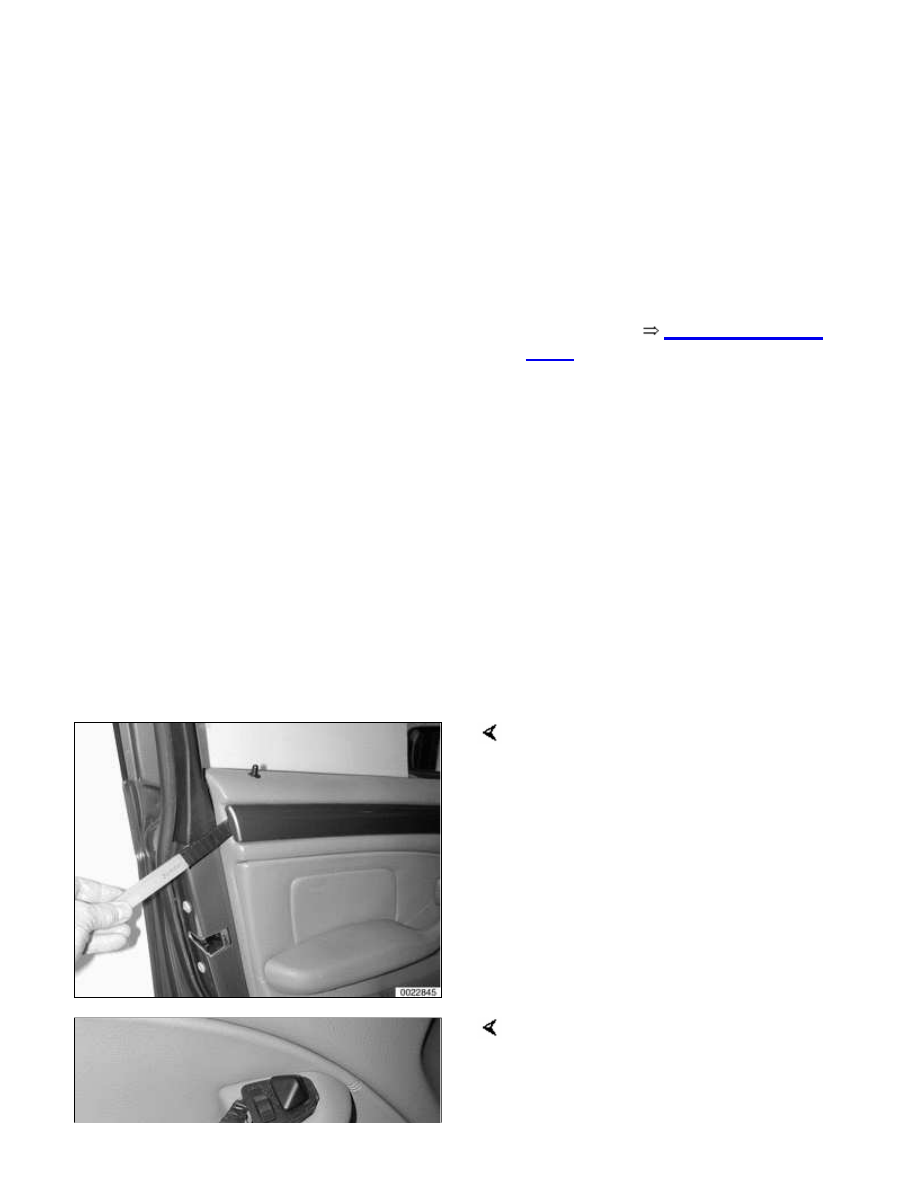
Gently pry off door panel trim strip.
Carefully pry out mirror adjustment
switch and disconnect harness
connector from switch.
Нет комментариевНе стесняйтесь поделиться с нами вашим ценным мнением.
Текст