BMW 3 (E46). Manual — part 159
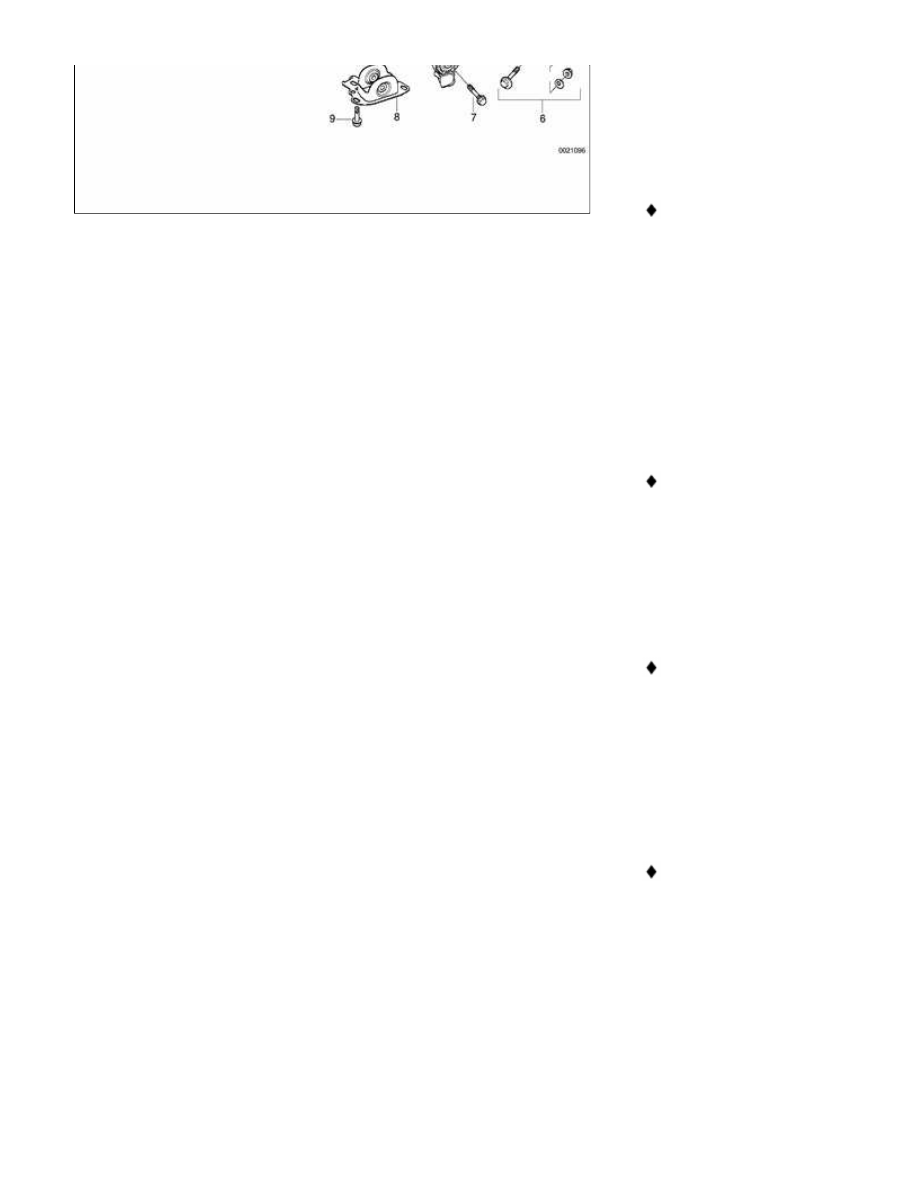
4
-
Upper control
arm outer bolt
self-locking M12
nut
tighten to 110 Nm
(81 ft-lb)
5
-
Trailing arm
6
-
Lower control
arm eccentric
bolt eccentric
flat M12 washer
self locking M12
nut
tighten to 110 Nm
(81 ft-lb)
7
-
Trailing arm
front bolt
self-locking M12
nut
tighten to 110 Nm
(81 ft-lb)
8
-
Trailing arm
front bracket
9
-
Bracket
mounting bolt
tighten to 77 Nm (57
ft-lb)
10
-
Drive axle
11
-
Lower control
arm
12
-
Lower control
arm plastic
shield

13
-
Lower control
arm inner M12
bolt lock plate
tighten to 110 Nm
(81 ft lb)
Trailing arm, removing and
installing
-
Raise rear end of car and remove
wheel.
WARNING!
Make sure that the car is firmly
supported on jack stands designed for
the purpose. Place the jack stands
beneath a structural chassis point. Do
not place jack stands under
suspension parts.
-
Remove drive axle as described in
331 Rear Axle Final Drive
.
-
Right side: Detach brake pad
sensor connector at brake caliper.
-
Remove brake rotor and caliper as
described in
340 Brakes
. Do not
remove brake line from caliper.
Suspend caliper from body using
stiff wire.
-
Remove parking brake cable from
brake shoe expander. See
340
Brakes
.
Remove rear brake line bracket
mounting bolt (arrow). Detach bracket
from trailing arm.
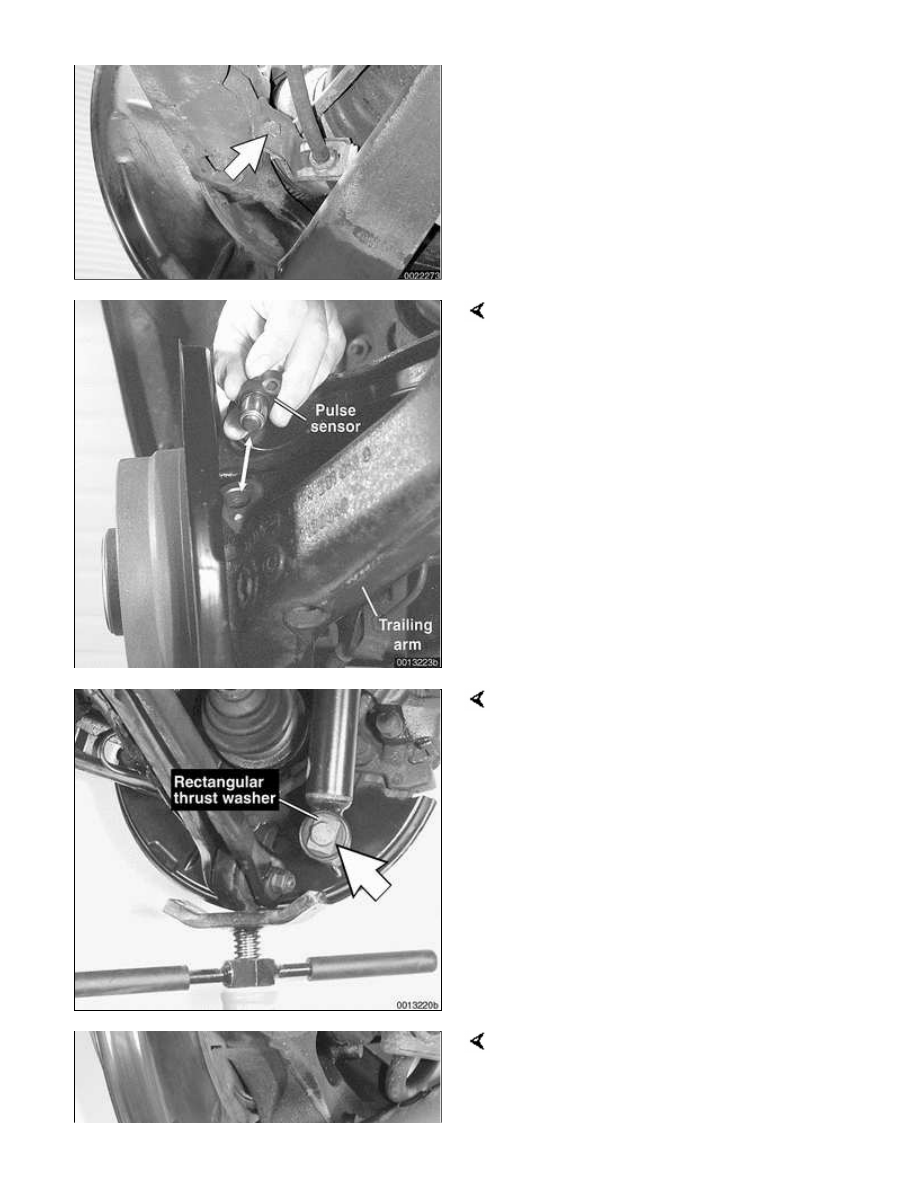
CAUTION!
Avoid damaging the brake hose by
stretching when the trailing arm is
lowered.
-
Remove fuel tank protective panel,
if equipped.
Remove ABS pulse sensor from trailing
arm.
-
Unclip pulse sensor and pad sensor
(if applicable) harnesses from
control arm and lay aside.
Support trailing arm from below using an
adjustable jackstand. Remove shock
absorber lower mounting bolt (arrow).
-
Slowly lower suspension until coil
spring can be safely removed.
Mark position (arrows) of lower control
arm eccentric mounting bolt.
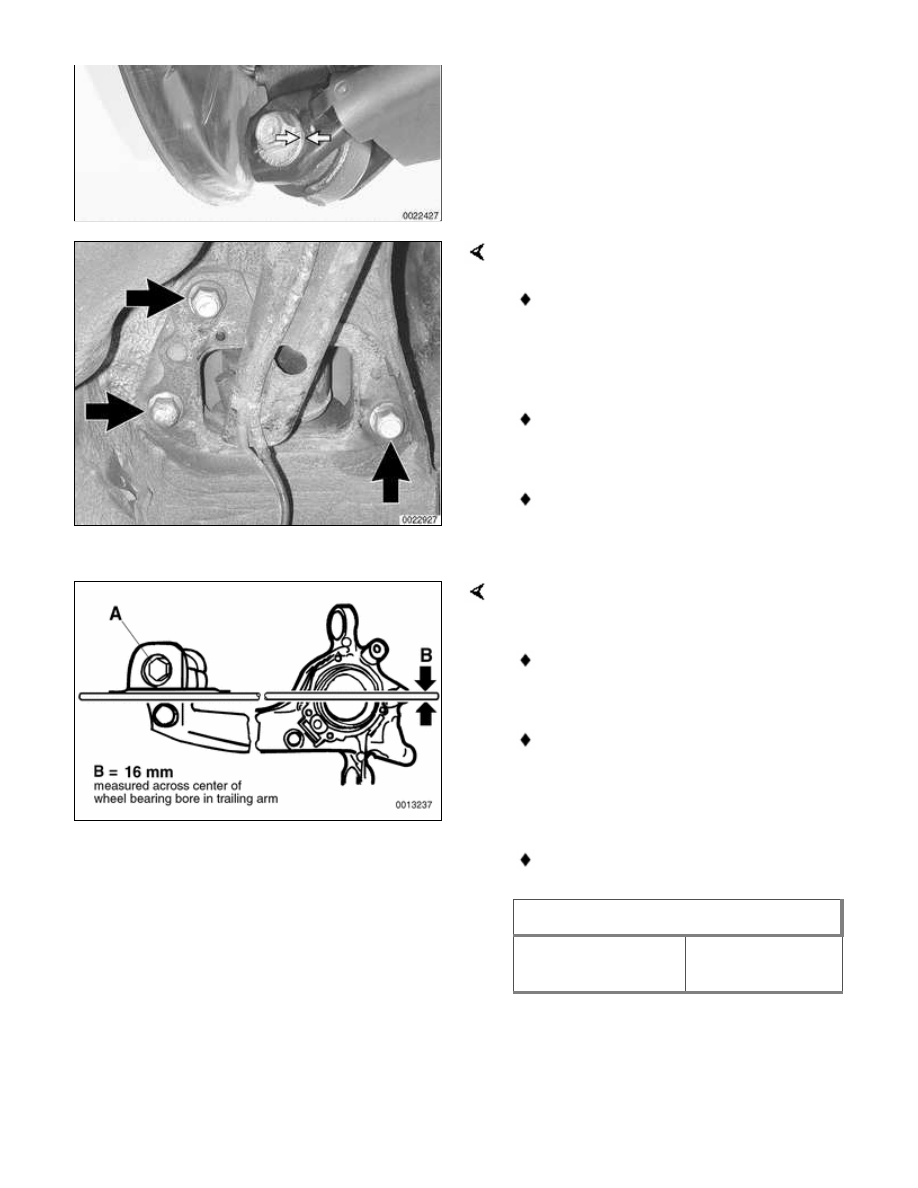
-
Unbolt upper and lower control
arms from trailing arm. Note
direction of bolt insertion in both
arms.
To remove trailing arm:
Make reference marks to locate
trailing arm bracket to body in order
to maintain alignment
specifications.
Remove trailing arm front bracket
mounting bolts (arrows).
Working with trailing arm on
workbench, detach front bracket
from arm.
When reinstalling, preload trailing arm
front bracket bushing:
Install bolt (A) through bracket and
arm and install nut finger tight.
Using 16 mm bar stock as shown in
illustration, align base of bracket so
that it is parallel with center of
wheel bearing bore on trailing arm.
Torque bracket bolt (A).
Tightening torque
Trailing arm to front
bracket
110 Nm (81 ft-lb)
-
Remainder of installation is reverse
of removal, noting the following:
Нет комментариевНе стесняйтесь поделиться с нами вашим ценным мнением.
Текст