BMW 3 (E46). Manual — part 135
8
-
Bolt M10
(always replace)
tighten to 59 Nm (44
ft-lb)
9
-
Control arm rear
bracket
10
-
Bolt M12
(always replace)
tighten to 110 Nm
(81 ft-lb)
11
-
Jack point
12
-
Subframe
mounting bolt
M12 (see torque
table)
13
-
Control arm
inner ball joint
14
-
Bolt M12
tighten to 77 Nm (57
ft-lb)
15
-
Self locking nut
M14 (always
replace)
tighten to 80 Nm (59
ft-lb)
Control Arms
In all models each front control arm has
three attachment points:
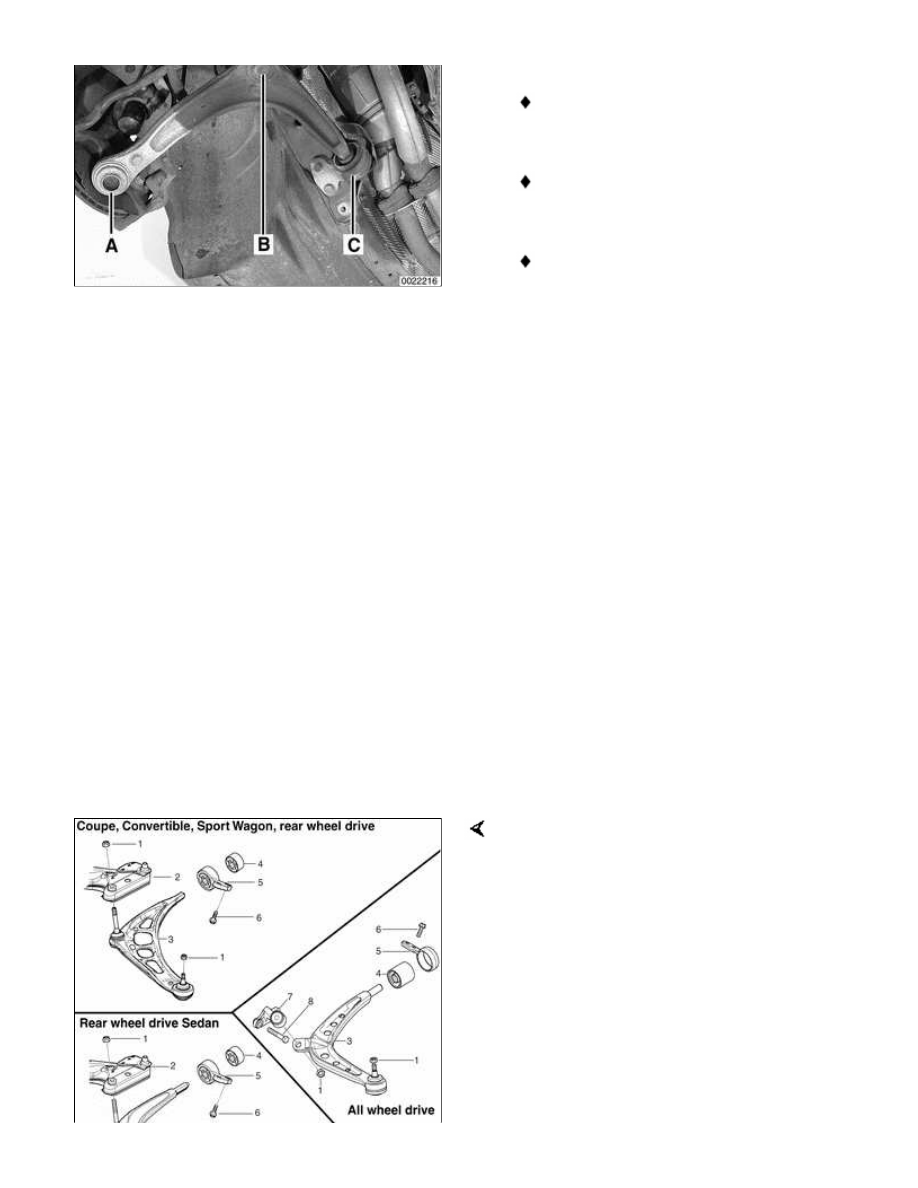
A Outer ball joint attached to
steering arm
B Inner ball joint attached to front
subframe
C Bushing and bracket attached to
the frame rail (rear wheel drive
models) or front subframe (all wheel
drive models)
Note:
Rear wheel drive front control arm is
shown in the illustration.
On all models the rear bushing of the
control arm is available as a replacement
part.
On rear wheel drive models, both ball
joints are pressed into the control arm at
the factory. On all wheel drive models,
the outer (steering arm) ball joint is
pressed in. Because of the aluminum
construction of the control arm,
pressed-in ball joints are not removable.
In case of pressed-in ball joint wear or
damage, the complete control arm must
be replaced. The control arm with ball
joint(s) is available as a replacement unit
from BMW.
E46 cars have been equipped with three
different styles of control arm. Make sure
a replacement control arm is identical to
the original.
1 - Ball joint nut
2 - Front subframe
3 - Control arm
4 - Bushing
5 - Bushing bracket

6 - Bracket mounting bolt
7 - Inner ball joint (all wheel drive only)
8 - Ball joint mounting bolt
Control arm, removing and
installing (rear wheel drive
models)
-
Raise car and remove wheel.
WARNING!
Make sure that the car is firmly
supported on jack stands designed for
the purpose. Place the jack stands
beneath a structural chassis point. Do
not place jack stands under
suspension parts.
-
Remove splash shield under engine
compartment.
-
Remove front end reinforcement.
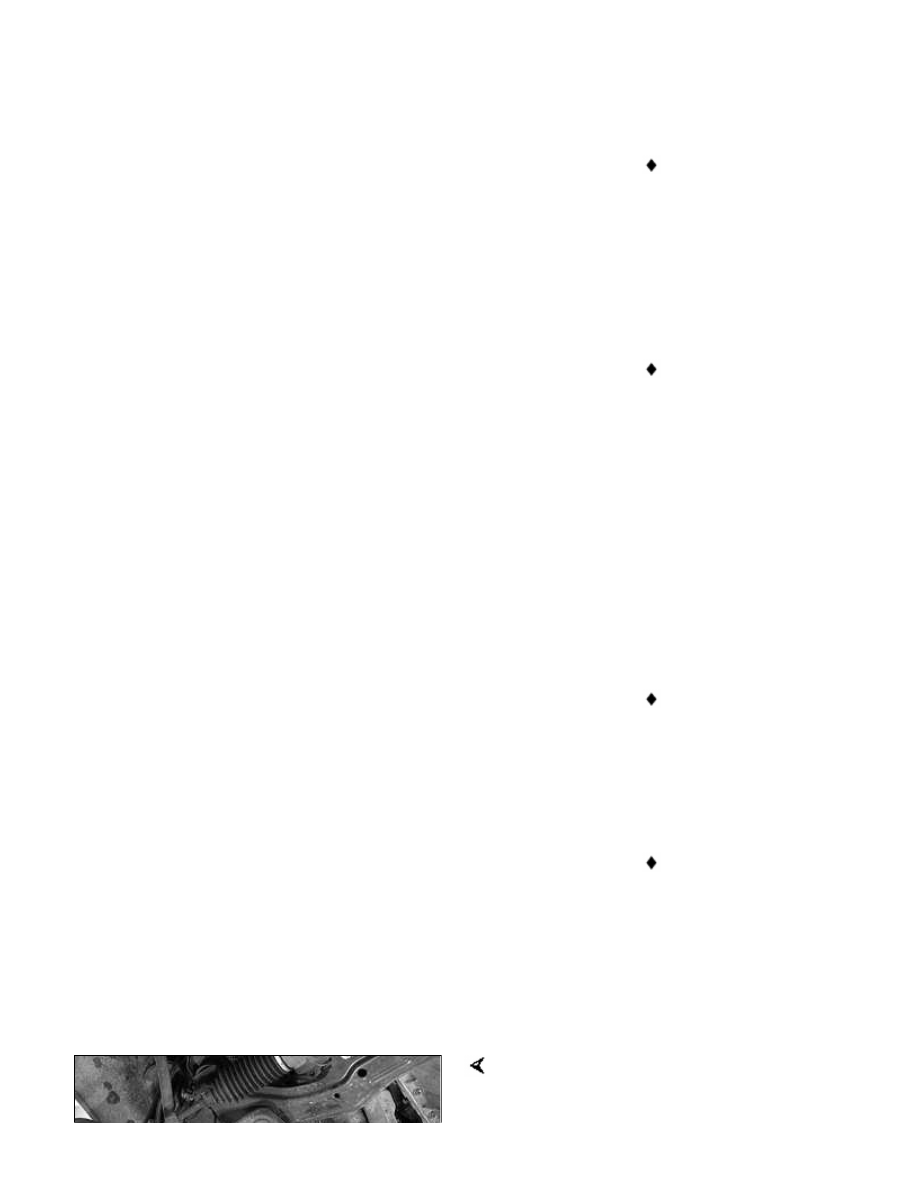
On cars equipped with xenon
headlights: Remove self levelling
headlight sensor mounting nuts
(arrows) from right control arm.
Working at steering arm, remove outer
ball joint nut (arrow). Use BMW special
tool 32 3 090 or equivalent to separate
steering arm from control arm.

Remove control arm inner ball joint
mounting nut (arrow) at subframe.
Drive ball joint shaft out of subframe
using soft faced hammer.
Support control arm while removing
control arm bracket bolts (arrows) from
frame rail.
-
Remove control arm.
Inspect rear bracket rubber bushing
for wear.
Check ball joints for damage,
looseness, or torn boots.
Replace control arm if ball joints are
damaged.
CAUTION!
If a control arm is deformed due
to an accident, inspect the inner
ball joint mounting bore in the
subframe for damage or
eccentricity.
Нет комментариевНе стесняйтесь поделиться с нами вашим ценным мнением.
Текст