BMW 3 (E46). Manual — part 136
If one control arm rear rubber
bushing is damaged, bushings on
both sides must be replaced.
Note:
Control arm rear bushing replacement is
covered later in this group.
-
Installation is reverse of removal,
noting the following:
Make sure all thread bores, bolts,
nuts and mating surfaces are clean.
Use new self-locking nuts or bolts,
where applicable.
Have vehicle alignment checked
after assembly. nothing
WARNING!
Do not reuse self-locking nuts or
bolts. They are designed to be used
only once and may fail if reused.
Tightening torques
Control arm rear
bracket to frame
rails M10 bolt
(always replace)
59 Nm (44 ft-lb)
Front end reinforcement to front
subframe or body frame rails: M10 bolt
(always replace)
Stage 1
59 Nm (44 ft-lb)
Stage 2
torque angle 90°
+ 30°
Inner ball joint to
subframe M14
self-locking nut
(always replace)
90 Nm (66 ft-lb)
Tightening torques
Outer ball joint to
steering arm M12
self-locking nut
(always replace)
65 Nm (48 ft-lb)
Road wheel to hub
100 ± 10 Nm
(74 ± 7 ft-lb)
Control arm, removing and
installing (all wheel drive
models)
-
Raise car and remove wheel.
WARNING!
Make sure that the car is firmly
supported on jack stands designed for
the purpose. Place the jack stands
beneath a structural chassis point. Do
not place jack stands under
suspension parts.
-
Remove splash shield under engine
compartment.
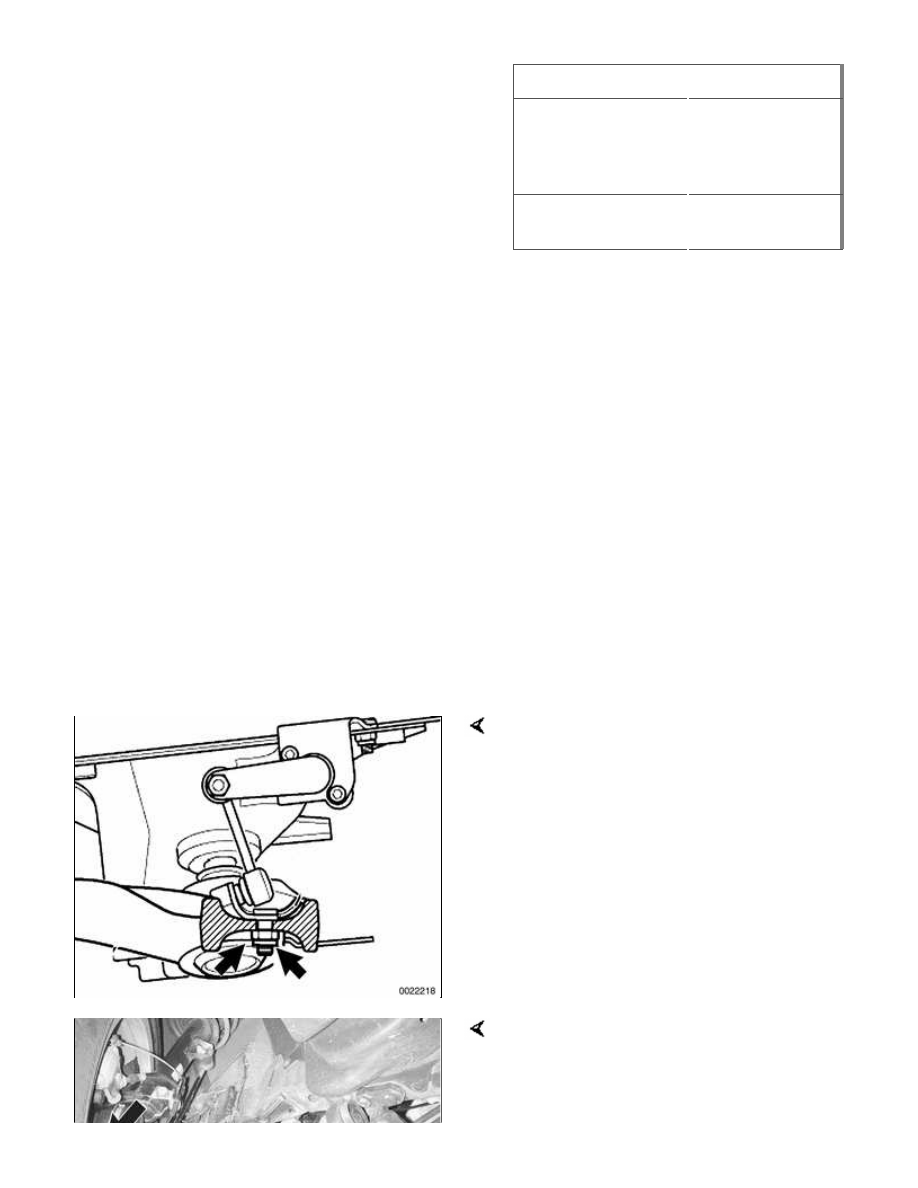
On cars equipped with xenon
headlights: Remove headlight vertical
aim sensor mounting nuts (arrows) from
right control arm.
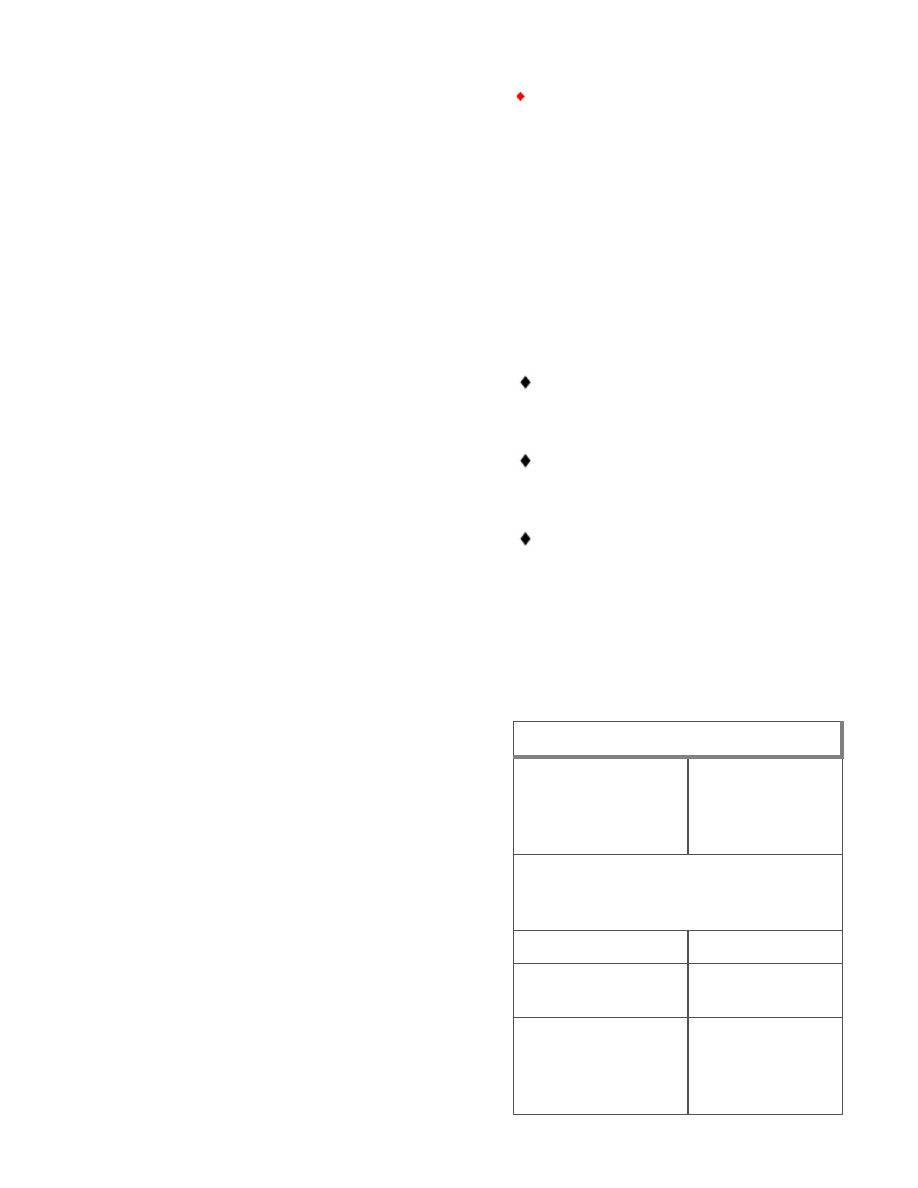
Working at steering arm, remove outer
ball joint nut (arrow). Use BMW special
tool 32 3 090 or equivalent to separate
steering arm from control arm.
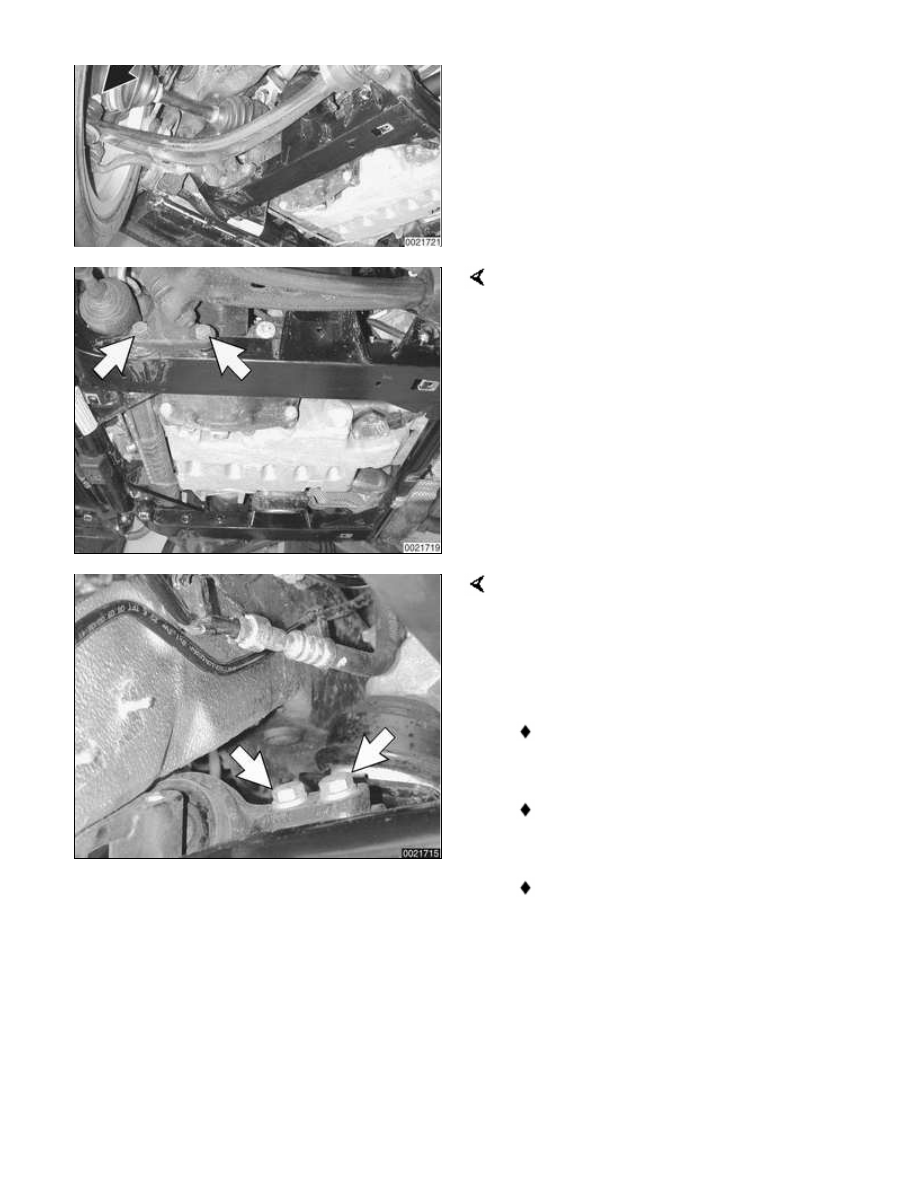
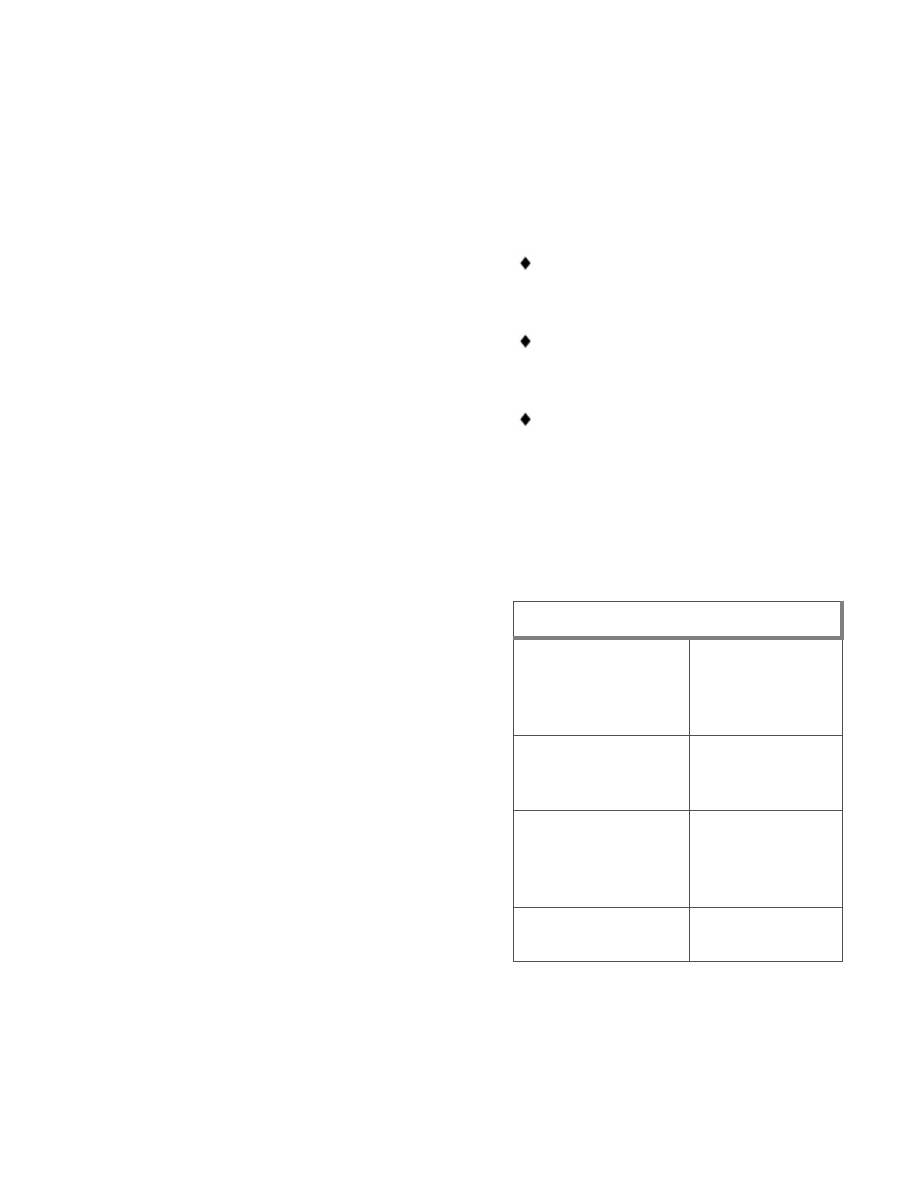
Remove inner ball joint mounting bracket
bolts (arrows) from subframe.
Support control arm. Working at rear of
subframe, remove control arm rear
bracket mounting bolts (arrows).
-
Remove control arm.
Inspect rear bracket rubber bushing
for wear.
Check ball joints for damage,
looseness, or torn boots.
Replace control arm if outer
(steering arm) ball joint is damaged.
CAUTION!
If a control arm rear rubber bushing is
damaged, both bushings must be
replaced.
Note:
Inner ball joint and control arm rear
bushing replacement is covered later in
this group.
-
Installation is reverse of removal,
noting the following:
Make sure all thread bores, bolts,
nuts and mating surfaces are clean.
Use new self-locking nuts or bolts,
where applicable.
Have vehicle alignment checked
after assembly. nothing
WARNING!
Do not reuse self-locking nuts or
bolts. They are designed to be used
only once and may fail if reused.
Tightening torques
Control arm rear
bracket to subframe
M10 bolt (always
replace)
59 Nm (44 ft-lb)
Inner ball joint
mount to subframe
M12 bolt
77 Nm (57 ft-lb)
Outer ball joint to
steering arm M12
self-locking nut
(always replace)
65 Nm (48 ft-lb)
Road wheel to hub
100 ± 10 N
(74 ± 7 ft-lb)
Inner ball joint, replacing (all
wheel drive models)
-
Raise car and support safely
Нет комментариевНе стесняйтесь поделиться с нами вашим ценным мнением.
Текст