Hummer H1 (1992-1998). Manual — part 11

Change 1
2-33
2 - 1 5 . ENGINE DISASSEMBLY INTO SUBASSEMBLIES (Cont’d)
x. Oil Pump Drive
1.
Remove capscrew (9) and clamp (12) from cylinder block (7).
2.
Remove oil pump drive (10) and gasket (11) from cylinder block (7). Discard gasket (11).
TURBO ENGINE
2-15. ENGINE DISASSEMBLY INTO SUBASSEMBLIES (Cont’d)
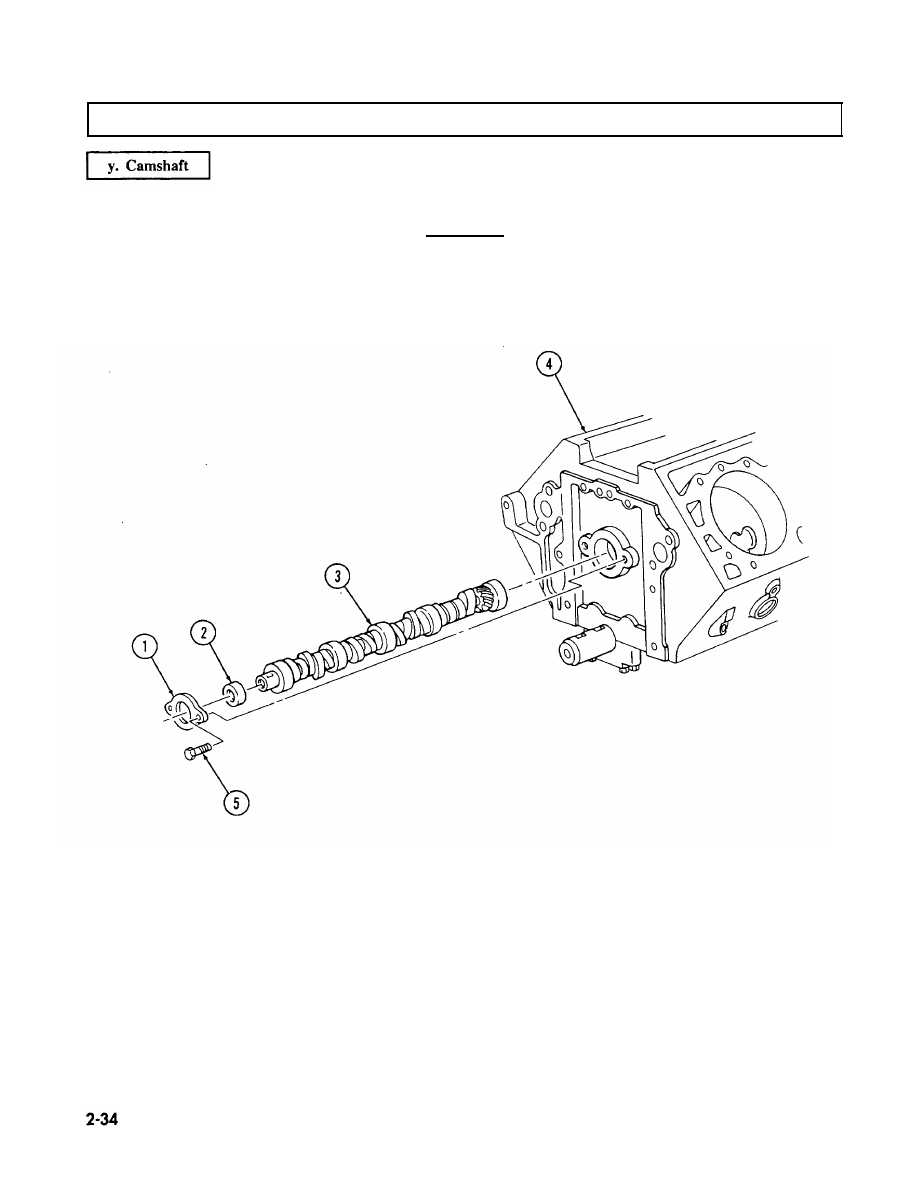
1. Remove two capscrews (5), camshaft thrust plate (1), and spacer (2) from cylinder block (4).
CAUTION
Support camshaft during removal to prevent damage to camshaft
bearings.
2. Remove camshaft (3) from cylinder block (4).
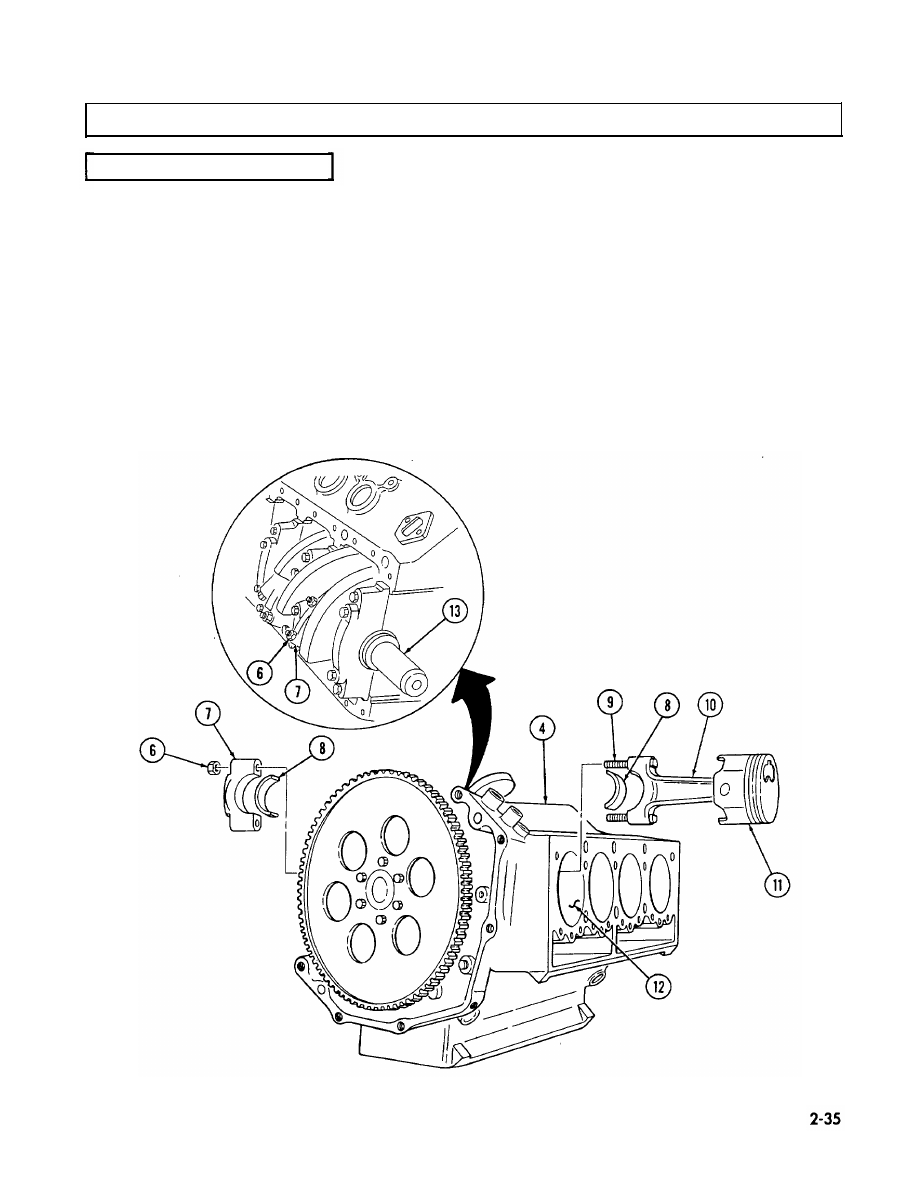
2-15. ENGINE DISASSEMBLY INTO SUBASSEMBLIES (Cont’d)
z. Pistons and Connecting Rods
1.
2.
3.
4.
5.
6,
7.
8.
9.
Remove ridge from upper inside wall of each cylinder (12) with ridge reamer.
Rotate cylinder block (4) approximately 90°.
Rotate crankshaft (13) to gain access to two nuts (6).
Check sides of connecting rod (10) and rod cap (7) for matching identification numbers. If no
numbers are present, stamp connecting rod (10) and rod cap (7) with cylinder number for assembly.
Remove two nuts (6) securing rod cap (7) to connecting rod (10) and remove rod cap (7) and two
bearings (8). Discard bearings (8).
Cover connecting rod bolts (9) with 3/8-in. rubber hose.
Push connecting rod (10) and piston (11) out from the inside and remove from cylinder block (4).
Remove rubber hose from connecting rod bolts (9) and install rod cap (7) on connecting rod (10) and
secure with nuts (6).
Repeat steps 3 through 8 for remaining pistons and connecting rods.
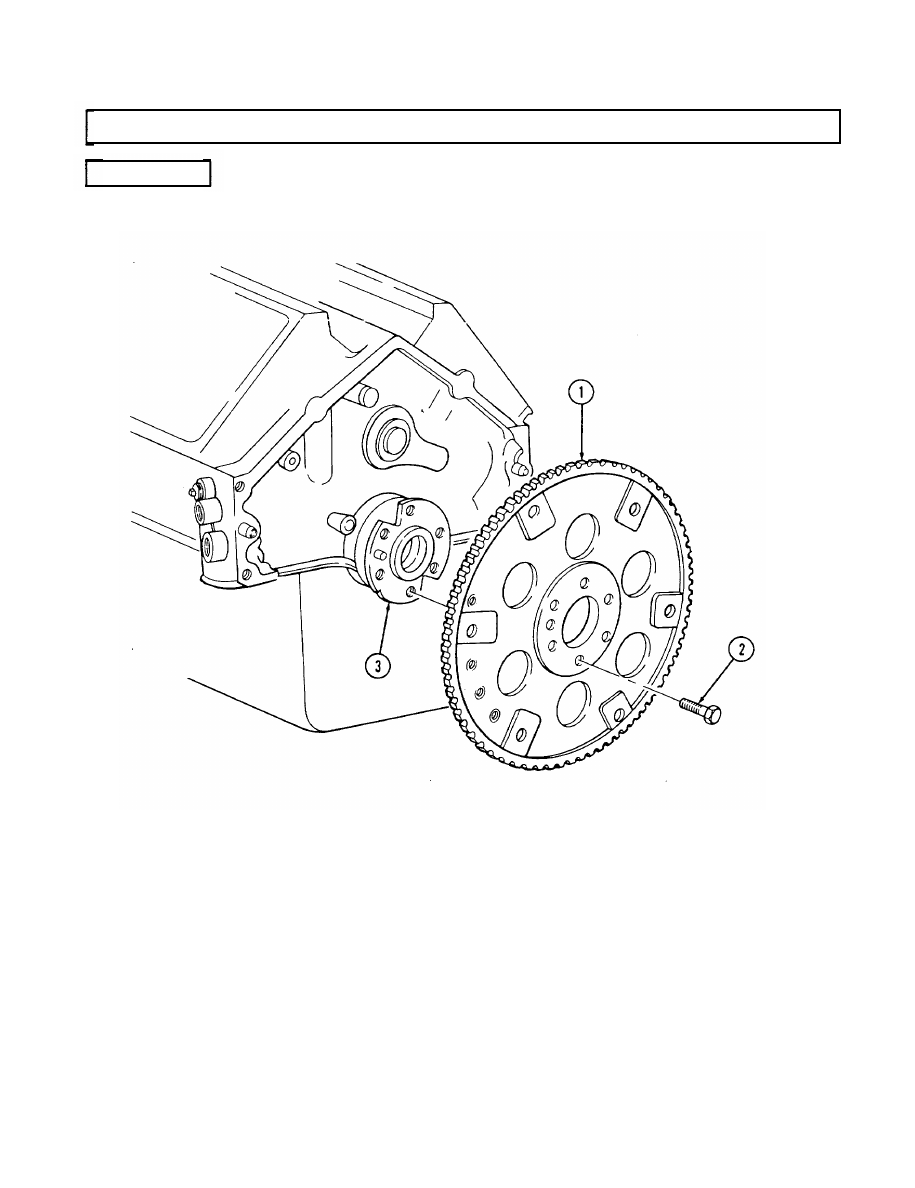
2-15. ENGINE DISASSEMBLY INTO SUBASSEMBLIES (Cont’d)
aa. Flywheel
Keep crankshaft (3) from rotating and remove six capscrews (2) and flywheel (1) from crankshaft (3).
2-36
Нет комментариевНе стесняйтесь поделиться с нами вашим ценным мнением.
Текст