Jaguar XJ (X350). Manual — part 1491
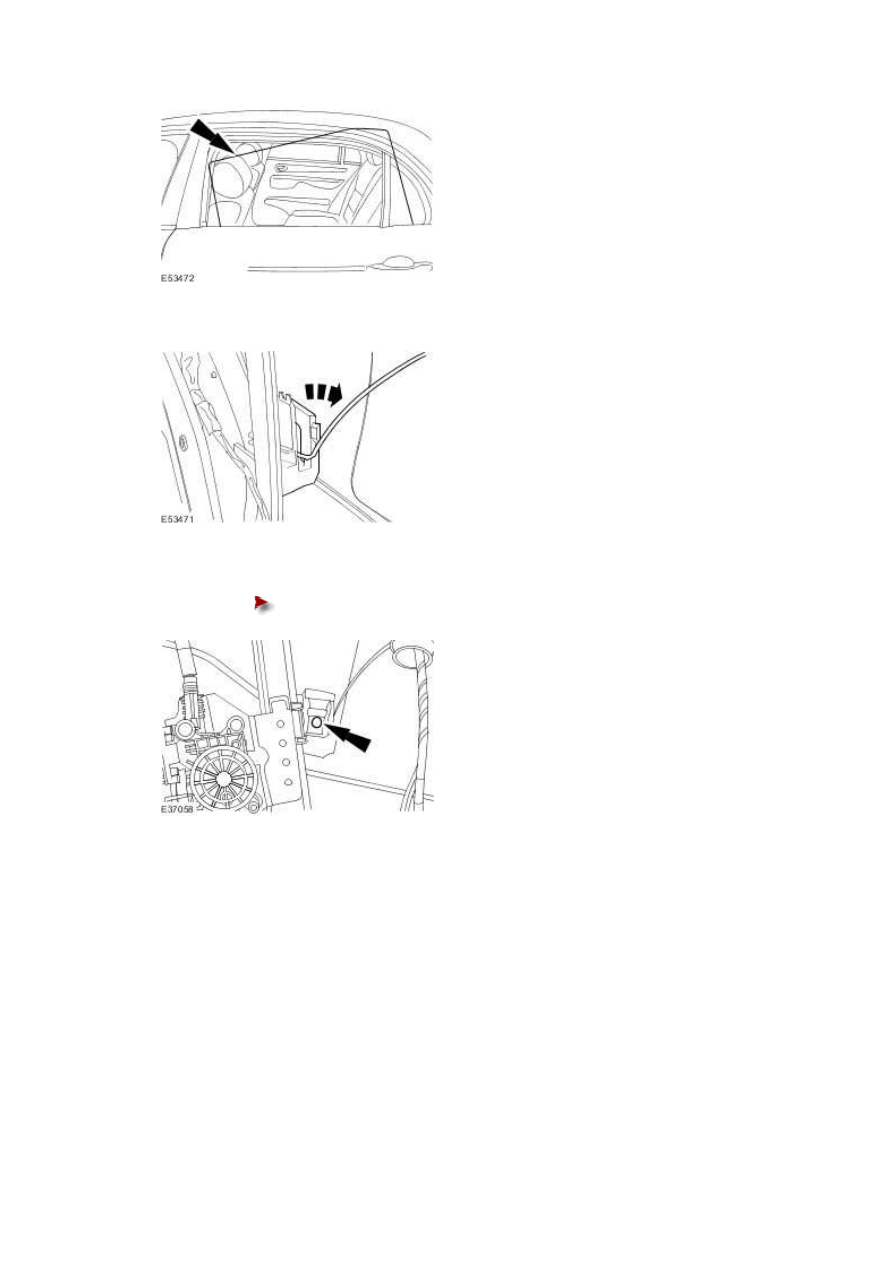
2 . Fully seat the rear door window glass into the window regulator.
3 . Fully tighten the rear door window glass retaining bolt.
Tighten to 7 Nm.
4 . Install the rear door fixed window glass.
For additional information, refer to Rear Door Fixed Window Glass
5
.
NOTE:
When the battery has been disconnected and connected the settings for the
windows one touch facility and the anti-trap facility will have been erased.
Initialize the door window motors.
For additional information, refer to Door Window Motor Initialization
Rear Door Window Glass (76.31.02) – Armoured
Removal
WARNING: The use of other products than Betawipe on poly carbonate involves a deterioration of the glass, an
opacity effect and an early delamination of the shielding. The ballistic standards and the protection of customers would
not be assured. Failure to follow this instruction may result personal injury.
CAUTION: The use of other products than Betawipe on poly carbonate involves a deterioration of the glass, an
opacity effect and an early delamination of the shielding. The ballistic standards and the protection of customers would
not be assured. Failure to follow this instruction may result in damage to the vehicle.
CAUTION: Make sure that only the recommended degreasing and cleaning fluids are used. Failure to follow this
instruction may result in damage to the vehicle.
CAUTION: Make sure that only the recommended adhesive, sealant and primers are used. Failure to follow this
instruction may result in damage to the vehicle.
1 . Remove the rear door trim panel.
For additional information, refer to
Rear Door Trim Panel (76.34.04)
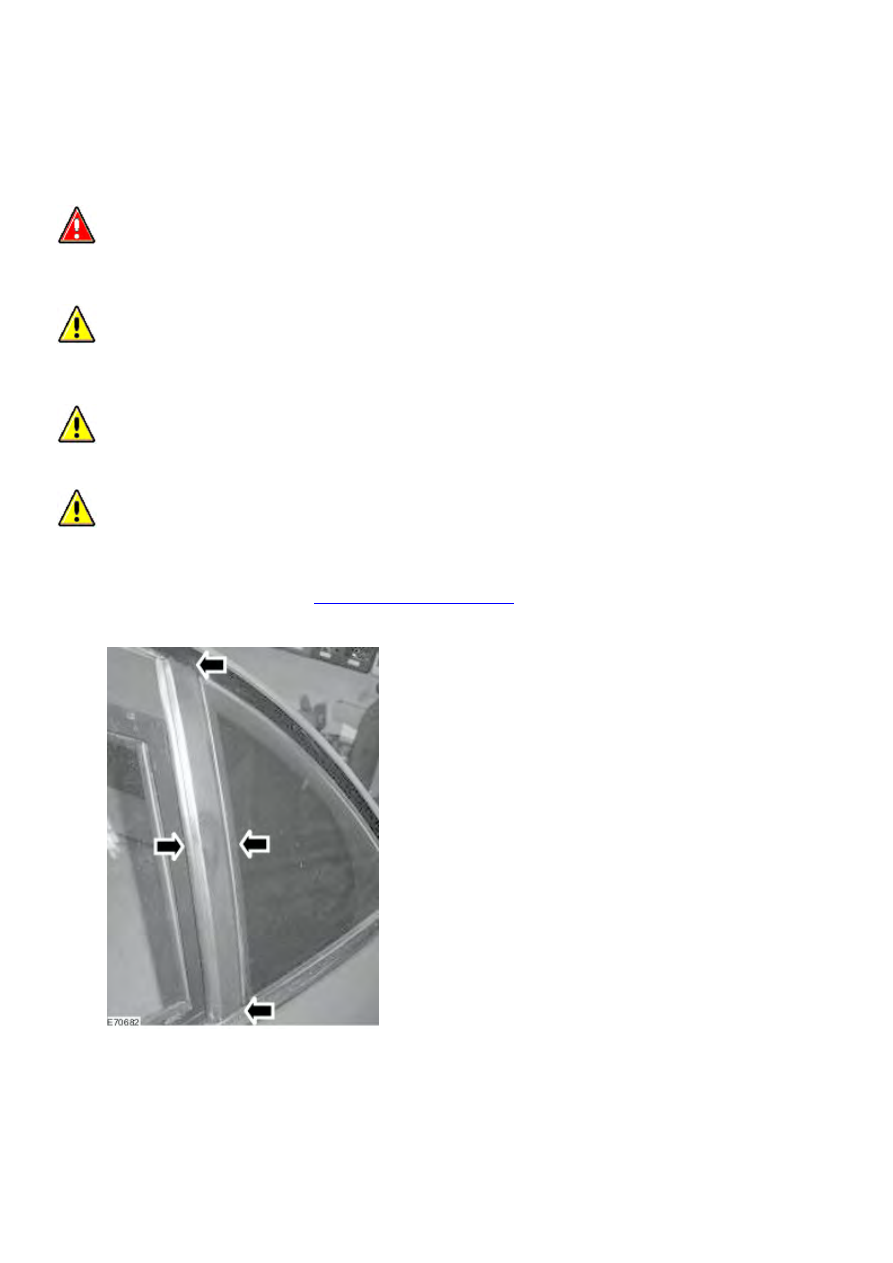
2 . Using a suitable tool, cut the rear door window glass trim panel.
Published: Mar 28, 2014
Vehicles
www.
3 . Protect the rear door trim and rear door frame.
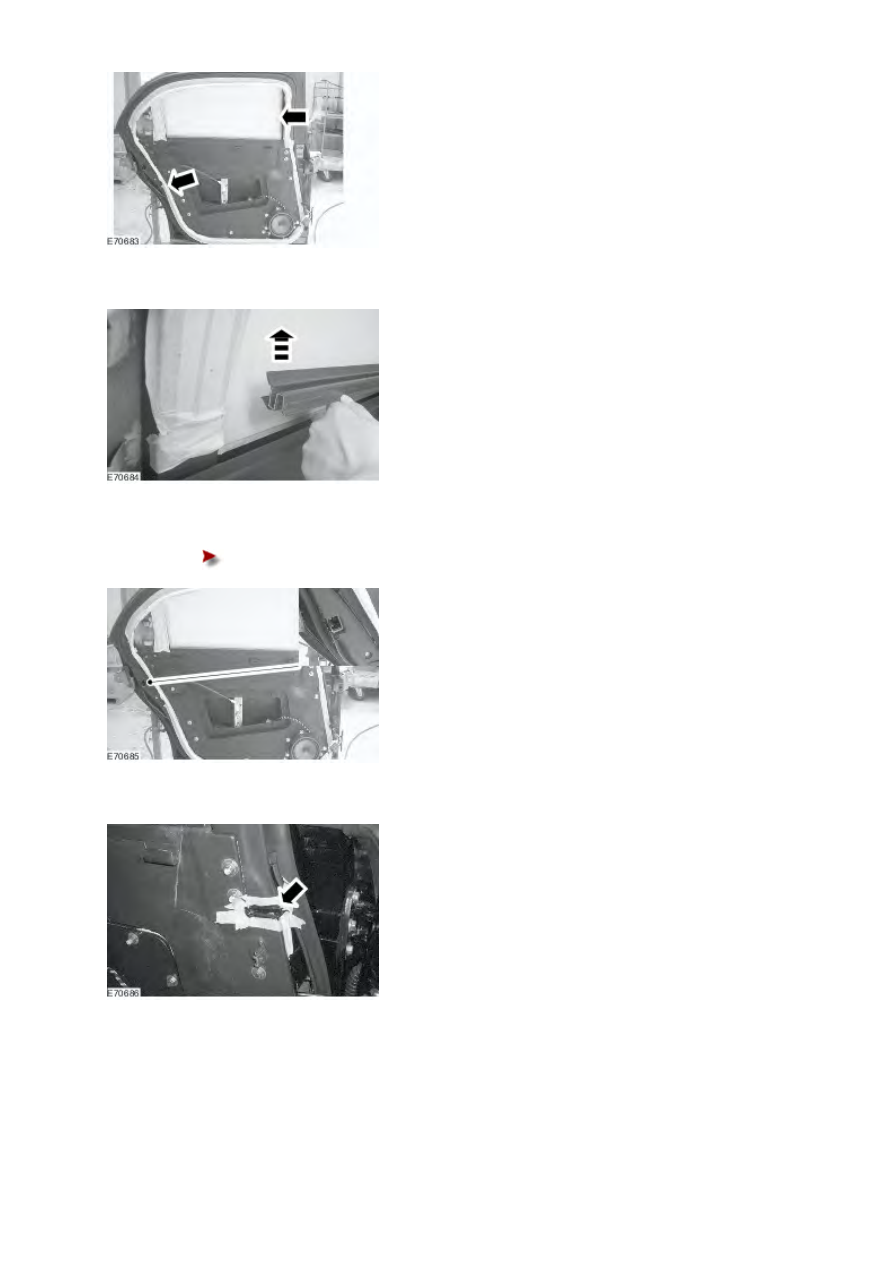
4 . Remove the rear door inner weather strip.
5 . Remove the rear door latch trim panel.
Remove the retaining screw.
6 . Using a suitable tool, cut the rear door panel seal.

7 . Disconnect the rear door speaker electrical connector.
8 . Remove the rear door speaker.
9 . Remove the rear door access panel.
Remove the retaining bolts.
10 . Remove the rear door handle release cable access panel.
www.
Нет комментариевНе стесняйтесь поделиться с нами вашим ценным мнением.
Текст