Jaguar XJ (X350). Manual — part 1410
Description and operation
Body Closures
Doors
All doors comprise of an inner and outer panel, spot clinched and bonded together to form a
door assembly. Both panels incorporate extensions bonded together to form a cheater
assembly and a sealant is applied in cosmetic bead form to all spot clinch joints.
The doors are conventional latch to striker plate design with the strikers located on the body
pillars.
A joint-less single profile bulb seal is installed on each door together with a water shedder and
separate vacuum formed speaker cup. Upper and lower door hinges and multi-stage check
arms require no lubrication throughout the vehicle life.
Luggage Compartment Lid
The luggage compartment lid comprises of an inner and outer panel spot clinched and bonded
together to form a complete assembly.
The luggage compartment lid is a conventional lock to striker plate design with the striker
located centrally on the edge of the load space floor.
Hood
The hood assembly consists of a one piece inner and outer panel, spot clinched and bonded
together with a bead of sealant applied to each clinch joint. The hood opens from the front and
is secured by two hood latches and a secondary safety catch.

Removal and installation
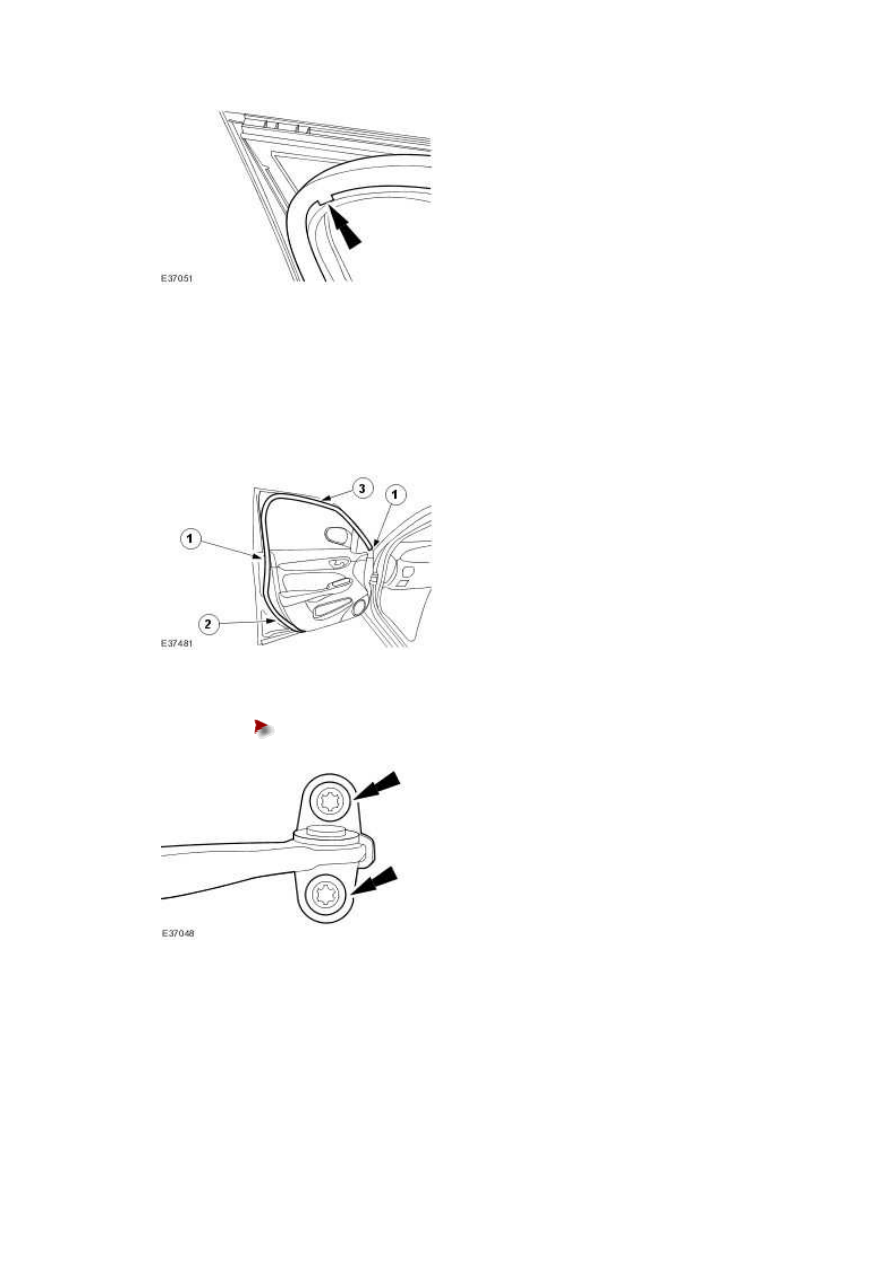
Front Door Opening Weatherstrip
(76.40.01)
Removal
1
.
CAUTION: Make sure the door check arm cannot contact the A-piilar
whilst it is detach. Failure to follow this instruction may result in damage to the
vehicle.
Detach the door check arm.
2
.
Remove the front door opening weatherstrip.
Remove the front door opening weatherstrip retaining clips from the
door using suitable side cutters.
Installation
1 . Align the front door opening weatherstrip to the front door.
www.
2 . Attach the top of the front door weatherstrip.
1)
Attach the the front door opening weatherstrip two top retaining
clips.
2) Attach the remaining front door opening weatherstrip retaining clips.
3) Attach the top of the front door weatherstrip.
3 . Attach the door check arm.
Tighten to 10 Nm.
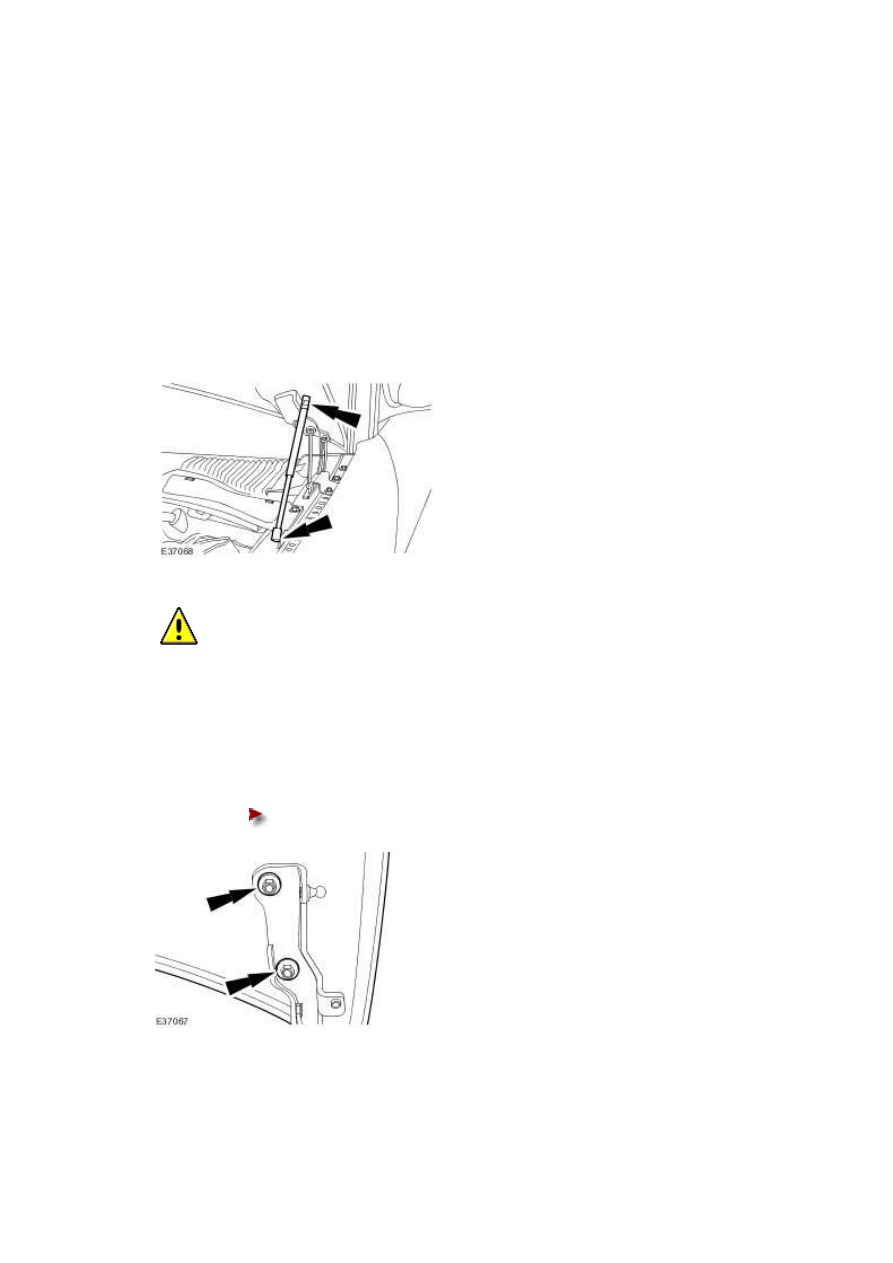
Hood (76.16.01)
Removal
1 . NOTE:
Support the hood while the hood struts are removed.
NOTE:
Left-hand shown, right-hand similar.
Remove the hood strut.
2
.
CAUTION: Make sure the hood does not contact the vehicle body while
removing. Failure to carry out these instructions may cause damage to the
vehicle.
NOTE:
Left-hand shown, right-hand similar.
Remove the hood.
Remove the hood retaining bolts.
www.
Нет комментариевНе стесняйтесь поделиться с нами вашим ценным мнением.
Текст