Jaguar XJ (X350). Manual — part 1146
on or near any fuel related components. Highly flammable vapors are always present and may
ignite. Failure to follow these instructions may result in personal injury.
WARNING: The fuel system remains pressurized for a long time after the ignition is switched
off. The fuel pressure must be relieved before attempting any repairs. Failure to follow these
instructions may result in personal injury.
WARNING: After carrying out repairs, the fuel system must be checked visually for leaks.
Failure to follow these instructions may result in personal injury.
WARNING: This procedure involves fuel handling. Be prepared for fuel spillage at all times
and always observe fuel handling precautions. Failure to follow these instructions may result in
personal injury.
WARNING: If taken internally do not induce vomiting, seek immediate medical attention.
Failure to follow these instructions may result in personal injury.
WARNING: If fuel contacts the eyes, flush the eyes with cold water or eyewash solution and
seek medical attention.
WARNING: Wash hands thoroughly after handling, as prolonged contact may cause
irritation. Should irritation develop, seek medical attention.
1
.
CAUTION: Make sure no damage occurs to the fuel level float or fuel pump module
components.
NOTE:
Install a new gasket to the fuel pump module flange.
NOTE:
Take care not to stretch the gasket.
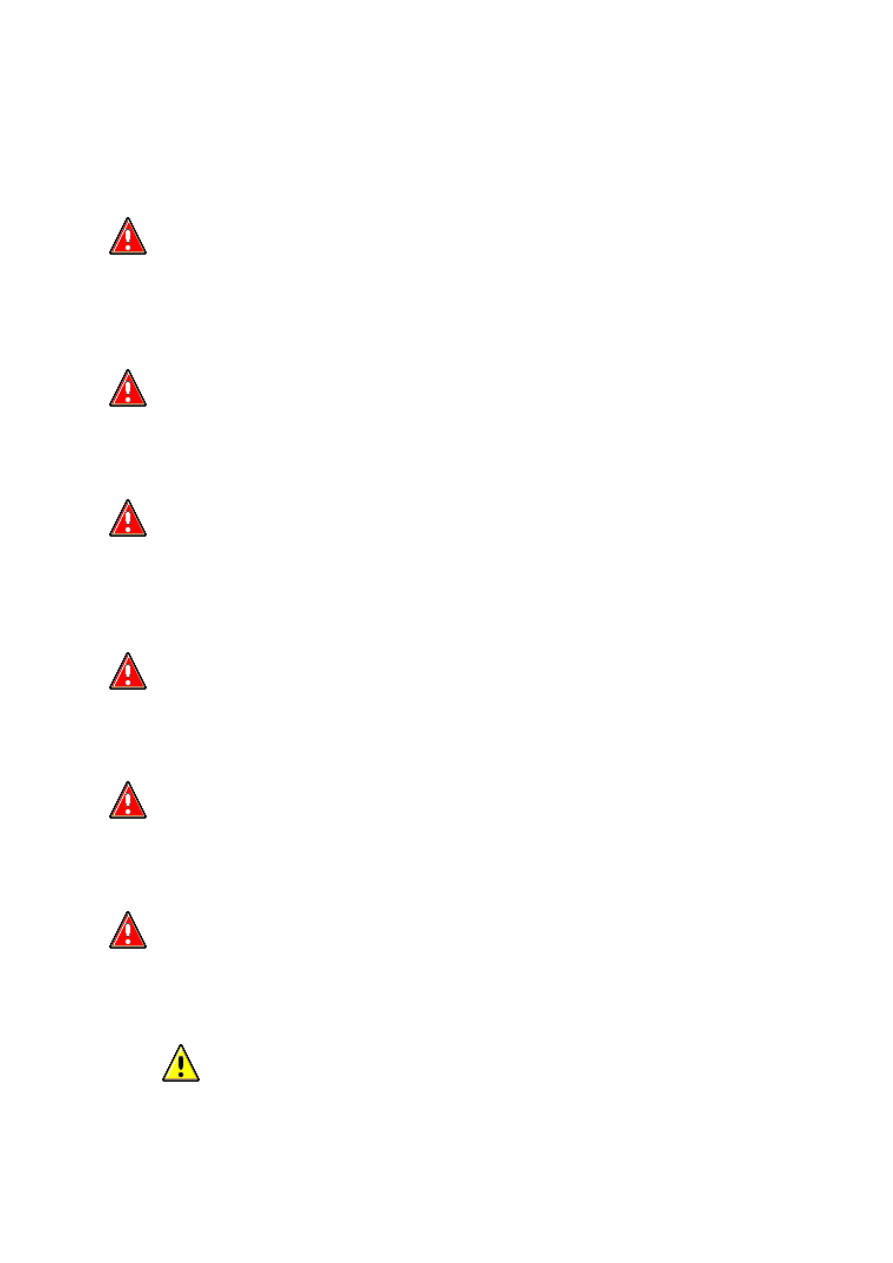
Install the fuel pump module.
2 . Connect the fuel transfer line.
3 . Connect the fuel transfer pipe quick release coupling.
For additional information, refer to Quick Release Coupling - Push Connect .
www.
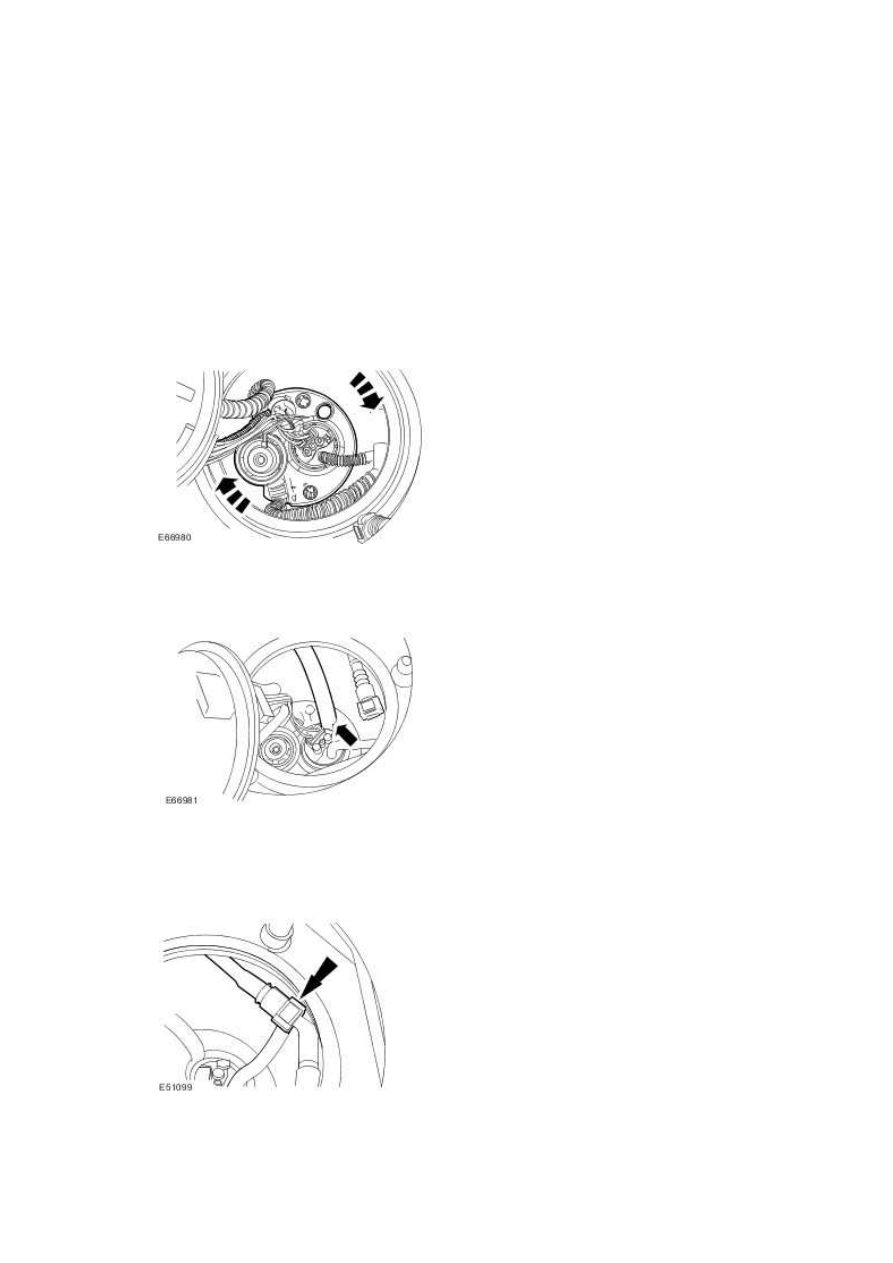
4 . Reposition and align the upper part of the fuel pump module.
5 . Align the arrow on the fuel pump module with the alignment marks on the fuel tank.
6
.
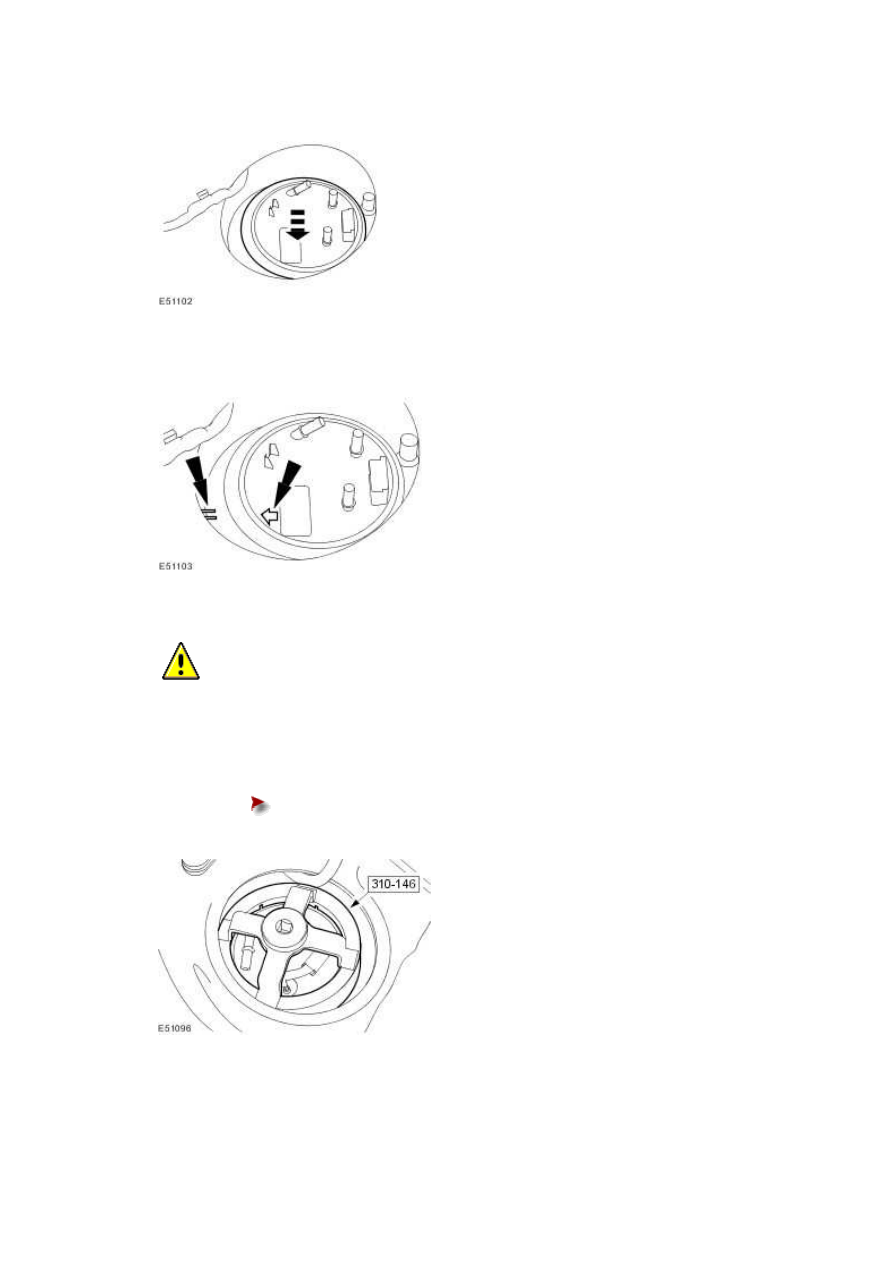
CAUTION: Make sure no damage occurs to the fuel pump module when installing
the locking ring.
Using the special tool, install the fuel pump module locking ring.
Tighten to 60 Nm.
7 . Connect the fuel pump module quick release coupling.
For additional information, refer to Quick Release Coupling - Push Connect

8 . Connect the fuel fired booster heater fuel supply line quick release coupling.
For additional information, refer to Quick Release Coupling - Push Connect
9 . Connect the fuel pump module electrical connector.
10 . Attach the fuel pump module electrical connector to the retaining bracket.
www.
Нет комментариевНе стесняйтесь поделиться с нами вашим ценным мнением.
Текст