Jaguar XJ (X350). Manual — part 1161
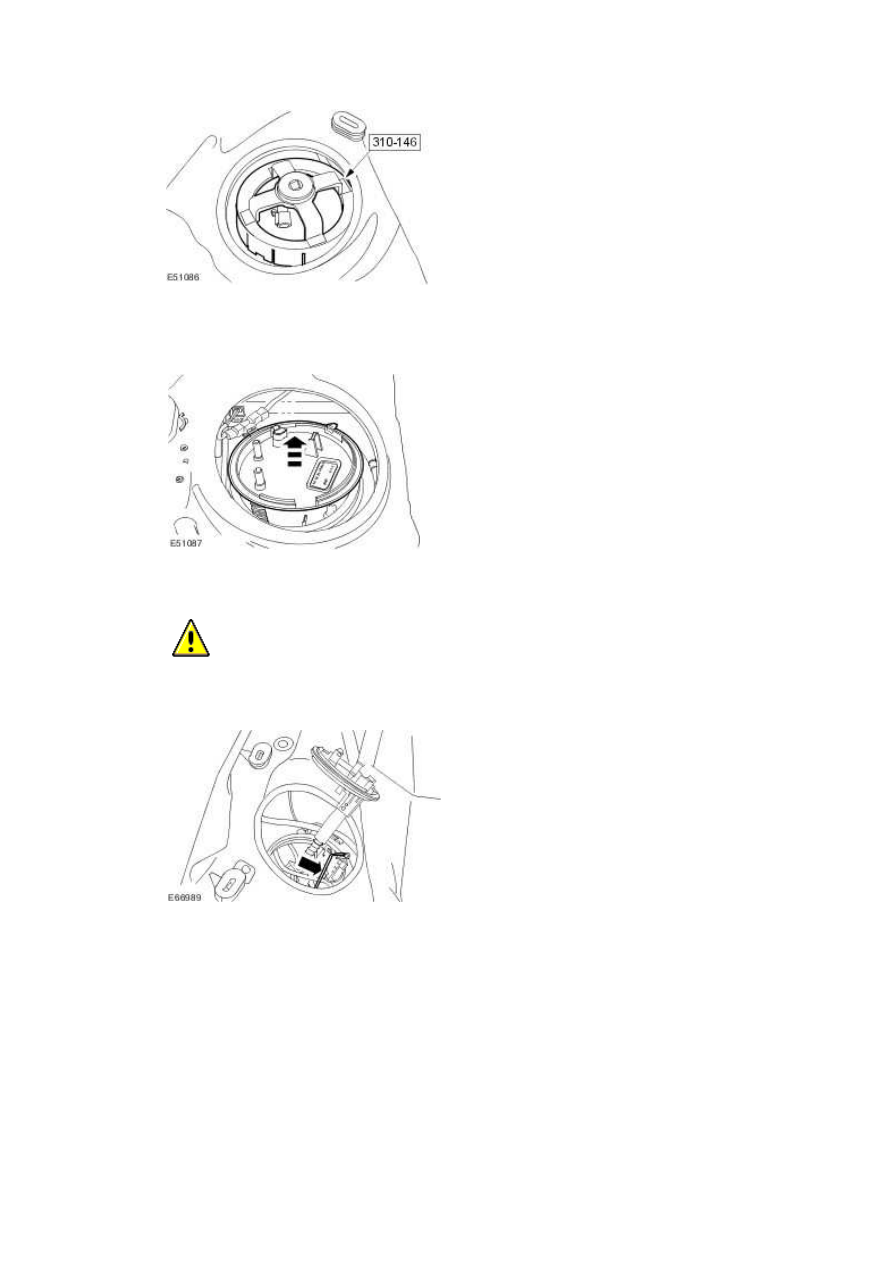
24 . Detach and reposition the upper part of the fuel transfer unit.
25 .
CAUTION: Make sure no damage occurs to the fuel level float.
Remove the fuel level float.
26 . Remove the fuel transfer unit.
Installation
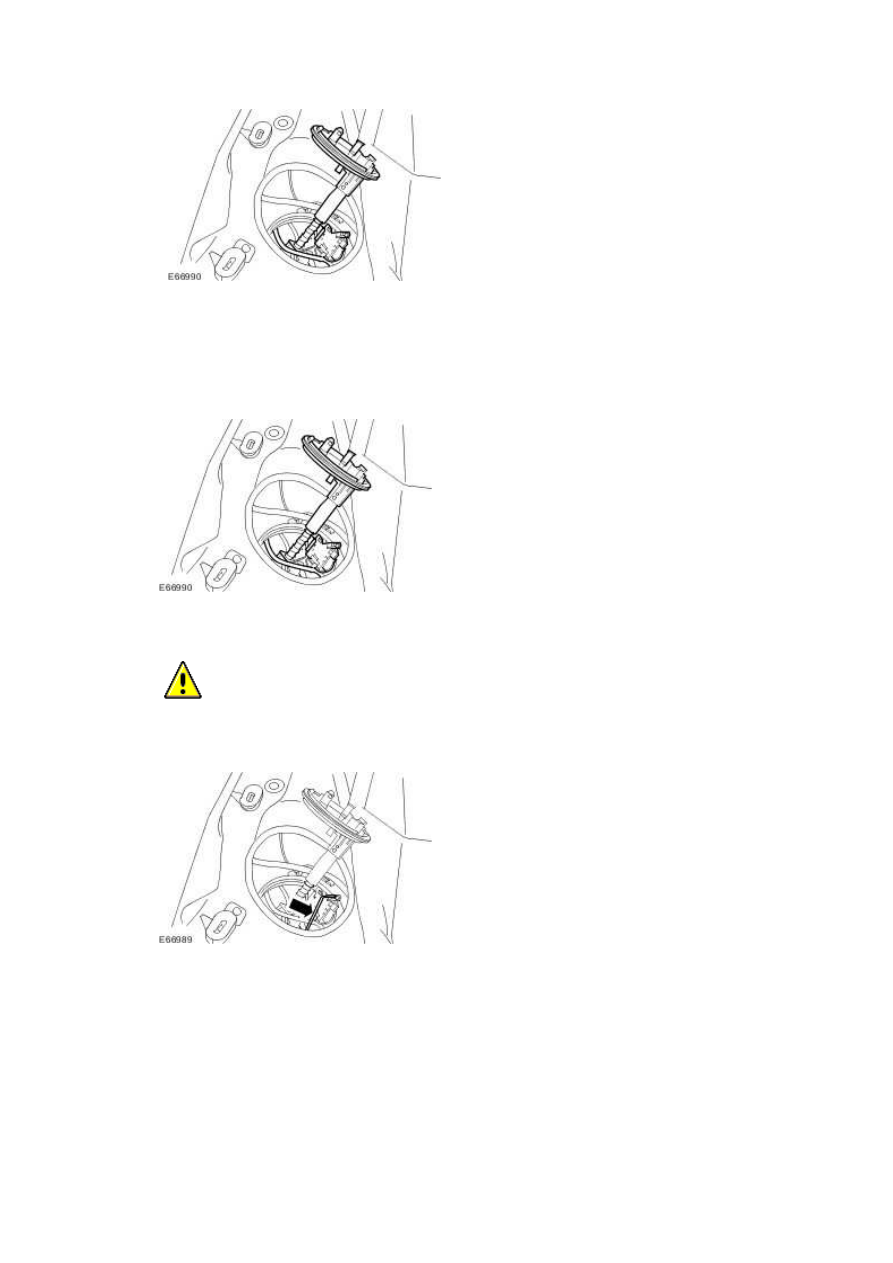
1 . Install the fuel transfer unit.
2 .
CAUTION: Make sure no damage occurs to the fuel level float.
Install the fuel level float.
3 . Reposition and align the upper part of the fuel transfer unit.
www.
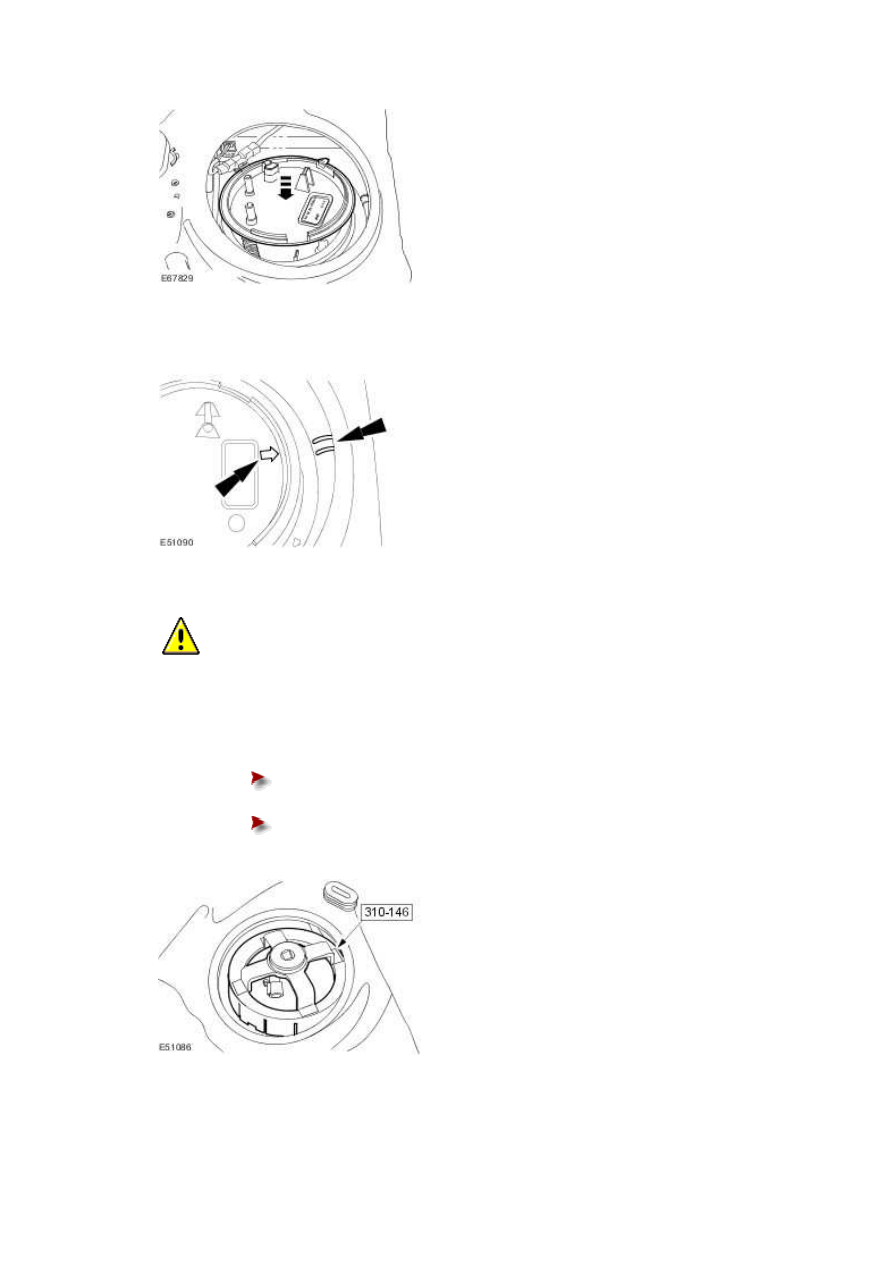
4 . Align the arrow on the fuel transfer unit with the alignment marks on the fuel tank.
5
.
CAUTION: Make sure no damage occurs to the fuel transfer unit when installing the
locking ring.
Using the special tool, install the fuel transfer unit locking ring.
Install a new O-ring seal.
Tighten to 60 Nm.
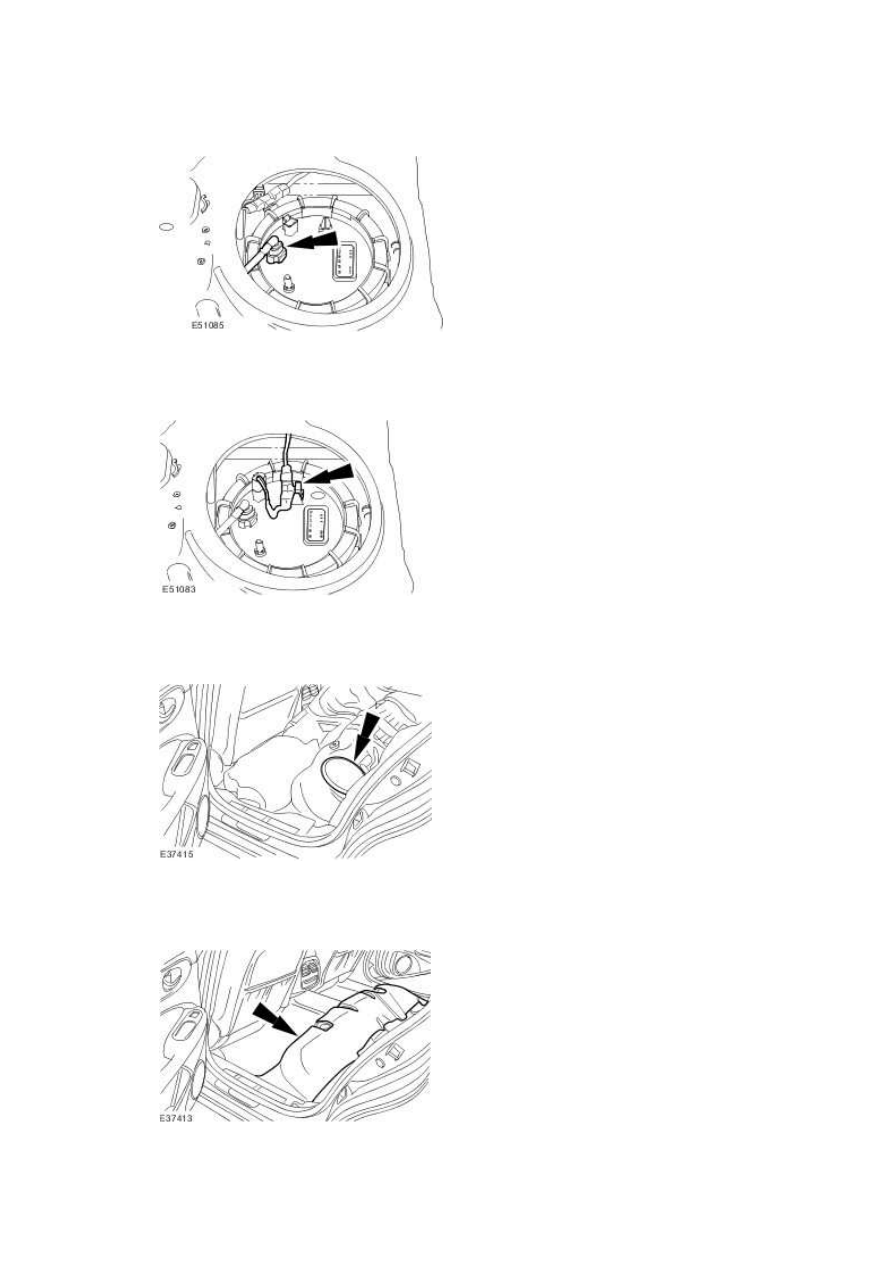
6 . Connect the fuel return line to the fuel transfer unit.
For additional information, refer to Quick Release Coupling - Push Connect
7 . Attach the fuel transfer unit electrical connector to the retaining bracket.
8 . Install the floor aperture cover.
9 . Attach the floor covering.
www.
Нет комментариевНе стесняйтесь поделиться с нами вашим ценным мнением.
Текст