Jaguar XJ (X350). Manual — part 266

4
.
Install pedal hold-down tool.
Install the tool between the brake pedal and the seat frame.
Turn the tool hand-wheel to press and hold the brake pedal 60 mm (2.4
inch) from the 'Off' position
This will prevent loss of fluid from the reservoir through disconnected
brake tubes.
Vehicles with standard brakes
5 . Remove the bleed pipes and bottles.
Tighten the left-hand front caliper bleed nipple.
Tighten to 8 Nm.
Tighten the left-hand rear brake caliper bleed nipple.
Tighten to 14 Nm.
Disconnect and remove the brake bleed pipes and bottles.
Install the bleed nipple dust caps.
Vehicles with high performance brakes
6 . Remove the bleed pipes and bottles.
Tighten the left-hand front caliper bleed nipple.
Tighten to 14 Nm.
Tighten the left-hand rear brake caliper bleed nipple.
Tighten to 14 Nm.
Disconnect and remove the brake bleed pipes and bottles.
Install the bleed nipple dust caps.
All vehicles
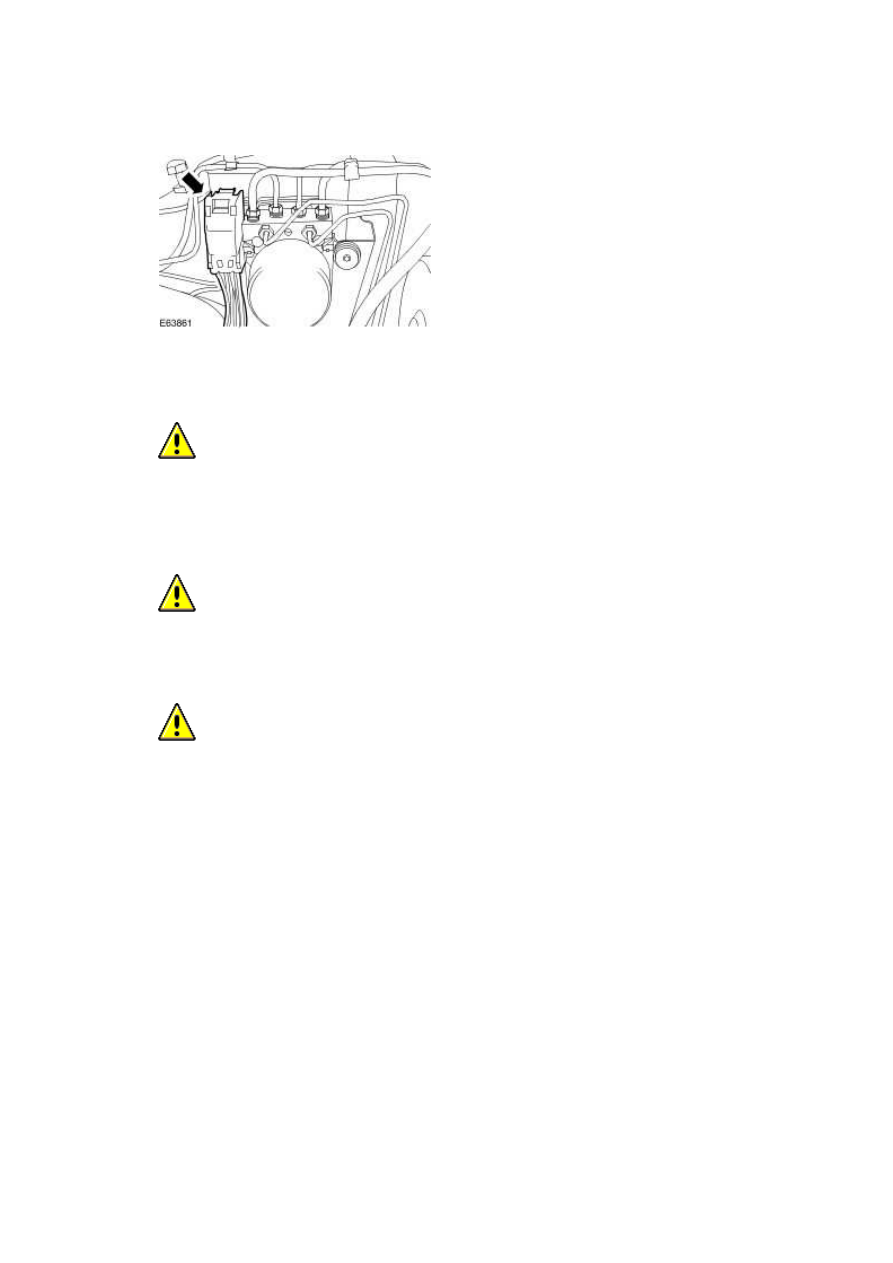
7 . Disconnect the hydraulic control unit (HCU) electrical connector.
Right-hand drive vehicles
8
.
CAUTION: If brake fluid is spilt on the paintwork, the effected area must be
immediately washed down with cold water. Failure to follow this instruction may result in
damage to the vehicle.
CAUTION: To minimise brake fluid loss the brake tubes must be disconnected in the
order shown. Failure to follow this instruction may result in damage to the vehicle.
CAUTION: Cap the exposed brake tubes and ports to prevent loss of fluid and dirt
ingress. Failure to follow this instruction may result in damage to the vehicle.
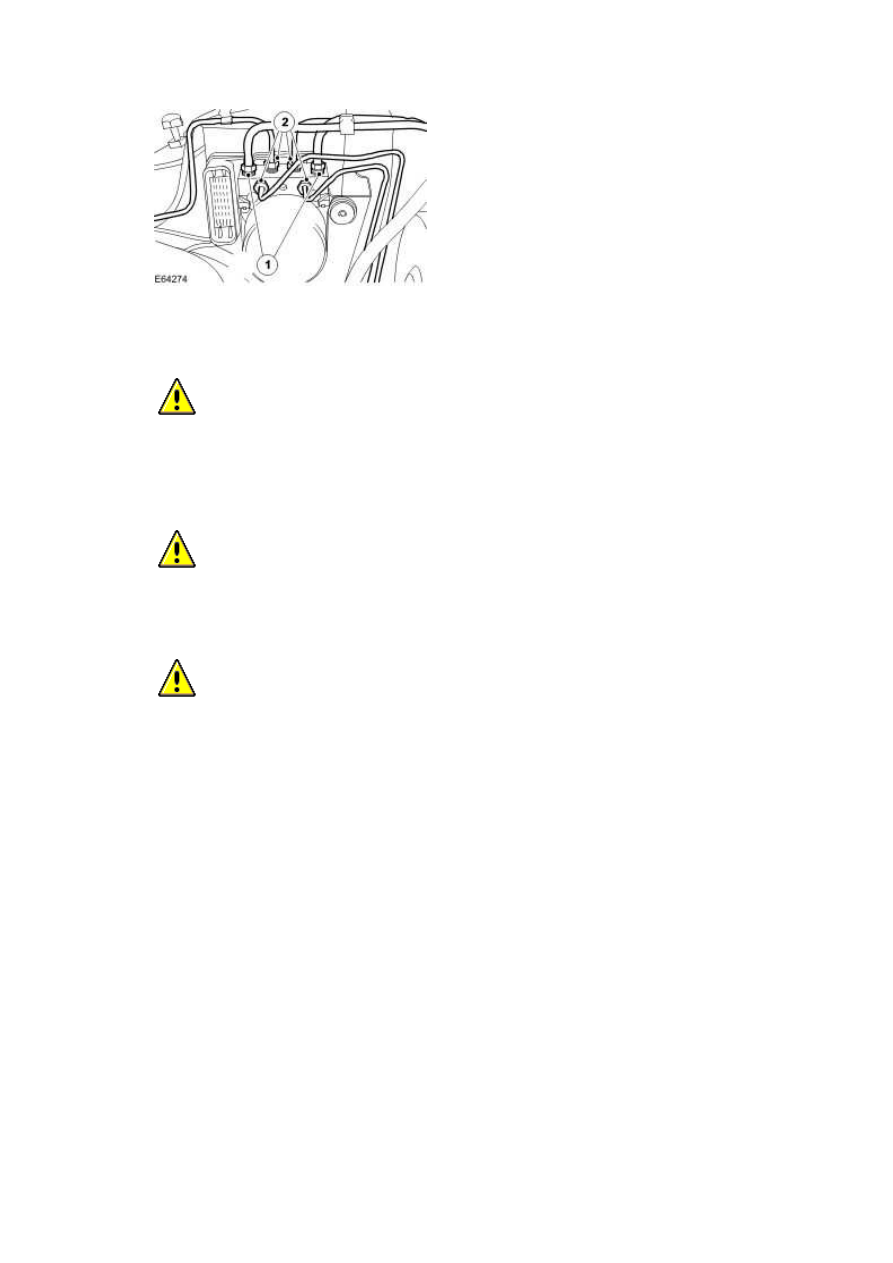
NOTE:
Using a suitable tool mark the position of the brake tubes to the HCU.
Disconnect the HCU brake tubes.
1) Disconnect the HCU primary and secondary circuit brake tubes.
2) Disconnect the HCU outlet brake tubes.
www.
Left-hand drive vehicles
9
.
CAUTION: If brake fluid is spilt on the paintwork, the effected area must be
immediately washed down with cold water. Failure to follow this instruction may result in
damage to the vehicle.
CAUTION: To minimise brake fluid loss the brake tubes must be disconnected in the
order shown. Failure to follow this instruction may result in damage to the vehicle.
CAUTION: Cap the exposed brake tubes and ports to prevent loss of fluid and dirt
ingress. Failure to follow this instruction may result in damage to the vehicle.
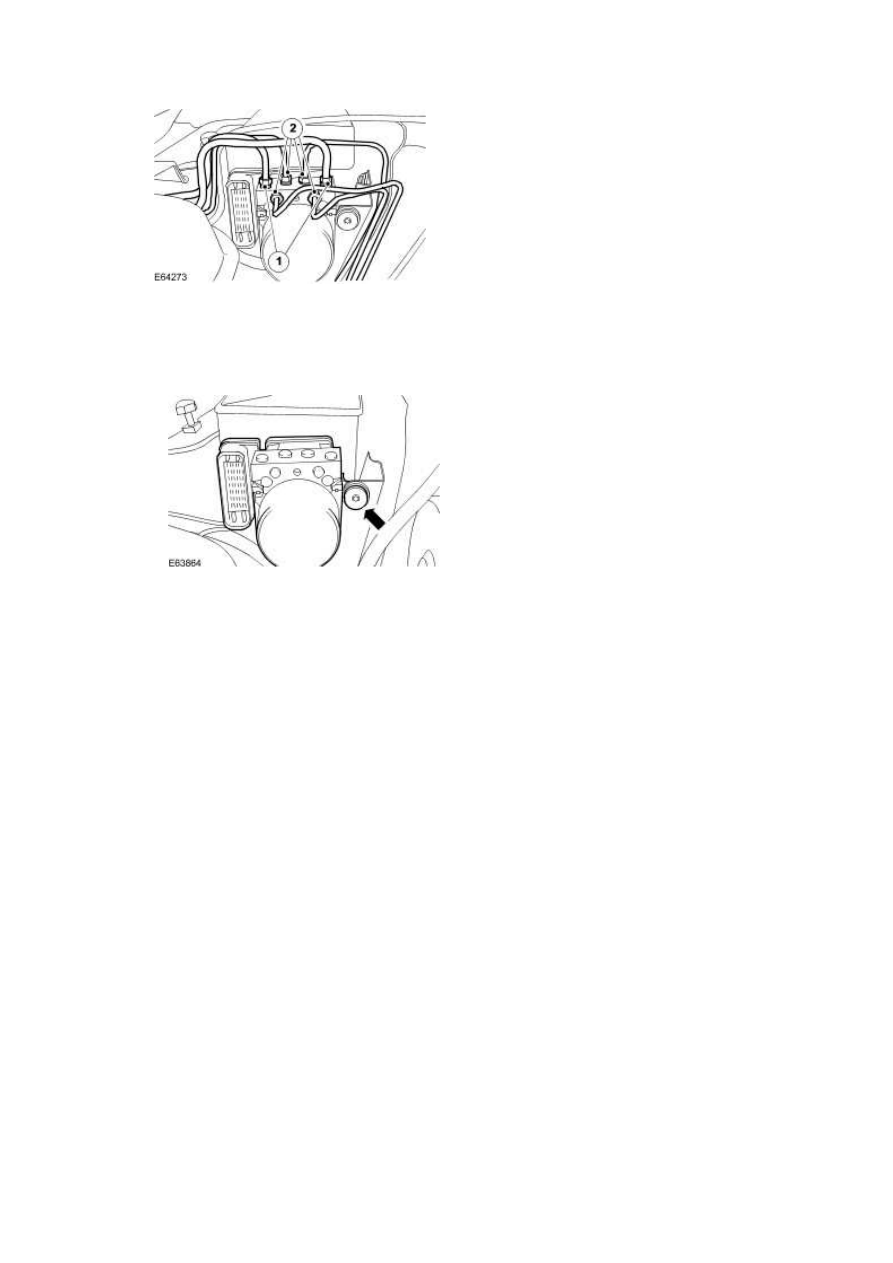
NOTE:
Using a suitable tool mark the position of the brake tubes to the HCU.
Disconnect the HCU brake tubes.
1) Disconnect the HCU primary and secondary circuit brake tubes.
2) Disconnect the HCU outlet brake tubes.
All vehicles
10 . Remove the HCU.
Installation
1
.
NOTE:
A new HCU does not come supplied with the HCU base bracket. The HCU base bracket
should be removed and installed to the new HCU. The HCU base bracket securing bolts
must be torqued if a new HCU is being installed to the vehicle.
•
Tighten the three HCU base bracket securing bolts to 9 Nm.
To install, reverse the removal procedure.
2 . Tighten to 9 Nm.
www.
Нет комментариевНе стесняйтесь поделиться с нами вашим ценным мнением.
Текст