Jaguar XJ (X350). Manual — part 1362

fuel pump circuit should be verified. A fuel pump module, which is controlled by the ECM supplies
the fuel pump. In all cases of suspected PATS non-start issues, the most logical failure modes should
be eliminated first. Check all relevant supplies and grounds to the IC and ECM, check that the starter
relay has a permanent 12v supply, check that the relay has a 12v supply and ground across the coil
whilst the ignition is in the crank position.
PATS Fault Codes
For the various PATS modes/faults listed in the table , the IC will store a DTC and indicate this to the
customer during the detection peroid defined in the 'when logged' column, by illuminating the
indicator as described for 60 seconds and then flashing the LED 10 times as appropriate. The
indication will stop immediately the ignition is turned to off any time during the fault indication
sequence. Up to 4 DTC's could be stored per key read (1-!0 read attempts). No DTC's will be stored
until all retry attempts are complete. Only the highest priority fault code will be flashed.
The PATS LED will be commanded on as shown under 'indication'. Normal PATS operations are
complete within 400ms of the ignition switch transition from off to run or start, worst case for ECM
communication problems will be less than 2 seconds. If PATS is not complete during the 2 seconds
the ECM will terminate PATS and await the next ignition run/start event. PATS faults will be indicated
via the LED as soon as possible and will terminate the LED prove out. At key off all previous flashing
will cease and the perimeter anti theft system will control the LED when the vehicle is locked and
armed.
Mode of Operation/Fault
When Logged
Ignition
Switch
Position
DTC
LED
Fault
Code
Indication
Prove out
N/A
Off to
Run/Start
N/A
N/A
3 Seconds of steady
illumination
Perimeter Anti theft Control
N/A
Off
N/A
N/A
Off or 0.5Hz, 5% duty
cycle until off
Transceiver not connected
Key Read
Run/Start
B1681
11
60 seconds off 4Hz
flashing at 50% duty
cyle followed by fault
code flashing 10 times
Key problem. No code
received from Key
Key Read
Run/Start
B1600
13
60 seconds off 4Hz
flashing at 50% duty
cyle followed by fault
code flashing 10 times
Key/Transceiver problem,
partial code received,
Key Read
Run/Start
B1602
14
60 seconds off 4Hz
flashing at 50% duty
cyle followed by fault

checksum error
code flashing 10 times
Key code not stored in
memory(also due to having 8
key codes already stored in
memory)/ signature
mismatch
Ke
Read/Diagnostic
Test
Run/Start
B1601
15
60 seconds off 4Hz
flashing at 50% duty
cyle followed by fault
code flashing 10 times
Problem with CAN link - ECM
disabled. ECM system status
CAN message missing
ECM CAN
Comm's
Run/Start
U2511
U1900
16
60 seconds off 4Hz
flashing at 50% duty
cyle followed by fault
code flashing 10 times
Following part replacement the following codes maybe applicable, these are not normal customer
mode fault codes.
Mode of Operation/Fault
When Logged
Ignition
Switch
Position
DTC
LED
Fault
Code
Indication
Following new key
programming Jaguar Approved
Diagnostic System application,
2 keys have not been cycled in
the ignition
B and A/Dealer
Run/Start
B1213 21
60 seconds of
steady indication
followed by fault
code flashing 10
times
PATS reset application not
performed after part IPK
replacement
B and A/Dealer
Run/Start
B2141 22
60 seconds of
steady indication
followed by fault
code flashing 10
times
PATS reset application not
performed after part ECM
replacement
Challenge/Response Run/Start
U2510 23
60 seconds of
steady indication
followed by fault
code flashing 10
times
1 . If an obvious cause for an observed or reported concern is found, correct the cause (if possible)
before proceeding to the next step.
2 . If the cause is not visually evident, verify the symptom and refer to the Jaguar Approved
Diagnostic System.
www.

Removal and installation
Passive Anti-Theft System (PATS)
Transceiver (86.52.30)
Removal
1 . Remove the ignition switch lock cylinder. <<211-04>>
2 . Remove the PATS transceiver.
1) Detach the PATS transceiver retaining tang.
2) Remove the PATS transceiver.
Installation
1 . To install, reverse the removal procedure.
419-02 : Remote Convenience
General procedures
Universal Transmitter Programming
WARNING: A garage door opening system that cannot stop or reverse itself after
detecting an object in its path does not meet current federal safety standards. To
decrease the risk of serious injury or death, do not use this HomeLink transmitter with
a door opening system that lacks stop and reverse features as required by federal
standards. This includes any garage door opening system manufactured before April 1,
1982. For more information, call HomeLink customer assistance at 1-800-355-3515.
1.
CAUTION: During this procedure, the system that you are programming will be
made to operate. Make sure that people or objects are clear of the garage door or gate
being programmed.
Verify the hand-held transmitter is operative.
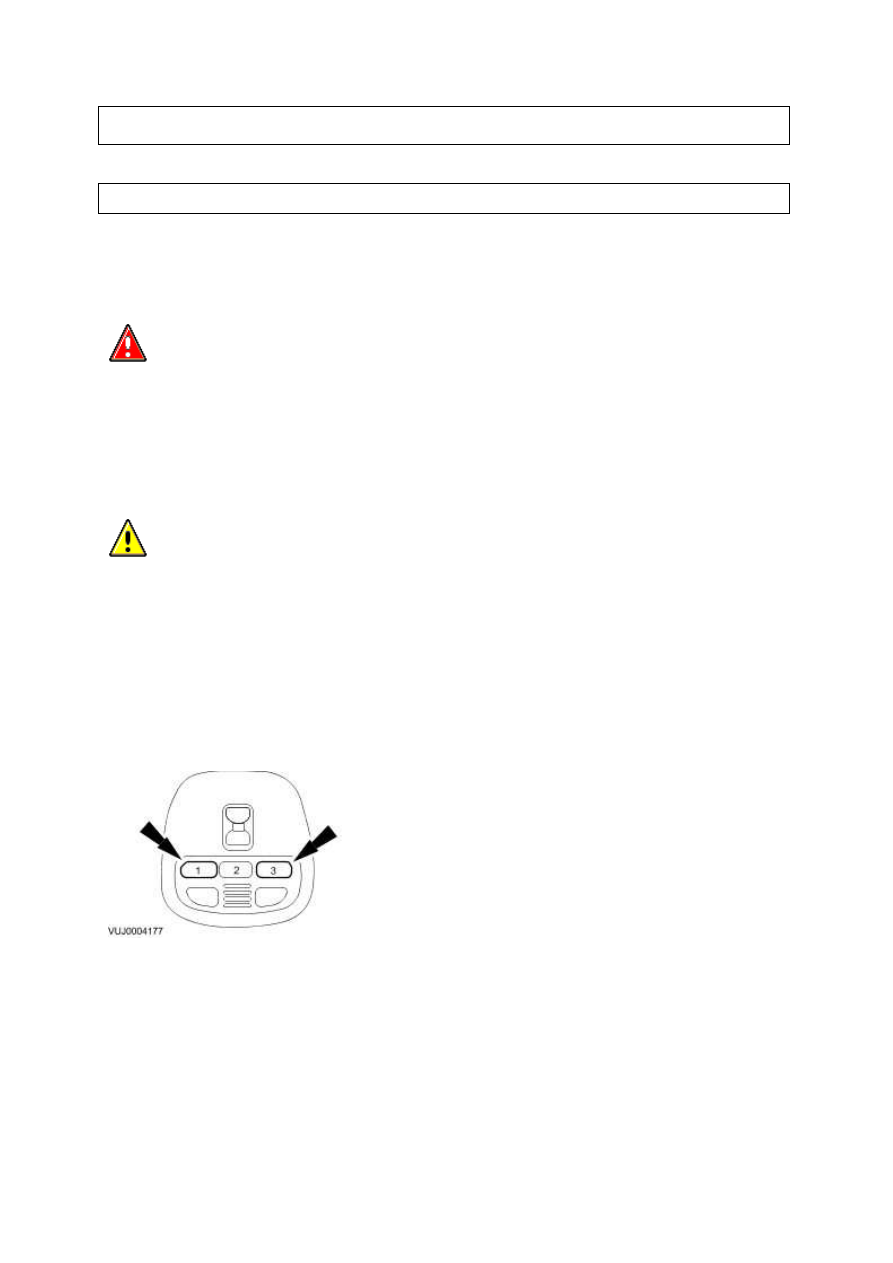
2. Prepare for programming the universal transmitter by erasing all three channels by holding
down the two outside buttons until the red light begins to flash (20-30 seconds). Release both
buttons.
3. Select one of the three universal transmitter channels to be programmed by pressing the
desired button.
4. Hold the end of the hand-held transmitter 50-150mm (2-6 in) from the front surface of the
universal transmitter so that the red light can still be seen.
www.
Нет комментариевНе стесняйтесь поделиться с нами вашим ценным мнением.
Текст