DAF LF45, LF55 Series. Manual — part 292
©
200416
4-5
Inspection and adjustment
BE ENGINE FUEL SYSTEM
ΛΦ45/55 series
4
2
4.3 INSPECTION, INTERNAL FUEL LEAKS
When inspecting for internal fuel
leaks, fuel will escape. Collect the
fuel and avoid the risk of fire.
Dirt in the fuel system can lead to
significant damage to parts of the
system. All open connections must
therefore be sealed.
The common rail system is under
high pressure when the engine is
running. This pressure can rise to
approx. 1400 bar. Even when the
engine is not running, there may be
a high residual pressure in the fuel
rail (approx. 50 bar). Depressurise
the system before working on the
common rail system by wrapping the
coupling in a cloth and then
unscrewing it and collecting the
escaping fuel in a container.
Inspection, internal fuel leaks
1.
Check that all injector pipes have been
tightened to the correct torque and that there
are no external signs of fuel leakage; see
"Technical data".
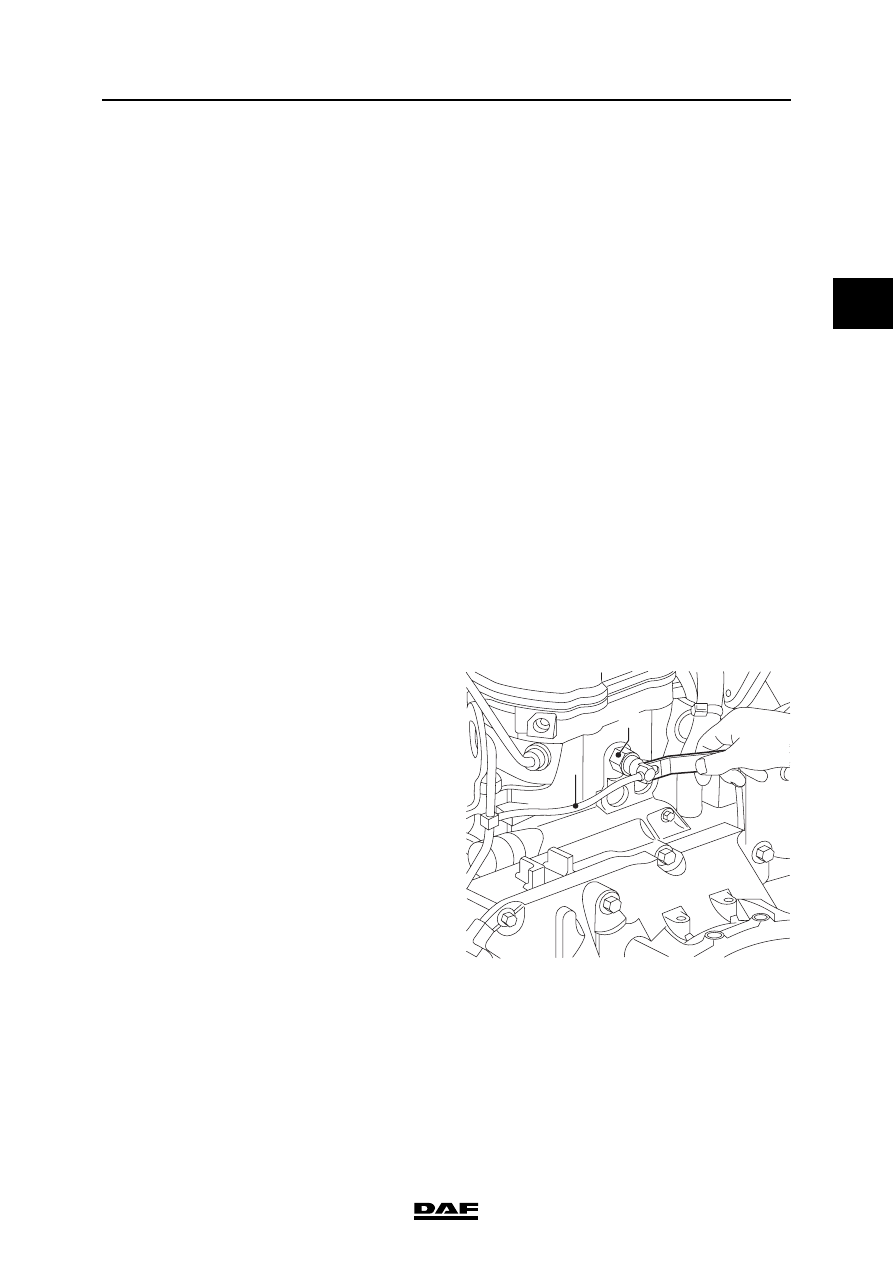
2.
Disconnect the fuel return pipe (1) from the
fuel return overflow valve (2) on the rear of
the cylinder head.
}
}
}
i400679
1
2
BE ENGINE FUEL SYSTEM
4-6
©
200416
Inspection and adjustment
2
ΛΦ45/55 series
4
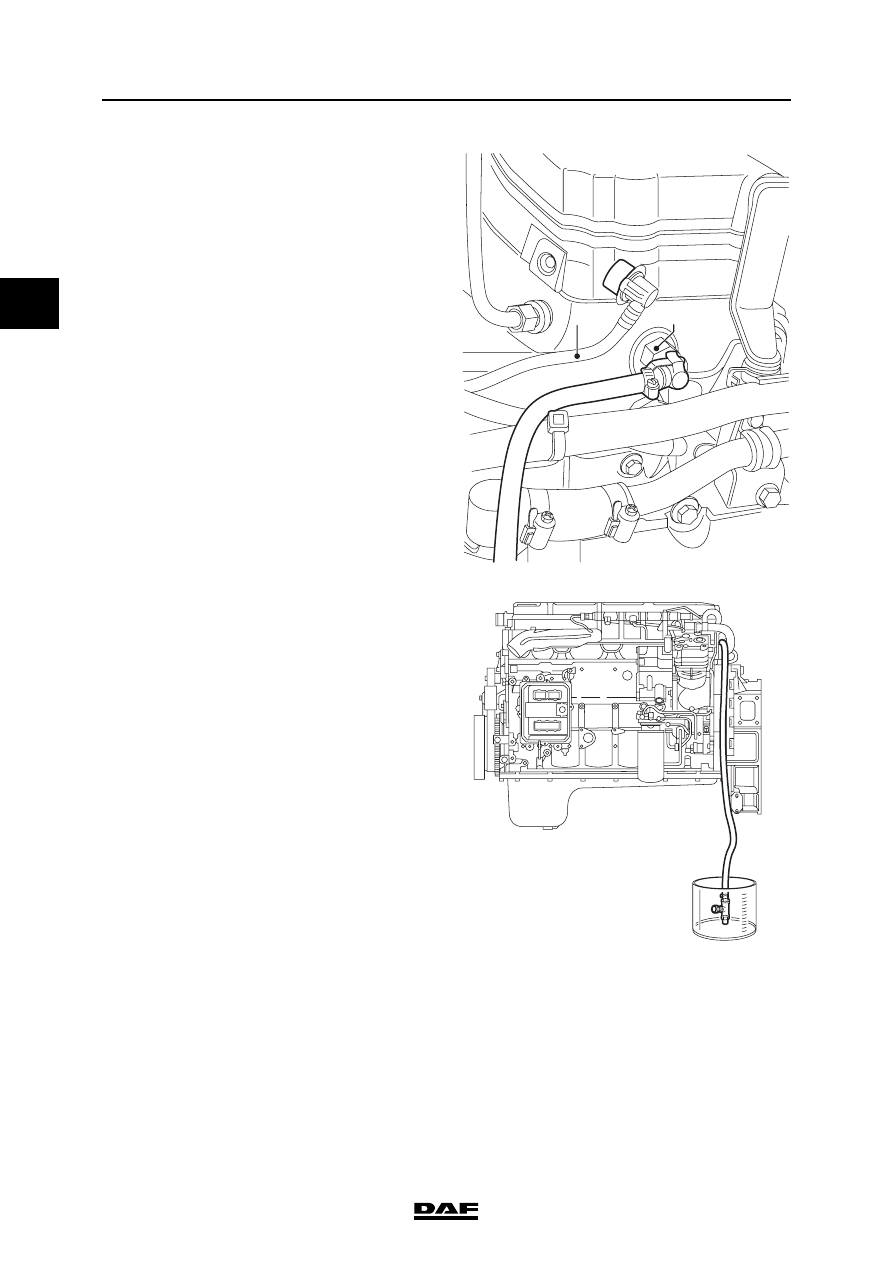
3.
Seal the disconnected fuel pipe (1) using the
special tool (DAF no. 1453151) to prevent
the return fuel escaping.
4.
Fit the special tool (DAF no. 1329476) onto
the fuel return overflow valve (2).
5.
Place the free end of the special tool
(DAF no. 1329476) in a container and start
the engine.
6.
While the engine is idling, measure the
quantity of return fuel using a stop watch and
a measuring beaker; see "Technical data" for
the maximum quantity of return fuel.
Note:
If the quantity of return fuel is within the
specified value there are no internal leaks.
If the quantity of return fuel exceeds the
specified value, the internal fuel leak must be
located.
1
2
i400680
i400682
©
200416
4-7
Inspection and adjustment
BE ENGINE FUEL SYSTEM
ΛΦ45/55 series
4
2
Locating internal fuel leak
1.
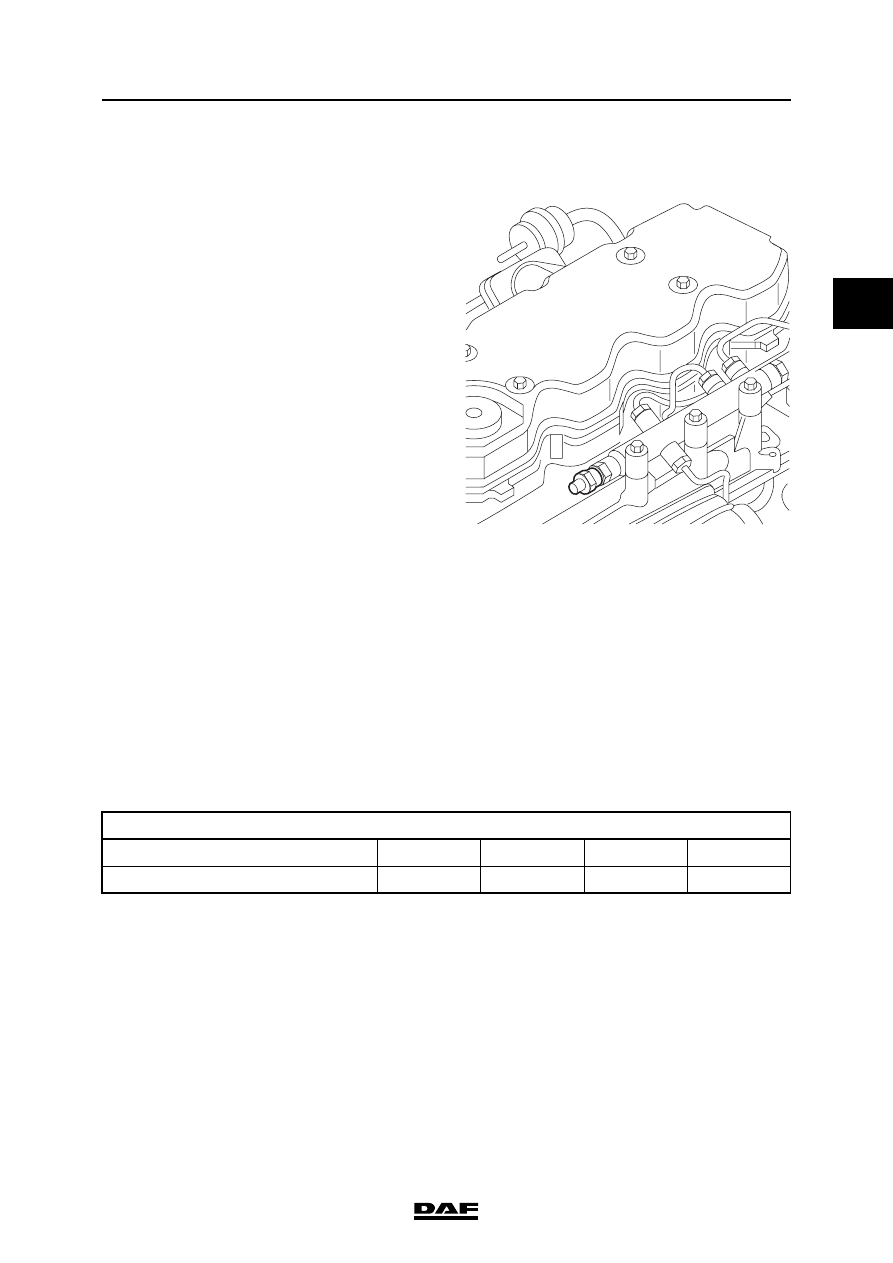
Take the injector pipe out of cylinder 1.
2.
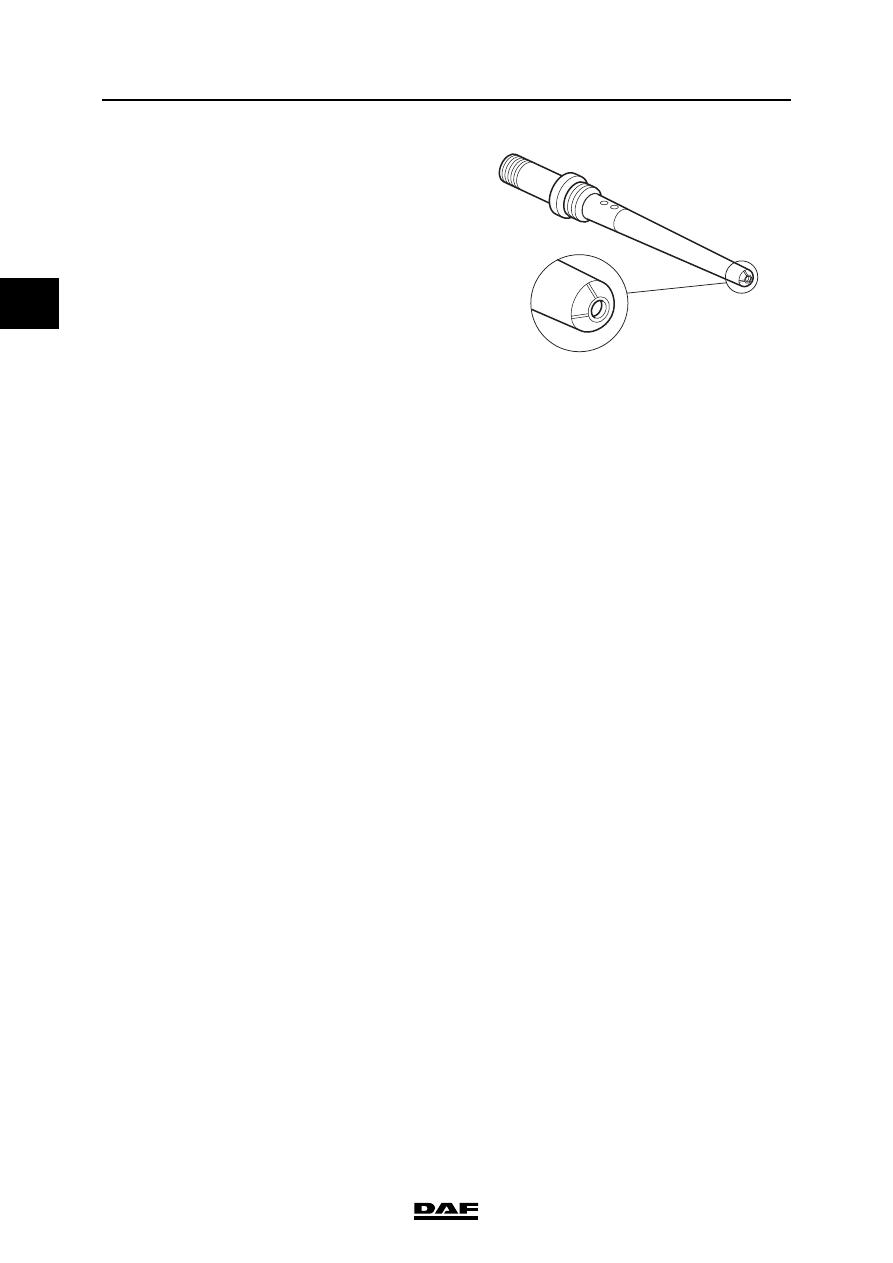
Seal the connection of cylinder 1 on the fuel
rail using the special tool
(DAF no. 1453133). Tighten the plug to 30
Nm.
3.
While the engine is idling, use a stop watch
to measure the time required to fill a
measuring beaker with 360 ml of return fuel.
See "Technical data" for the minimum time
permitted for filling the measuring beaker.
Note:
Use a measuring beaker with a mark at
360ml.
4.
Remove the special tool (DAF no. 1453133)
and reconnect the injector pipe.
5.
Repeat the above steps for the other
cylinders and note the values.
Note:
When the leaking cylinder has been plugged,
the quantity of return fuel will decrease and,
as a result, the time it takes to fill the
measuring beaker to 360ml will increase.
If several high values are measured, this
indicates that there may be several leaks. If
this is the case, first check the cylinders that
give the highest values and then repeat the
test.
In the example shown in the table below
there is an internal leak in the 3
rd
cylinder,
which could be caused by a leak in the fuel
supply pipe and/or a defective injector.
Example:
6.
In the event of a leak, remove the fuel supply
pipe and the injector of the cylinder in
question; see "Removal and installation".
i400681
Leak test results
Blocked cylinder
1
2
3
4
Time (s) to fill to 360ml
35
36
200
37
BE ENGINE FUEL SYSTEM
4-8
©
200416
Inspection and adjustment
2
ΛΦ45/55 series
4
7.
Check the fuel supply pipe for damage and
signs of leakage.
Leakage in the fuel supply pipe can be
recognised by erosion tracks (lines) on the
nose of the supply pipe. If necessary or if in
doubt, replace the fuel supply pipe.
8.
Check that the injector fuel connection is not
leaking.
Leakage in the injector fuel connection can
be recognised by erosion tracks (lines) in the
socket of the fuel connection . If necessary or
if in doubt, replace the injector.
Note:
If fuel has been found in the lubricating oil,
extra attention must be paid to the O-rings of
the injectors, as these have most probably
been damaged by increased pressure in the
return circuit as a result of an internal leak.
Note:
The following guidelines must be adhered to:
-
If the injector is defective, both the injector
and the fuel supply pipe must be replaced.
-
If the fuel supply pipe is defective and in
addition the sealing surface with the injector
is damaged, both the injector and the fuel
supply pipe must be replaced.
-
If the fuel supply pipe is defective and the
sealing surface with the injector is not
damaged, the fuel supply pipe must be
replaced but the injector can be reused.
9.
Fit the injector and fuel supply pipe. See
"Removal and installation".
10. Again inspect for internal fuel leaks to check
that there is no leakage.
i400776
Нет комментариевНе стесняйтесь поделиться с нами вашим ценным мнением.
Текст