DAF LF45, LF55 Series. Manual — part 269
©
200508
4-3
Inspection and adjustment
CLUTCH
ΛΦ45/55 series
3
9
Note:
While releasing the clutch pedal, the clutch servo
should bleed itself via this bleed vent.
4.
Depress the clutch pedal and check that
there is no leakage via the clutch servo bleed
vent.
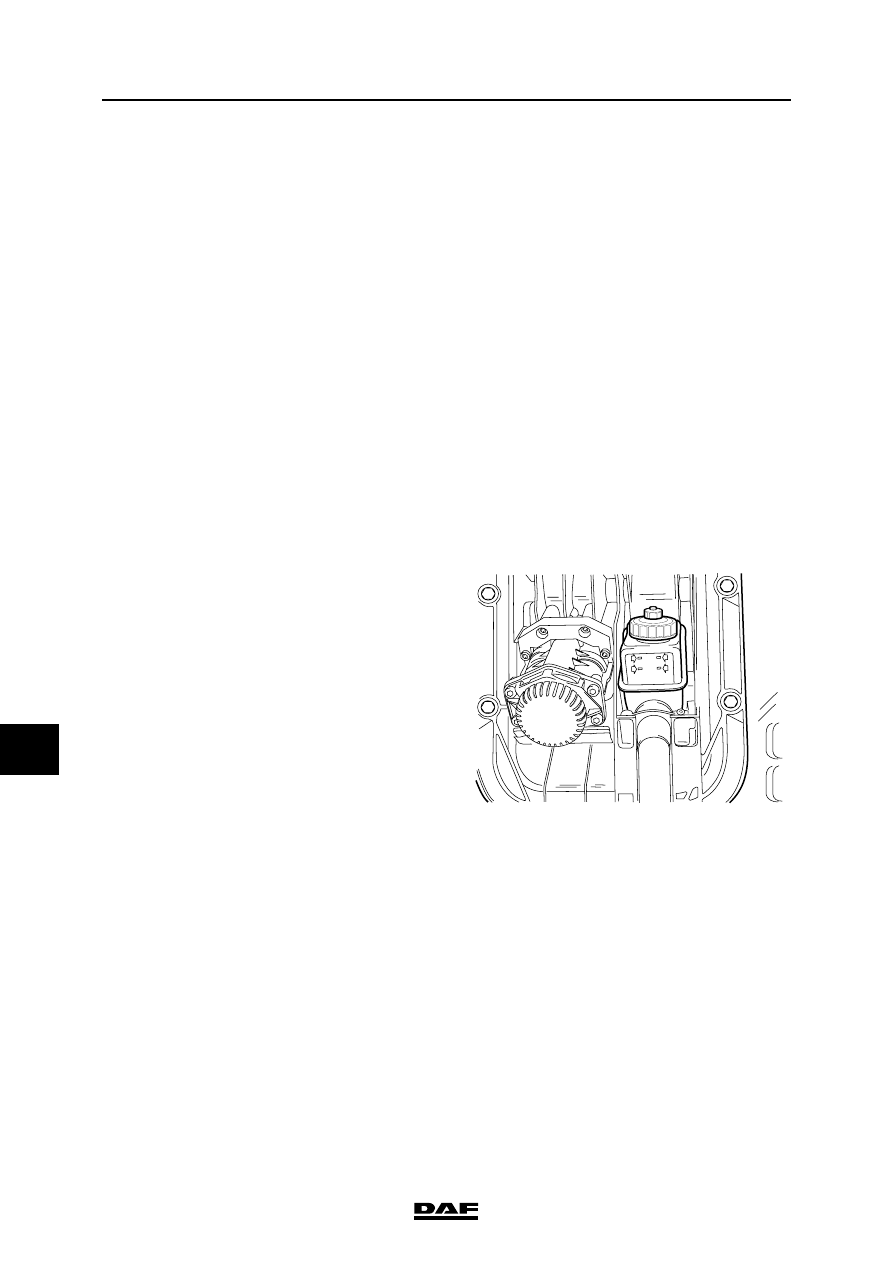
5.
Check that there is no oil leakage via the vent
opening (10).
Note:
A drop of oil on the vent opening (10) is normal
and is not a reason to replace the clutch servo.
If there is constant leakage, the clutch servo must
be repaired or replaced.
If in doubt as to whether the clutch servo situation
is normal or whether there is a leak, inspect the
fluid level in the clutch reservoir.
6.
Depress the clutch pedal and check whether
there is an air leak via the vent opening (10).
CLUTCH
4-4
©
200508
Inspection and adjustment
9
ΛΦ45/55 series
3
4.2 CHECKING CLUTCH FLUID LEVEL
Hydraulic fluid is toxic and can
therefore have a damaging effect on
your health. Any direct or indirect
physical contact should therefore be
avoided. As hydraulic fluid is also
corrosive it may damage the
paintwork of the vehicle. Any
contact between hydraulic fluid and
paintwork should therefore be
avoided.
Always use new and clean hydraulic
fluid which has been kept in a sealed
container that meets the
specifications. Hydraulic fluid which
has absorbed water (from the
ambient air) may have an adverse
effect on the operation of the clutch
system. Avoid any contact with
mineral oil. Even one drop of mineral
oil in the system will damage the
seals.
1.
Check whether the fluid level is between the
MINI and MAXI marks when the cab is in the
driving position.
}
}
MAXI
P MAX 4 BAR
MINI
G0 00 213

©
200508
5-1
Removal and installation
CLUTCH
ΛΦ45/55 series
3
9
5. REMOVAL AND INSTALLATION
5.1 REMOVAL AND INSTALLATION, CLUTCH SERVO
Hydraulic fluid is toxic and can
therefore have a damaging effect on
your health. Any direct or indirect
physical contact should therefore be
avoided.
As hydraulic fluid is also corrosive it
may damage the paintwork of the
vehicle. Any contact between
hydraulic fluid and paintwork should
therefore be avoided.
Always use new and clean hydraulic
fluid which has been kept in a sealed
container that meets the
specifications. Hydraulic fluid which
has absorbed water (from the
ambient air) may have an adverse
effect on the operation of the clutch
system. Avoid any contact with
mineral oil. Even one drop of mineral
oil in the system will damage the
seals.
Removing clutch servo
1.
Remove the air pipe from the clutch servo.
2.
Place a container beneath the clutch servo
and remove the fluid pipe. Then plug the
pipe.
Note:
The clutch servo is mounted against the clutch
housing under pre-tension.
3.
Remove the attachment nuts from the clutch
servo.
Fitting clutch servo
1.
Fit the clutch servo.
Note:
Make sure that the push rod falls into the cup-
shaped recess in the wear indicator. Then tighten
the attachment nuts evenly.
2.
Tighten the attachment nuts evenly.
3.
Connect the air and fluid pipes.
4.
Fill and bleed the clutch system.
}
}
}
V300289
10
CLUTCH
5-2
©
200508
Removal and installation
9
ΛΦ45/55 series
3
5.2 REMOVAL AND INSTALLATION, THRUST BEARING
Removing thrust bearing
1.
Remove the gearbox.
2.
Remove the thrust bearing from the gearbox
front cover in the clutch housing.
Installation, thrust bearing
In the case of thrust bearings with a
plastic coating, no grease should be
used on the gearbox front cover. The
grease will attack the plastic coating
and shorten the service life of the
thrust bearing.
1.
Check the clutch lever for wear.
2.
Check the pressure fingers of the diaphragm
spring for wear.
3.
Apply a little grease to all pressure surfaces
of the clutch lever.
4.
Ensure that the gearbox front cover is free of
grease and dirt.
5.
Install the thrust bearing on the gearbox front
cover. No grease is permitted.
6.
Fit the gearbox.
}
Нет комментариевНе стесняйтесь поделиться с нами вашим ценным мнением.
Текст