DAF LF45, LF55 Series. Manual — part 329

©
200416
4-5
Removal and installation
CE ENGINE INLET/EXHAUST SYSTEM
ΛΦ45/55 series
4
6
4.3 REMOVAL AND INSTALLATION, AIR FILTER ELEMENT
Removing the air filter element
1.
Loosen all clamping brackets on the air filter
cover.
2.
Remove the air filter cover.
3.
Remove the air filter element.
4.
Clean the inside of the air filter housing and
the air filter cover.
5.
Clean the rubber sealing valves (1 and 2) on
the filter housing. Check the sealing valve for
damage.
Installing the air filter element
1.
Fit the air filter element in the air filter
housing.
2.
Fit the air filter cover.
3.
Install all the clamping brackets.
4.
Reset the air filter indicator (3) by pressing
the knob on the indicator.
I4 00 535
3
1
2

CE ENGINE INLET/EXHAUST SYSTEM
4-6
©
200416
Removal and installation
6
ΛΦ45/55 series
4
4.4 REMOVAL AND INSTALLATION, GLOW PLUG
Removing the glow plug
1.
Remove the inlet manifold.
2.
Remove the attachment bolts from the glow
plug and remove the glow plug.
Installing the glow plug
1.
Fit the glow plug and tighten the attachment
bolts to the specified torque. See "Technical
data".
2.
Fit the inlet manifold.
M201155
©
200416
5-1
Cleaning
CE ENGINE INLET/EXHAUST SYSTEM
ΛΦ45/55 series
4
6
5. CLEANING
5.1 CLEANING THE EXTERIOR OF RADIATOR AND AIR COOLER
Inhalation of dust may have serious
consequences for your health.
Take the necessary precautions,
such as wearing goggles and a
facemask.
Note:
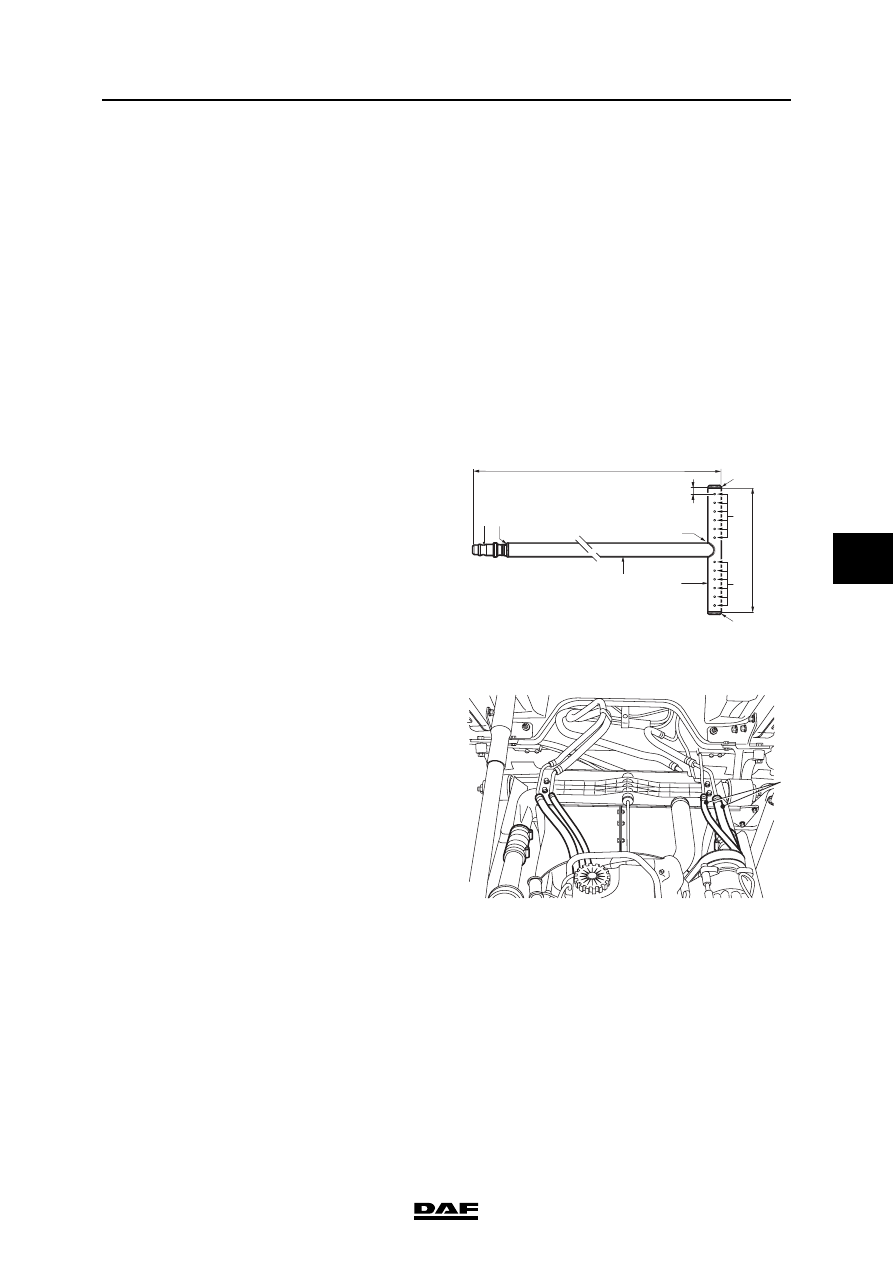
With the aid of a simple tool, the radiator and the
air cooler can be blow-cleaned.
The tool (radiator cleaner) cannot be ordered
from DAF. It should be manufactured by yourself
according to the drawing.
Key to drawing:
1.
If the vehicle has air conditioning, loosen the
support of the refrigerant pipes (1) on the
radiator and remove the condenser from the
air cooler supports. Push the condenser as
far as possible forwards.
}
100mm
5mm
2
1150mm
2
4
3
5
5
4
1
1
M2108
1
Solder up
2
Solder
3
Quick-release coupling for air hose
4
Steel pipe,
10 mm
5
6 x
1.5 mm between holes, with a
centre-to-centre distance between the
holes of 7 mm, drilled on one side
i400824
1

CE ENGINE INLET/EXHAUST SYSTEM
5-2
©
200416
Cleaning
6
ΛΦ45/55 series
4
2.
Insert the radiator cleaner (3) between the air
cooler (1) and radiator (2) from underneath,
with the air holes facing the air cooler (1).
3.
Apply air pressure to the radiator cleaner (3)
and continue blow-cleaning the air cooler (1)
until no more dirt comes out.
4.
Turn the radiator cleaner (3) over, turning the
holes towards the radiator (2), and blow-
clean the radiator (2).
5.
If the vehicle has air conditioning, fit the
condenser in the air cooler supports and
tighten the support of the refrigerant pipes
(1) on the radiator.
1
2
3
M201351
P
1
2
3
M201352
P
i400824
1
Нет комментариевНе стесняйтесь поделиться с нами вашим ценным мнением.
Текст