DAF LF45, LF55 Series. Manual — part 186
©
200505
4-1
Removing and installing
BE ENGINE LUBRICATION SYSTEM
ΛΦ45/55 series
2
4
4. REMOVING AND INSTALLING
4.1 REMOVAL AND INSTALLATION, LUBRICATING OIL FILTER
To prevent skin injury, avoid
unnecessary contact with the
drained lubricating oil. Be careful
when changing the oil. Hot oil may
cause serious injuries.
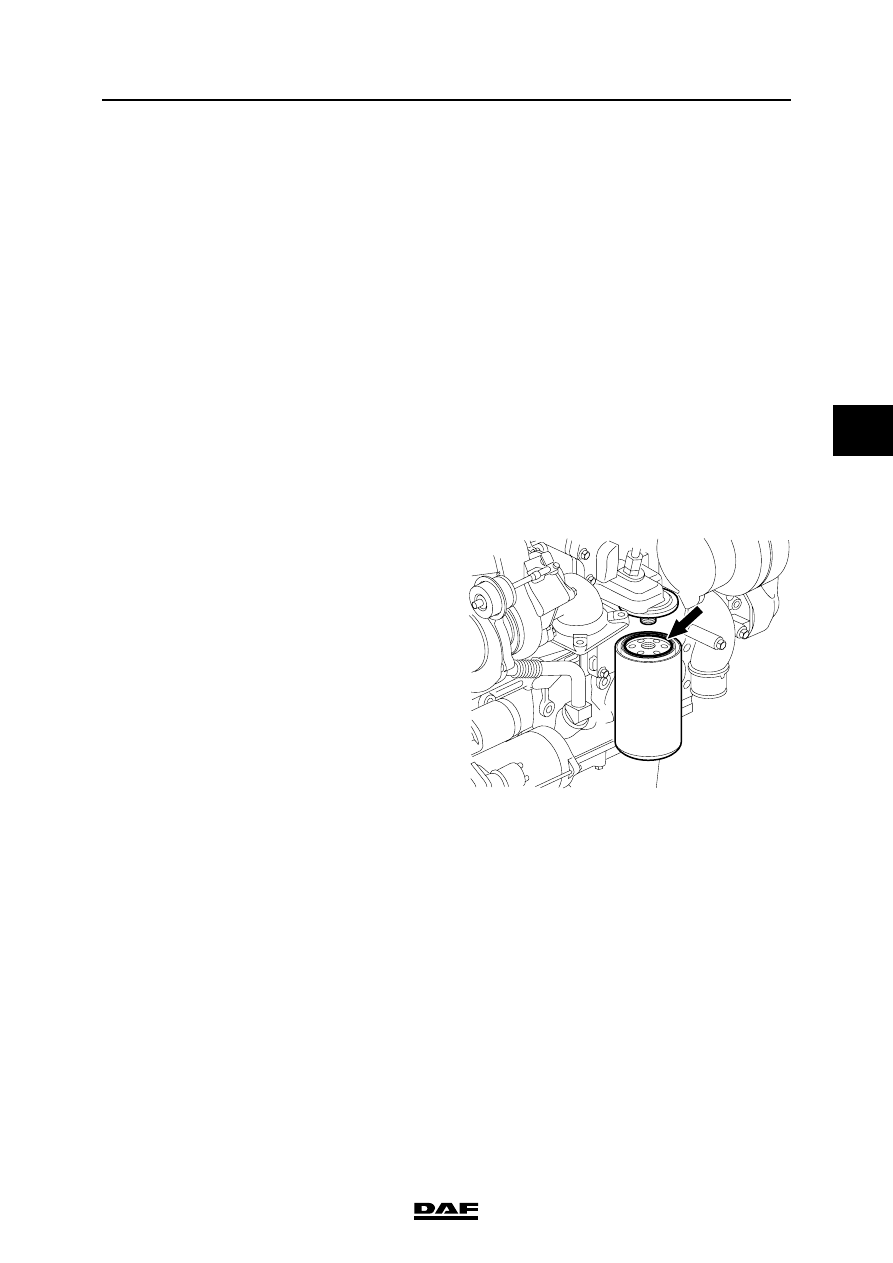
Removing the oil filter
1.
Clean the location and the area surrounding
the filter element if extremely fouled.
2.
Remove the filter element by turning it anti-
clockwise. Collect any oil that is flowing out.
3.
Remove the O-ring if it has not been
removed already.
Installing the oil filter
1.
Lightly oil the filter element sealing ring.
2.
Fill the filter element with clean oil. Use the
specified oil.
3.
Fit the filter until the seal abuts, and tighten it
by hand another
• to a full turn.
4.
Run the engine for a short time and check
whether the oil filter is correctly sealed.
5.
Check the oil level and correct if necessary.
Use the specified oil.
}
G0 00 207
BE ENGINE LUBRICATION SYSTEM
4-2
©
200505
Removing and installing
4
ΛΦ45/55 series
2
4.2 REMOVAL AND INSTALLATION, OIL COOLER
Removing the oil cooler
1.
Drain the coolant. See "Draining and filling".
2.
Remove the lubricating oil filter.
3.
Remove the turbocharger oil supply pipe.
4.
Remove the attachment bolts from the oil
cooler and remove the oil cooler.
Installing the oil cooler
1.
Fit the oil cooler with new gaskets and
tighten the attachment bolts to the specified
torque and in the specified sequence.
See"Technical data".
2.
Tighten the oil supply pipe to the specified
torque. See "Technical data".
3.
Fit the lubricating oil filter.
4.
Fill the cooling system.
5.
Run the engine briefly, and check that the oil
cooler does not leak.
6.
Check the lubricating oil level.
7.
Check the coolant level.

©
200505
4-3
Removing and installing
BE ENGINE LUBRICATION SYSTEM
ΛΦ45/55 series
2
4
4.3 REMOVAL AND INSTALLATION, OIL SUMP
Removing the oil sump
1.
Drain the engine oil. See "Draining and
filling".
2.
Support the oil sump.
3.
Remove the attachment bolts all around.
4.
Remove the oil sump (1) with sealing rubber
(2) and flange (3).
Installing the oil sump
1.
Thoroughly clean the sealing surfaces of the
oil sump and the engine block.
2.
Check the oil sump sealing rubber (2).
Damaged sealing rubbers must be replaced.
3.
Fit the oil sump (1) with sealing rubber (2)
and flange (3) upright.
4.
Fit the attachment bolts in the specified
sequence and tighten them to the specified
torque. See "Technical data".
5.
Fill the engine with the correct amount of
lubricating oil. See "Draining and Filling".
6.
Run the engine for a short time and check for
oil leaks. Then check the oil level.
M201139
1
2
3
BE ENGINE LUBRICATION SYSTEM
4-4
©
200505
Removing and installing
4
ΛΦ45/55 series
2
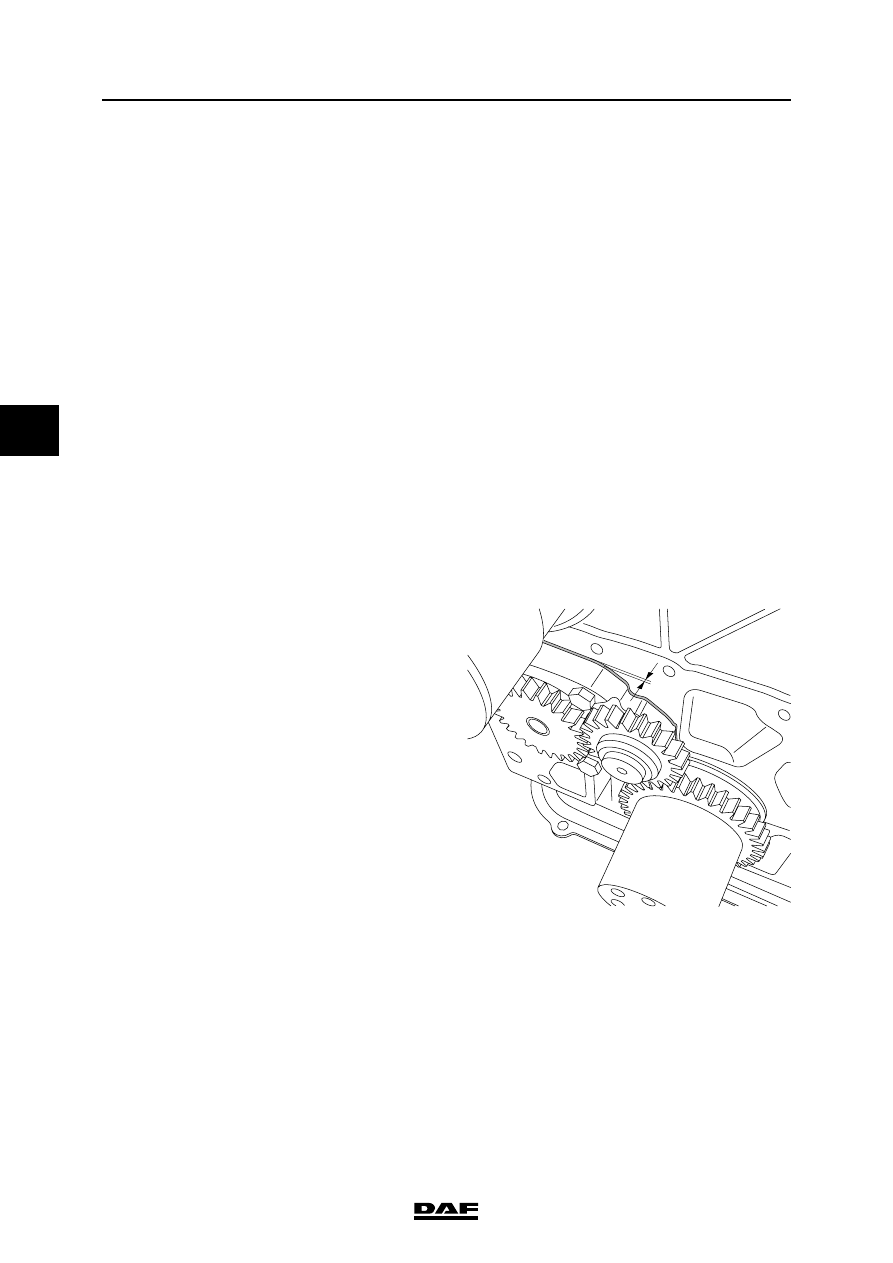
4.4 REMOVING AND INSTALLING LUBRICATING OIL PUMP
Removing lubricating oil pump
1.
Remove the fan.
2.
Remove the poly-V-belt.
3.
Remove the vibration damper and the
crankshaft pulley.
4.
Remove the front crankshaft seal.
5.
Remove the front engine panel.
6.
Remove the attachment bolts from the
lubricating oil pump crosswise and remove it.
Installing lubricating oil pump
1.
Check the lubricating oil pump. See
"Checking and adjusting".
2.
Fill the lubricating oil pump with engine oil
and position the lubricating oil pump in the
cylinder block.
3.
Fit the attachment bolts and tighten them
crosswise to the specified torque. See
"Technical data".
Note:
The rear plate of the lubricating oil pump is at
the back of the bore; if the lubricating oil
pump is fitted correctly, the flange will not
touch the cylinder block.
4.
Fit the front engine panel.
5.
Fit a new front crankshaft seal.
6.
Fit the crankshaft pulley and the vibration
damper.
7.
Fit the poly-V-belt.
8.
Fit the fan.
M201124
Нет комментариевНе стесняйтесь поделиться с нами вашим ценным мнением.
Текст