Dodge Dakota (ND). Manual — part 1206
INSTALLATION
1. Slide the upper retaining tab of the upper B-pillar
trim panel (3) into the hole in the B-pillar (1) and
engage the retaining tabs that secure the trim
panel to the B-pillar.
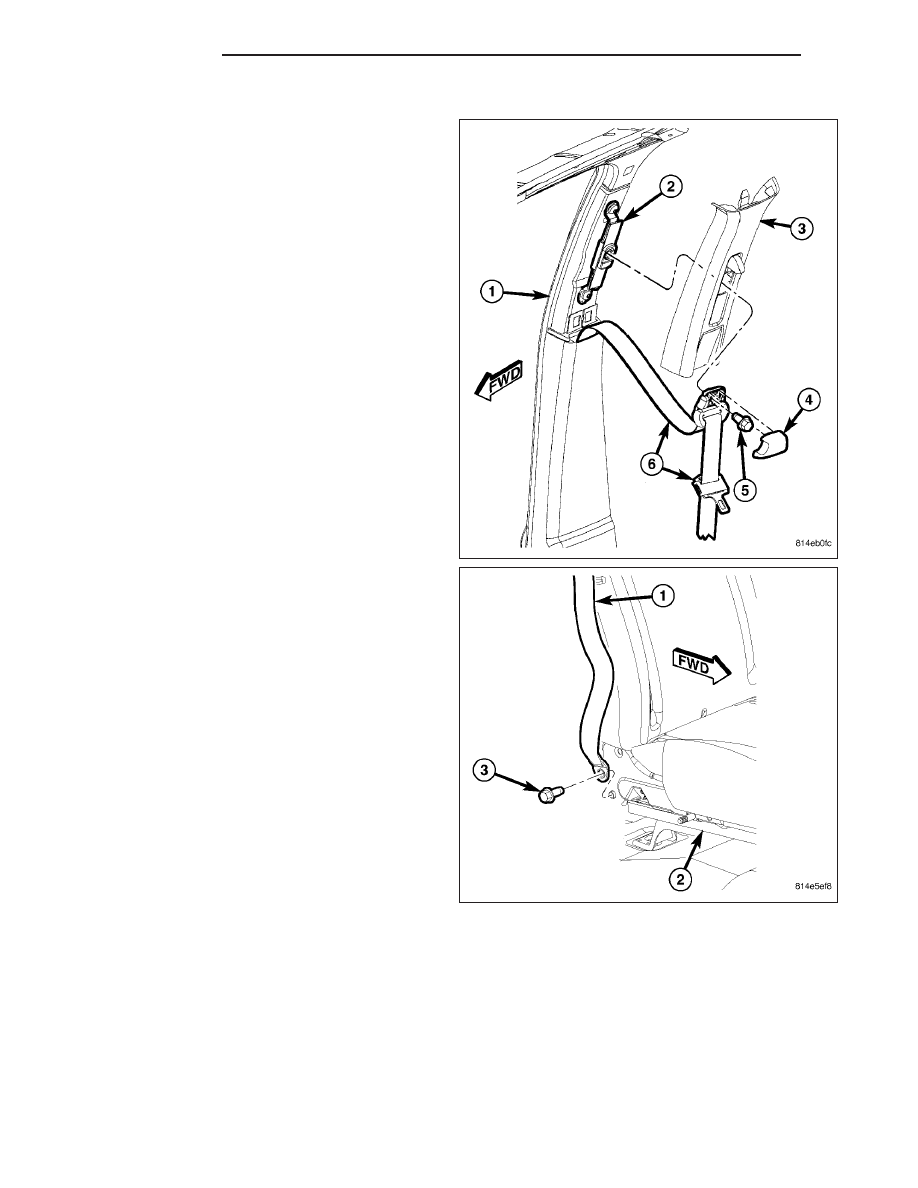
2. Position the seat belt (6) turning loop onto the
height adjuster (2) on the upper B-pillar.
3. Install the screw (5) that secures the turning loop to
the height adjuster. Tighten the screw to 39 N·m
(29 ft. lbs.).
4. Engage the upper edge of a trim cover (4) over the
top of the turning loop. Then, squeeze the lower
end of the trim cover and the turning loop together
firmly and evenly until the engagement tabs of the
trim cover snap into the slots of the turning loop.
5. Position the seat belt (1) lower anchor to the
mounting hole on the outboard side of the front
seat cushion frame (2). Be certain that the seat belt
webbing between the turning loop and the lower
anchor is not twisted.
6. Install the screw (3) that secures the lower anchor
to the outboard side of the front seat cushion
frame. Tighten the screw to 39 N·m (29 ft. lbs.).
PANEL-C PILLAR LOWER TRIM
REMOVAL
Club Cab, Without Rear Jumper Seats
1. Adjust the front seat to its most forward position.
23 - 236
INTERIOR
ND
2. Remove the outer front seat belt retractor cover,
(Refer to 23 - BODY/INTERIOR/COVER-OUTER
FRONT SEAT BELT RETRACTOR - REMOVAL).
3. Remove the rear door sill scuff plate, (Refer to 23 -
BODY/INTERIOR/PLATE-DOOR
SCUFF
-
REMOVAL).
4.
CAUTION: Keep the inner bottom end of the upper
C-pillar trim panel away from the cab back trim
panel when removing the upper C-pillar trim panel
to prevent scratching the back trim panel.Remove
the upper C-pillar trim panel, refer to (Refer to 23 -
BODY/INTERIOR/PANEL-C PILLAR UPPER TRIM -
REMOVAL).
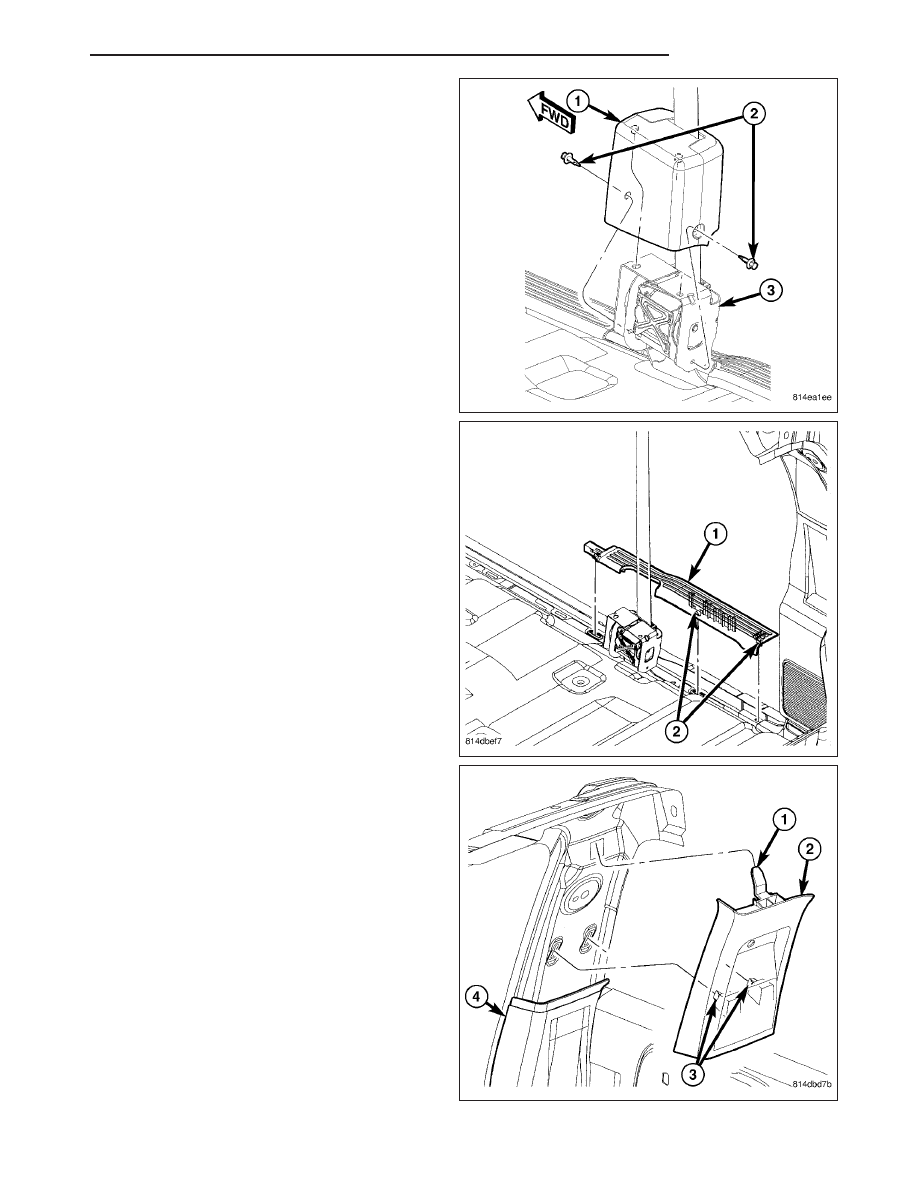
5. Using a trim stick C-4755 or equivalent, disengage
the retaining tabs that secure the lower C-pillar trim
panel (4) to the C-pillar and remove the trim panel.
ND
INTERIOR
23 - 237
Club Cab, With Rear Jumper Seats
1. Adjust the front seat to its most forward position.
2. Fold up the rear jumper seat.
3. Remove the outer front seat belt retractor cover,
(Refer to 23 - BODY/INTERIOR/COVER-OUTER
FRONT SEAT BELT RETRACTOR - REMOVAL).
4. Remove the rear door sill scuff plate, (Refer to 23 -
BODY/INTERIOR/PLATE-DOOR
SCUFF
-
REMOVAL).
23 - 238
INTERIOR
ND
5.
CAUTION: Keep the inner bottom end of the upper
C-pillar trim panel away from the cab back trim
panel when removing the upper C-pillar trim panel
to prevent scratching the back trim panel.Remove
the upper C-pillar trim panel, refer to (Refer to 23 -
BODY/INTERIOR/PANEL-C PILLAR UPPER TRIM -
REMOVAL).
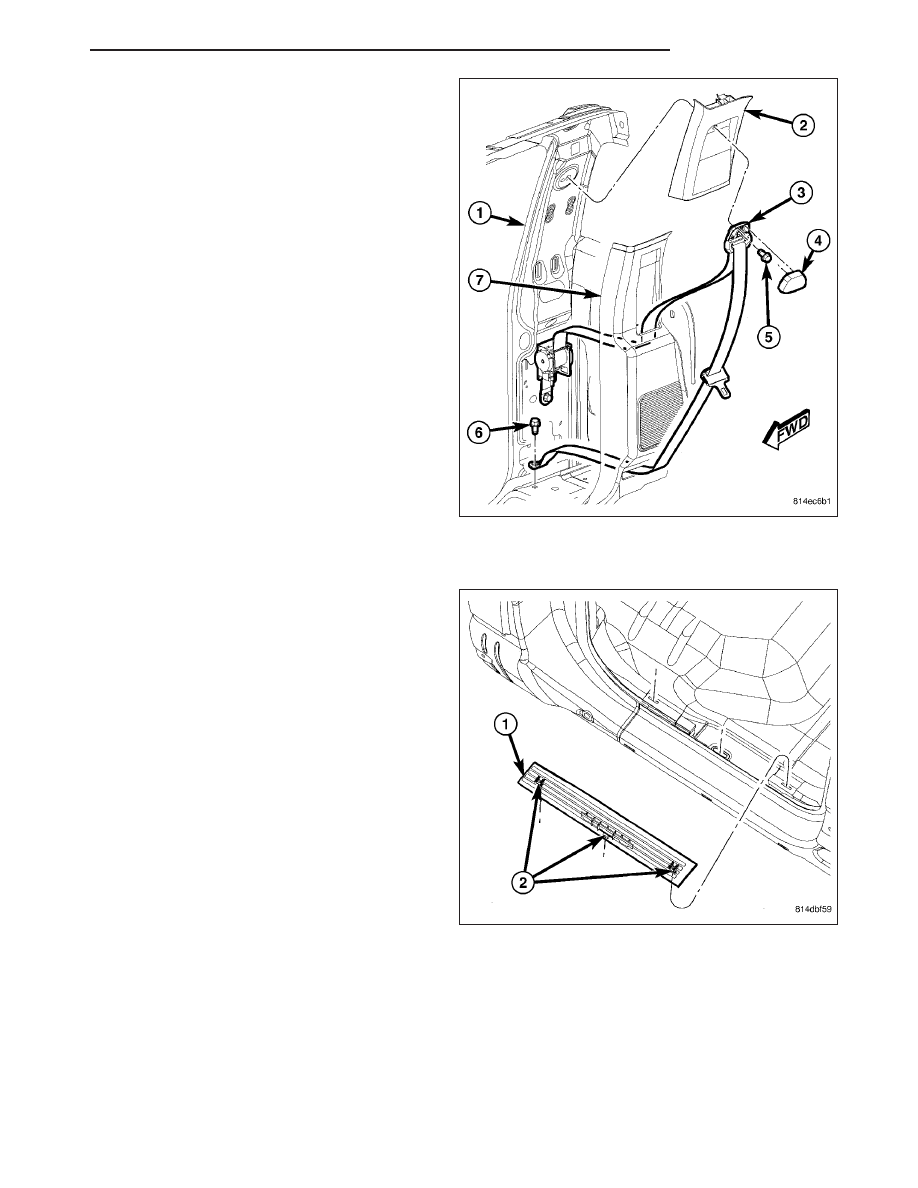
6. Using a trim stick C-4755 or equivalent, disengage
the retaining tabs that secure the lower C-pillar trim
panel (7) to the C-pillar (1).
7. Remove the screw (6) that secures the lower
anchor to the floor panel near the base of the C-pil-
lar.
8. Remove the seat belt (3) from the lower C-pillar
trim panel through the slots provided and remove
the trim panel.
Quad Cab
1. Remove the rear door sill scuff plate, (Refer to 23 -
BODY/INTERIOR/PLATE-DOOR
SCUFF
-
REMOVAL).
2. Remove the rear seat, (Refer to 23 - BODY/SEATS/SEAT-SECOND ROW - REMOVAL).
ND
INTERIOR
23 - 239
Нет комментариевНе стесняйтесь поделиться с нами вашим ценным мнением.
Текст