Dodge Dakota (ND). Manual — part 1152
CHECK
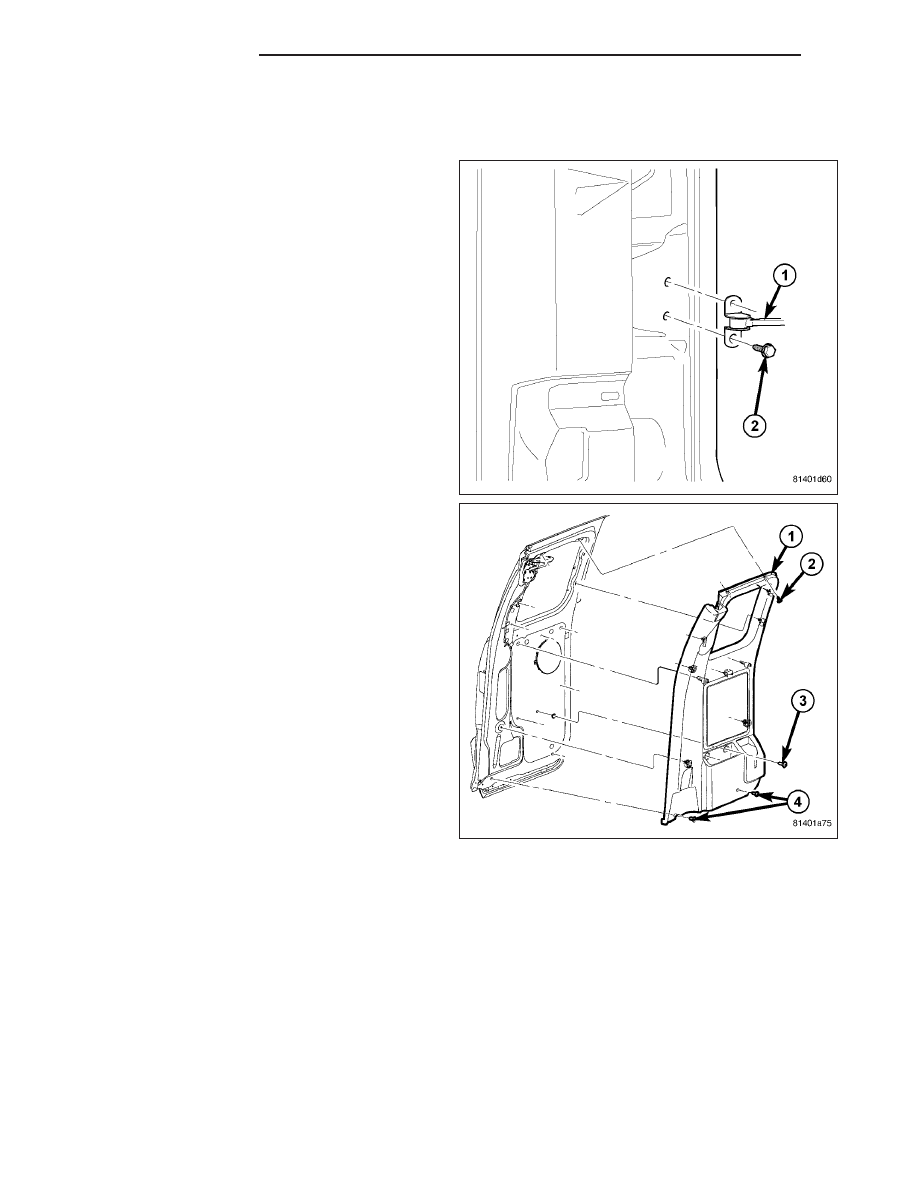
REMOVAL
1. Open the door and remove the body bolts (2) con-
necting the check (1) to the pillar.
2. Remove the door trim panel. (Refer to 23 - BODY/
DOOR - CARGO/PANEL-TRIM - REMOVAL)
23 - 20
DOOR - CARGO
ND
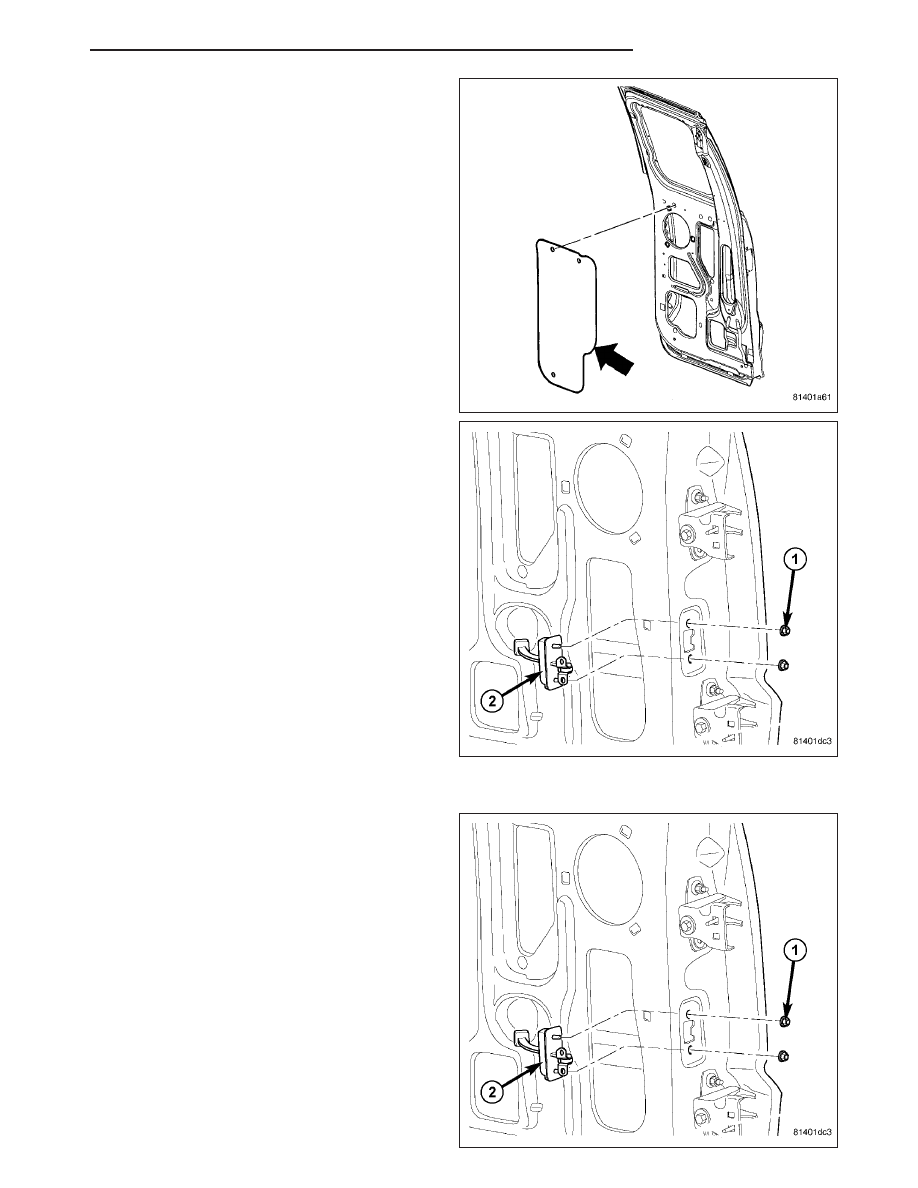
CAUTION: Do not allow the watershield or adhe-
sive to become contaminated with dirt or other
foreign substances.
Do not damage the watershield during removal
and installation.
If the watershield becomes contaminated or dam-
aged, replace the watershield.
3. Partially separate the watershield to gain access to
the inner door.
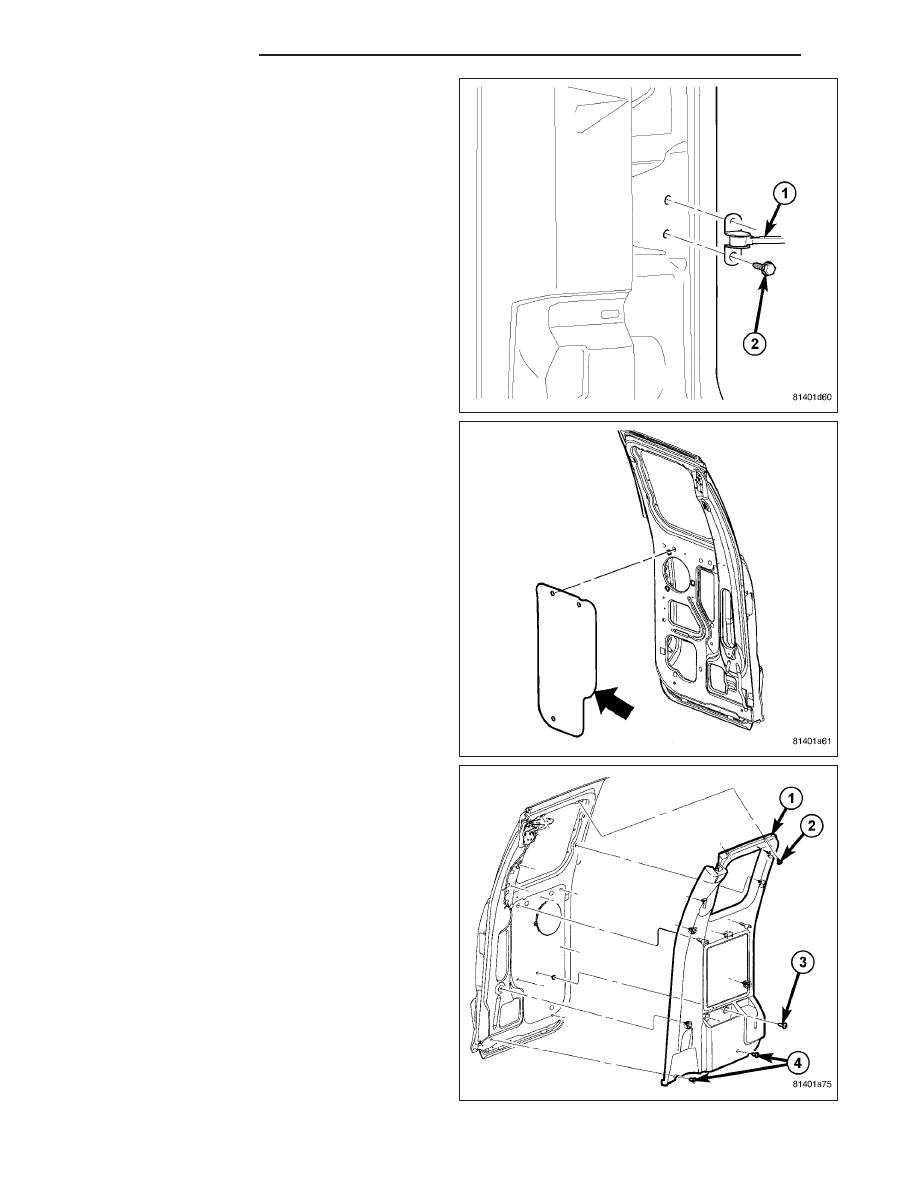
4. Remove the nuts (1) and remove the door check
(2).
INSTALLATION
1. Position the check (2) into the door and install the
nuts (1).
2. Tighten the nuts to 23 N·m (200 in. lbs.).
ND
DOOR - CARGO
23 - 21
3. Attach the check (1) to the pillar and install the
bolts (2).
4. Tighten the bolts to 23 N·m (200 in. lbs.).
CAUTION: Do not allow the watershield or adhe-
sive to become contaminated with dirt or other
foreign substances.
Do not damage the watershield during removal
and installation.
If the watershield becomes contaminated or dam-
aged, replace the watershield.
5. Secure the watershield to the inner door panel.
6. Install the door trim panel (1). (Refer to 23 - BODY/
DOOR - CARGO/PANEL-TRIM - INSTALLATION)
23 - 22
DOOR - CARGO
ND
DOOR
REMOVAL
1. Using a grease pencil or equivalent, mark the out-
line of the door hinges on the door end to aid
installation.
2. Support the door with a suitable lifting device.
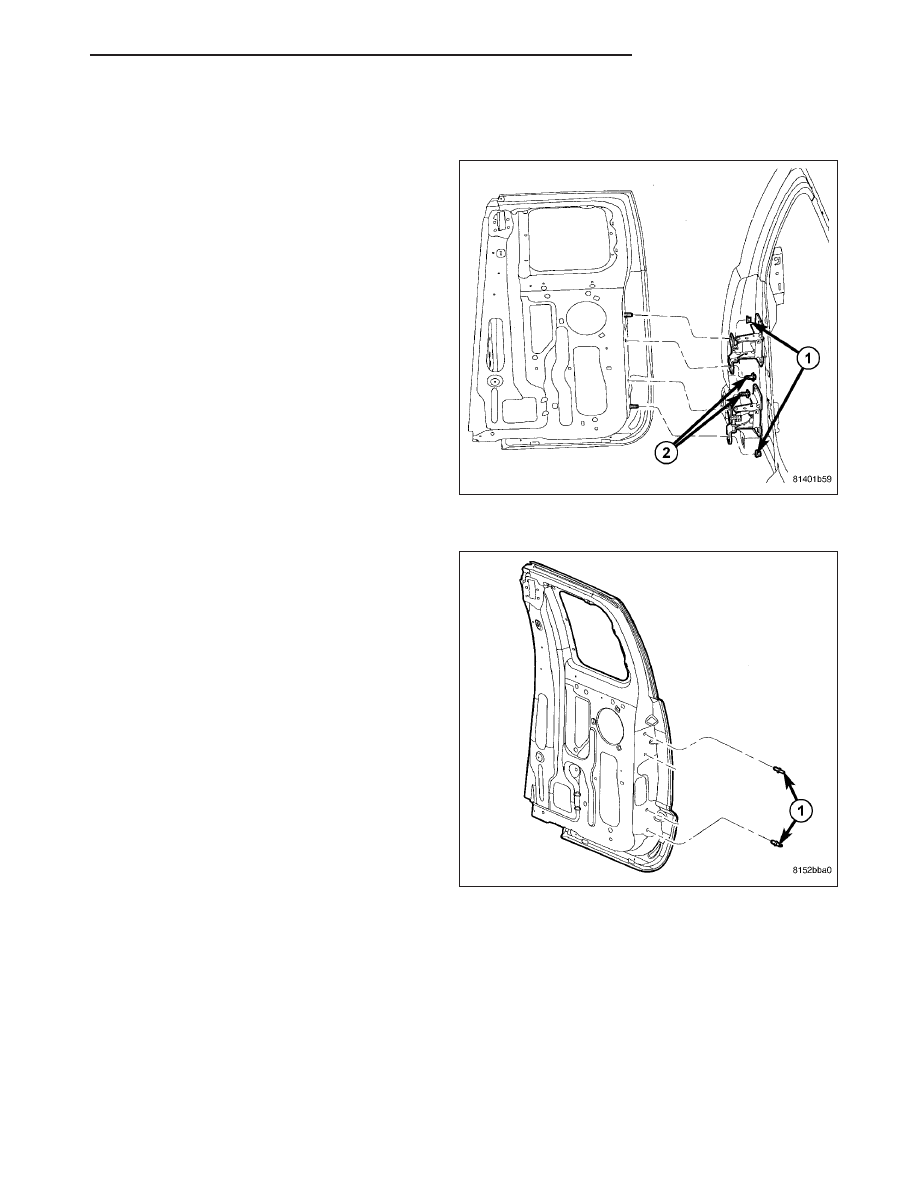
3. Remove the nuts (1) and the bolts (2) attaching the
door hinges to the door.
INSTALLATION
NOTE: When installing a door it will be necessary
to replace the shouldered door studs (1) with ser-
vice studs without the shoulder in order to
achieve correct door position adjustments.
1. Install the service studs (1) and tighten to 12 N·m
(105 in. lbs.).
ND
DOOR - CARGO
23 - 23
Нет комментариевНе стесняйтесь поделиться с нами вашим ценным мнением.
Текст