Dodge Dakota (ND). Manual — part 1180
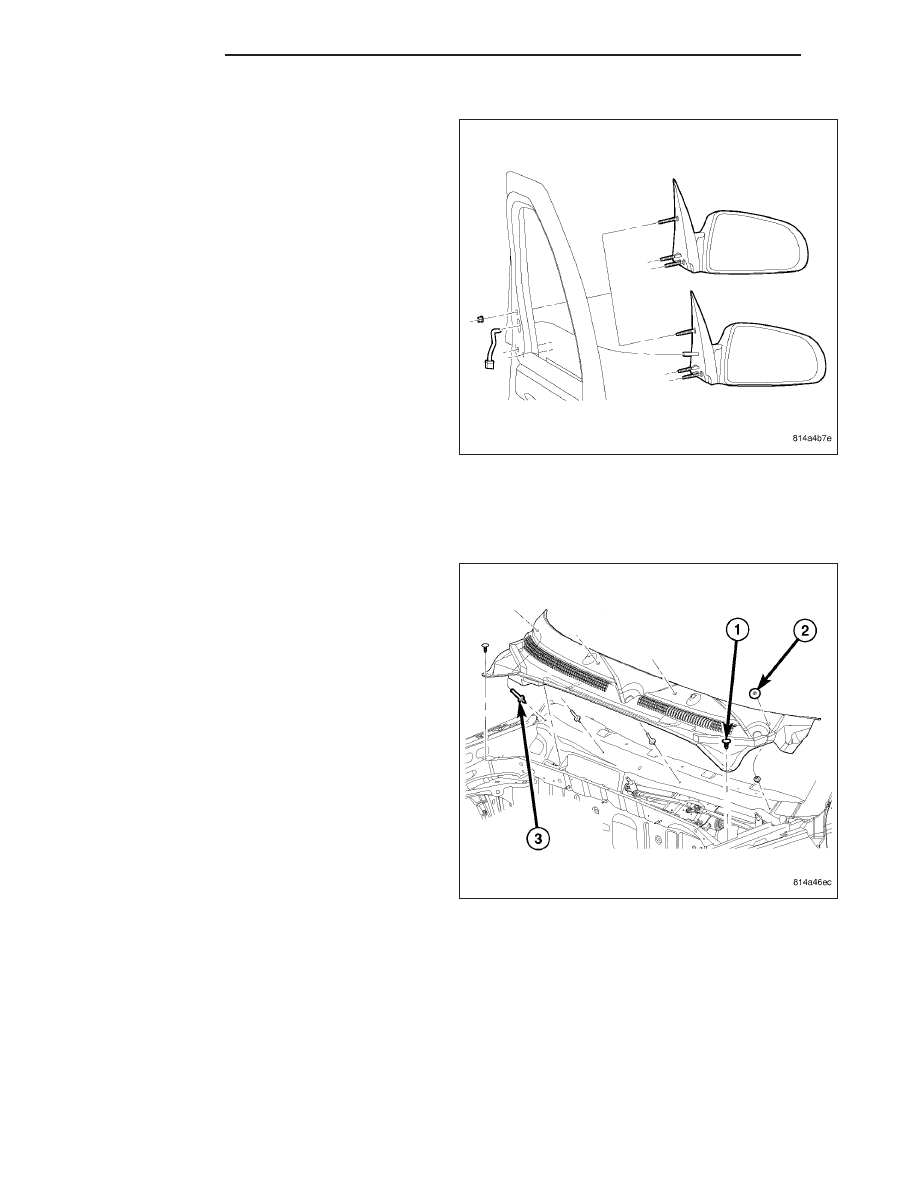
INSTALLATION
1. Install the mirror and install the nuts.
2. Tighten the nuts to 7 N·m (60 in. lbs.).
3. Connect the electrical connector.
4. Install the door trim panel (Refer to 23 - BODY/
DOOR - FRONT/TRIM PANEL - INSTALLATION).
PANEL-COWL TOP
REMOVAL
1. Open the hood and remove the wiper arm nuts and
wiper arms. (Refer to 8 - ELECTRICAL/WIPERS/
WASHERS/WIPER ARMS - REMOVAL)
2. Remove the four rear nuts and the two front pins.
3. Remove the cowl grille.
23 - 132
EXTERIOR
ND

INSTALLATION
1. Install the grille and install the front pins and rear
nuts.
2. Install the wiper arms and install the nuts (Refer to
8
-
ELECTRICAL/WIPERS/WASHERS/WIPER
ARMS - INSTALLATION).
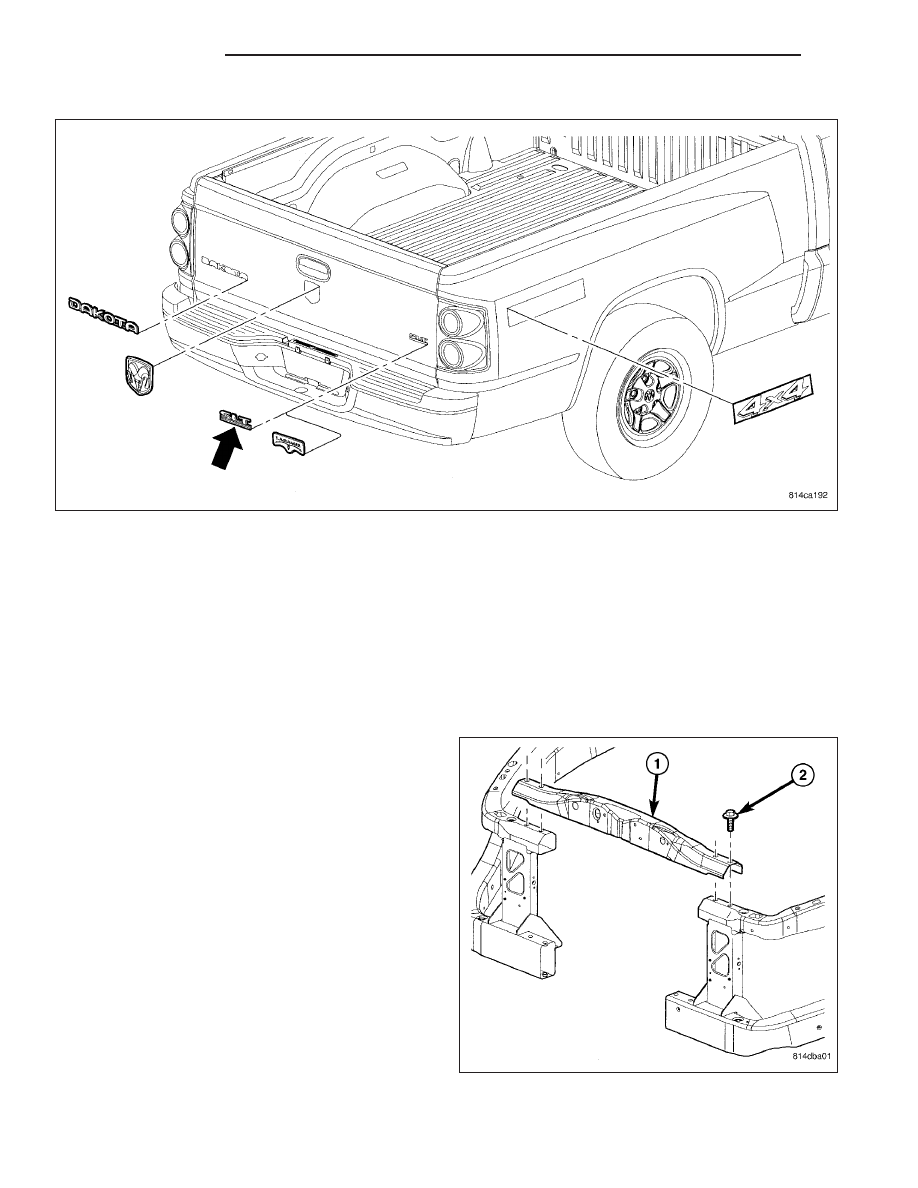
PLATES-EXTERIOR NAME
REMOVAL
NOTE: Exterior nameplates are attached to body panels with adhesive tape.
1. Apply a length of masking tape on the body, parallel to the top edge of the nameplate to use as a guide, if
necessary.
2. If temperature is below 21°C (70°F) warm emblem with a heat lamp or gun. Do not exceed 52°C (120°F) when
heating emblem.
3. Insert a plastic trim stick or a hard wood wedge behind the emblem to separate the adhesive backing from the
body.
4. Clean adhesive residue from body with MOPAR
T
Super Clean solvent or equivalent.
ND
EXTERIOR
23 - 133
INSTALLATION
1. Remove carrier from adhesive tape on back of emblem.
2. Position emblem properly on body.
3. Press emblem firmly to body with palm of hand.
4. If temperature is below 21°C (70°F) warm emblem with a heat lamp or gun to assure adhesion. Do not exceed
52°C (120°F) when heating emblem.
RADIATOR CROSSMEMBER - UPPER
REMOVAL
1. Raise hood.
2. Remove the front hood seal.
3. Remove the center brace mounting nuts and
remove hood latch.
4. Remove the crossmember mounting bolts.
5. Remove crossmember.
23 - 134
EXTERIOR
ND
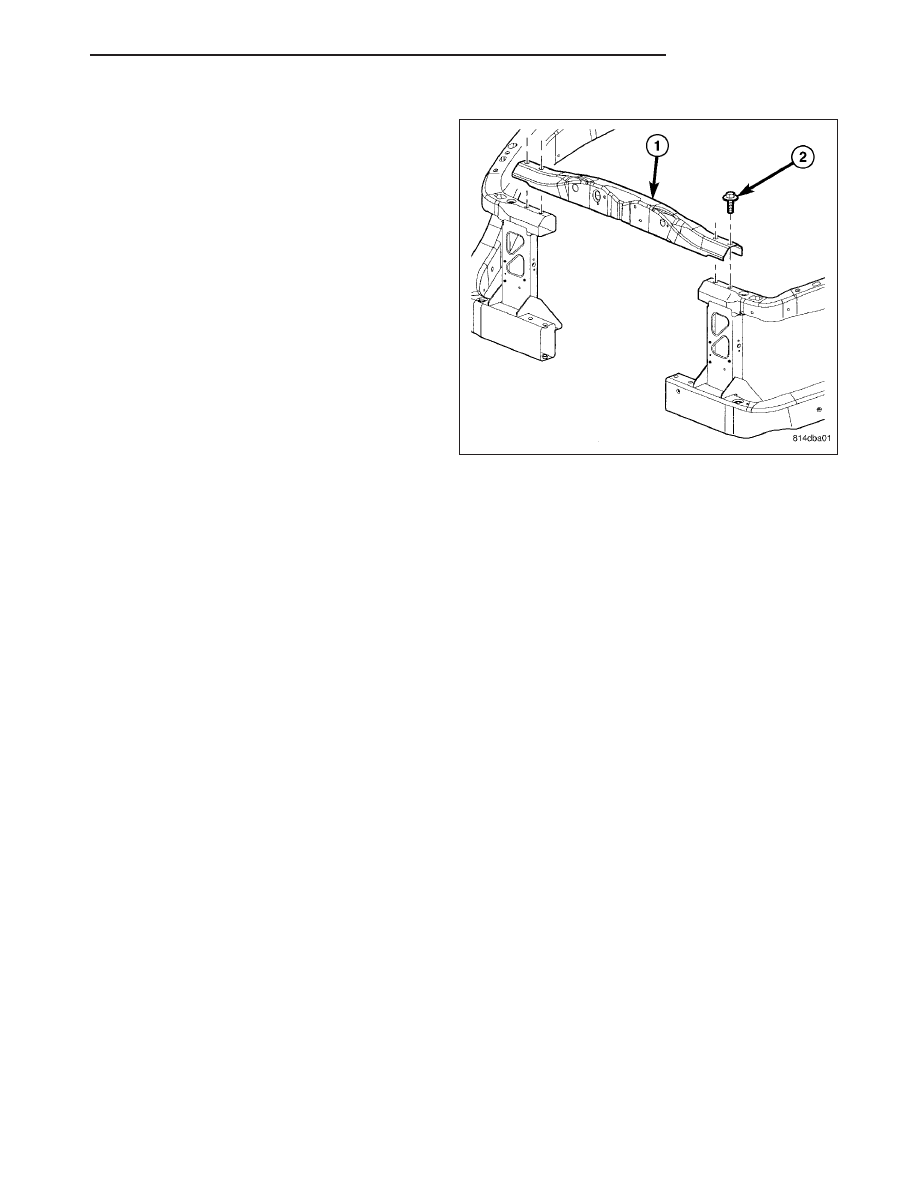
INSTALLATION
1. Install upper crossmember.
2. Install outer mounting bolts and tighten.
3. Install nuts attaching latch to radiator crossmember
support. Tighten nuts to 11 N·m (8 ft. lbs.) torque.
4. Check hood fit and adjust if required. (Refer to 23 -
BODY/BODY STRUCTURE/GAP AND FLUSH -
SPECIFICATIONS)
5. Install hood seal.
STRIPES AND DECALS-BODY
REMOVAL
1. Warm the panel to approximately 38°C (100°F) using a suitable heat lamp or heat gun.
2. Peel decal from body panel using an even pressure pull.
3. Remove adhesive residue from body panel using a suitable adhesive removing solvent.
INSTALLATION
The painted surface of the body panel to be covered by a decal must be smooth and completely cured before decal
can be applied. Ripples and feather edging will read through if surface is not properly prepared. Clean all residue
from surface.
1. Peel paper backing away from decal exposing adhesive back of decal.
2. Apply soap solution liberally to adhesive back of decal.
3. Apply soap solution liberally to body panel surface.
4. Place decal into position on body panel. Smooth out wrinkles by pulling lightly on edges of decal until it lays flat
on painted surface.
5. Push air pockets from under decal to the perimeter of the panel from the center of the decal out.
6. Squeegee soap solution and air bubbles from behind decal from the center of the panel out using a body putty
applicator squeegee.
7. Small air or water bubbles under decal can be pierced with a pin and smoothed out.
ND
EXTERIOR
23 - 135
Нет комментариевНе стесняйтесь поделиться с нами вашим ценным мнением.
Текст