Dodge Dakota (ND). Manual — part 1181
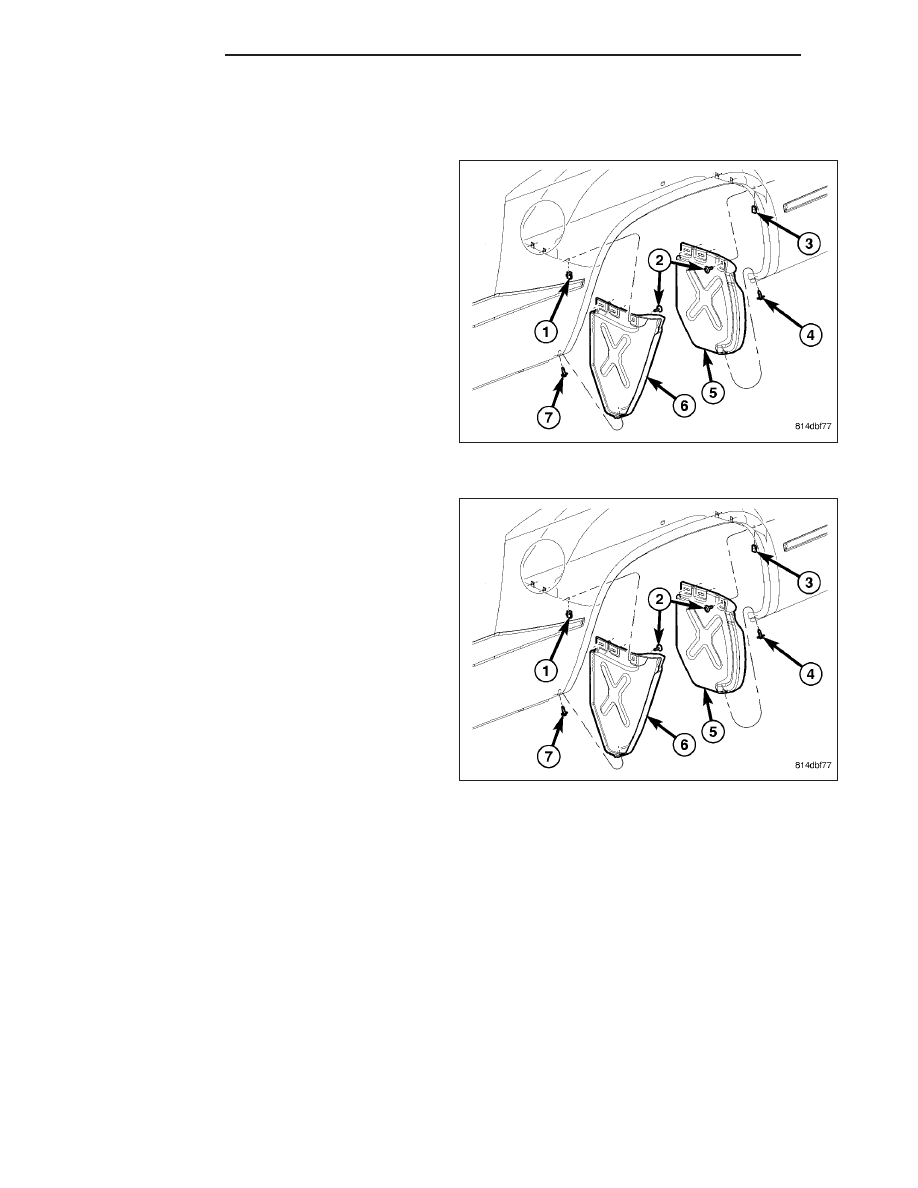
SHIELD-SPLASH
REMOVAL
1. Remove the screws and remove the shields.
INSTALLATION
1. Install the shields and install the screws.
23 - 136
EXTERIOR
ND
HOOD
TABLE OF CONTENTS
page
page
HINGE
. . . . . . . . . . . . . . . . . . . . . . . . . . . . 137
. . . . . . . . . . . . . . . . . . . . . . . . 138
HOOD
. . . . . . . . . . . . . . . . . . . . . . . . . . . . 139
. . . . . . . . . . . . . . . . . . . . . . . . 139
. . . . . . . . . . . . . . . . . . . . . . . 139
LATCH
. . . . . . . . . . . . . . . . . . . . . . . . . . . . 140
. . . . . . . . . . . . . . . . . . . . . . . . 141
. . . . . . . . . . . . . . . . . . . . . . . 141
RELEASE-HOOD LATCH
. . . . . . . . . . . . . . . . . . . . . . . . . . . . 142
. . . . . . . . . . . . . . . . . . . . . . . . 143
STRIKER-HOOD LATCH
. . . . . . . . . . . . . . . . . . . . . . . . . . . . 144
. . . . . . . . . . . . . . . . . . . . . . . . 144
SUPPORT CYLINDER
. . . . . . . . . . . . . . . . . . . . . . . . . . . . 145
. . . . . . . . . . . . . . . . . . . . . . . . 146
HINGE
REMOVAL
NOTE: It is not necessary to remove the hood to
replace one or both hinges. The hinges can be
replaced one at a time.
1. Open hood and support the side that requires
hinge replacement.
2. Mark all bolt and hinge attachment locations using
a grease pencil or equivalent, to provide reference
marks for installation.
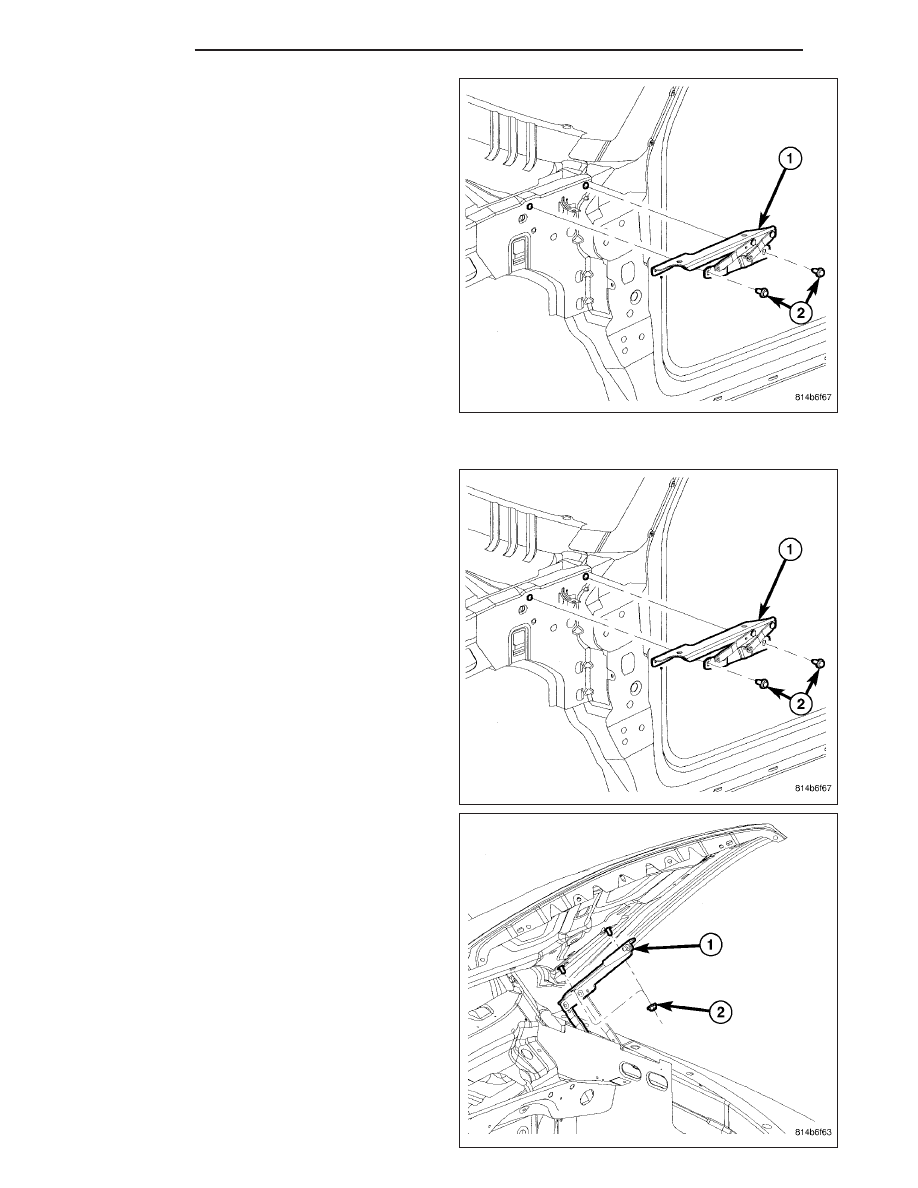
3. Remove support cylinder from the upper hinge (1)
(Refer to 23 - BODY/HOOD/SUPPORT CYLINDER
- REMOVAL).
4. Remove the nuts (2) attaching the hinge (1) to the
hood.
ND
HOOD
23 - 137
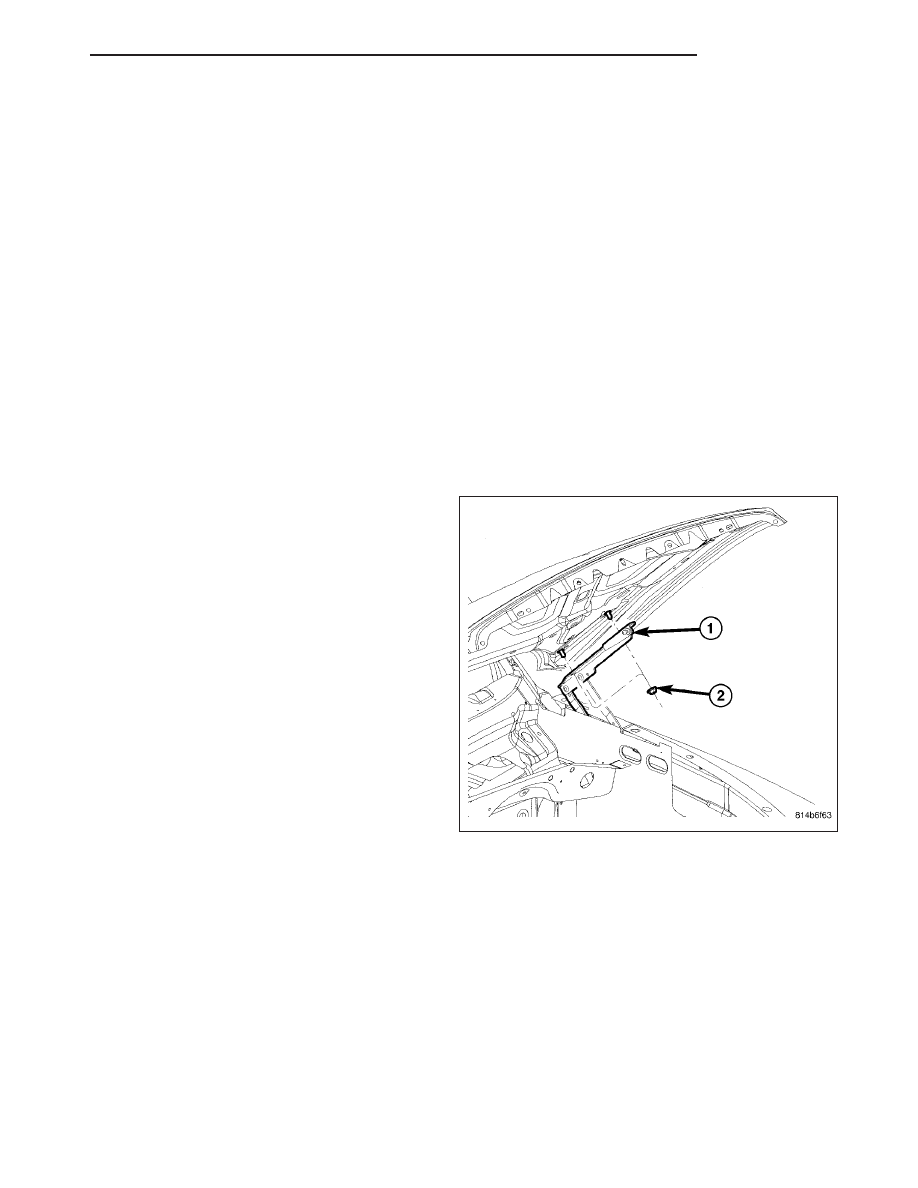
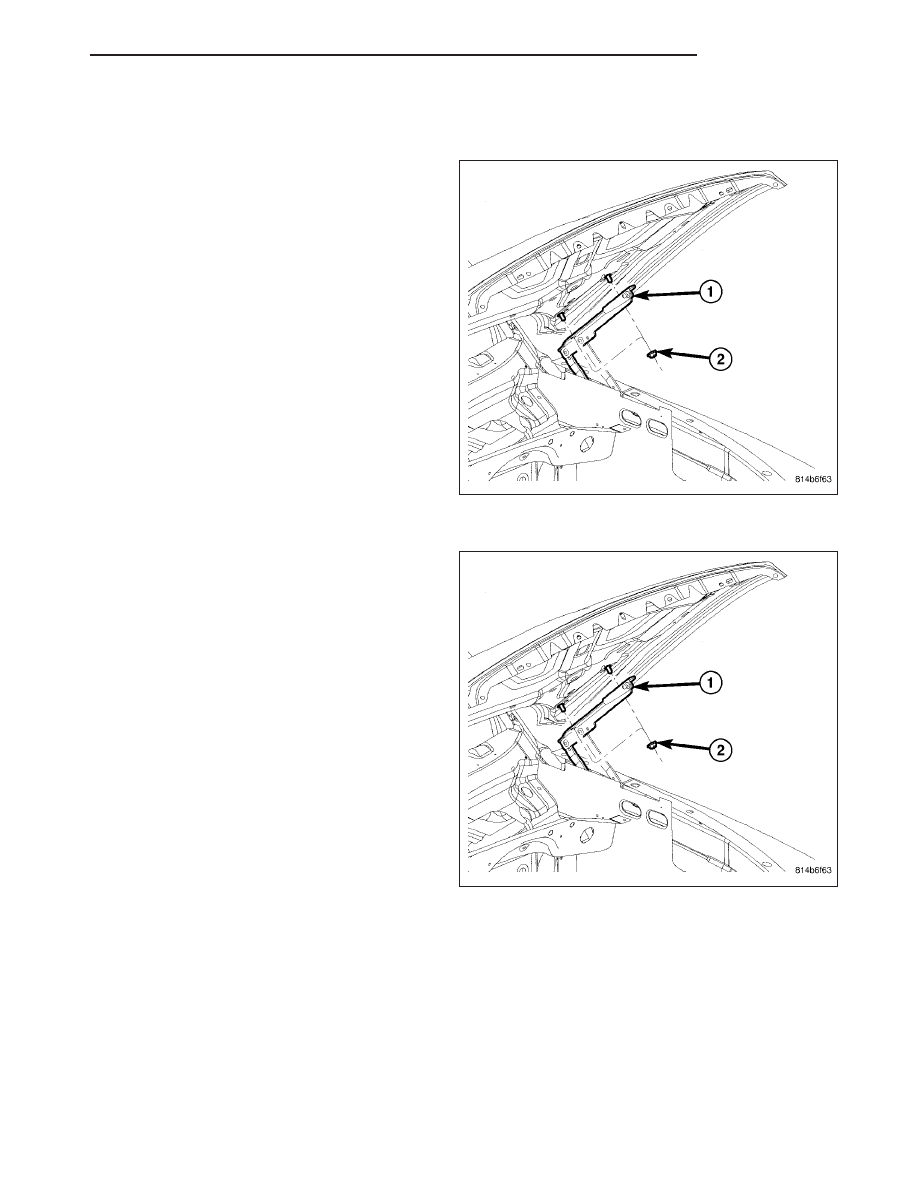
5. From inside the engine compartment, remove the
two hinge bolts (2).
6. Slide the hinge (2) forward and remove from the
fender rail.
INSTALLATION
1. Install the hinge (1), slide back into position on the
fender rail and align all marks.
2. From inside the engine compartment, install the
two hinge bolts (2).
3. Tighten the rear bolt to 20 N·m (15 ft. lbs.)
4. Tighten the front bolt to 20 N·m (15 ft. lbs.)
5. Install the nuts (2) attaching the hinge (1) to the
hood and tighten the nuts to 23 N·m (17 ft. lbs.)
6. Install support cylinder (Refer to 23 - BODY/HOOD/
SUPPORT CYLINDER - INSTALLATION).
7. Check hood fit and adjust if required. (Refer to 23 -
BODY/BODY STRUCTURE/GAP AND FLUSH -
SPECIFICATIONS)
23 - 138
HOOD
ND
HOOD
REMOVAL
1. Open and support hood. Disconnect the washer
hoses.
2. Mark all nut and hinge attachment locations using
a grease pencil or equivalent, to provide reference
marks for installation.
3. Remove support cylinders (Refer to 23 - BODY/
HOOD/SUPPORT CYLINDER - REMOVAL).
4. Remove the top nuts (2) attaching hood to hinge
and loosen the bottom nuts (2) until they can be
removed by hand.
5. Remove the bottom nuts (2) and separate the hood
(1) from the vehicle.
INSTALLATION
1. Position the hood (1) onto the hinges.
2. Align all marks and install the nuts(2).
3. Tighten the nuts too 23 N·m (17 ft. lbs.).
4. Install support cylinder (Refer to 23 - BODY/HOOD/
SUPPORT CYLINDER - INSTALLATION).
5. Connect the washer hoses.
6. Close hood and adjust as necessary. (Refer to 23 -
BODY/HOOD/HOOD - ADJUSTMENTS)
ADJUSTMENTS
NOTE: For gap and flush specifications, (Refer to 23 - BODY/BODY STRUCTURE/GAP AND FLUSH - SPEC-
IFICATIONS).
1. If hood is low in relation to cowl panel, loosen the hood to hinge nuts and insert shims between hinge and hood.
2. Adjust hood bumpers in or out to adjust hood-to-fender height alignment.
3. Loosen the hood latch screws.
4. Close the hood and check the fore/aft position of the hood.
5. Loosen the hood to hinge nuts to adjust the fore/aft position.
6. Once the fore/aft position of the hood is correct, tighten the hood to hinge nuts to 23 N·m (17 ft. lbs.).
ND
HOOD
23 - 139
Нет комментариевНе стесняйтесь поделиться с нами вашим ценным мнением.
Текст