Infiniti FX35 / FX45. Manual — part 279
CO-46
< SERVICE INFORMATION >
[VK45DE]
RADIATOR (ALUMINUM TYPE)
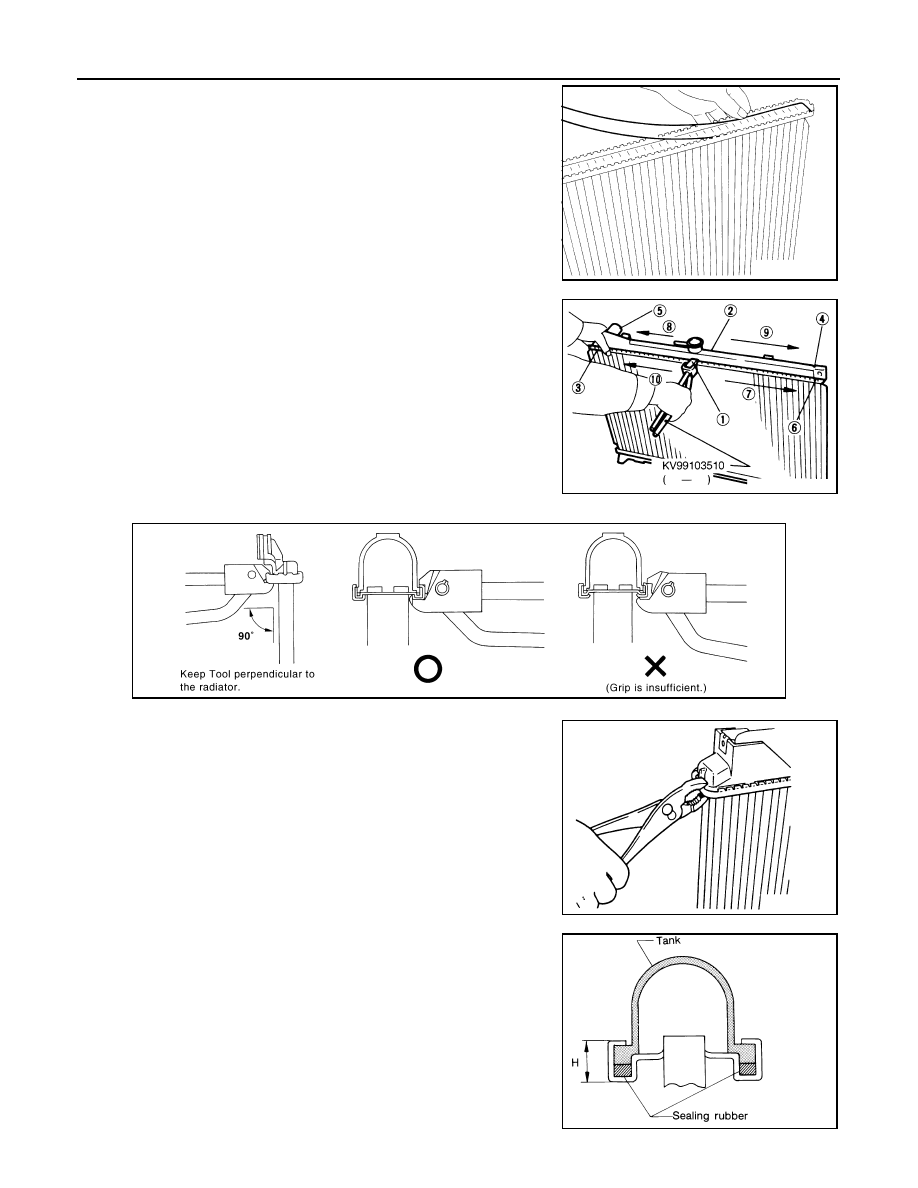
2.
Install new sealing rubber while pushing it with fingers.
CAUTION:
Be careful not to twist sealing rubber.
3.
Caulk tank in numerical order as shown in the figure with radia-
tor plate pliers A (SST).
• Use pliers in the locations where radiator plate pliers A [SST:
KV99103510 (
—
)] cannot be used.
4.
Make sure that the rim is completely crimped down.
SLC917A
SLC904-A
PBIC2076E
SLC897
Standard height “H”
: 8.0 - 8.4 mm (0.315 - 0.331 in)
SLC554A
RADIATOR (ALUMINUM TYPE)
CO-47
< SERVICE INFORMATION >
[VK45DE]
C
D
E
F
G
H
I
J
K
L
M
A
CO
N
P
O
5.
Make sure that there is no leakage. Refer to "INSPECTION".
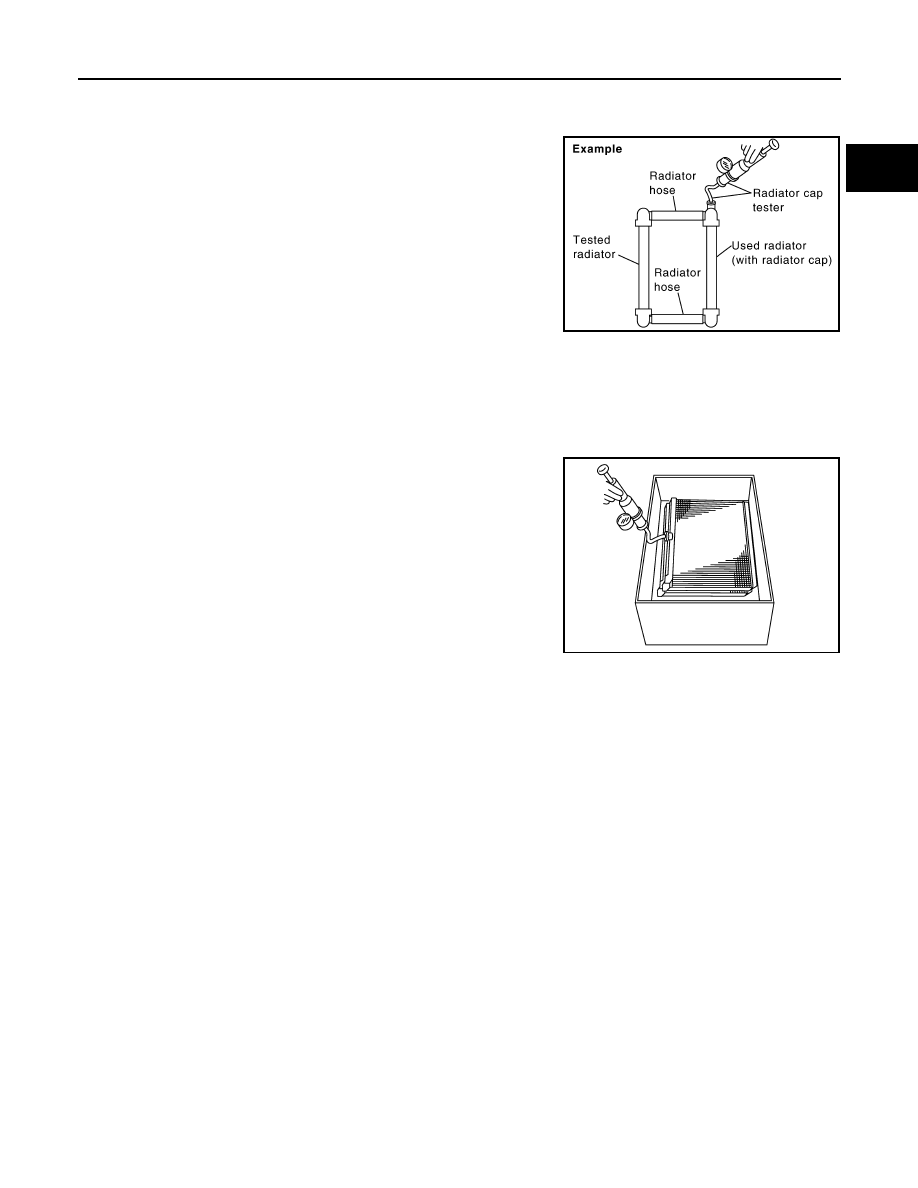
INSPECTION
1.
Apply pressure with radiator cap tester adapter (commercial ser-
vice tool) and radiator cap tester (commercial service tool).
• provide used radiator and connect it to tested radiator using
radiator hoses as shown in the figure.
NOTE:
The used radiator should be tested beforehand to confirm it
has no leakage. If used one is not available, it is possible to
use new service part as a radiator testing tool.
WARNING:
To prevent the risk of hose coming undone while under pressure, securely fasten it down with
hose clamp.
CAUTION:
Attach hose to A/T fluid cooler to seal its inlet and outlet.
2.
Check for leakage by soaking radiator in water container with
the testing pressure applied.
Testing pressure
: 157 kPa (1.6 kg/cm
2
, 23 psi)
PBIC5158E
PBIC1699E
CO-48
< SERVICE INFORMATION >
[VK45DE]
COOLING FAN
COOLING FAN
Component (Crankshaft Driven type)
INFOID:0000000001325877
Removal and Installation
INFOID:0000000001325878
REMOVAL
1.
Remove air duct (inlet). Refer to
2.
Remove engine front undercover with power tool.
3.
Remove radiator shroud (lower). Refer to
4.
Remove drive belts. Refer to
.
5.
Remove fan coupling and cooling fan assembly.
CAUTION:
Do not damage or scratch radiator core when removing.
6.
Remove cooling fan from fan coupling.
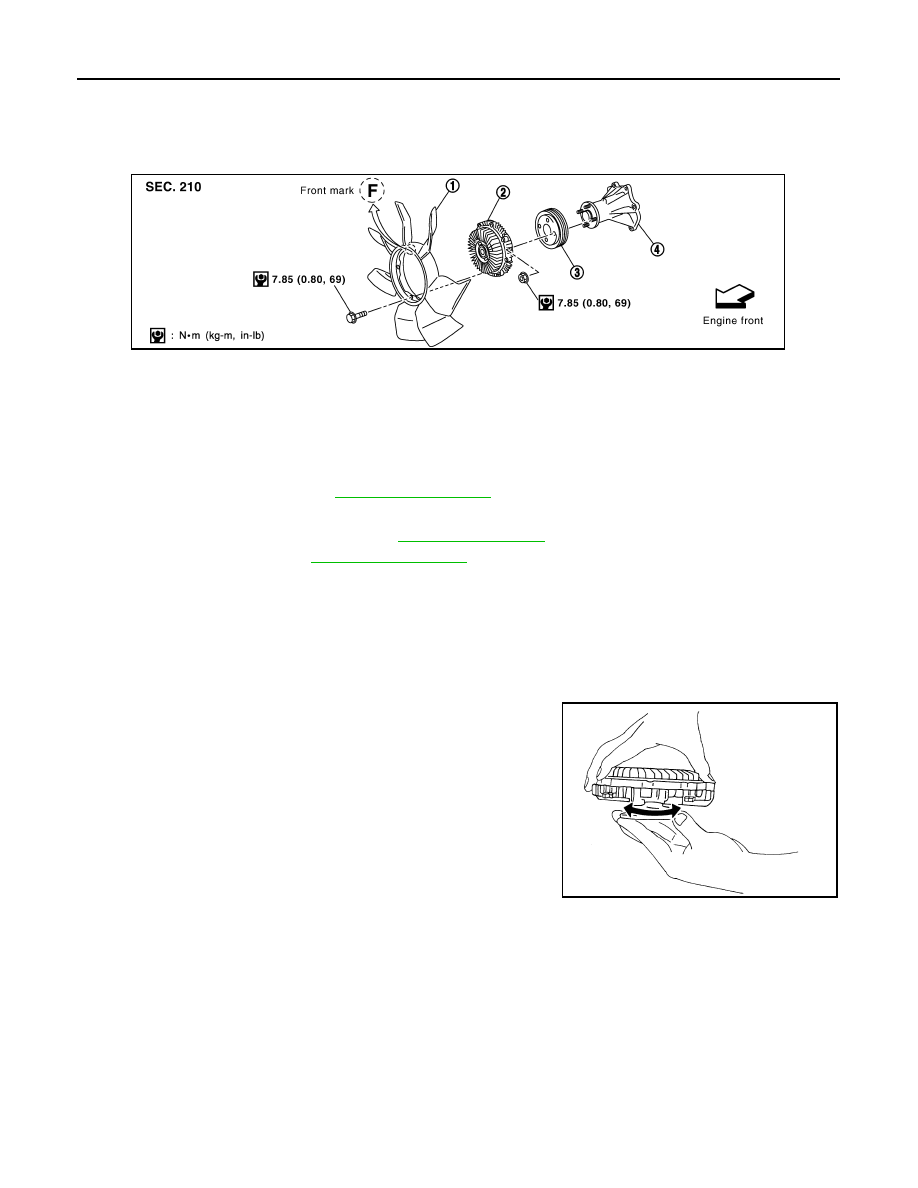
INSPECTION AFTER REMOVAL
Fan Coupling
Inspect fan coupling for oil leakage and bimetal conditions.
• If anything is found, replace fan coupling.
Cooling Fan
Inspect cooling fan for crack or unusual bend.
• If anything is found, replace cooling fan.
INSTALLATION
Note the following, install in the reverse order of removal.
• Install cooling fan with its front mark “F” facing front of vehicle. Refer to "Removal and Installation".
1.
Cooling fan
2.
Fan coupling
3.
Fan and water pump pulley
4.
Water pump
PBIC1537E
SLC072

COOLING FAN
CO-49
< SERVICE INFORMATION >
[VK45DE]
C
D
E
F
G
H
I
J
K
L
M
A
CO
N
P
O
Component (Motor Driven Type)
INFOID:0000000001325879
Removal and Installation
INFOID:0000000001325880
REMOVAL
1.
Remove front grille. Refer to
EI-22, "Component Parts Location"
2.
Disconnect harness connector from fan motor.
3.
Remove cooling fan assembly.
CAUTION:
Do not damage or scratch A/C condenser when removed.
INSTALLATION
Install in the reverse order of removal.
• Cooling fan is controlled by ECM. For details. Refer to
.
Disassembly and Assembly (Motor Driven Type)
INFOID:0000000001325881
DISASSEMBLY
1.
Remove cooling fan from fan motor.
2.
Remove fan motor from fan grille.
INSPECTION AFTER DISASSEMBLY
Cooling Fan
Inspect cooling fan for crack or unusual bend.
• If anything is found, replace cooling fan.
ASSEMBLY
Assemble in the reverse order of disassembly.
1.
Cooling fan
2.
Fan grille
3.
Fan motor
PBIC1666E
Нет комментариевНе стесняйтесь поделиться с нами вашим ценным мнением.
Текст