Infiniti FX35 / FX45. Manual — part 272
CO-18
< SERVICE INFORMATION >
[VQ35DE]
RADIATOR (ALUMINUM TYPE)
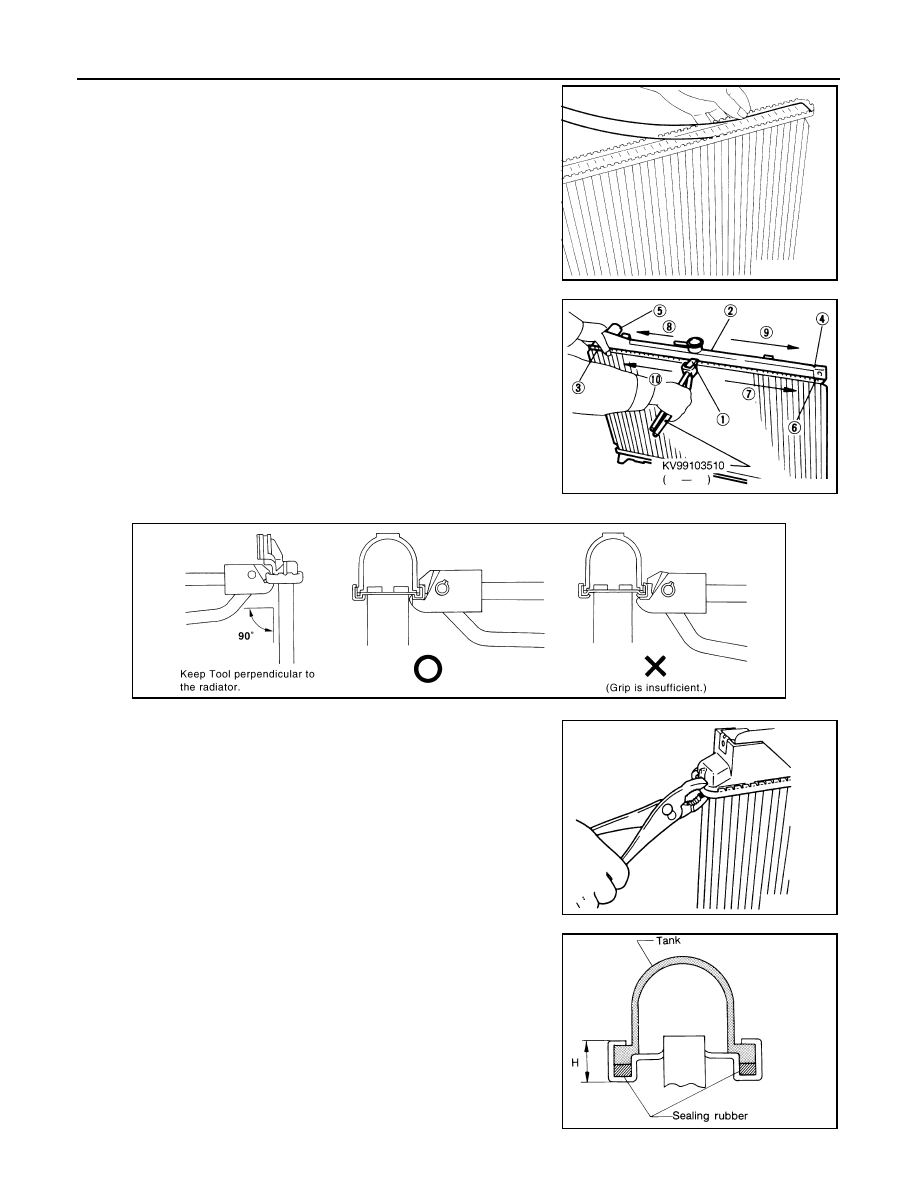
2.
Install new sealing rubber while pushing it with fingers.
CAUTION:
Be careful not to twist sealing rubber.
3.
Caulk tank in numerical order as shown in the figure with the
radiator plate pliers A (SST).
• Use pliers in the locations where the radiator plate pliers A
[SST: KV99103510 (
—
)] cannot be used.
4.
Make sure that the rim is completely crimped down.
SLC917A
SLC904-A
PBIC2076E
SLC897
Standard height “H”
: 8.0 - 8.4 mm (0.315 - 0.331 in)
SLC554A
RADIATOR (ALUMINUM TYPE)
CO-19
< SERVICE INFORMATION >
[VQ35DE]
C
D
E
F
G
H
I
J
K
L
M
A
CO
N
P
O
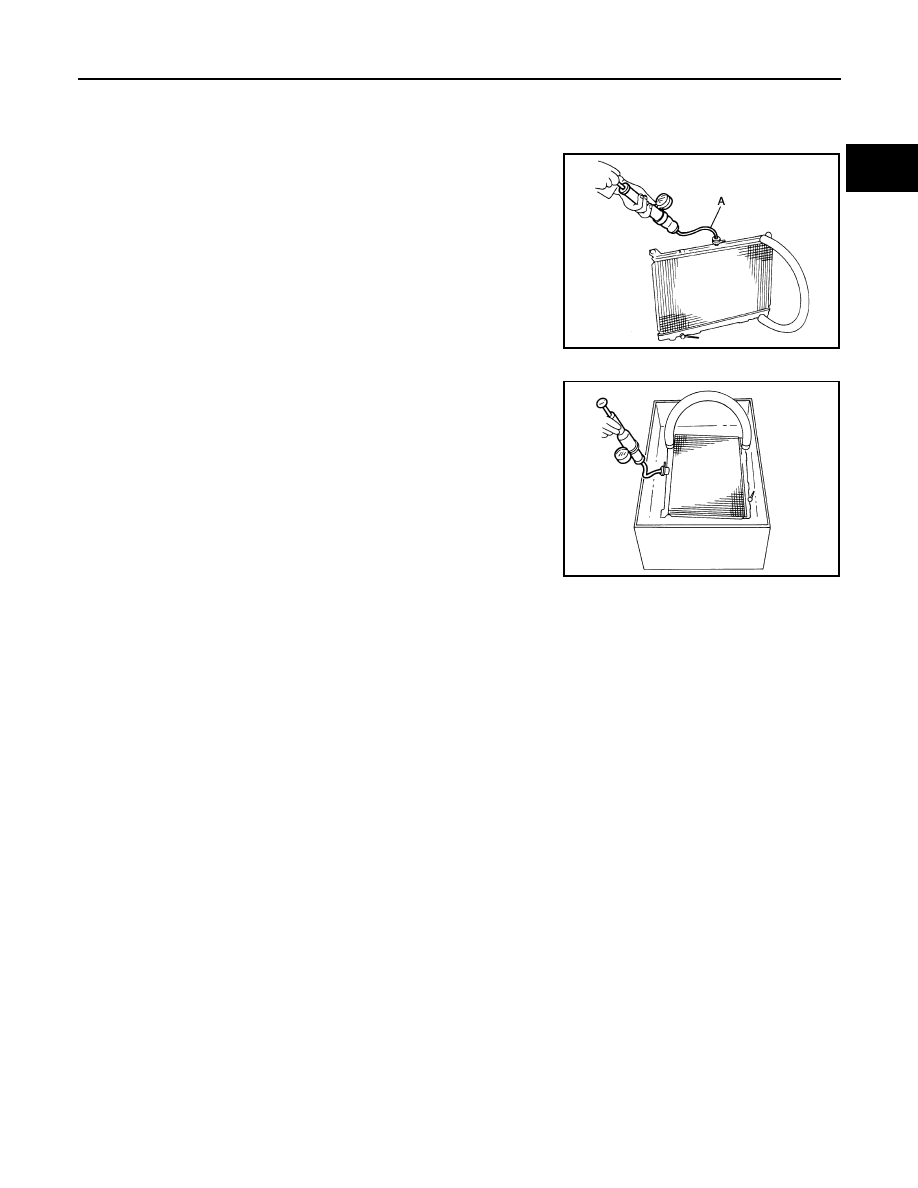
5.
Make sure that there is no leakage.
Refer to "INSPECTION".
INSPECTION
1.
Apply pressure with the radiator cap tester adapter (commercial
service tool) (A) and the radiator cap tester (commercial service
tool).
WARNING:
To prevent the risk of hose coming undone while under
pressure, securely fasten it down with hose clamp.
CAUTION:
Attach hose to A/T fluid cooler to seal its inlet and outlet.
2.
Check for leakage by soaking radiator in water container with
the testing pressure applied.
Testing pressure
: 157 kPa (1.6 kg/cm
2
, 23 psi)
JPBIA0736ZZ
SLC934
CO-20
< SERVICE INFORMATION >
[VQ35DE]
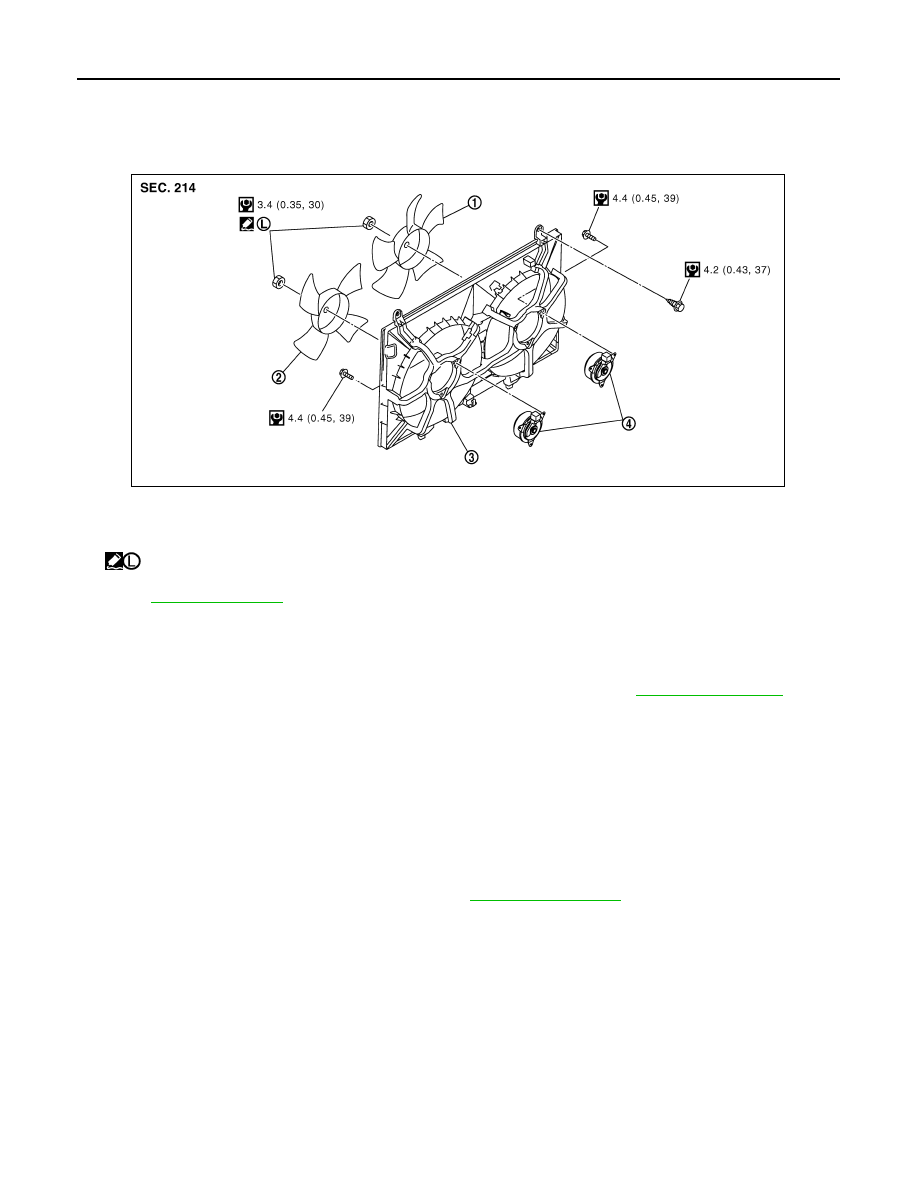
COOLING FAN
COOLING FAN
Component
INFOID:0000000001325853
• Refer to
for symbols in the figure.
Removal and Installation
INFOID:0000000001325854
REMOVAL
1.
Remove air duct (inlet), power duct and air cleaner case assembly. Refer to
2.
Disconnect harness connector from fan motors, and move harness to aside.
3.
Remove radiator cooling fan assembly.
CAUTION:
Be careful not to damage or scratch on radiator core.
INSTALLATION
Installation is the reverse order of removal.
INSPECTION AFTER INSTALLATION
Make sure that fan motors operate normally.
NOTE:
Cooling fans are controlled by ECM. For details, refer to
.
Disassembly and Assembly
INFOID:0000000001325855
DISASSEMBLY
1.
Remove cooling fans (RH and LH) from fan motors.
2.
Remove fan motors from fan shroud.
INSPECTION AFTER DISASSEMBLY
Cooling Fan
Inspect cooling fan for crack or unusual bend.
• If anything is found, replace cooling fan.
ASSEMBLY
1.
Cooling fan (RH)
2.
Cooling fan (LH)
3.
Fan shroud
4.
Fan motor
: Apply Genuine High Strength Lock-
ing Sealant or equivalent
JPBIA0990GB
COOLING FAN
CO-21
< SERVICE INFORMATION >
[VQ35DE]
C
D
E
F
G
H
I
J
K
L
M
A
CO
N
P
O
Assemble in the reverse order of disassembly.
CAUTION:
Cooling fans and fan motors are different between RH and LH. Be careful not to misassemble them.
Нет комментариевНе стесняйтесь поделиться с нами вашим ценным мнением.
Текст