Infiniti FX35 / FX45. Manual — part 731
GW-8
< SERVICE INFORMATION >
SQUEAK AND RATTLE TROUBLE DIAGNOSES
Most of these incidents can be repaired by adjusting, securing or insulatingthe item(s) or component(s) caus-
ing the noise.
SUNROOF/HEADLINING
Noises in the sunroof/headlining area can often be traced to one of the following:
1.
Sunroof lid, rail, linkage or seals making a rattle or light knockingnoise
2.
Sunvisor shaft shaking in the holder
3.
Front or rear windshield touching headlining and squeaking
Again, pressing on the components to stop the noise while duplicatingthe conditions can isolate most of these
incidents. Repairs usually consistof insulating with felt cloth tape.
SEATS
When isolating seat noise it's important to note the position the seatis in and the load placed on the seat when
the noise is present. These conditionsshould be duplicated when verifying and isolating the cause of the
noise.
Cause of seat noise include:
1.
Headrest rods and holder
2.
A squeak between the seat pad cushion and frame
3.
The rear seatback lock and bracket
These noises can be isolated by moving or pressing on the suspectedcomponents while duplicating the condi-
tions under which the noise occurs.Most of these incidents can be repaired by repositioning the component
orapplying urethane tape to the contact area.
UNDERHOOD
Some interior noise may be caused by components under the hood or onthe engine wall. The noise is then
transmitted into the passenger compartment.
Causes of transmitted underhood noise include:
1.
Any component mounted to the engine wall
2.
Components that pass through the engine wall
3.
Engine wall mounts and connectors
4.
Loose radiator mounting pins
5.
Hood bumpers out of adjustment
6.
Hood striker out of adjustment
These noises can be difficult to isolate since they cannot be reached from the interior of the vehicle. The best
method is to secure, move or insulate one component at a time and test drive the vehicle. Also, engine RPM
or load can be changed to isolate the noise. Repairs can usually be made by moving, adjusting, securing, or
insulating the component causing the noise.
SQUEAK AND RATTLE TROUBLE DIAGNOSES
GW-9
< SERVICE INFORMATION >
C
D
E
F
G
H
J
K
L
M
A
B
GW
N
O
P
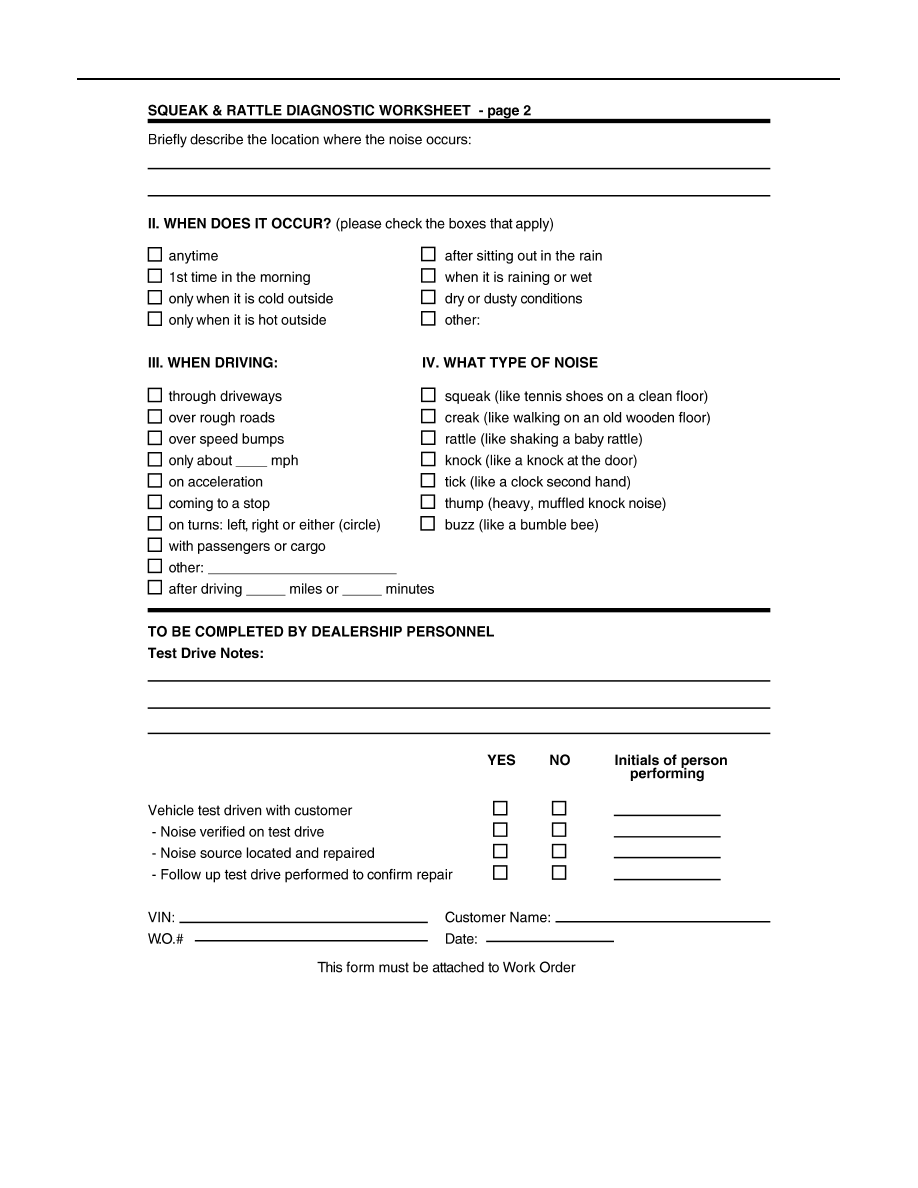
Diagnostic Worksheet
INFOID:0000000001327959
PIIB8741E
GW-10
< SERVICE INFORMATION >
SQUEAK AND RATTLE TROUBLE DIAGNOSES
PIIB8742E
WINDSHIELD GLASS
GW-11
< SERVICE INFORMATION >
C
D
E
F
G
H
J
K
L
M
A
B
GW
N
O
P
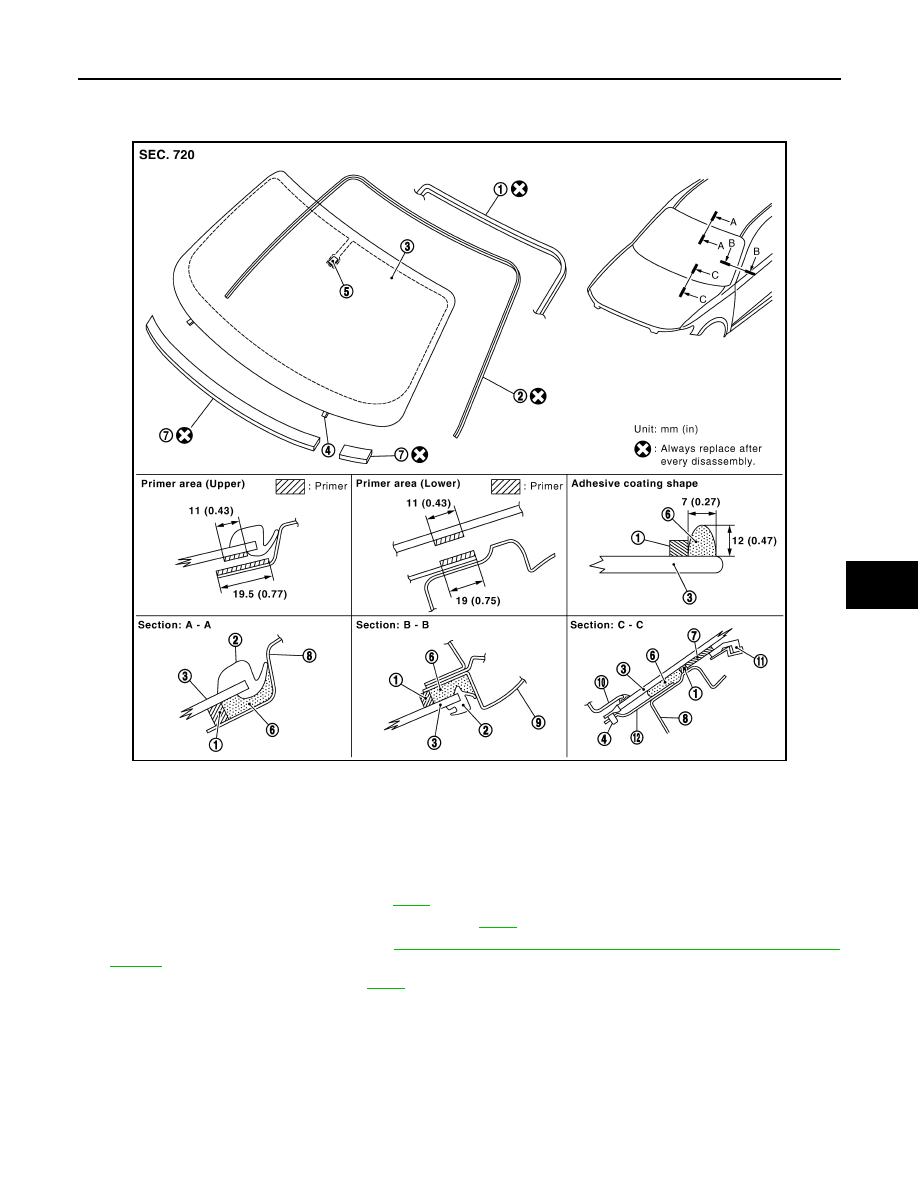
WINDSHIELD GLASS
Removal and Installation
INFOID:0000000001327960
REMOVAL
1.
Remove the front pillar garnish. Refer to
.
2.
Partially remove the headlining (front edge). Refer to
3.
Remove the front wiper arms. Refer to
WW-28, "Removal and Installation of Front Wiper and Washer
4.
Remove the cowl top cover. Refer to
5.
Pull the molding using the pliers.
6.
Apply a protective tape around the windshield glass to protect the painted surface from damage.
Remove glass using piano wire or power cutting tool and an inflatable pump bag after removing moldings.
NOTE:
Mark the body and the glass with mating marks if a windshield glass is reused.
WARNING:
Always wear safety glasses and heavy gloves to help prevent glass splinters from entering your eyes
or cutting your hands when cutting the glass from the vehicle.
PIIA9190E
1.
Dam rubber
2.
Molding
3.
Windshield glass
4.
Spacer
5.
Mirror base
6.
Bond
7.
Insulator
8.
Panel
9.
Body side (outer)
10. Cowl top cover
11.
Pad
12. Bracket
Нет комментариевНе стесняйтесь поделиться с нами вашим ценным мнением.
Текст