Infiniti FX35 / FX45. Manual — part 219
BACK DOOR
BL-143
< SERVICE INFORMATION >
C
D
E
F
G
H
J
K
L
M
A
B
BL
N
O
P
1.
Remove rear plate assembly. Refer to
2.
Remove back door striker mounting screws, and remove back
door striker from the vehicle.
INSTALLATION
Install in the reverse order of removal.
CAUTION:
After installing, perform fitting adjustment. Refer to
.
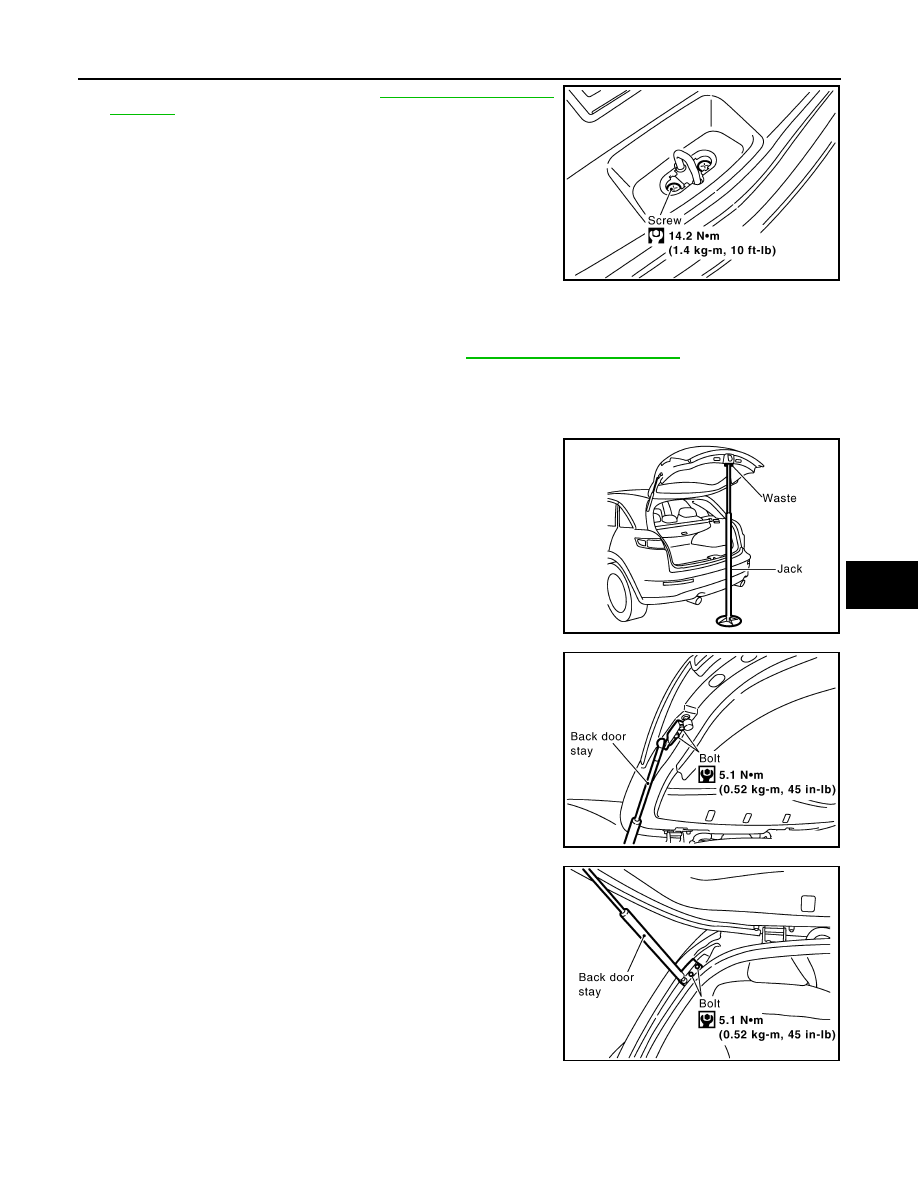
Removal and Installation of Back Door Stay
INFOID:0000000001327882
REMOVAL
1.
Support the back door lock with a proper material to prevent it
from falling.
WARNING:
Body injury may occur if no supporting rod is holding the
back door open when removing the damper stay.
2.
Remove back door stay on back door.
3.
Remove back door stay assembly on vehicle.
INSTALLATION
Install in the reverse order of removal.
CAUTION:
After installing, check operation.
PIIA9325E
PIIA6061E
PIIA6029E
PIIA6031E
BL-144
< SERVICE INFORMATION >
BACK DOOR
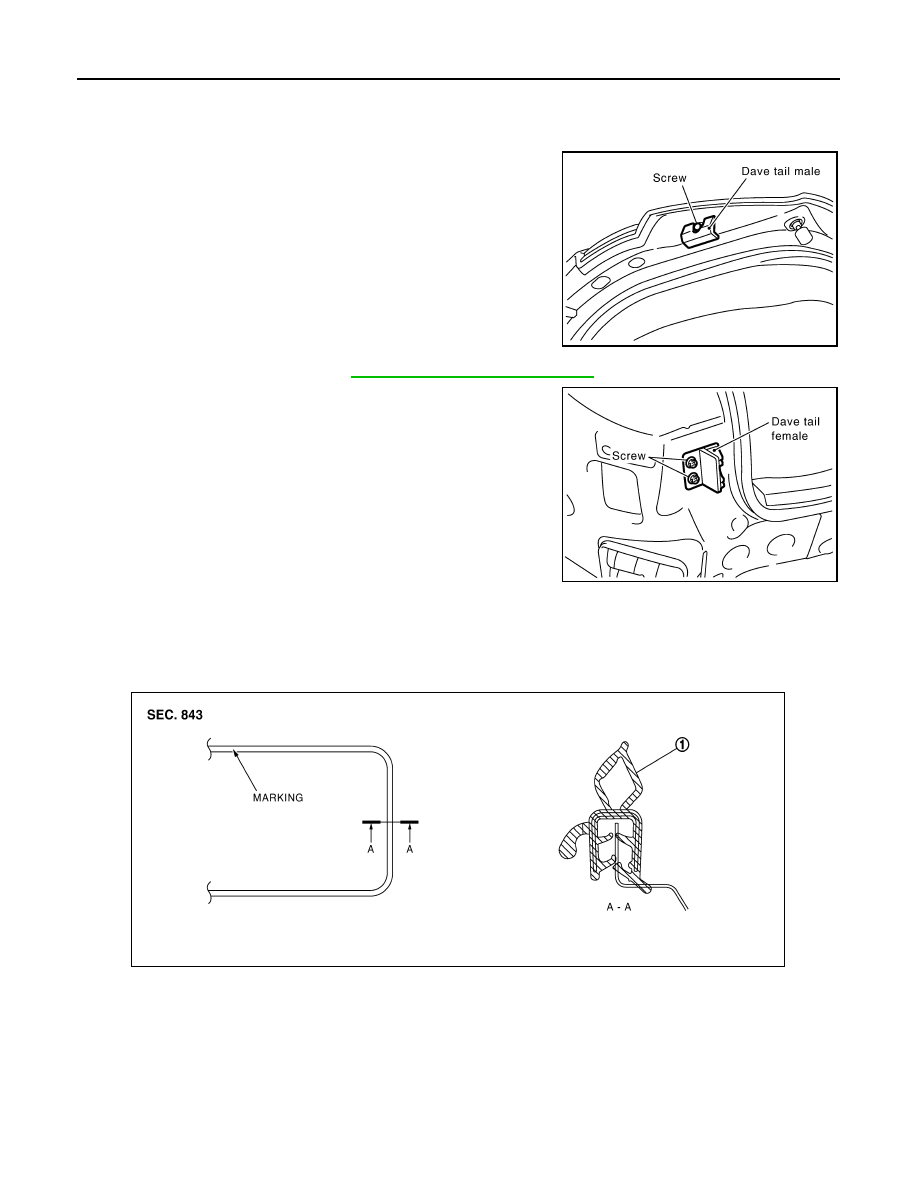
Removal and Installation of Dave Tail Male & Female
INFOID:0000000001327883
REMOVAL
1.
Remove the dave tail male.
2.
Remove the rear bumper. Refer to
EI-17, "Component Parts Location"
3.
Remove the dave tail female.
INSTALLATION
Install in the reverse order of removal.
Removal and Installation of Back Door Weather-strip
INFOID:0000000001327884
REMOVAL
Pull up and remove engagement with body from weather-strip joint.
CAUTION:
After removal, do not pull strongly on the weather-strip.
INSTALLATION
PIIA6078E
PIIA6079E
1.
Weather-strip
PIIA6032E
BACK DOOR
BL-145
< SERVICE INFORMATION >
C
D
E
F
G
H
J
K
L
M
A
B
BL
N
O
P
1.
Working from the upper section, align weather-strip mark with vehicle center position mark and install
weather-strip onto the vehicle.
2.
For the lower section, align the weather-strip seam with center of the striker.
3.
After installation, pull the weather-strip gently to ensure that there is no loose section.
NOTE:
Make sure the weather-strip is fit tightly at each corner and back door rear plate.
BL-146
< SERVICE INFORMATION >
BACK DOOR LOCK ASSEMBLY
BACK DOOR LOCK ASSEMBLY
Removal and Installation of Back Door Lock & Closure Assembly
INFOID:0000000001327885
REMOVAL
1.
Remove back door finisher. Refer to
EI-47, "Component Parts Location"
2.
Disconnect the connector and the clip of the back door lock & closure assembly.
3.
Remove the mounting bolts.
4.
Disconnect the connector of the back door opener actuator.
5.
Remove the mounting bolts, remove back door lock & closure assembly.
INSTALLATION
Install in the reverse order of removal.
CAUTION:
• After installing, check operation.
• After installing, perform fitting adjustment. Refer to
.
INSPECTION
1.
Check back door lock for the following.
• Malfunction noise or door closing and opening effort
• Component wear or damage
2.
Apply body grease to the rotating part of the back door lock.
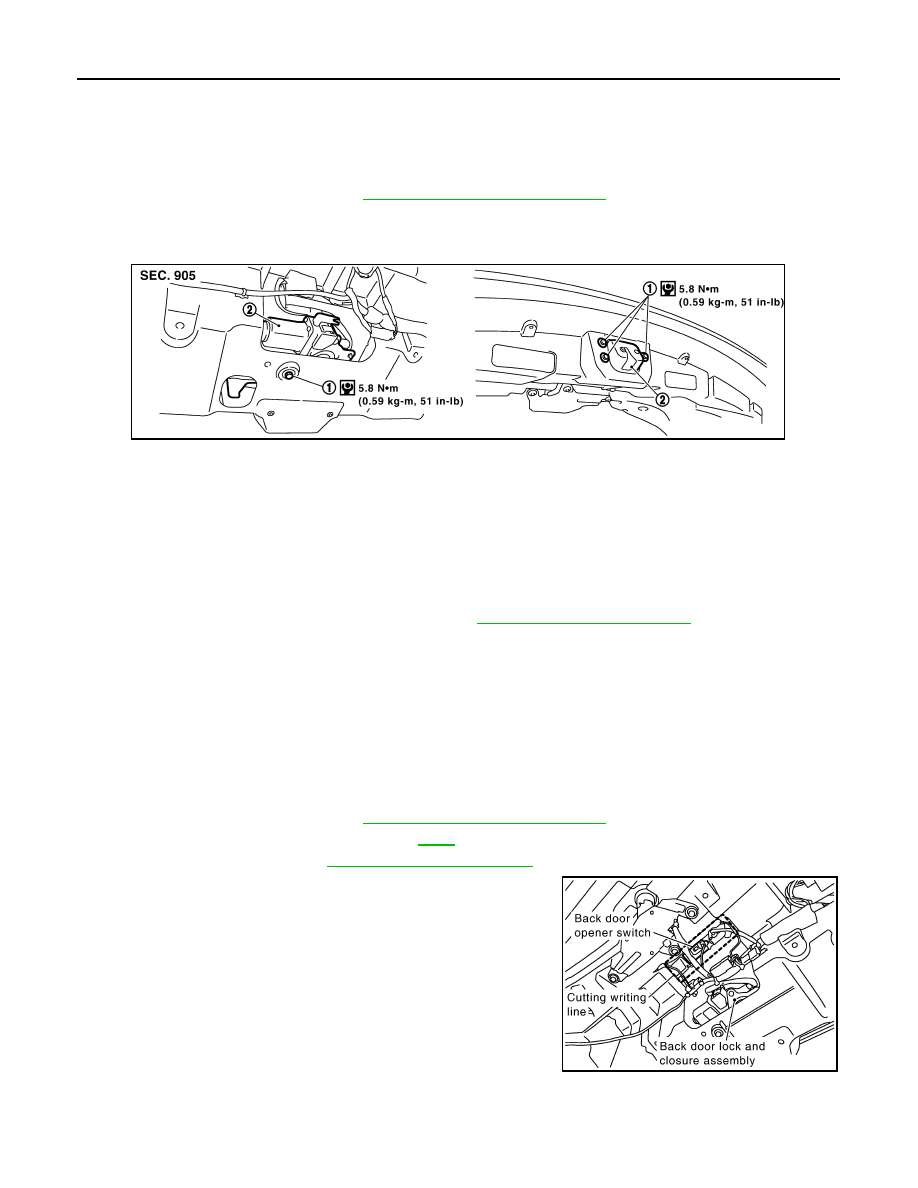
Removal and Installation of Back Door Opener Switch
INFOID:0000000001327886
REMOVAL
1.
Remove back door finisher. Refer to
EI-47, "Component Parts Location"
2.
Remove back door outside finisher. Refer to
.
3.
Remove licence lamp. Refer to
4.
Cut back door inner panel along with cutting groove line.
CAUTION:
When cutting the back door panel, always wear safety
glasses, heavy gloves and a dust proof mask to prevent eye
and skin irritation from glass fiver splinters.
NOTE:
1.
Bolt
2.
Back door lock & closure assembly
PIIA6043E
PIIA6903E
Нет комментариевНе стесняйтесь поделиться с нами вашим ценным мнением.
Текст