Infiniti FX35 / FX45. Manual — part 836
MA-24
< SERVICE INFORMATION >
ENGINE MAINTENANCE (VK45DE ENGINE)
3.
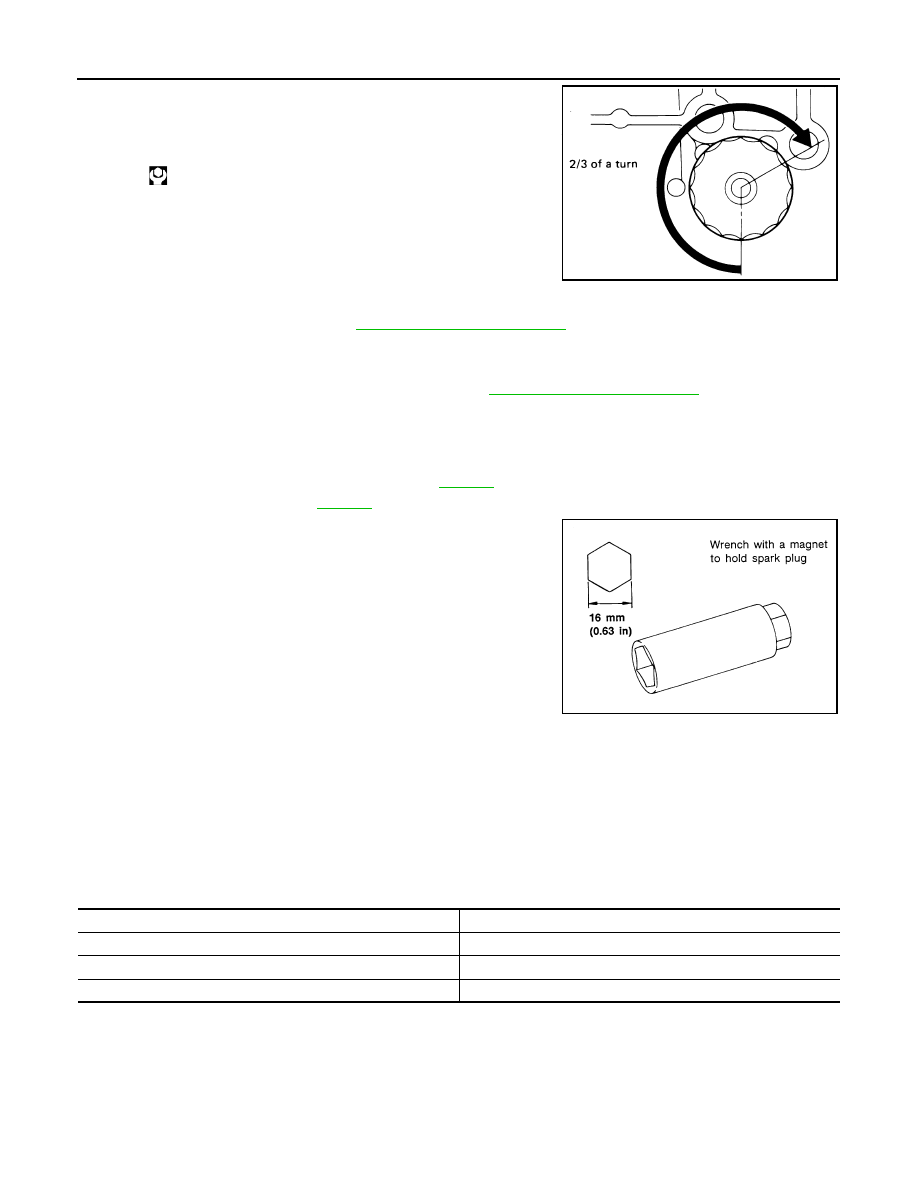
Screw oil filter manually until it touches the installation surface,
then tighten it by 2/3 turn. Or tighten to specification.
INSPECTION AFTER INSTALLATION
1.
Check the engine oil level. Refer to
2.
Start engine, and check there is no leaks of engine oil.
3.
Stop engine and wait for 15 minutes.
4.
Check the engine oil level and add engine oil. Refer to
Changing Spark Plugs (Platinum-Tipped Type)
INFOID:0000000001328916
REMOVAL
1.
Remove engine cover with power tool. Refer to
2.
Remove ignition coil. Refer to
.
3.
Remove spark plug with spark plug wrench (commercial service
tool).
CAUTION:
Do not drop or shock it.
INSPECTION AFTER REMOVAL
Use standard type spark plug for normal condition.
Hot type spark plug is suitable when fouling occurs with standard type spark plug under conditions such as:
• Frequent engine starts
• Low ambient temperatures
Cold type spark plug is suitable when spark plug knock occurs with standard type spark plug under conditions such as:
• Extended highway driving
• Frequent high engine revolution
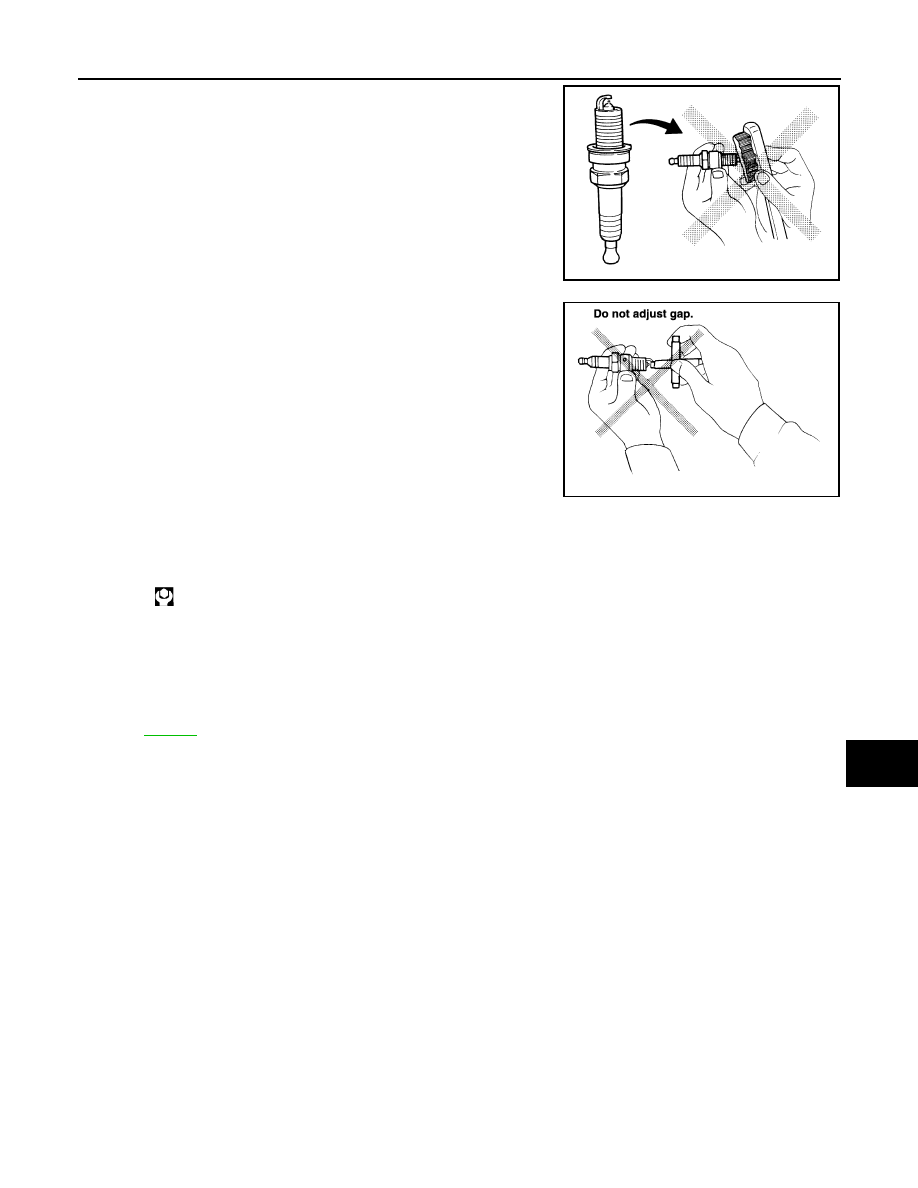
CAUTION:
• Do not drop or shock spark plug.
Oil filter:
:17.7 N·m (1.8 kg-m, 13 ft-lb)
SMA229B
SEM294A
Make
NGK
Standard type
PLFR5A-11
Hot type
PLFR4A-11
Cold type
PLFR6A-11
Gap (Nominal)
: 1.1 mm (0.043 in)
ENGINE MAINTENANCE (VK45DE ENGINE)
MA-25
< SERVICE INFORMATION >
C
D
E
F
G
H
I
J
K
M
A
B
MA
N
O
P
• Do not use wire brush for cleaning.
• If plug tip is covered with carbon, spark plug cleaner may be
used.
• Checking and adjusting plug gap is not required between
change intervals.
INSTALLATION
Install in the reverse order of removal.
Checking EVAP Vapor Line
INFOID:0000000001328917
1.
Visually inspect EVAP vapor lines for improper attachment and for cracks, damage, loose connections,
chafing and deterioration.
2.
Inspect fuel tank filler cap vacuum relief valve for clogging, sticking, etc.
Refer to
.
Cleaner air pressure:
Less than 588 kPa (6 kg/cm
2
, 85 psi)
Cleaning time:
Less than 20 seconds
SMA773C
SMA806CA
Spark plug:
: 24.6 N·m (2.5 kg-m, 18 ft-lb)
MA-26
< SERVICE INFORMATION >
CHASSIS AND BODY MAINTENANCE
CHASSIS AND BODY MAINTENANCE
Checking Exhaust System
INFOID:0000000001328918
Check exhaust pipes, muffler and mounting for improper attachment,
leaks, cracks, damage, chafing or deterioration.
• If anything is found, repair or replace damaged parts.
Checking A/T Fluid
INFOID:0000000001328919
1.
Warm up engine.
2.
Check for A/T fluid leakage.
3.
Loosen the level gauge bolt.
4.
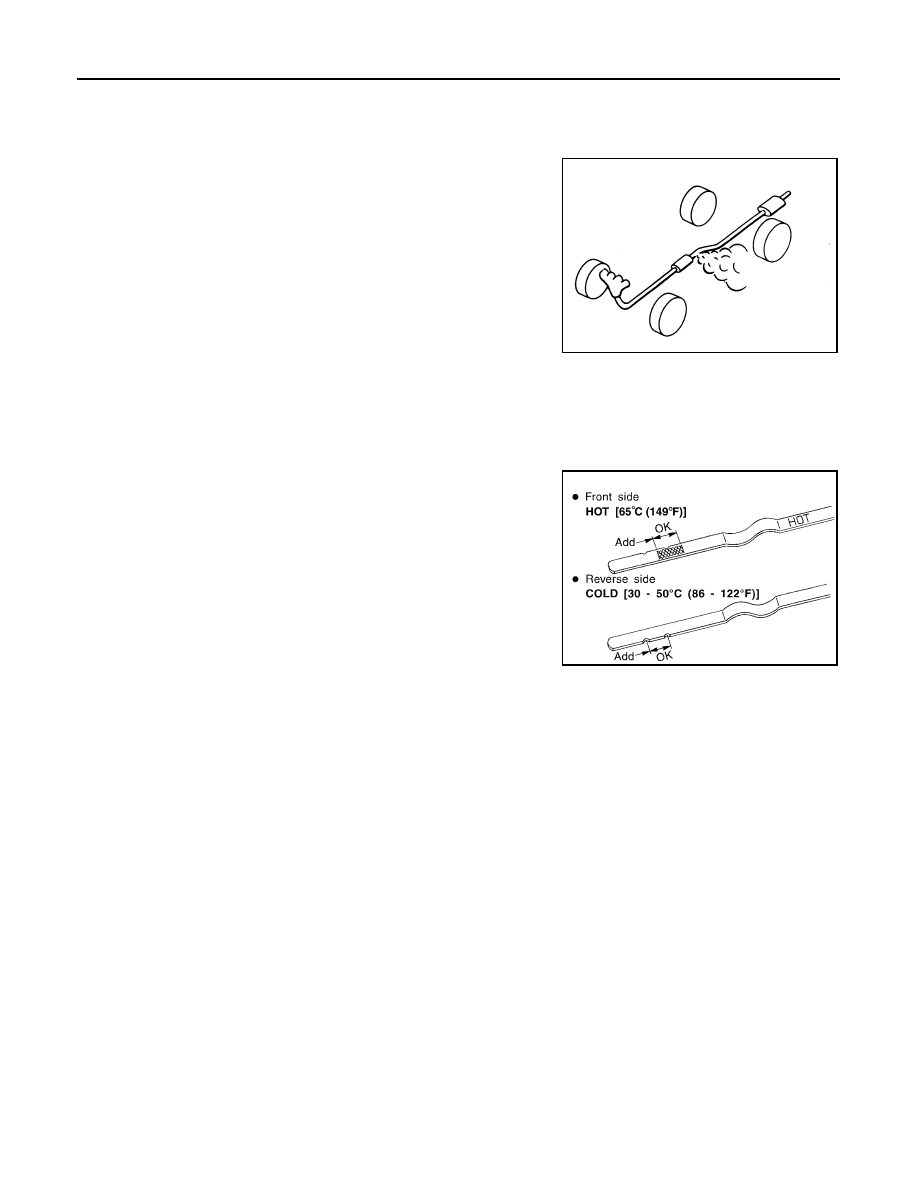
Before driving, A/T fluid level can be checked at A/T fluid tem-
peratures of 30 to 50
°
C (86 to 122
°
F) using “COLD” range on A/
T fluid level gauge as follows.
a.
Park vehicle on level surface and set parking brake.
b.
Start engine and move selector lever through each gear posi-
tion. Leave selector lever in “P” position.
c.
Check A/T fluid level with engine idling.
d.
Remove A/T fluid level gauge and wipe clean with lint-free
paper.
CAUTION:
When wiping away the A/T fluid level gauge, always use
lint-free paper, not a cloth one.
e.
Re-insert A/T fluid level gauge into A/T fluid charging pipe as far as it will go.
CAUTION:
To check A/T fluid level, insert the A/T fluid level gauge until the cap contacts the end of the A/T
fluid charging pipe, with the A/T fluid level gauge reversed from the normal attachment conditions.
f.
Remove A/T fluid level gauge and note reading. If reading is at low side of range, add ATF to the A/T fluid
charging pipe.
CAUTION:
Do not overfill.
5.
Drive vehicle for approximately 5 minutes in urban areas.
6.
Make the A/T fluid temperature approximately 65
°
C (149
°
F).
NOTE:
SMA211A
SCIA7120E
CHASSIS AND BODY MAINTENANCE
MA-27
< SERVICE INFORMATION >
C
D
E
F
G
H
I
J
K
M
A
B
MA
N
O
P
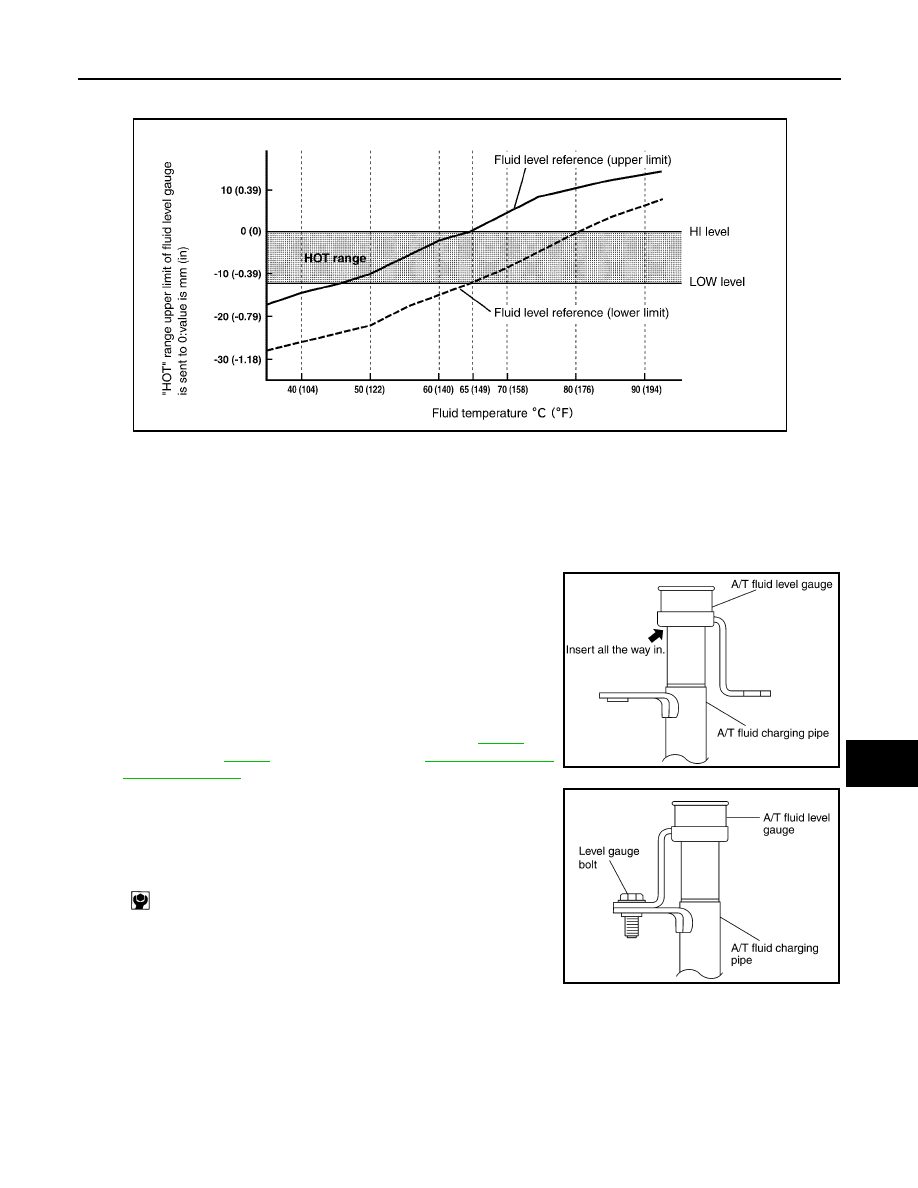
A/T fluid level will be greatly affected by temperature as shown in figure. Therefore, be certain to
perform operation while checking data with CONSULT-III.
a.
Connect CONSULT-III to data link connector.
b.
Select “MAIN SIGNALS” in “DATA MONITOR” mode for “TRANSMISSION” with CONSULT-III.
c.
Read out the value of “ATF TEMP 1”.
7.
Recheck A/T fluid level at A/T fluid temperatures of approximately 65
°
C (149
°
F) using “HOT” range on A/
T fluid level gauge.
CAUTION:
• When wiping away the A/T fluid level gauge, always use lint-free paper, not a cloth one.
• To check A/T fluid level, insert the A/T fluid level gauge
until the cap contacts the end of the A/T fluid charging
pipe, with the A/T fluid level gauge reversed from the nor-
mal attachment conditions as shown.
8.
Check A/T fluid condition.
• If ATF is very dark or smells burned, check operation of A/T.
Flush cooling system after repair of A/T.
• If ATF contains frictional material (clutches, bands, etc.),
replace radiator and flush cooler line using cleaning solvent
and compressed air after repair of A/T. Refer to
VQ35DE) or
(for VK45DE) and
9.
Install the removed A/T fluid level gauge in the A/T fluid charging
pipe.
10. Tighten level gauge bolt.
Changing A/T Fluid
INFOID:0000000001328920
1.
Warm up ATF.
2.
Stop engine.
Level gauge bolt:
: 5.1 N·m (0.52 kg-m, 45 in-lb)
SLIA0016E
SCIA2899E
SCIA4896E
Нет комментариевНе стесняйтесь поделиться с нами вашим ценным мнением.
Текст