Infiniti FX35 / FX45. Manual — part 618
EI-36
< SERVICE INFORMATION >
DOOR FINISHER
DOOR FINISHER
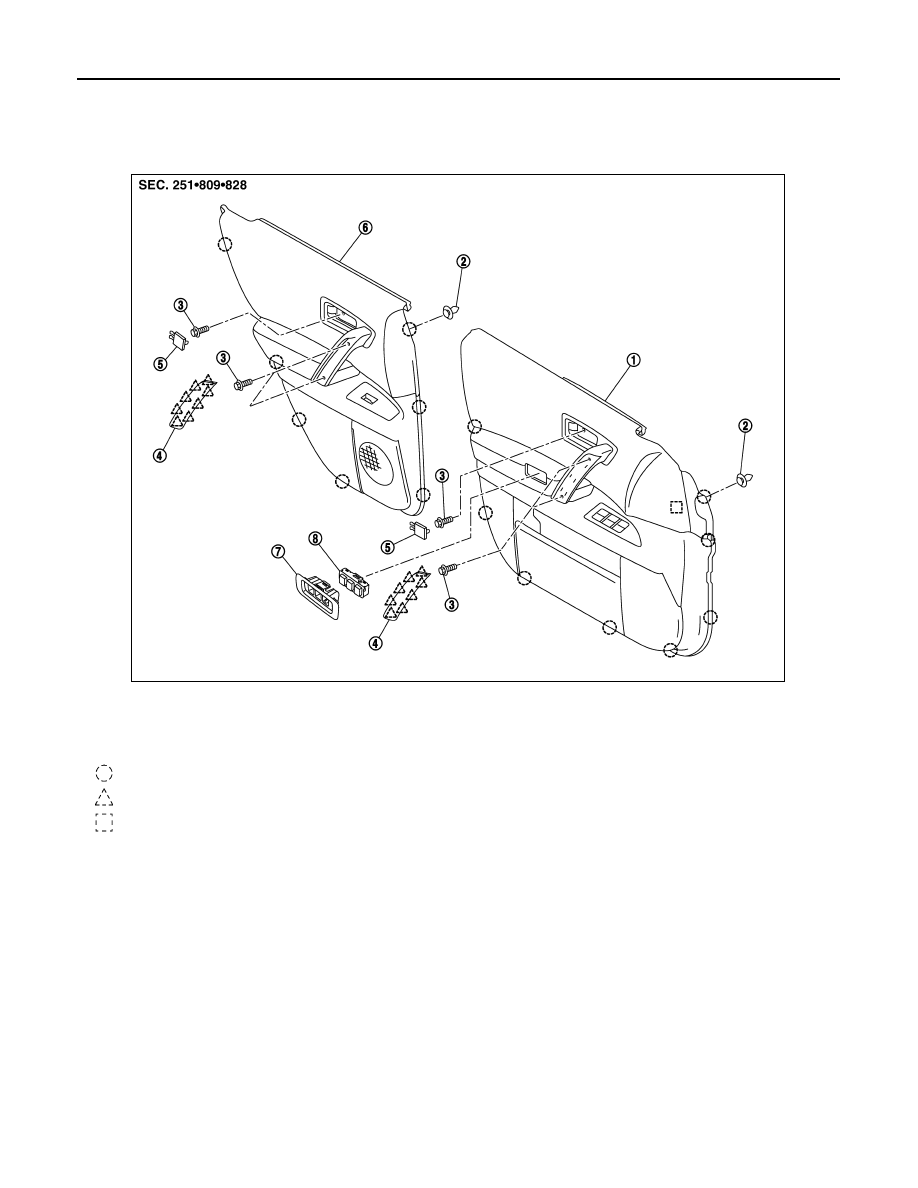
Component Parts Location
INFOID:0000000001328074
Removal and Installation
INFOID:0000000001529409
DOOR FINISHER (FRONT AND REAR)
Removal
1.
Remove door finisher cap of inside handle portion and remove bolt.
2.
Remove door grip cap and remove bolts of door grip portion.
1.
Door finisher (front)
2.
Clip (C101)
3.
Bolt
4.
Door grip cap
5.
Door finisher cap
6.
Door finisher (rear)
7.
Seat memory switch finisher
8.
Seat memory switch
: Clip
: Pawl
: Metal clip
PIIB8502E

DOOR FINISHER
EI-37
< SERVICE INFORMATION >
C
D
E
F
G
H
J
K
L
M
A
B
EI
N
O
P
3.
Insert screw driver rolled with cloth between panel on vehicle
and clips (as indicated with arrow), and remove finisher.
4.
Pull up door finisher, and remove electrical parts connectors.
5.
Remove lock knob cable, inside handle cable and illumination
harness connector (front door only) from backside of inside han-
dle assembly.
6.
Remove the following parts after removing door finisher.
• Inside handle
• Seat memory switch and seat memory switch finisher
• Power window switch
• Step lamp
Installation
Install in the reverse order of removal.
CAUTION:
To install finisher, check if all clips are matched over holes of panel on vehicle, then push it.
SIIA0810E
PIIA4959E
EI-38
< SERVICE INFORMATION >
BODY SIDE TRIM
BODY SIDE TRIM
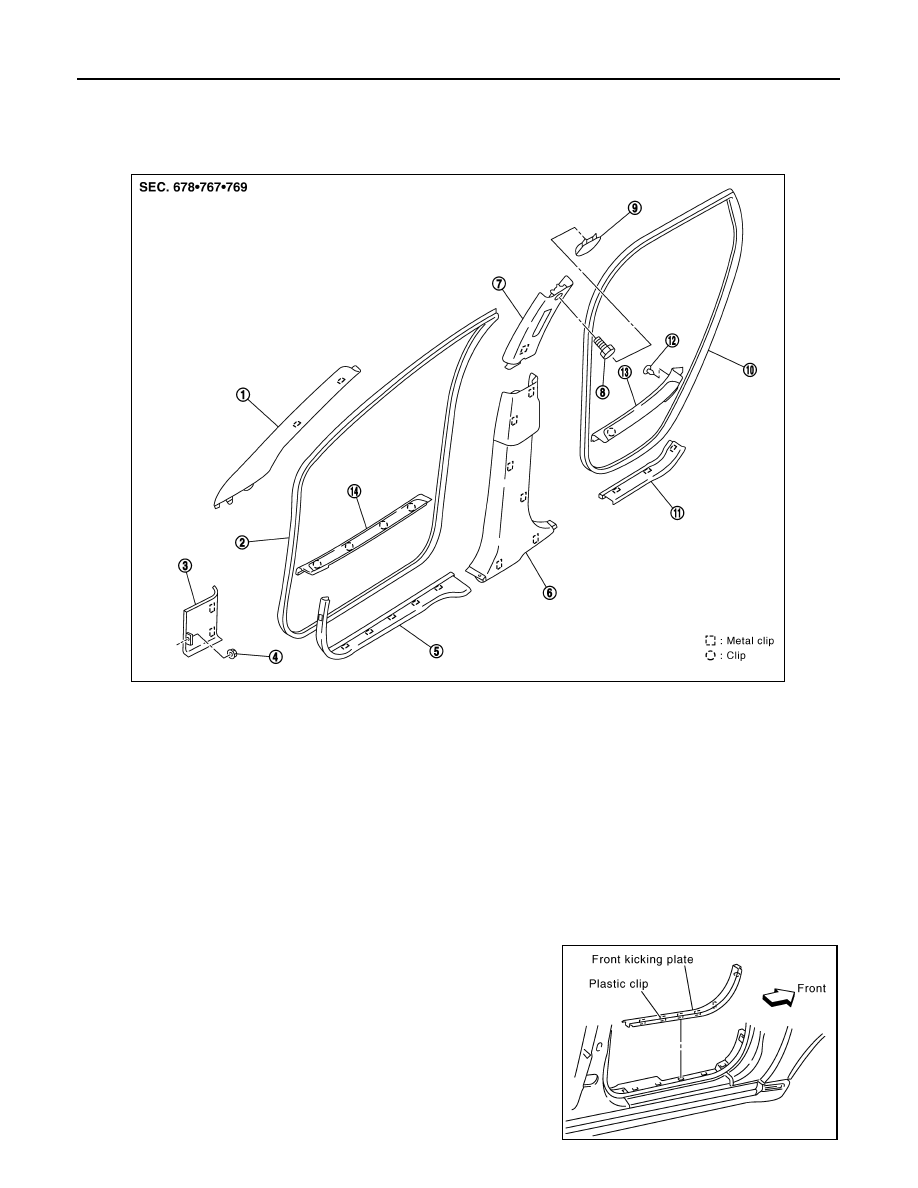
Component Parts Location
INFOID:0000000001328075
Removal and Installation
INFOID:0000000001529410
CAUTION:
Wrap the tip of flat-bladed screwdriver with a cloth when removing metal clips from garnishes.
CENTER PILLAR LOWER GARNISH
Removal
1.
Remove front and rear kicking plate.
2.
Remove front and rear body side welt.
1.
Front pillar garnish
2.
Front body side welt
3.
Dash side finisher
4.
Nut
5.
Front kicking plate
6.
Center pillar lower garnish
7.
Center pillar upper garnish
8.
Bolt
9.
Center pillar upper cap
10. Rear body side welt
11. Rear kicking plate
12. Clip (C203)
13. Center mudguard finisher (rear)
14. Center mudguard finisher (front)
PIIA4340E
PIIA4344E
BODY SIDE TRIM
EI-39
< SERVICE INFORMATION >
C
D
E
F
G
H
J
K
L
M
A
B
EI
N
O
P
3.
Remove center pillar lower garnish.
NOTE:
Insert screwdriver rolled with cloth between panel on vehicle and
clips, then disconnect clips.
Installation
Install in the reverse order of removal.
NOTE:
To install, check if all clips are matched over holes of panel on vehicle, then push on.
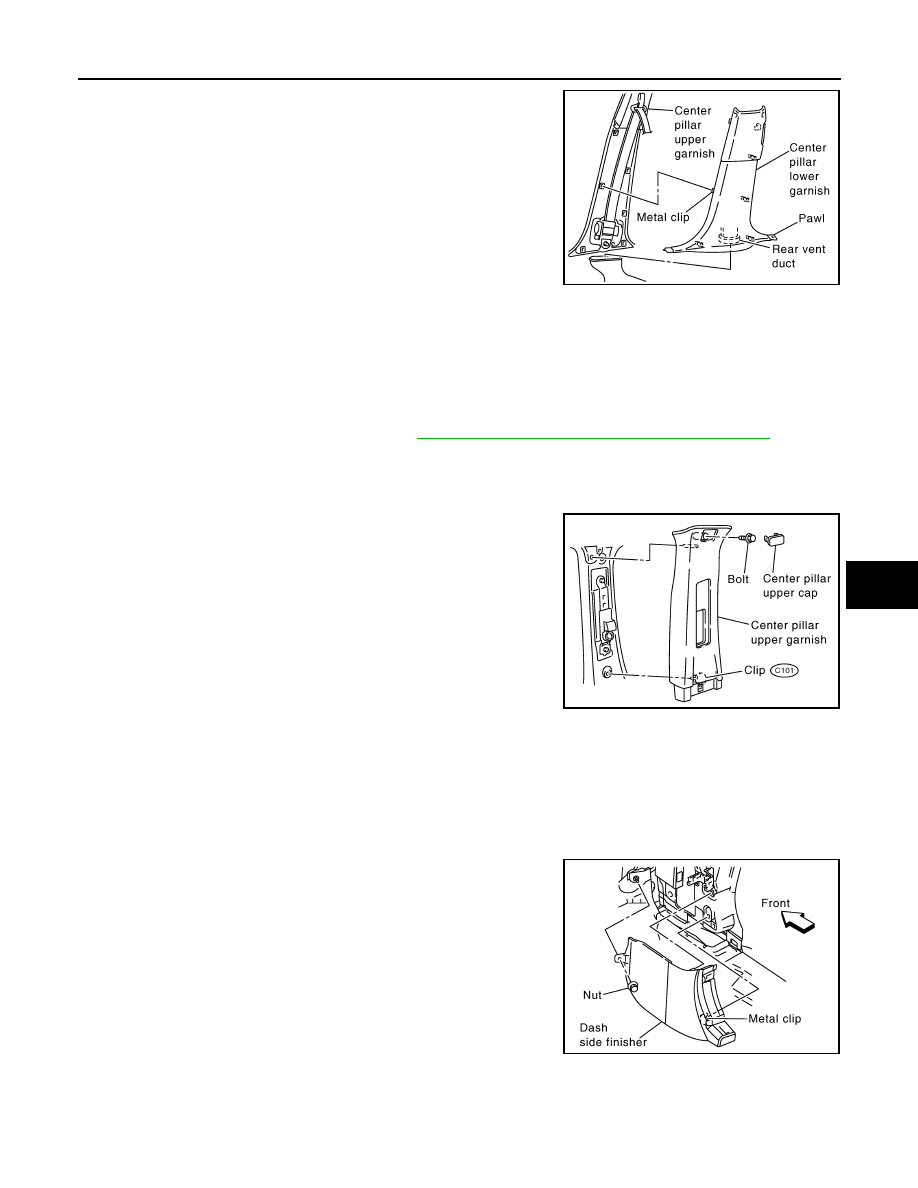
CENTER PILLAR UPPER GARNISH
Removal
1.
Remove seat belt shoulder anchor. Refer to
SB-3, "Removal and Installation of Front Seat Belt"
.
2.
Remove front and rear kicking plate.
3.
Remove front and rear body side welt.
4.
Remove center pillar lower garnish.
5.
Remove center pillar upper cap and bolt.
6.
Remove center pillar upper garnish.
Installation
Install in the reverse order of removal.
DASH SIDE FINISHER
Removal
1.
Remove front kicking plate.
2.
Remove front body side welt.
3.
Remove nut.
4.
Remove dash side finisher.
NOTE:
Insert screwdriver rolled with cloth between panel on vehicle and
clips, then disconnect clips.
Installation
Install in the reverse order of removal.
NOTE:
To install, check if all clips are matched over holes of panel on vehicle, then push on.
PIIA4341E
PIIA4342E
PIIA4343E
Нет комментариевНе стесняйтесь поделиться с нами вашим ценным мнением.
Текст