Infiniti FX35 / FX45. Manual — part 949
PREPARATION
TF-7
< SERVICE INFORMATION >
C
E
F
G
H
I
J
K
L
M
A
B
TF
N
O
P
Commercial Service Tool
INFOID:0000000001327427
ST30611000
(J-25742-1)
Drift bar
a: 350 mm (1.10 in)
b: 25 mm (1.10 in) dia.
c: M12
×
1.5P
• Removing rear bearing
ST35321000
(
—
)
Drift
a: 49 mm (1.93 in) dia.
b: 41 mm (1.61 in) dia.
• Removing rear bearing
• Installing mainshaft assembly
ST31214000
(J-25269-B)
Drift
a: 34 mm (1.34 in) dia.
b: 25.5 mm (1.004 in) dia.
• Removing front drive shaft front bearing
• Removing front drive shaft rear bearing
KV38104010
(
—
)
Drift
a: 67 mm (2.64 in) dia.
b: 49 mm (1.93 in) dia.
• Installing front drive shaft rear bearing
• Installing rear bearing
ST33200000
(J-26082)
Drift
a: 60 mm (2.36 in) dia.
b: 44.5 mm (1.752 in) dia.
• Installing front drive shaft front bearing
ST30621000
(J-25742-5)
Drift
a: 80 mm (3.15 in) dia.
b: 59 mm (2.32 in) dia.
• Installing mainshaft bearing
Tool number
(Kent-Moore No.)
Tool name
Description
NT663
ZZA1000D
ZZA0534D
ZZA1000D
ZZA1002D
ZZA1000D
TF-8
< SERVICE INFORMATION >
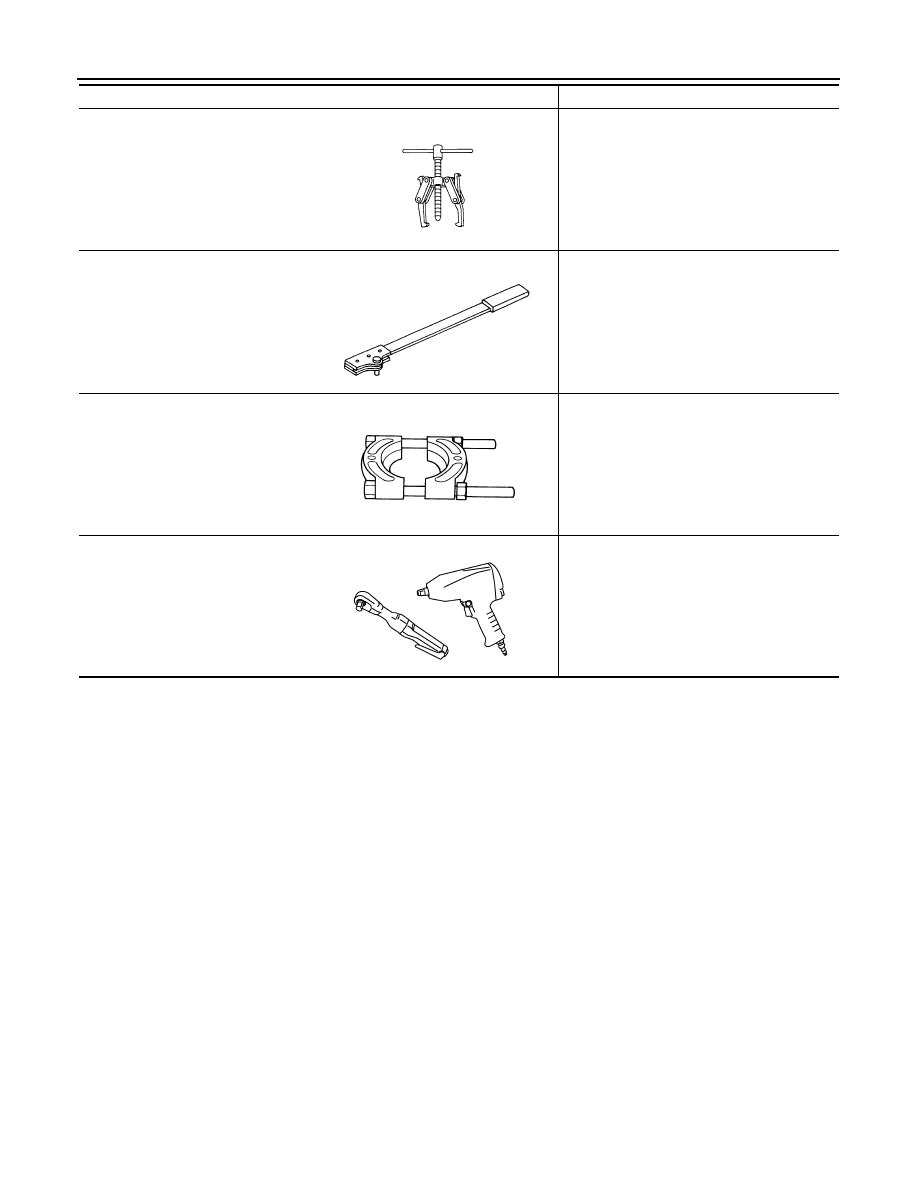
PREPARATION
Tool name
Description
Puller
• Removing companion flange
Flange wrench
• Removing and installing self-lock nut
Puller
• Removing front drive shaft front bearing
• Removing front drive shaft rear bearing
Power tool
• Loosening bolts and nuts
NT077
NT771
ZZB0823D
PBIC0190E
NOISE, VIBRATION AND HARSHNESS (NVH) TROUBLESHOOTING
TF-9
< SERVICE INFORMATION >
C
E
F
G
H
I
J
K
L
M
A
B
TF
N
O
P
NOISE, VIBRATION AND HARSHNESS (NVH) TROUBLESHOOTING
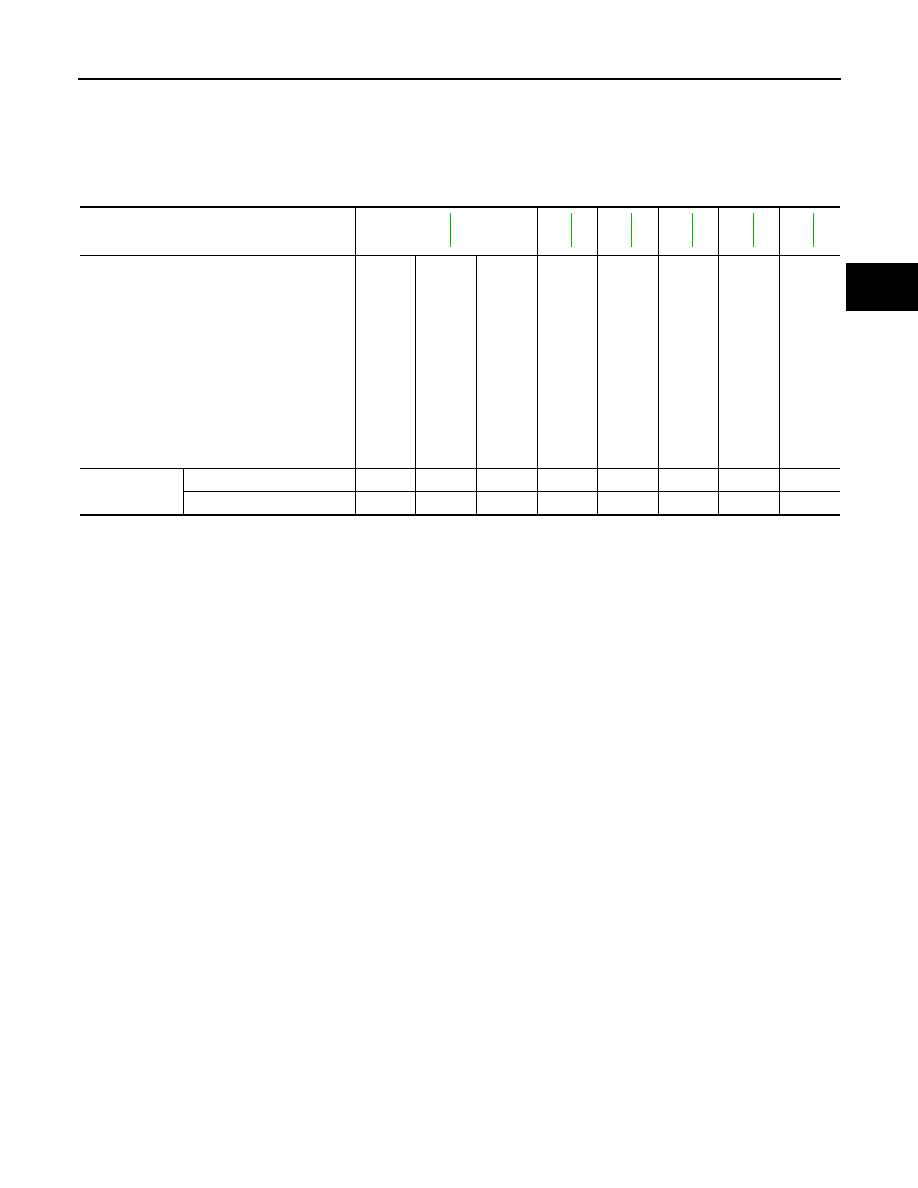
NVH Troubleshooting Chart
INFOID:0000000001327428
Use the chart below to help you find the cause of the symptom. The numbers indicate the order of the inspec-
tion. If necessary, repair or replace these parts.
Reference page
SUSPECTED PARTS
(Possible cause)
TRANSFE
R
FLUID (Level low)
TRANSFE
R
FLUI
D
(W
rong)
T
R
ANSF
ER
F
L
UID (L
ev
el
to
o h
ig
h
)
LI
QUI
D
GA
SKET (D
amaged)
OIL SEAL
(W
orn or
damaged)
GEAR (W
orn
or
da
ma
ge
d)
BEARING (W
orn or damaged)
TRANSFE
R
CASE
(Damaged)
Symptom
Noise
1
2
3
3
3
Transfer fluid leakage
4
1
2
2
3

TF-10
< SERVICE INFORMATION >
TRANSFER FLUID
TRANSFER FLUID
Replacement
INFOID:0000000001327429
DRAINING
1.
Run the vehicle to warm up the transfer unit sufficiently.
2.
Stop the engine, and remove the drain plug to drain the transfer
fluid.
3.
Apply sealant to drain plug. Install drain plug on transfer and
tighten to the specified torque. Refer to
.
• Use Genuine Silicone RTV or equivalent. Refer to
"Recommended Chemical Product and Sealant"
FILLING
1.
Remove filler plug and add transfer fluid until fluid level reaches
the specified limit near filler plug mounting hole.
CAUTION:
Carefully fill the fluid. (Fill up for approx. 3 minutes.)
2.
Leave the vehicle for 3 minutes, and check the fluid level again.
3.
Set a new gasket onto filler plug and install it on transfer and tighten to the specified torque. Refer to
40, "Disassembly and Assembly"
.
CAUTION:
Do not reuse gasket.
Inspection
INFOID:0000000001327430
FLUID LEAKAGE AND FLUID LEVEL
1.
Check fluid level from filler plug mounting hole as shown in the
figure.
2.
Before installing filler plug, set a new gasket. Install filler plug on
transfer and tighten to the specified torque. Refer to
CAUTION:
Do not reuse gasket.
SDIA2087E
Fluid and viscosity
: Refer to
Fluid capacity
: Approx. 1.25 (2-5/8 US pt, 2-1/4 lmp pt)
SDIA2028E
SDIA2028E
Нет комментариевНе стесняйтесь поделиться с нами вашим ценным мнением.
Текст