Infiniti FX35 / FX45. Manual — part 892

REAR FINAL DRIVE ASSEMBLY
RFD-23
< SERVICE INFORMATION >
C
E
F
G
H
I
J
K
L
M
A
B
RFD
N
O
P
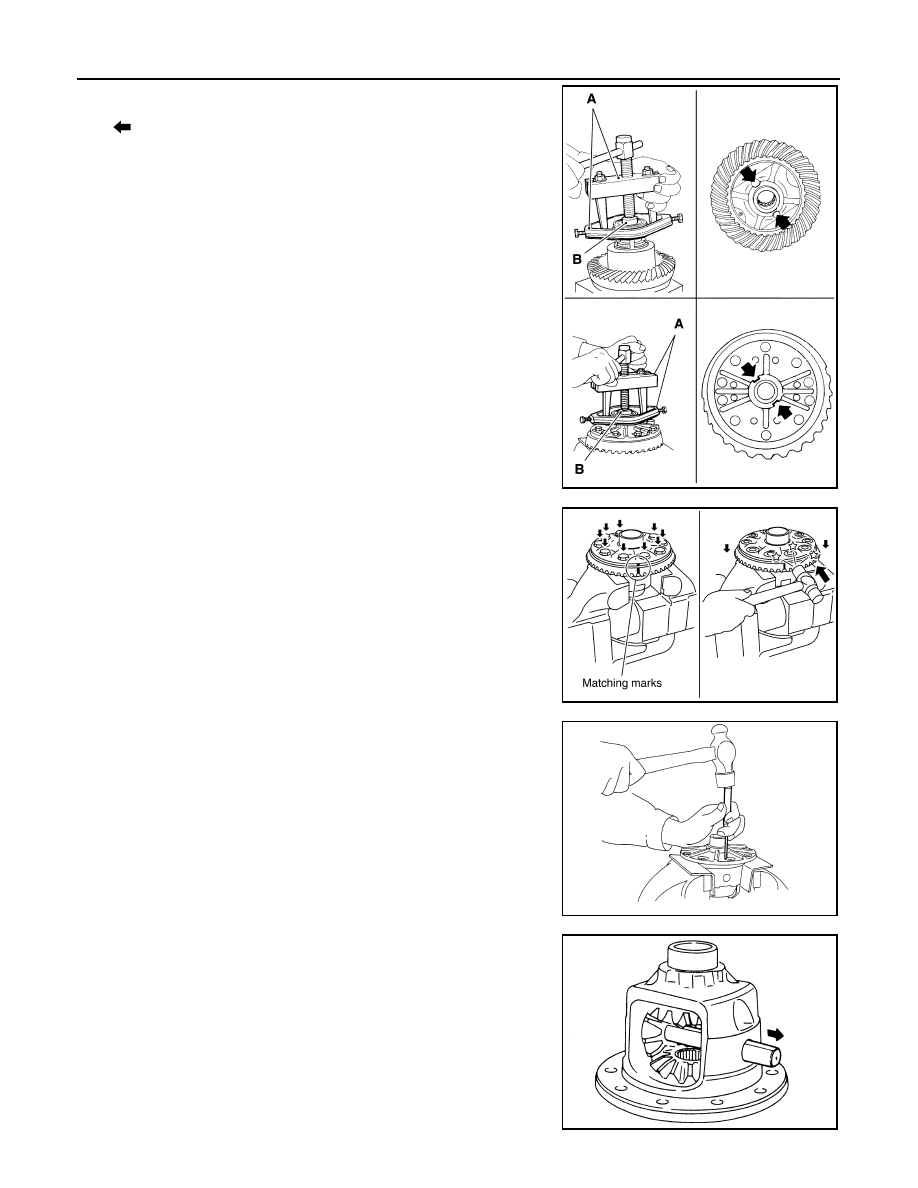
6.
For proper reinstallation, paint matching marks on one side of
the bearing cap.
CAUTION:
• For matching marks, use paint. Never damage bearing
caps and gear carrier.
• Bearing caps are line-board during manufacture. The
matching marks are used to reinstall them in their original
positions.
7.
Remove bearing caps.
8.
Lift differential case assembly out with a suitable tool.
• Keep side bearing outer races together with inner race. Do not
mix them up.
Also, keep side bearing adjusting washers together with bear-
ings.
SDIA1795E
S-PD343
PDIA0547E
SPD527
RFD-24
< SERVICE INFORMATION >
REAR FINAL DRIVE ASSEMBLY
9.
Remove side bearing inner race.
To prevent damage to bearing, engage puller jaws in groove
(
).
CAUTION:
• To prevent damage to the side bearing and drive gear,
place copper plates between these parts and vise.
• It is not necessary to remove side bearing inner race
except it is replaced.
10. For proper reinstallation, paint matching marks on one differen-
tial case assembly.
CAUTION:
For matching marks, use paint. Never damage differential
case and drive gear.
11. Remove drive gear mounting bolts.
12. Tap drive gear off differential case assembly with a soft hammer.
CAUTION:
Tap evenly all around to keep drive gear from bending.
13. Remove lock pin of pinion mate shaft with a punch from drive
gear side.
14. Remove pinion mate shaft.
Tool number
A: ST33051001 (J-22888-20)
B: ST33061000 (J-8107-2)
PDIA0758J
PDIA0496E
PDIA0759J
SDIA0031J
REAR FINAL DRIVE ASSEMBLY
RFD-25
< SERVICE INFORMATION >
C
E
F
G
H
I
J
K
L
M
A
B
RFD
N
O
P
15. Turn pinion mate gear, then remove pinion mate gear, pinion
mate thrust washer, side gear and side gear thrust washer from
differential case.
Drive Pinion Assembly
1.
Remove differential assembly. Refer to
RFD-16, "Removal and Installation"
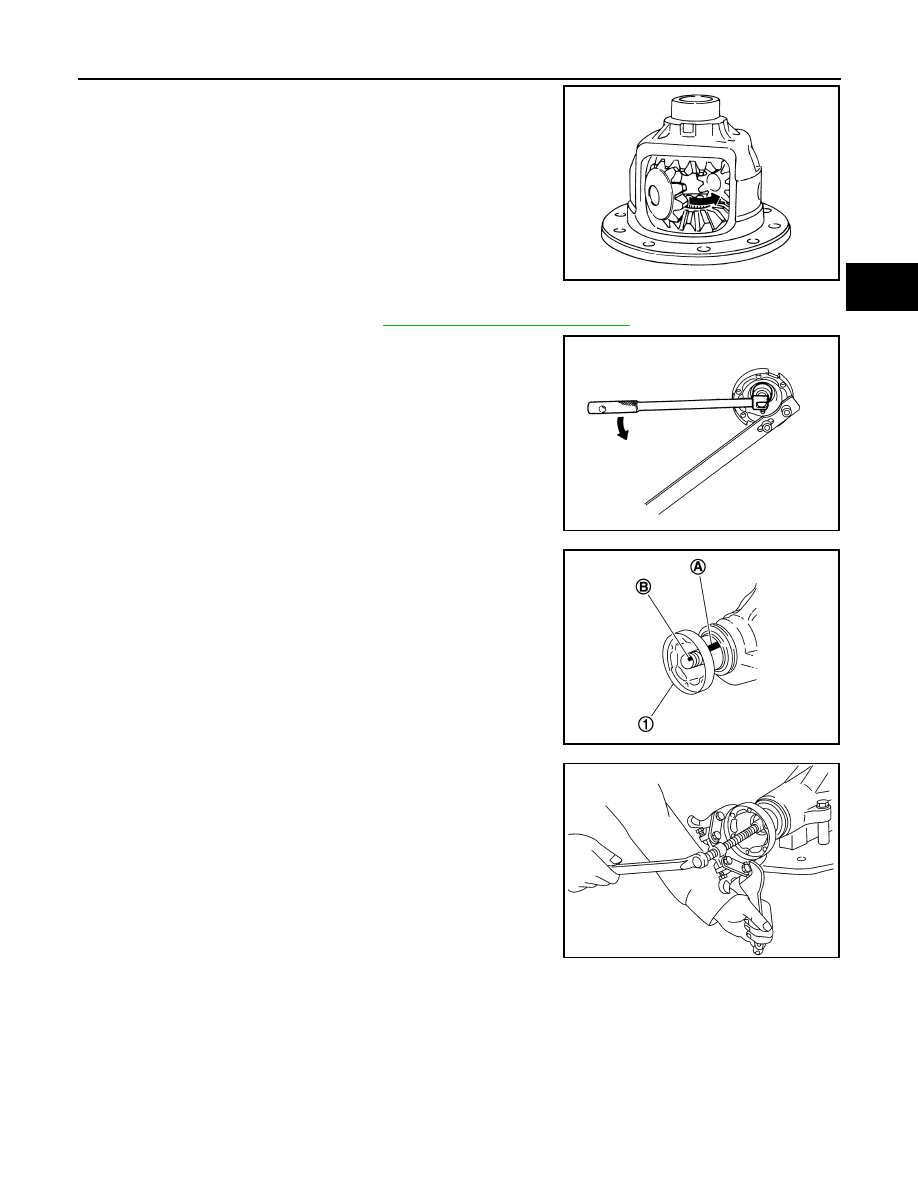
2.
Remove drive pinion lock nut with the flange wrench.
3.
Put matching mark (B) on the end of drive pinion. The matching
mark should be in line with the matching mark (A) on companion
flange (1).
CAUTION:
For matching mark, use paint. Never damage companion
flange and drive pinion.
NOTE:
The matching mark (A) on the final drive companion flange (1)
indicates the maximum vertical runout position.
When replacing companion flange, matching mark is not neces-
sary.
4.
Remove companion flange using the suitable puller.
SDIA0032J
PDIA0837J
PDIA0750J
SDIA1129E
RFD-26
< SERVICE INFORMATION >
REAR FINAL DRIVE ASSEMBLY
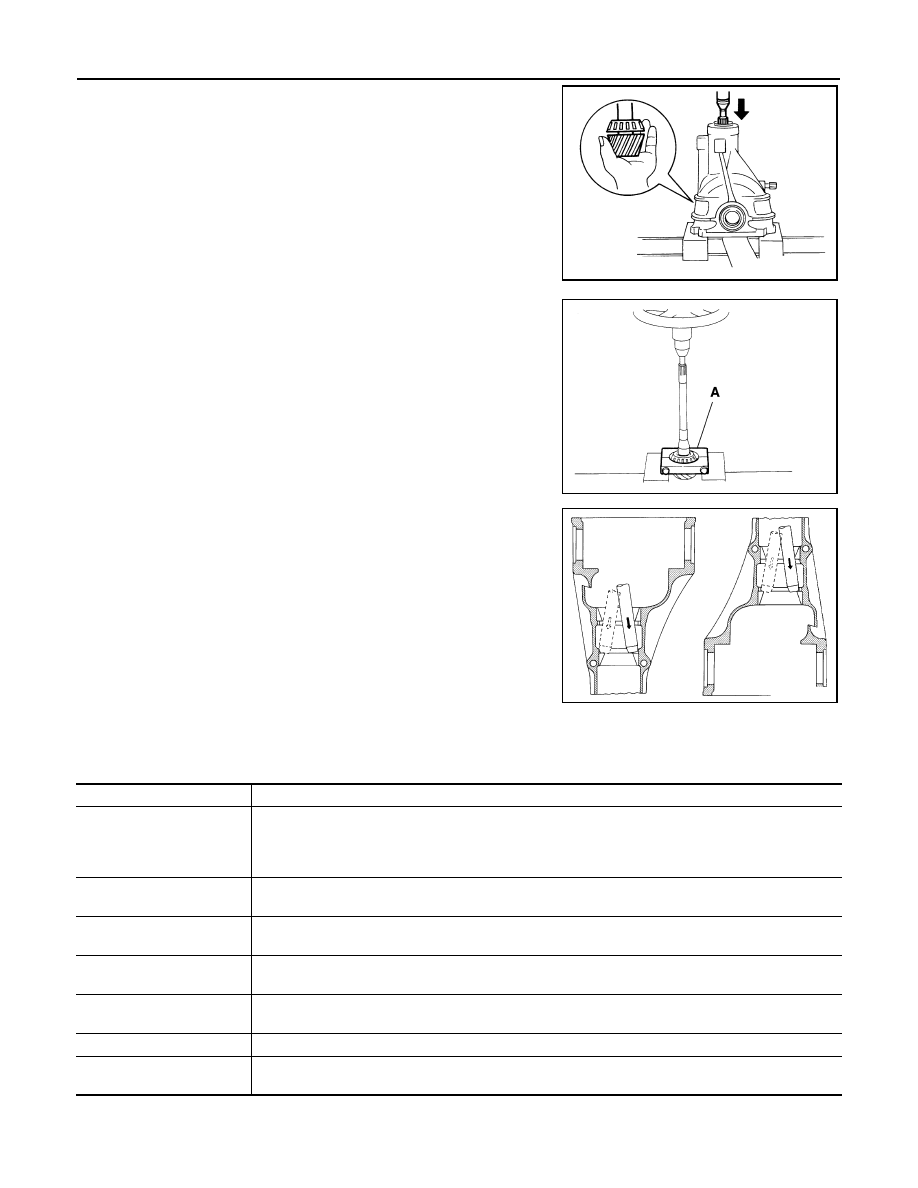
5.
Press drive pinion assembly out of gear carrier.
CAUTION:
Never drop drive pinion assembly.
6.
Remove front oil seal.
7.
Remove side oil seal.
8.
Remove pinion front bearing inner race.
9.
Remove collapsible spacer.
10. Remove pinion rear bearing inner race and pinion height adjust-
ing washer with the replacer.
11. Tap pinion front/rear bearing outer races uniformly a brass rod or
equivalent to removed.
CAUTION:
Be careful not to damage gear carrier.
INSPECTION AFTER DISASSEMBLY
Clean up the disassembled parts. Then, inspect if the parts are worn or damaged. If so, follow the measures
below.
ADJUSTMENT AND SELECTION OF ADJUSTING WASHERS
PDIA0760J
Tool number
A: ST30031000 (J-22912-01)
PDIA0801J
SDIA0817E
Content
Conditions and Measures
Hypoid gear
• If the gear teeth do not mesh or line-up correctly, determine the cause and adjust or replace as nec-
essary.
• If the gears are worn, cracked, damaged, pitted or chipped (by friction) noticeably, replace with new
drive gear and drive pinion as a set.
Bearing
• If any chipped (by friction), pitted, worn, rusted or scratched mark, or unusual noise from the bearing
is observed, replace as a bearing assembly (as a new set).
Side gear and Pinion mate
gear
• If any cracks or damage on the surface of the tooth is found, replace.
• If any worn or chipped mark on the contact sides of the thrust washer is found, replace.
Side gear thrust washer and
pinion mate thrust washer
• If it is chipped (by friction), damaged, or unusually worn, replace.
Oil seal
• Whenever disassembled, replace.
• If wear, deterioration of adherence (sealing force lips), or damage is detected on the lips, replace them.
Differential case
• If any wear or crack on the contact sides of the differential case is found, replace.
Companion flange
• If any chipped mark (about 0.1 mm, 0.004 in) or other damage on the contact sides of the lips of the
companion flange is found, replace.
Нет комментариевНе стесняйтесь поделиться с нами вашим ценным мнением.
Текст