Infiniti FX35, FX50 (S51). Manual — part 1070
EXT-30
< REMOVAL AND INSTALLATION >
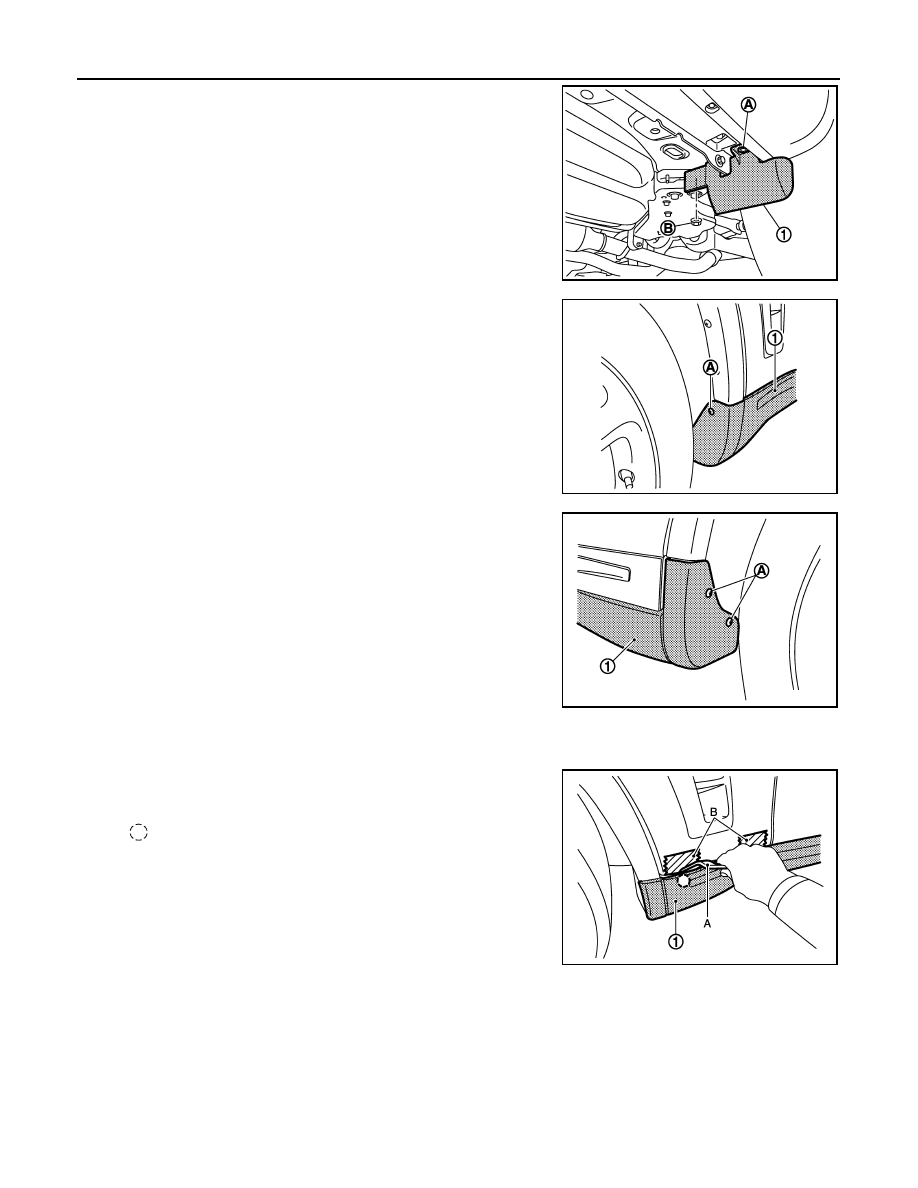
CENTER MUD GUARD
1.
Remove wind deflector (1) fixing clip (A) and nut (B), and then
remove wind deflector.
2.
Remove screw (A) of center mud guard (1) front end.
3.
Remove screws (A) of center mud guard (1) rear end.
4.
Remove bolts of center mud guard underside.
5.
Fully open front door and rear door.
6.
Remove clips from back side of center mud guard (1) with a
remover tool (A).
CAUTION:
• Apply protective tape (B) on the body to protect the
painted surface from damage.
• Never use an item as a remover tool that could damage
body panel.
• Disengage the clips slowly and carefully.
• Never pull the center mud guard strongly.
7.
Remove center mud guard from body side.
INSTALLATION
Install in the reverse order of removal.
CAUTION:
• Always replace clips with a new one, if the center mud guard is reused.
• When installing center mud guard, check that clips are securely fitted in body panel holes, and then
press them in.
JMKIA2726ZZ
JMKIA2727ZZ
JMKIA2728ZZ
: Clip
JMKIA2729ZZ
FLOOR SIDE FAIRING
EXT-31
< REMOVAL AND INSTALLATION >
C
D
E
F
G
H
I
J
L
M
A
B
EXT
N
O
P
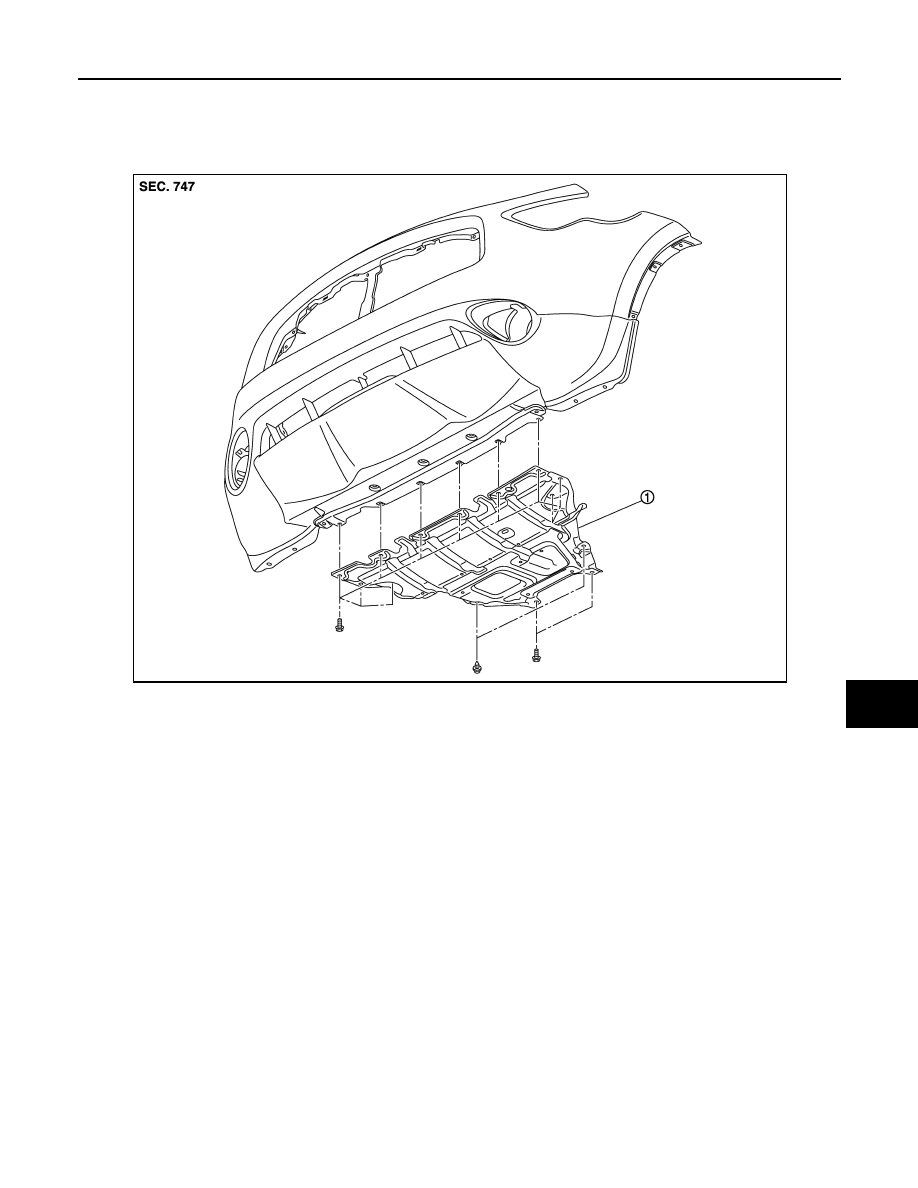
FLOOR SIDE FAIRING
Exploded View
INFOID:0000000005248871
Removal and Installation
INFOID:0000000005248872
REMOVAL
1.
Remove front under cover fixing clips and bolts.
2.
Remove front under cover.
INSTALLATION
Install in the reverse order of removal.
1.
Floor under cover
JMKIA2773ZZ

EXT-32
< REMOVAL AND INSTALLATION >
FILLET MOLDING
FILLET MOLDING
Exploded View
INFOID:0000000005248873
Removal and Installation
INFOID:0000000005248874
REMOVAL
FRONT FILLET MOLDING
1.
Remove front fillet molding fixing screws.
1.
Front fillet molding
2.
Grommet
3.
Rear fillet molding
: Clip
: Pawl
: Vehicle front
Refer to
for symbols in the figure.
JMKIA2730ZZ
FILLET MOLDING
EXT-33
< REMOVAL AND INSTALLATION >
C
D
E
F
G
H
I
J
L
M
A
B
EXT
N
O
P
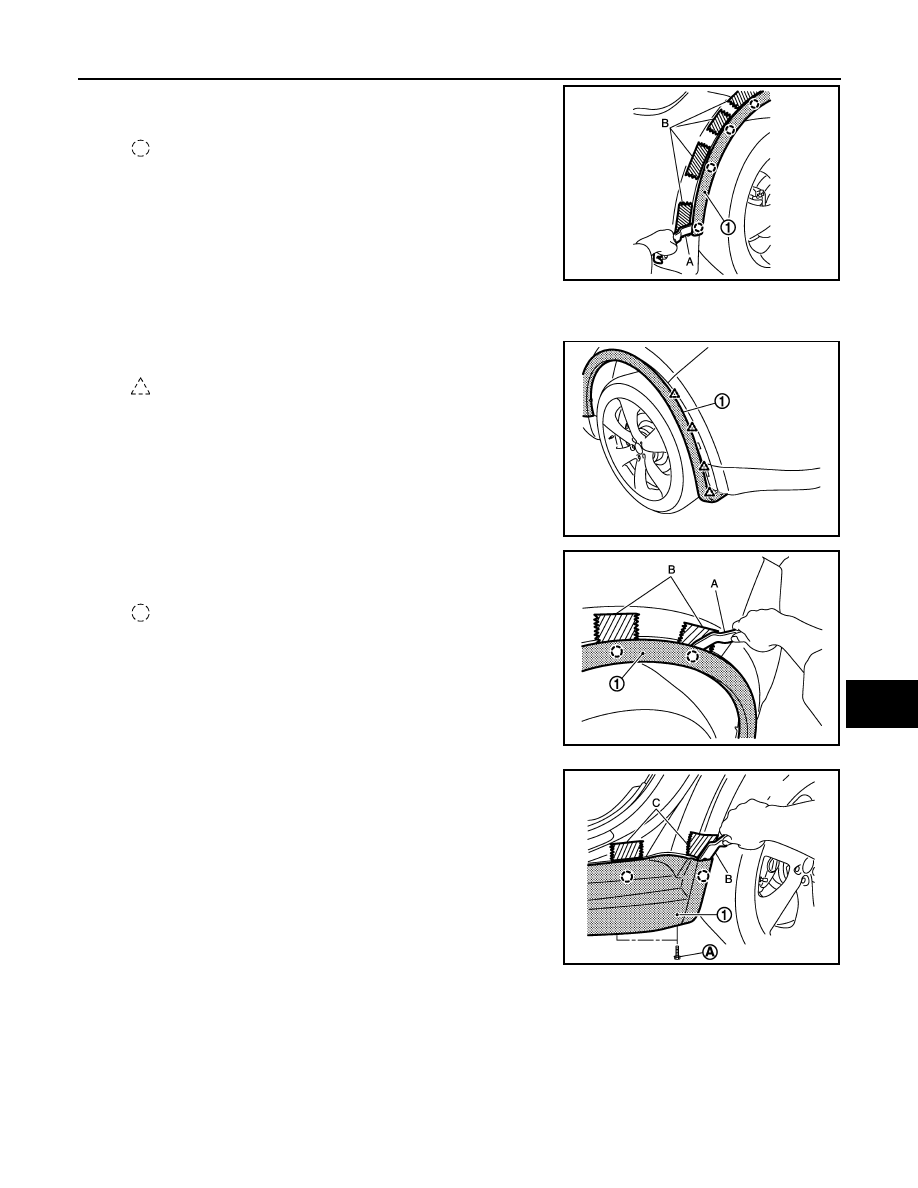
2.
Disengage the fillet molding (1) fixing clips from front end to rear
end with a remover tool (A).
CAUTION:
• Apply a protective tape (B) on the bumper fascia and
fender to protect the painted surface from damage.
• Never use an item as a remover tool that could damage
bumper fascia assembly and front fender.
• Disengage the clips slowly and carefully.
• Never pull the front fillet molding strongly.
REAR FILLET MOLDING
1.
Remove rear fillet molding fixing screws.
2.
Disengage the pawls from the rear fillet molding (1) rear side.
3.
Disengage the clips from the rear fillet molding (1) from the rear
end to front end with a remover tool (A).
CAUTION:
• Apply protective tape (B) on the body to protect the
painted surface from damage.
• Never use an item as a remover tool which could damage
body panel.
• Disengage the clips slowly and carefully.
• Never pull the rear fillet molding strongly.
4.
Remove the center mud guard (1) mounting bolts (A) from rear
end of center mud guard under side.
5.
Disengage the center mud guard fixing clips with a remover tool
(B), and then release the rear end of center mud guard.
CAUTION:
• Apply a protective tape (C) on the body to protect the
painted surface from damage.
• Never use an item as a remover tool which could damage
body panel.
• Disengage the clips slowly and carefully.
• Never pull the center mud guard strongly.
6.
Remove the rear fillet molding from the vehicle.
INSTALLATION
Install in the reverse order of removal.
CAUTION:
• When installing, visually check the fillet molding and the clips, then replace them with new parts if
they are damaged.
• When installing fillet molding, check that blind clips are securely fitted in body panel holes, and then
press them in.
: Clip
JMKIA2731ZZ
: Pawl
JMKIA2733ZZ
: Clip
JMKIA2734ZZ
JMKIA2735ZZ
Нет комментариевНе стесняйтесь поделиться с нами вашим ценным мнением.
Текст