Infiniti FX35, FX50 (S51). Manual — part 1256
INT-26
< REMOVAL AND INSTALLATION >
HEADLINING
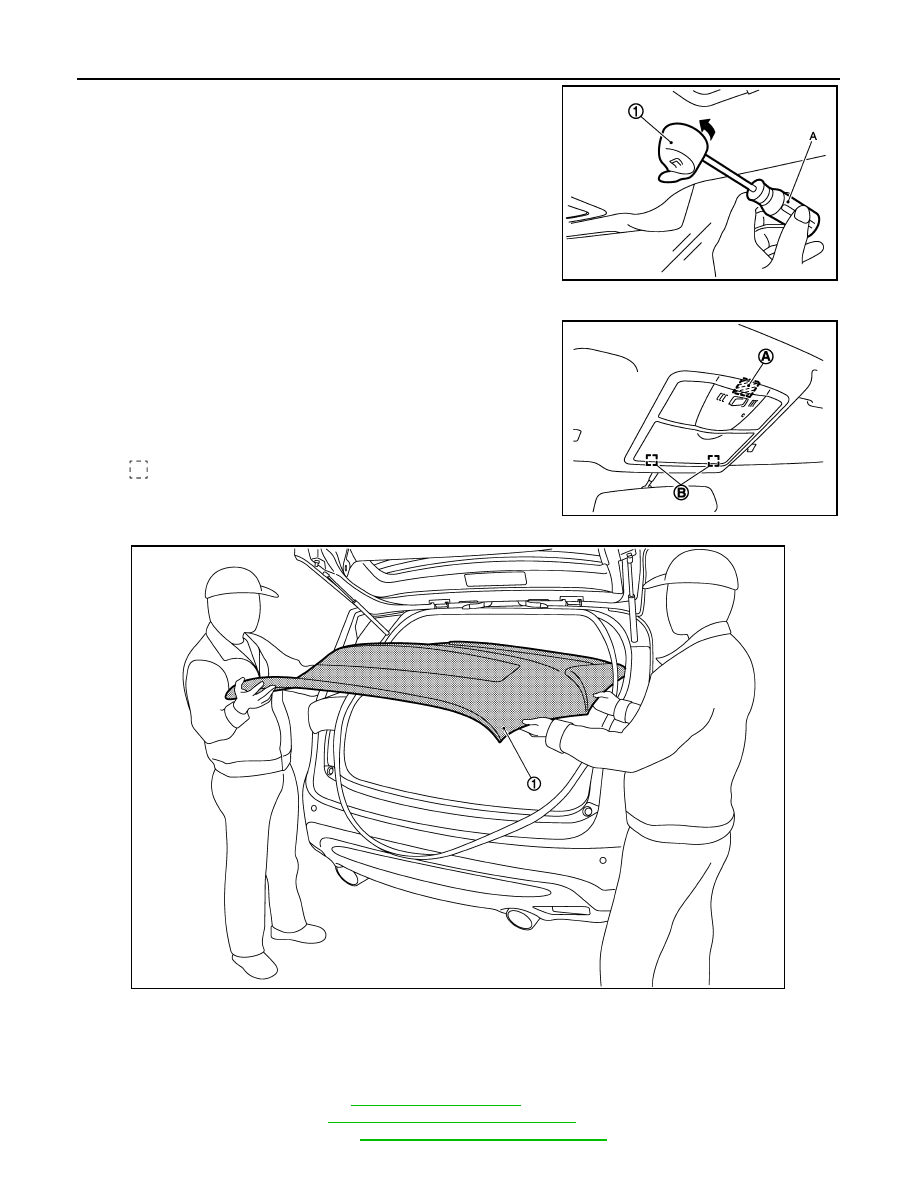
15. Insert a small flat-bladed screwdriver (A) into the hole of the
sun-visor holder (1), press while rotating approximately 90
degrees to remove.
16. Using remover tool, remove headlining hidden clip at the back side of headlining.
17. Pull down roof console assembly and disengage metal clips (B)
and dual-lock fastener (A).
CAUTION:
Roof console assembly is crimped from the back of head-
lining. Remove it by disengaging the crimped area of back
of roof console assembly after removing headlining from
the vehicle.
18. Remove headlining (1) from back door.
CAUTION:
• When removing, 2 workers are required.
• Never bend headlining when removing.
• Be careful not to scratch or damage any part of the body while taking out the headlining.
19. Remove the following parts after removing headlining.
• Roof console assembly. Refer to
.
• Map lamp assembly. Refer to
INL-183, "Removal and Installation"
• Personal lamp assembly. Refer to
INL-193, "Removal and Installation"
JMJIA1706ZZ
: Metal clip
JMJIA1008ZZ
JMJIA2066ZZ
HEADLINING
INT-27
< REMOVAL AND INSTALLATION >
C
D
E
F
G
H
I
K
L
M
A
B
INT
N
O
P
• Headlining harness.
INSTALLATION
Install in the reverse order of removal.
CAUTION:
• As for guide, install first sun-visor holder (LH/RH) and then the rear hidden clips at the back side of
headlining.
• Be careful not to bend the headlining when installing.

INT-28
< REMOVAL AND INSTALLATION >
LUGGAGE FLOOR TRIM
LUGGAGE FLOOR TRIM
Exploded View
INFOID:0000000005240803
1.
Luggage finisher center
2.
Belt assembly
3.
Luggage side finisher upper (LH)
4.
Luggage side finisher lower (LH)
5.
Luggage side finisher upper (RH)
6.
Luggage side finisher lower (RH)
7.
Seatback control finisher cap
8.
Seatback control cable finisher
9.
Rope hook
JMJIA2067ZZ
LUGGAGE FLOOR TRIM
INT-29
< REMOVAL AND INSTALLATION >
C
D
E
F
G
H
I
K
L
M
A
B
INT
N
O
P
Removal and Installation
INFOID:0000000005240804
REMOVAL
LUGGAGE REAR PLATE
1.
Fully open back door.
2.
Remove tonneau cover assembly.
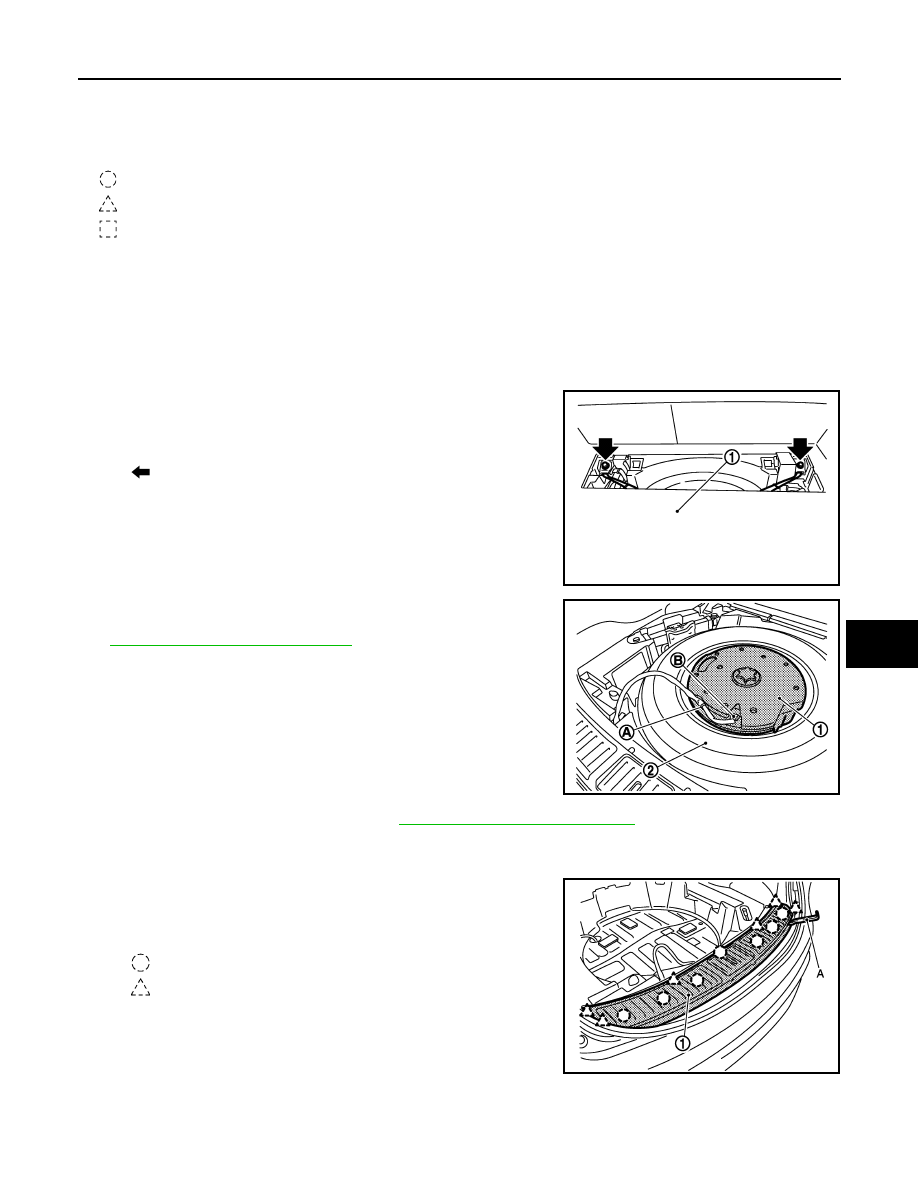
3.
Open and pull luggage finisher center (1) backwards, till the
bolts are visible.
4.
Remove both bolts and then remove luggage finisher center.
5.
Remove the clip (A), disconnect the woofer harness connector
(B), and then remove the woofer (1) and spire tire (2). Refer to
AV-572, "Removal and Installation"
6.
Remove the rear seat assembly. Refer to
SE-94, "Removal and Installation"
7.
Remove the luggage floor finisher front (LH/RH).
8.
Remove back door weather-strip.
9.
Disengage the rear plate (1) fixing clips with a remover tool (A)
then remove it.
10. Hold both sides of luggage rear plate, pull upwards to remove.
LUGGAGE FLOOR SPACER
10. Luggage room lamp
11. Luggage floor finisher front
12. Luggage floor spacer (LH)
13. Luggage rear plate cap
14. Luggage rear plate
15. Luggage floor spacer (RH)
16. Tonneau cover assembly
17. Tonneau cover (Back door trim side)
18. Luggage side finisher lid
19. Bose woofer
: Clip
: Pawl
: Metal clip
: Bolt
JMJIA1570ZZ
JMJIA2069ZZ
: Clip
: Pawl
JMJIA2074ZZ
Нет комментариевНе стесняйтесь поделиться с нами вашим ценным мнением.
Текст