Infiniti FX35, FX50 (S51). Manual — part 1252

INT-10
< PREPARATION >
PREPARATION
PREPARATION
PREPARATION
Special Service Tools
INFOID:0000000005240789
The actual shapes of Kent-Moore tools may differ from those of special service tools illustrated here.
Commercial Service Tools
INFOID:0000000005240790
Tool number
(Kent-Moore No.)
Tool name
Description
(J-39570)
Chassis ear
Locates the noise
(J-43980)
NISSAN Squeak and Rattle
Kit
Repairs the cause of noise
SIIA0993E
SIIA0994E
Tool name
Description
Engine ear
Locates the noise
Remover tool
Removes clips, pawls and metal clips
Power tool
SIIA0995E
PIIB7923J
PIIB1407E
FRONT DOOR FINISHER
INT-11
< REMOVAL AND INSTALLATION >
C
D
E
F
G
H
I
K
L
M
A
B
INT
N
O
P
REMOVAL AND INSTALLATION
FRONT DOOR FINISHER
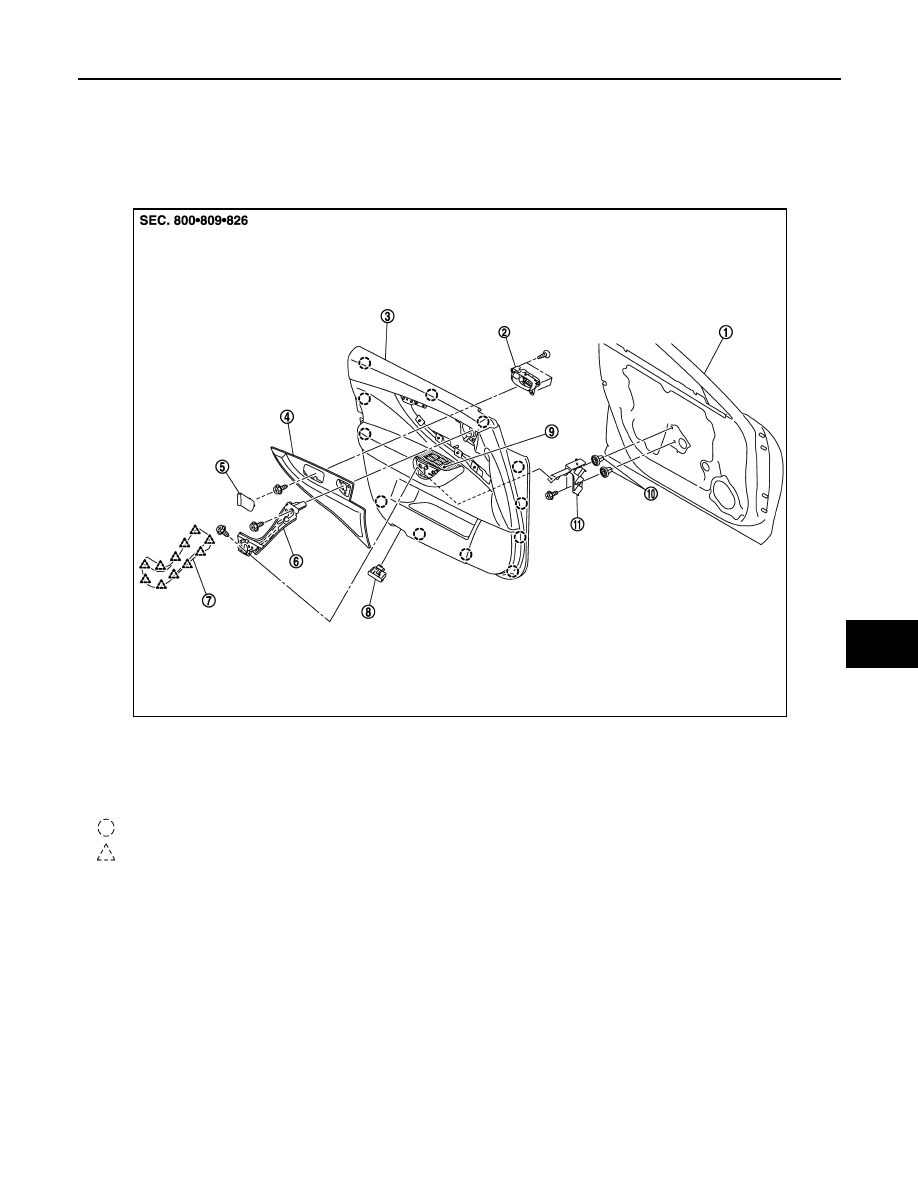
Exploded View
INFOID:0000000005240791
Removal and Installation
INFOID:0000000005240792
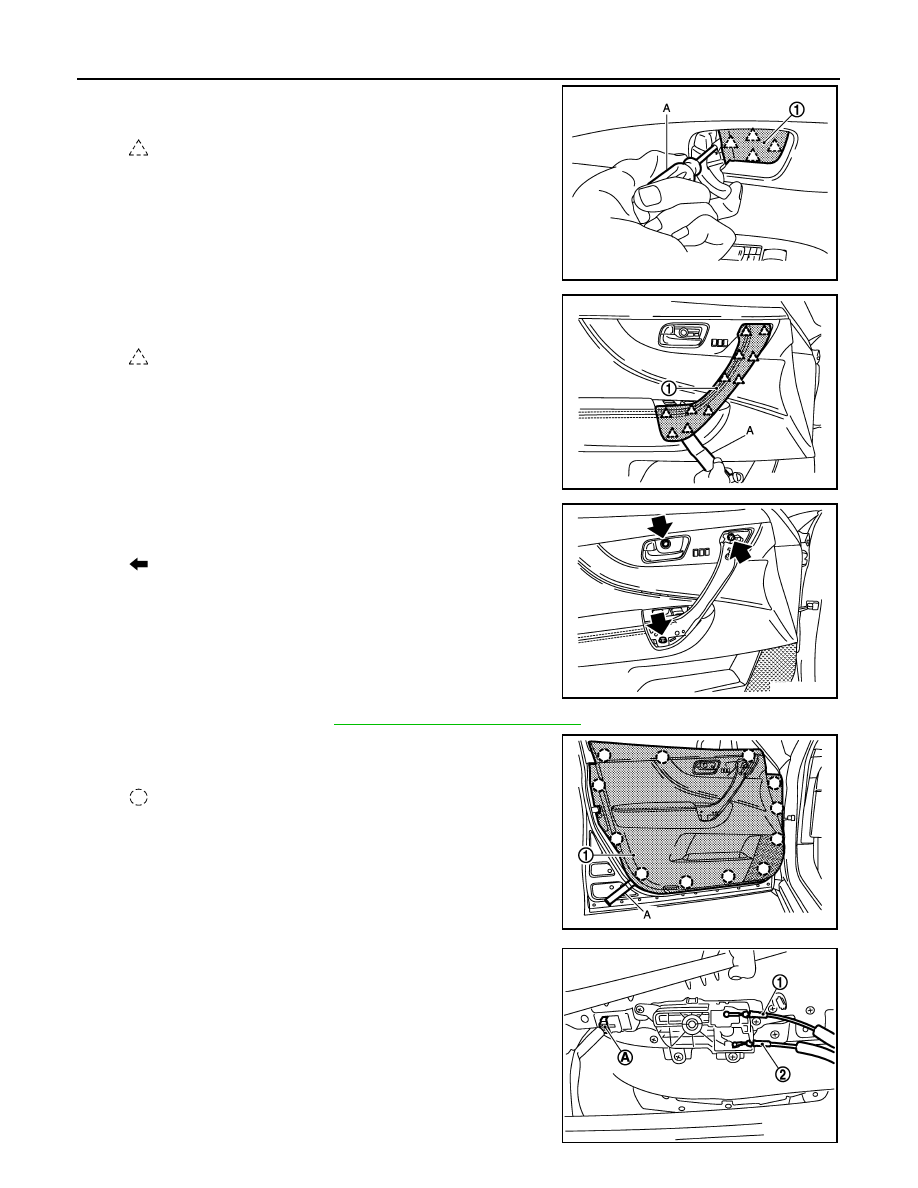
CAUTION:
Wrap the tip of flat-bladed screwdriver with a cloth before remove.
REMOVAL
1.
Fully open door window.
1.
Front door panel
2.
Front door inside handle
3.
Front door finisher
4.
Front door center finisher
5.
Inside handle escutcheon
6.
Front door grip
7.
Front door grip cap
8.
Step lamp
9.
Power window switch finisher
10. Grommet
11. Front door grip bracket
: Clip
: Pawl
JMJIA2047ZZ
INT-12
< REMOVAL AND INSTALLATION >
FRONT DOOR FINISHER
2.
Remove inside handle escutcheon (1) with a flat-bladed screw-
driver (A) wrapped in a tape as shown in the figure.
3.
Insert a remover tool (A) between the front door grip cap (1) and
the front door grip to disengage the pawls and remove the cap.
4.
Remove the bolts shown by the arrows in the figure with an
appropriate tool.
5.
Remove the step lamp. Refer to
INL-192, "Removal and Installation"
.
6.
Insert a remover tool (A) between the door finisher (1) and door
panel to disengage the clips.
CAUTION:
Insert a remover tool into the part shown in the figure.
(Between the clips and the door panel)
7.
Disconnect lock knob cable (1), inside handle cable (2) and the
seat memory switch harness connector (A).
: Pawl
JMJIA1506ZZ
: Pawl
JMJIA2049ZZ
: Bolt
JMJIA2050ZZ
: Clip
JMJIA2051ZZ
JMJIA1512ZZ
FRONT DOOR FINISHER
INT-13
< REMOVAL AND INSTALLATION >
C
D
E
F
G
H
I
K
L
M
A
B
INT
N
O
P
8.
Disconnect the mood lamp harness connector. Refer to
INL-190, "FRONT DOOR ARMREST : Exploded
.
9.
Disconnect the power window switch finisher harness connectors.
10. Remove the front door finisher.
INSTALLATION
Install in the reverse order of removal.
CAUTION:
When installing door finisher, check that clips are securely fitted in panel holes on body, and then
press them in.
Disassembly and Assembly
INFOID:0000000005240793
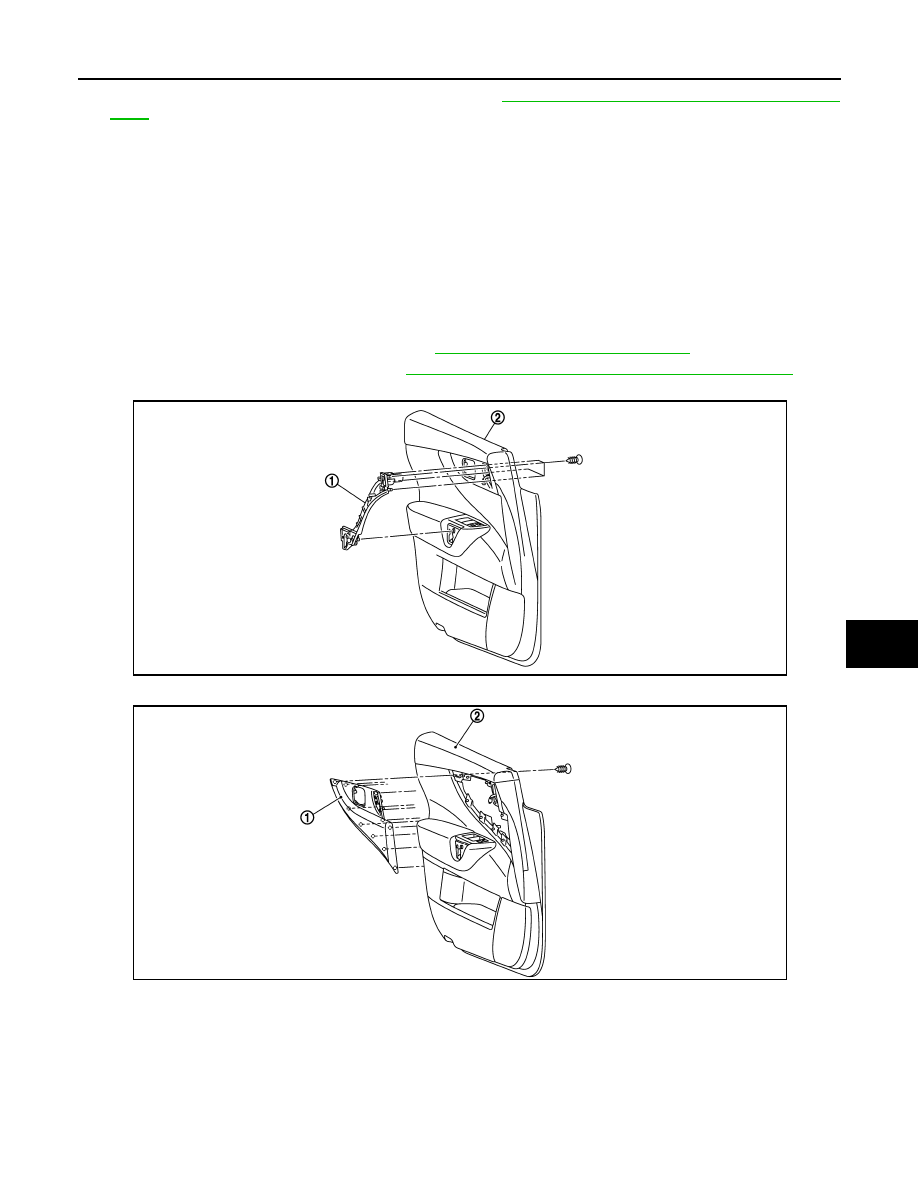
DISASSEMBLY
1.
Remove seat memory switch finisher. Refer to
ADP-217, "Removal and Installation"
2.
Remove front door inside handle. Refer to
DLK-270, "INSIDE HANDLE : Removal and Installation"
3.
Remove front door grip (1) fixing screws from front door finisher (2) and then remove it.
4.
Remove front door center finisher (1) fixing screws from door finisher (2) and then remove it.
ASSEMBLY
Assemble in the reverse order of removal.
JMJIA2105ZZ
JMJIA2106ZZ
Нет комментариевНе стесняйтесь поделиться с нами вашим ценным мнением.
Текст