Infiniti FX35, FX50 (S51). Manual — part 528
PREPARATION
DLK-235
< PREPARATION >
C
D
E
F
G
H
I
J
L
M
A
B
DLK
N
O
P
PREPARATION
PREPARATION
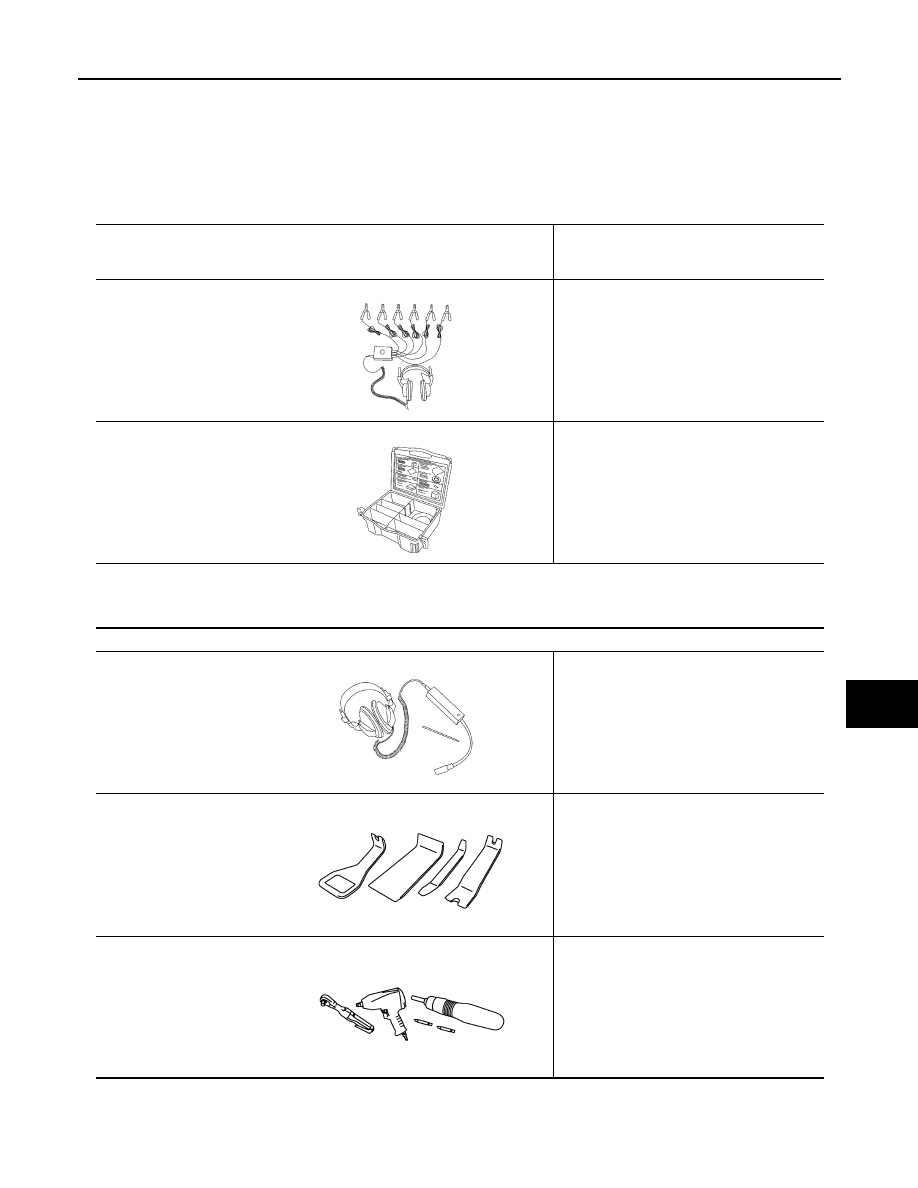
Special Service Tools
INFOID:0000000005239715
The actual shapes of Kent-Moore tools may differ from those of special service tools illustrated here.
Commercial Service Tools
INFOID:0000000005239716
Tool number
(Kent-Moore No.)
Tool name
Description
(J-39570)
Chassis ear
Locates the noise
(J-43980)
NISSAN Squeak and Rat-
tle Kit
Repairs the cause of noise
SIIA0993E
SIIA0994E
Tool name
Description
Engine ear
Locates the noise
Remover tool
Removes the clips, pawls, and metal clips
Power tool
SIIA0995E
PIIB7923J
PIIB1407E

DLK-236
< REMOVAL AND INSTALLATION >
HOOD
REMOVAL AND INSTALLATION
HOOD
HOOD ASSEMBLY
HOOD ASSEMBLY : Exploded View
INFOID:0000000005239717
REMOVAL
ADJUSTMENT
1.
Hood assembly
2.
Hood bumper rubber
3.
Seal
4.
Radiator core seal
5.
Hood insulator
6.
Inner cover
7.
Hood hinge cover
8.
Stud ball
9.
Hood stay
10.
Hood hinge
for symbols in the figure.
JMKIA2633ZZ

HOOD
DLK-237
< REMOVAL AND INSTALLATION >
C
D
E
F
G
H
I
J
L
M
A
B
DLK
N
O
P
HOOD ASSEMBLY : Removal and Installation
INFOID:0000000005239718
CAUTION:
• Operate with two workers, because of its heavy weight.
• Use protective tape or shop cloth to protect from damage during removal and installation.
REMOVAL
1.
Hood assembly
2.
Hood striker
3.
Hood bumper rubber
4.
Hood hinge
5.
Front bumper fascia
6.
Front fender
for symbols in the figure.
JMKIA2634GB
DLK-238
< REMOVAL AND INSTALLATION >
HOOD
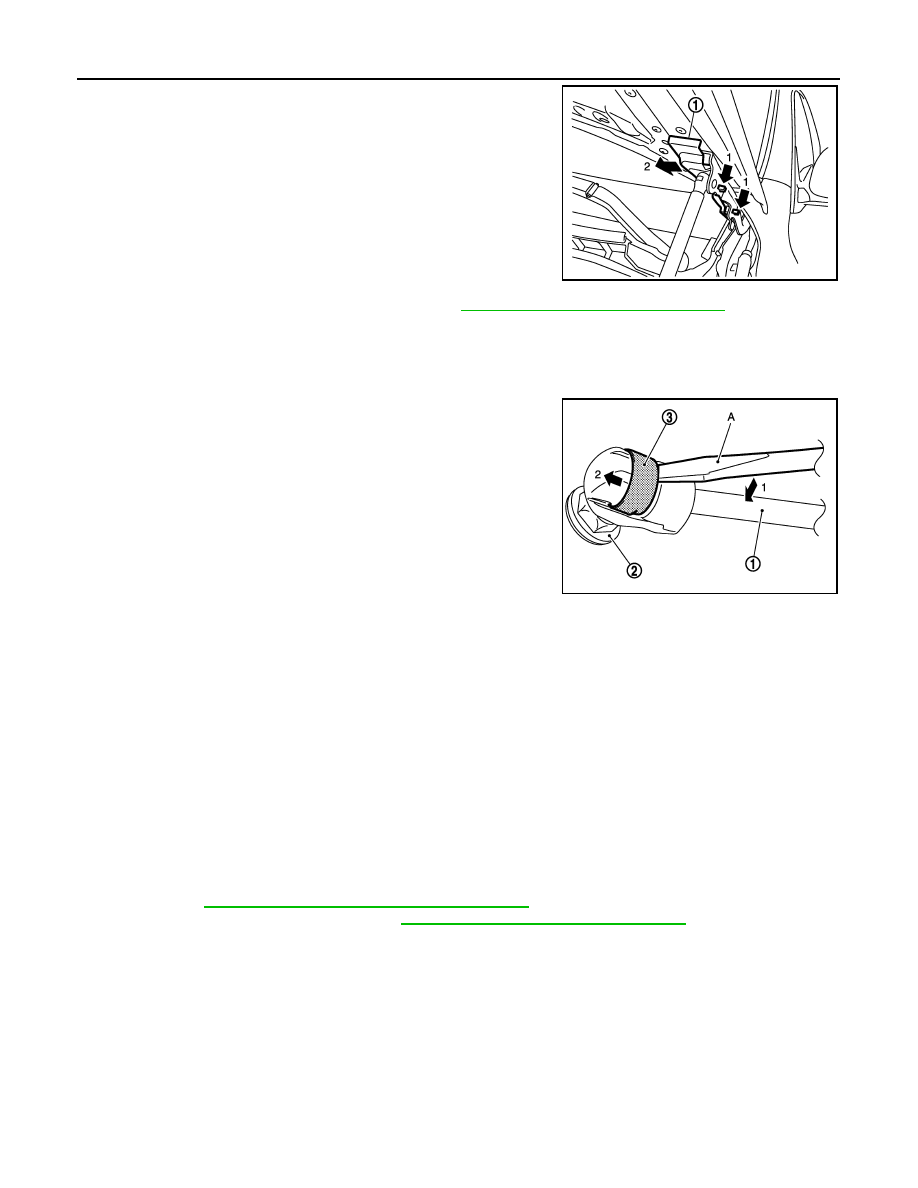
1.
Remove hood hinge cover (LH/RH) (1).
NOTE:
While pushing the pawls, pull hood hinge cover in the direction
of the arrow.
2.
Remove washer nozzle and washer tube. Refer to
WW-117, "Inspection and Adjustment"
.
3.
Support hood assembly with a proper material to prevent it from falling.
WARNING:
Bodily injury may occur if no supporting rod is holding the hood open when removing the hood
stay.
4.
Remove the metal clip (3) located on the connection between
the hood stay (1) and the stud ball (2) (hood side), by using a
flat-bladed screwdriver (A).
5.
Disengage the stud ball from the hood stay (hood side).
6.
Remove hood hinge mounting nuts on the hood to remove the hood assembly.
7.
Remove the following parts after removing the hood assembly.
• Radiator core seal
• Hood insulator
• Hood bumper rubber
• Inner cover
• Hood striker
• Secondary latch
INSTALLATION
Install in the reverse order of removal.
CAUTION:
• Apply anticorrosive agent onto the mounting surface.
• Check hood hinge rotating part for poor lubrication. If necessary, apply body grease.
• After installation, check hood open/close, lock/unlock operation.
• After installation, adjust the following parts.
- Hood: Refer to
DLK-238, "HOOD ASSEMBLY : Adjustment"
.
- Washer nozzle and washer tube: Refer to
WW-117, "Inspection and Adjustment"
.
• After installation, apply touch-up paint (the body color) onto the head of hood hinge mounting bolts
and nuts.
HOOD ASSEMBLY : Adjustment
INFOID:0000000005239719
Check the clearance and the surface height between hood and each part by seeing and touching. Fitting stan-
dard dimension in the table below should be satisfied.
If the clearance and the surface height are out of specification, adjust them according to the procedures
shown below.
JMKIA2090ZZ
JMKIA2255ZZ
Нет комментариевНе стесняйтесь поделиться с нами вашим ценным мнением.
Текст