Infiniti FX35, FX50 (S51). Manual — part 140
AV
AV CONTROL UNIT
AV-333
< REMOVAL AND INSTALLATION >
[NAVIGATION (SINGLE MONITOR)]
C
D
E
F
G
H
I
J
K
L
M
B
A
O
P
REMOVAL AND INSTALLATION
AV CONTROL UNIT
Exploded View
INFOID:0000000005475540
CAUTION:
Before replacing AV control unit, perform “READ CONFIGURATION” to save or print current vehicle
specification. For details, refer to
AV-243, "ADDITIONAL SERVICE WHEN REPLACING AV CONTROL
REMOVAL
DISASSEMBLY
Removal and Installation
INFOID:0000000005475541
CAUTION:
Before replacing AV control unit, perform “READ CONFIGURATION” to save or print current vehicle
specification. For details, refer to
AV-243, "ADDITIONAL SERVICE WHEN REPLACING AV CONTROL
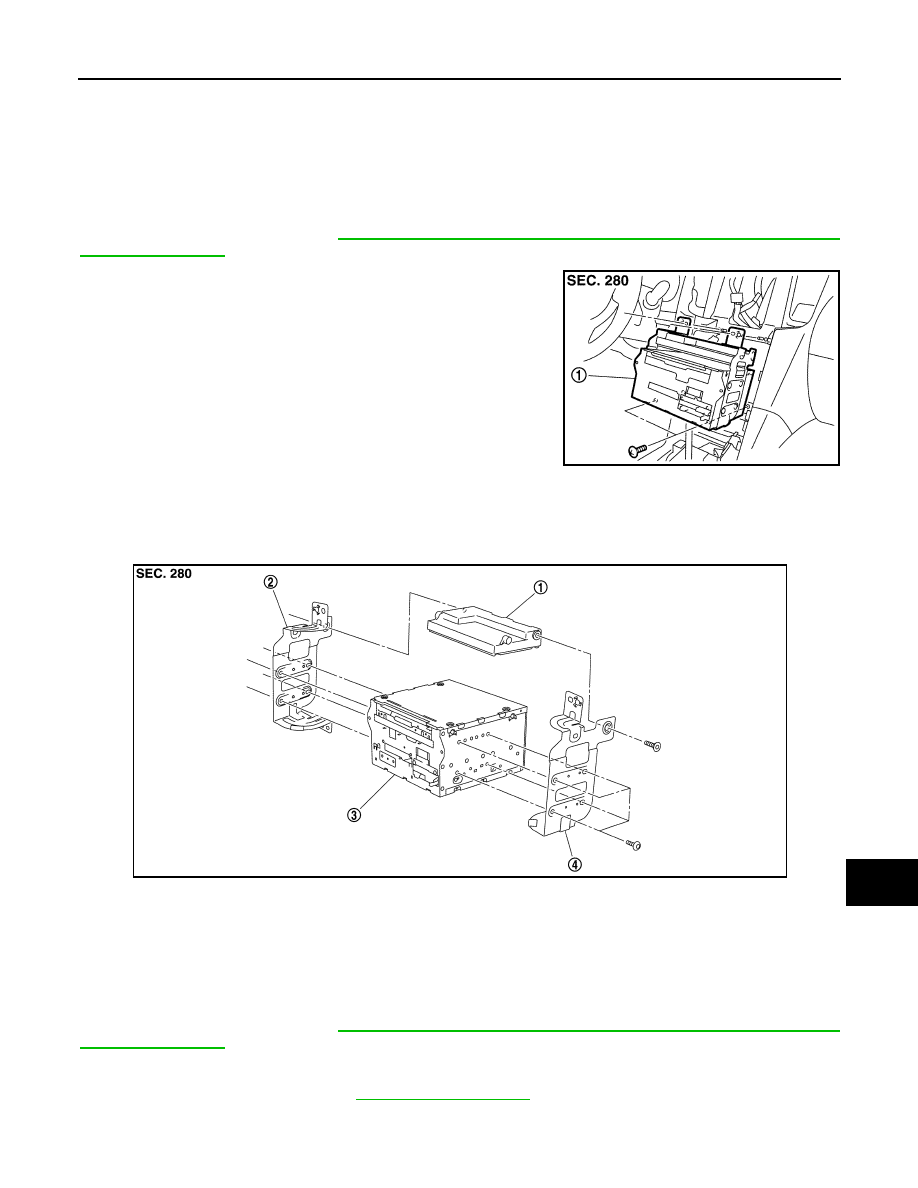
REMOVAL
1.
Remove front display unit. Refer to
2.
Remove AV control unit with a unified meter and A/C amp. as a single unit from the body.
3.
Remove bracket screws, and then remove AV control unit.
JSNIA1450ZZ
1:
AV control unit
1.
Unified meter and A/C amp.
2.
Bracket LH
3.
AV control unit
4.
Bracket RH
JSNIA1500ZZ
AV-334
< REMOVAL AND INSTALLATION >
[NAVIGATION (SINGLE MONITOR)]
AV CONTROL UNIT
INSTALLATION
Installation is the reverse order of removal.
CAUTION:
• Since AV control unit connector and unified meter and A/C amp. connector have the same form, be
careful not to insert them wrongly.
• Be sure to perform “WRITE CONFIGURATION” when replacing AV control unit.
AV
FRONT DISPLAY UNIT
AV-335
< REMOVAL AND INSTALLATION >
[NAVIGATION (SINGLE MONITOR)]
C
D
E
F
G
H
I
J
K
L
M
B
A
O
P
FRONT DISPLAY UNIT
Exploded View
INFOID:0000000005475542
REMOVAL
DISASSEMBLY
Removal and Installation
INFOID:0000000005475543
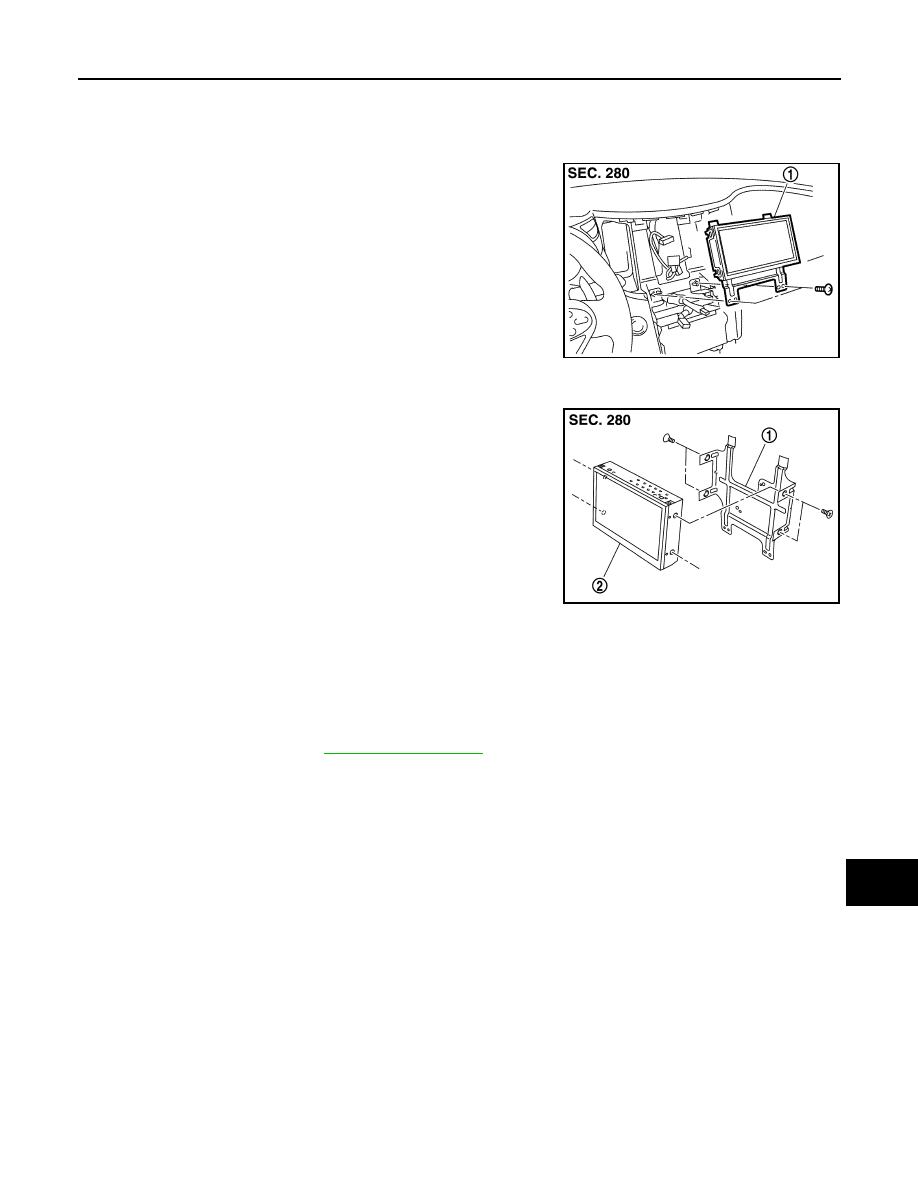
REMOVAL
1.
Remove cluster lid D. Refer to
.
2.
Remove front display unit mounting screws.
3.
Disconnect connector, and remove front display unit.
INSTALLATION
Installation is the reverse order of removal.
JSNIA1451ZZ
1.
Front display unit
JSNIA1538ZZ
1.
Bracket
2.
Front display unit

AV-336
< REMOVAL AND INSTALLATION >
[NAVIGATION (SINGLE MONITOR)]
FRONT DOOR SPEAKER
FRONT DOOR SPEAKER
Exploded View
INFOID:0000000005475550
Removal and Installation
INFOID:0000000005475551
REMOVAL
1.
Remove front door finisher. Refer to
.
2.
Remove front door speaker mounting bolts.
3.
Disconnect connector and remove front door speaker.
INSTALLATION
Installation is the reverse order of removal.
JSNIA1456ZZ
1.
Front door speaker
Нет комментариевНе стесняйтесь поделиться с нами вашим ценным мнением.
Текст