Infiniti EX35. Manual — part 1074
INSIDE MIRROR
MIR-51
< ON-VEHICLE REPAIR >
[WITH ADP]
C
D
E
F
G
H
I
J
K
M
A
B
MIR
N
O
P
1.
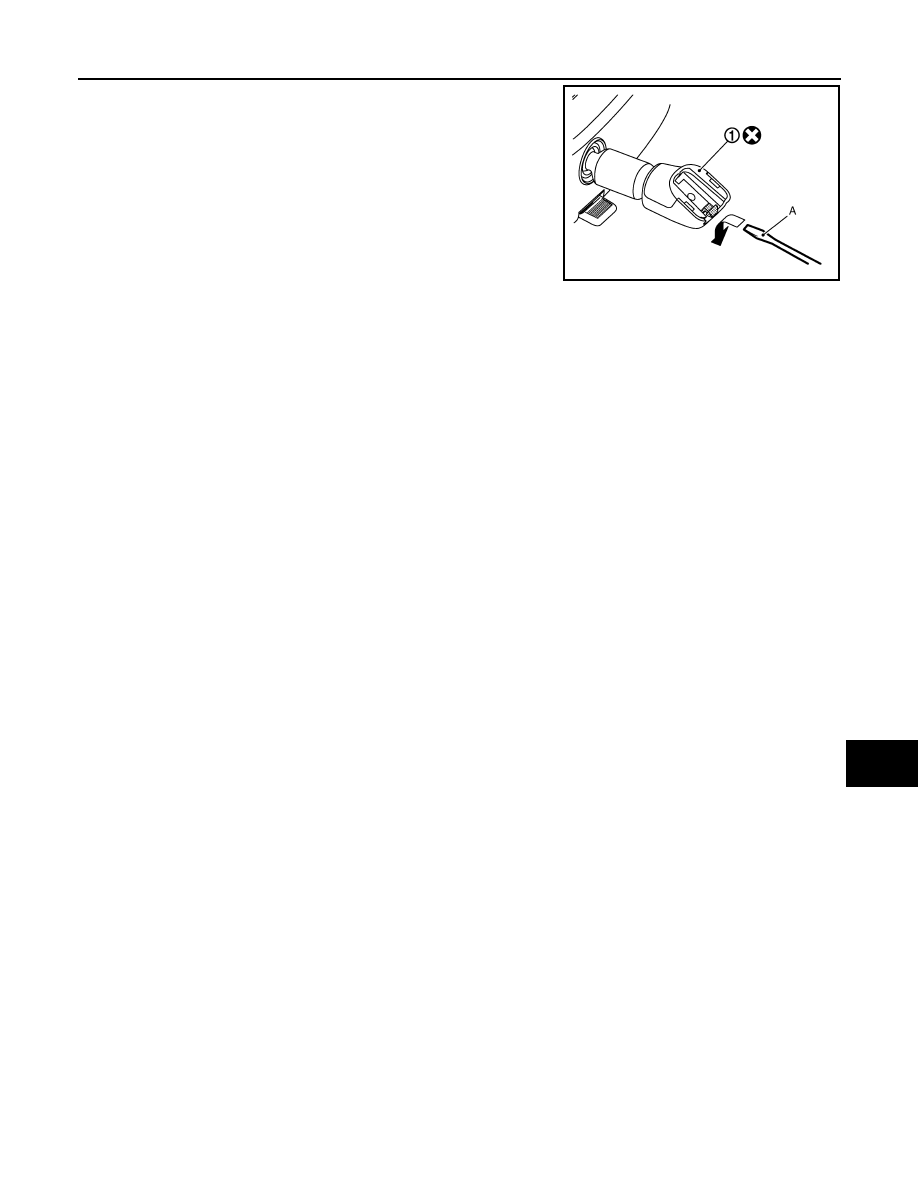
Insert minus driver (A) under the inside mirror (1).
2.
Slide the inside mirror to the upper side while pushing the pqwl
downward.
CAUTION:
Never use excessive force to remove the inside mirror because
it is inserted tightly into the miror base.
Option model
1.
Remove the inside mirror cover.
2.
Remove TORX bolt.
3.
Disconnect harness connector.
4.
Slide the inside mirror upward to remove.
INSTALLATION
Install in the reverse order of removal.
CAUTION:
When inserting the inside mirror into the mirror base, be sure to push the pawl until it get connected to
the mirror base.
JMLIA0055ZZ
MIR-52
< ON-VEHICLE REPAIR >
[WITH ADP]
OUTSIDE MIRROR
OUTSIDE MIRROR
DOOR MIRROR ASSEMBLY
DOOR MIRROR ASSEMBLY : Exploded View
INFOID:0000000003136552
DOOR MIRROR ASSEMBLY : Removal and Installation
INFOID:0000000003136553
REMOVAL
1.
Remove front door finisher. Refer to
INT-11, "DRIVER SIDE : Removal and Installation"
(driver side) or
INT-14, "PASSENGER SIDE : Removal and Installation"
(passenger side).
2.
Remove clips and remove corner cover.
3.
Disconnect door mirror harness connector.
4.
Remove door mirror mounting nuts, and remove door mirror assembly.
INSTALLATION
Install in the reverse order of removal.
CAUTION:
Perform camera image calibration. Refer to
AV-438, "CALIBRATING CAMERA IMAGE (AROUND VIEW
MONITOR) : Special Repair Requirement"
DOOR MIRROR ASSEMBLY : Disassembly and Assembly
INFOID:0000000003774530
DISASSEMBLY
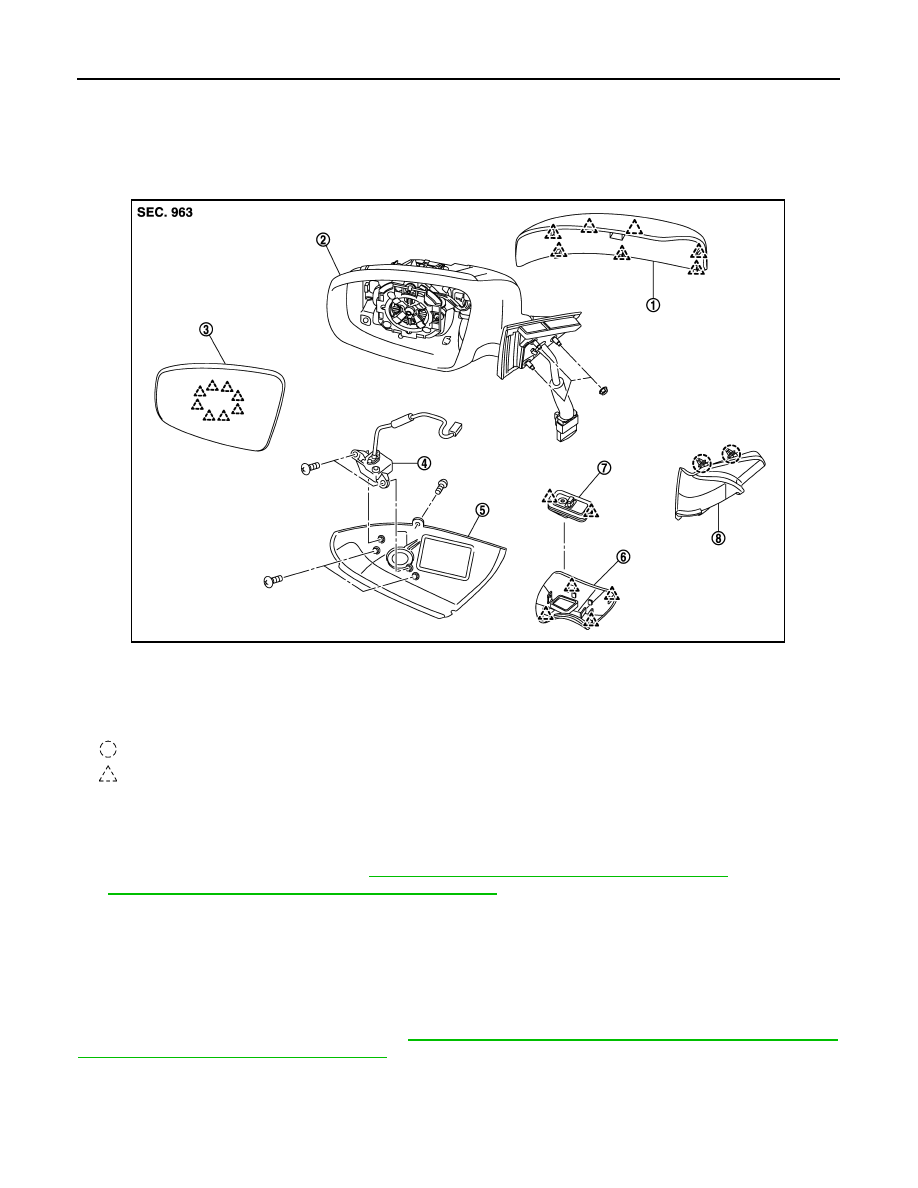
1.
Door mirror cover
2.
Mirror assembly
3.
Glass mirror
4.
Side camera assembly (with side
camera model)
5.
Side camera finisher assembly (with
side camera model)
6.
Base cover
7.
Puddle lamp
8.
Corner cover
: Clip
: Pawl
JMKIA2089ZZ

OUTSIDE MIRROR
MIR-53
< ON-VEHICLE REPAIR >
[WITH ADP]
C
D
E
F
G
H
I
J
K
M
A
B
MIR
N
O
P
1.
Remove door mirror cover. Refer to
MIR-55, "DOOR MIRROR COVER : Disassembly and Assembly"
2.
Remove side camera after removing door mirror assembly (BOSE audio with navigation model). Refer to
AV-928, "Removal and Installation"
AV-927, "Removal and Installation"
(LH)
3.
Remove base cover and puddle lamp.
ASSEMBLY
Assemble in the reverse order of disassemble.
GLASS MIRROR
GLASS MIRROR : Exploded View
INFOID:0000000003691831
GLASS MIRROR : Disassembly and Assembly
INFOID:0000000003136555
DISASSEMBLY
1.
Place the glass mirror upward.
2.
Put a strip of protective tape (B) on housing assembly.
3.
As shown in the figure, insert a small slotted screwdriver (A) into the recess between glass mirror (1) and
actuator (2). Push up both pawls (3) simultaneously to remove glass mirror lower half side.
NOTE:
1.
Door mirror cover
2.
Mirror assembly
3.
Glass mirror
4.
Side camera assembly (with side
camera model)
5.
Side camera finisher assembly (with
side camera model)
6.
Base cover
7.
Puddle lamp
8.
Corner cover
: Clip
: Pawl
JMKIA2089ZZ

MIR-54
< ON-VEHICLE REPAIR >
[WITH ADP]
OUTSIDE MIRROR
Insert screwdriver into recesses, and push up while rotating (twisting) to make work easier.
4.
Remove two terminals of mirror heater attachment.
5.
Lightly lift up lower side of glass mirror, and detach both pawls of upper side as if pulling it out. Disassem-
ble glass mirror from actuator.
NOTE:
Be certain not to allow grease on sealing agent in center of mirror or back side of glass mirror.
ASSEMBLY
Assemble in the reverse order of disassemble.
CAUTION:
After installation, visually check that pawls are securely engaged.
DOOR MIRROR COVER
DOOR MIRROR COVER : Exploded View
INFOID:0000000003691832
JMLIA0056ZZ
1.
Door mirror cover
2.
Mirror assembly
3.
Glass mirror
4.
Side camera assembly (with side
camera model)
5.
Side camera finisher assembly (with
side camera model)
6.
Base cover
7.
Puddle lamp
8.
Corner cover
: Clip
: Pawl
JMKIA2089ZZ
Нет комментариевНе стесняйтесь поделиться с нами вашим ценным мнением.
Текст