Infiniti EX35. Manual — part 972
FRONT DOOR FINISHER
INT-13
< ON-VEHICLE REPAIR >
C
D
E
F
G
H
I
K
L
M
A
B
INT
N
O
P
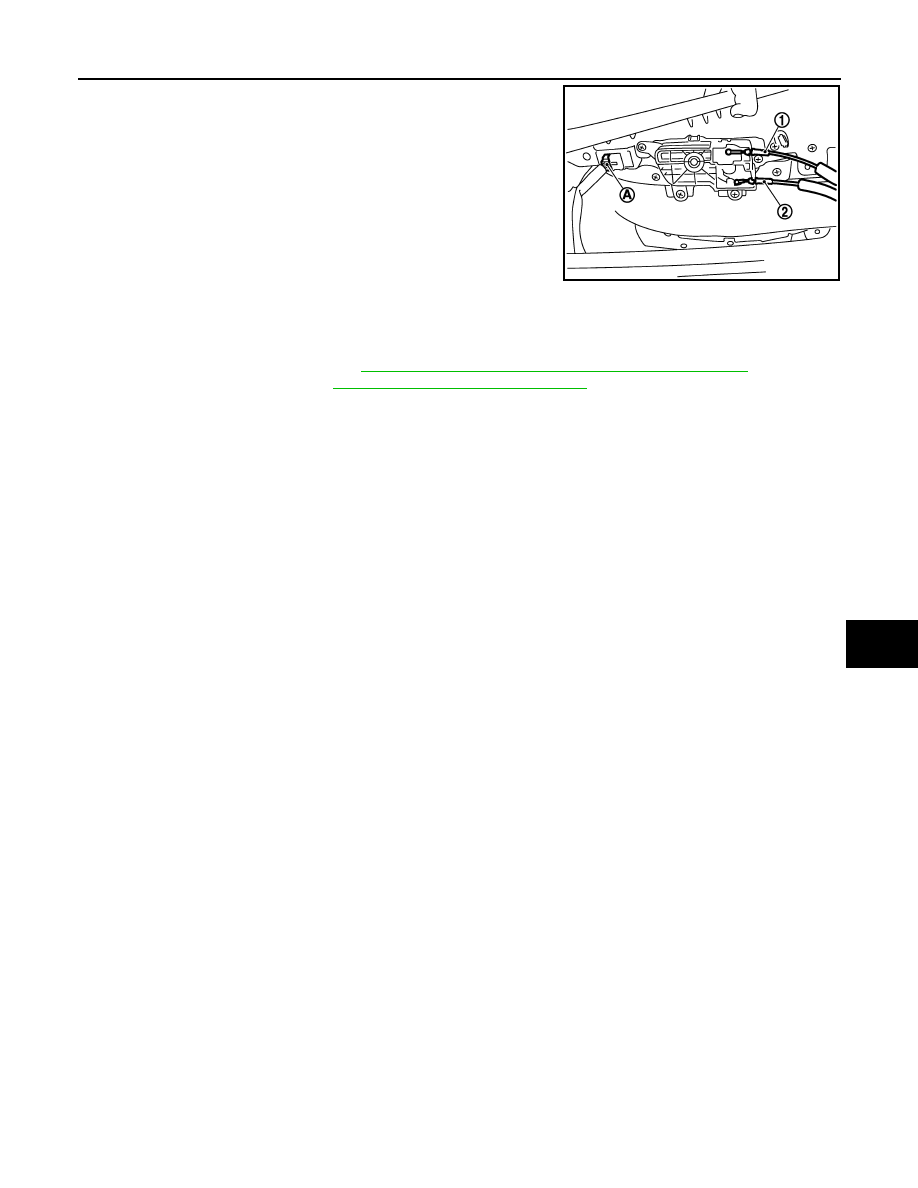
7.
Disconnect lock knob cable (1), inside handle cable (2) and the
seat position switch harness connector (A).
8.
Disconnect the power window switch finisher harness connectors.
9.
Remove the front door finisher.
10. Remove the following parts after removing the front door finisher.
• Front door inside handle. Refer to
DLK-247, "INSIDE HANDLE : Removal and Installation"
• Seat memory switch. Refer to
ADP-211, "Removal and Installation"
.
• The power window switch finisher.
INSTALLATION
Install in the reverse order of removal.
CAUTION:
When installing door finisher, check that clips are securely fitted in panel holes on body, and then
press them in.
PASSENGER SIDE
JMJIA1512ZZ

INT-14
< ON-VEHICLE REPAIR >
FRONT DOOR FINISHER
PASSENGER SIDE : Exploded View
INFOID:0000000003591417
PASSENGER SIDE : Removal and Installation
INFOID:0000000003591454
CAUTION:
Wrap the tip of flat-bladed screwdriver with a cloth before remove.
REMOVAL
1.
Fully open door window.
1.
Front door panel
2.
Front door finisher
3.
Step lamp
4.
Front door grip cap
5.
Inside handle escutcheon
6.
Front door inside seal
7.
Power window switch finisher
8.
Front door inside handle
9.
Power window switch
: Clip
: Pawl
JMJIA1513ZZ
FRONT DOOR FINISHER
INT-15
< ON-VEHICLE REPAIR >
C
D
E
F
G
H
I
K
L
M
A
B
INT
N
O
P
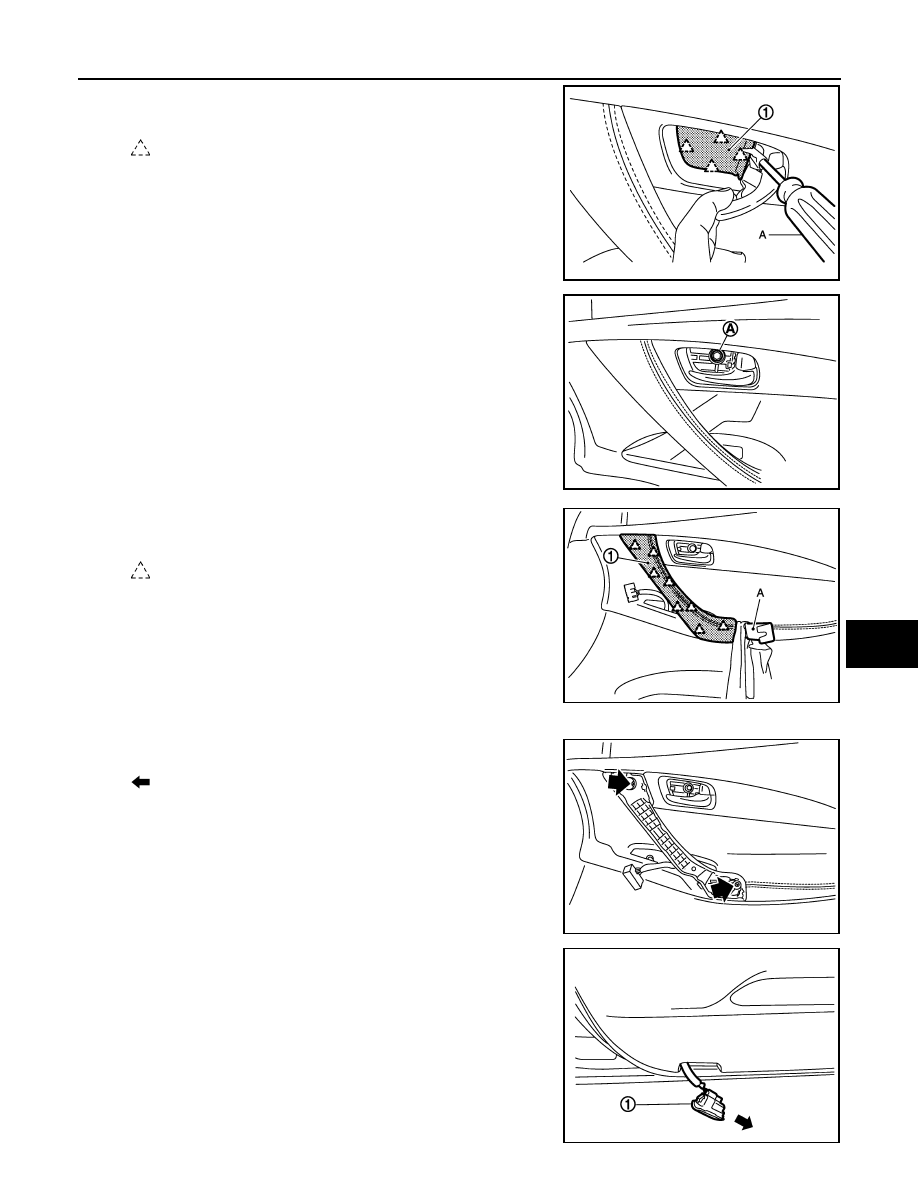
2.
Remove inside handle escutcheon (1) with a flatted-blade
screwdriver (A) wrapped in a tape as shown in the figure.
3.
Remove screw (A) located on the back side of inside handle
escutcheon.
4.
Insert a remover tool (A) wrapped into a shop cloth at the bottom
edge of front door grip cap to disengage the pawls.
5.
Remove front door grip cap.
6.
Remove front door grip fixing screws with tool.
7.
Remove step lamp (1) and then disconnect the harness connec-
tor.
: Pawl
JMJIA1514ZZ
JMJIA1515ZZ
: Pawl
JMJIA1517ZZ
: Screw
JMJIA1518ZZ
JMJIA1510ZZ
INT-16
< ON-VEHICLE REPAIR >
FRONT DOOR FINISHER
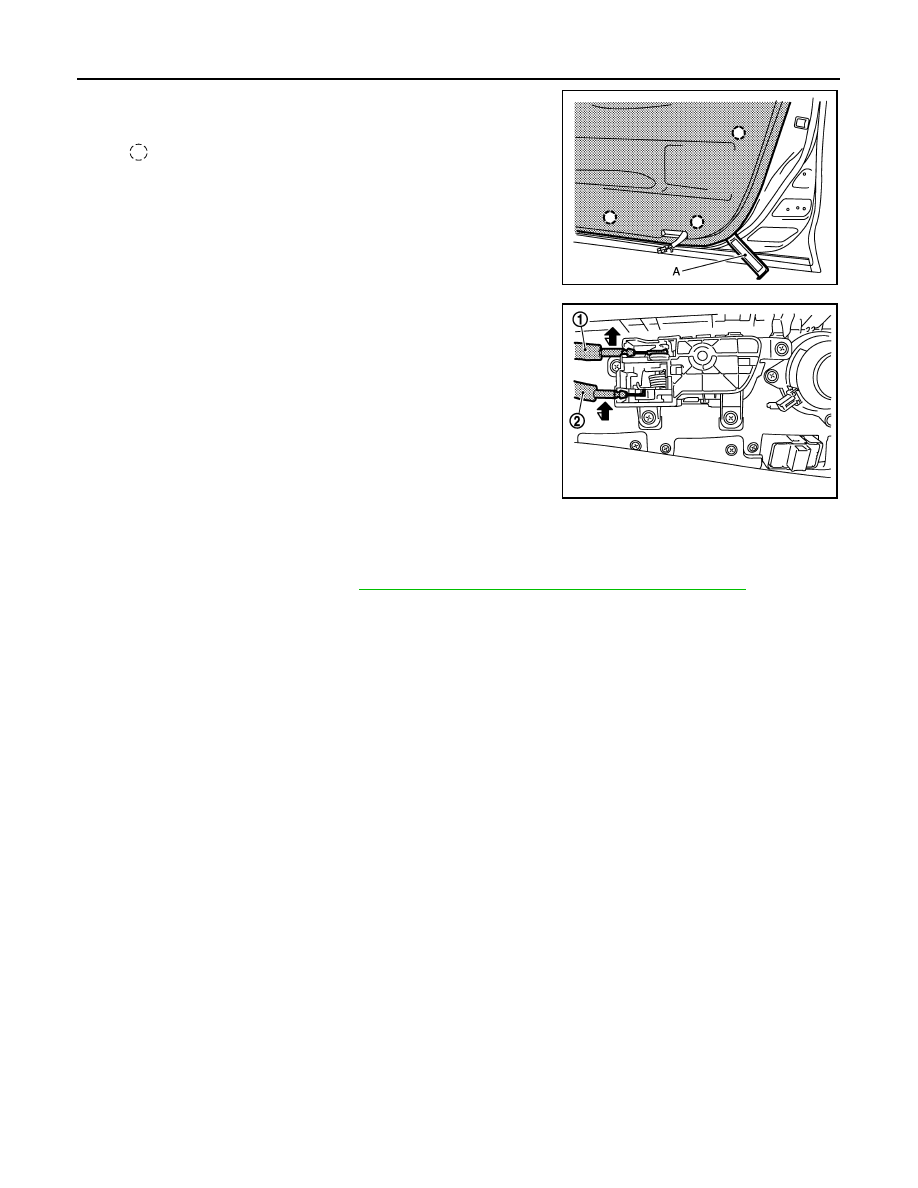
8.
Insert a remover tool (A) between the door finisher and door
panel to disengage the clips.
CAUTION:
Insert a remover tool (A) into the part show in the figure.
(Between the clips and the door panel)
9.
Disconnect lock knob cable (1) and inside handle cable (2) from
door inside handle assembly.
10. Disconnect the power window switch harness connector.
11. Remove the door finisher.
12. Remove the following parts after removing the door finisher.
• Front door inside handle. Refer to
DLK-247, "INSIDE HANDLE : Removal and Installation"
.
• Power window switch finisher.
INSTALLATION
Install in the reverse order of removal.
CAUTION:
When installing door finisher, check that clips are securely fitted in panel holes on body, and then
press them in.
: Clip
JMJIA1687ZZ
JMJIA0295ZZ
Нет комментариевНе стесняйтесь поделиться с нами вашим ценным мнением.
Текст