Infiniti EX35. Manual — part 971
PRECAUTIONS
INT-9
< PRECAUTION >
C
D
E
F
G
H
I
K
L
M
A
B
INT
N
O
P
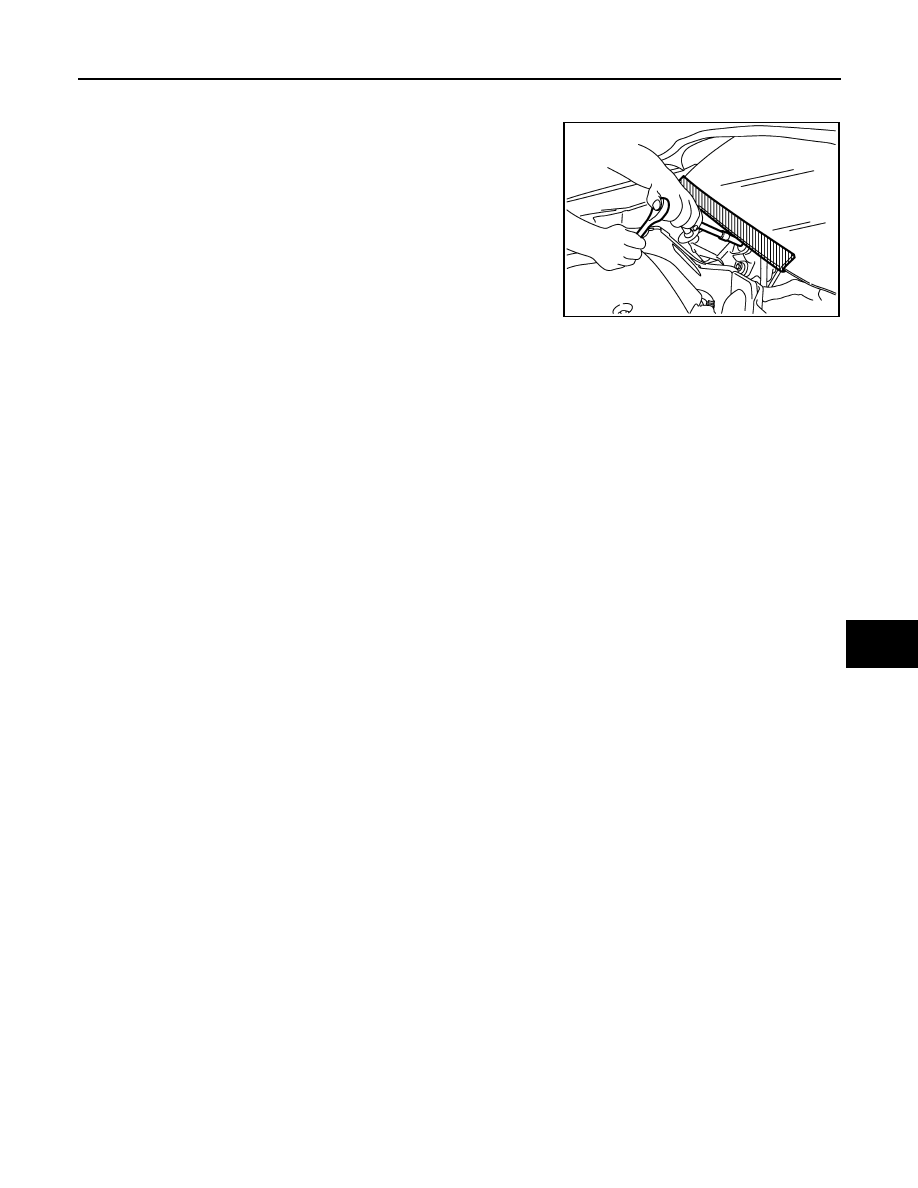
Precaution for Procedure without Cowl Top Cover
INFOID:0000000003140118
When performing the procedure after removing cowl top cover, cover
the lower end of windshield with urethane, etc.
Precaution for Work
INFOID:0000000003140119
• After removing and installing the opening/closing parts, be sure to carry out fitting adjustments to check their
operation.
• Check the lubrication level, damage, and wear of each part. If necessary, grease or replace it.
PIIB3706J
INT-10
< PREPARATION >
PREPARATION
PREPARATION
PREPARATION
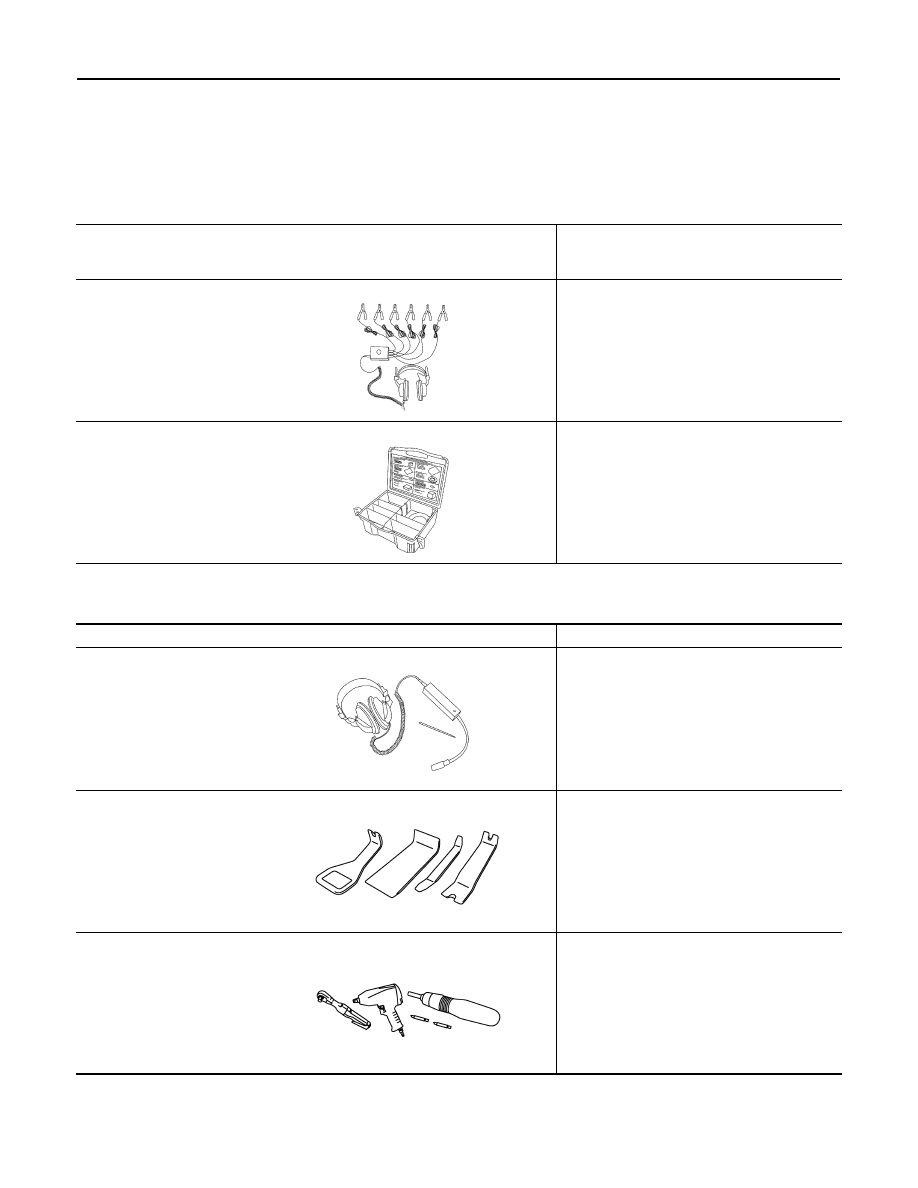
Special Service Tools
INFOID:0000000003140120
The actual shapes of Kent-Moore tools may differ from those of special service tools illustrated here.
Commercial Service Tools
INFOID:0000000003140121
Tool number
(Kent-Moore No.)
Tool name
Description
(J-39570)
Chassis ear
Location the noise
(J-43980)
NISSAN Squeak and Rattle
Kit
Repairing the cause of noise
SIIA0993E
SIIA0994E
Tool name
Description
Engine ear
Location the noise
Remover tool
Remove clips, pawls, metal clips
Power tool
SIIA0995E
PIIB7923J
PIIB1407E
FRONT DOOR FINISHER
INT-11
< ON-VEHICLE REPAIR >
C
D
E
F
G
H
I
K
L
M
A
B
INT
N
O
P
ON-VEHICLE REPAIR
FRONT DOOR FINISHER
DRIVER SIDE
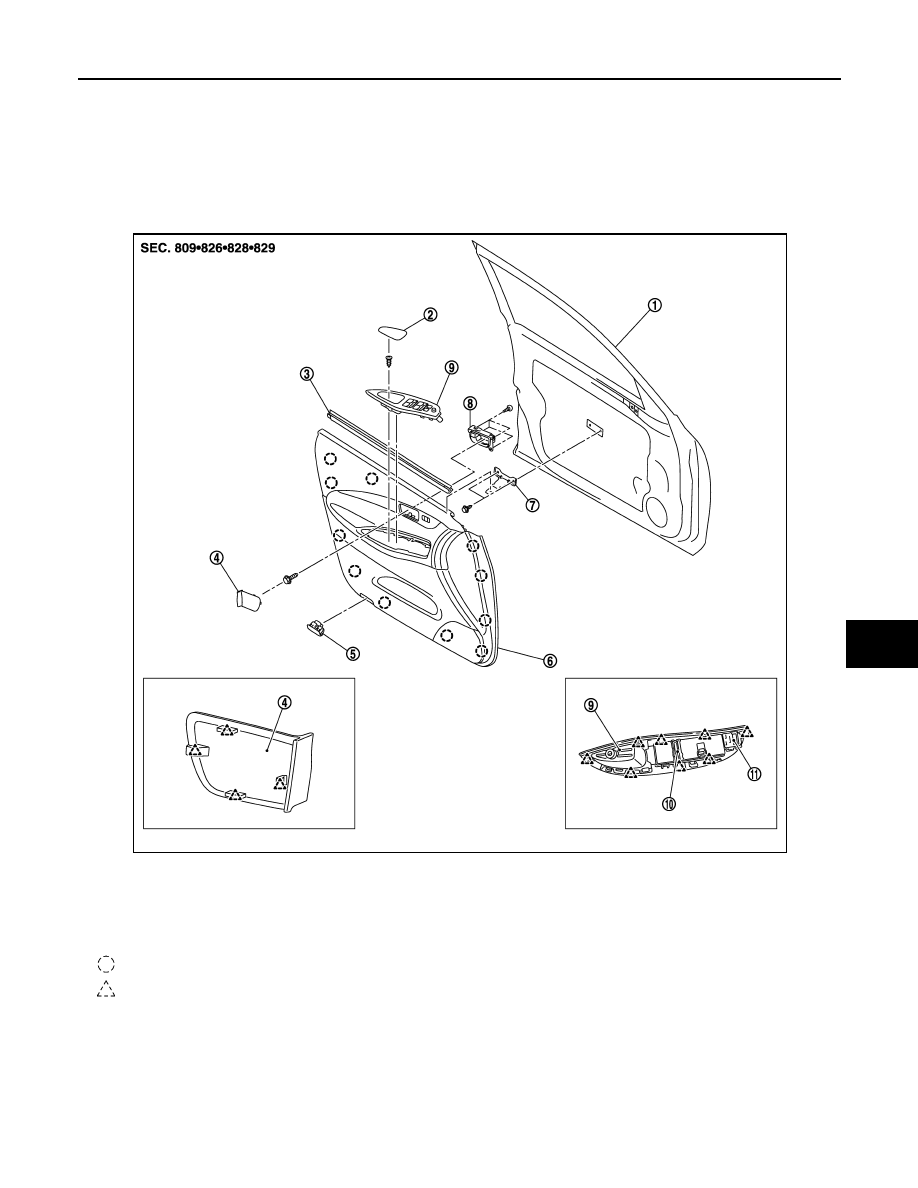
DRIVER SIDE : Exploded View
INFOID:0000000003591415
DRIVER SIDE : Removal and Installation
INFOID:0000000003591416
CAUTION:
Wrap the tip of flat-bladed screwdriver with a cloth before remove.
REMOVAL
1.
Fully open door window.
1.
Front door panel
2.
Pull handle cover
3.
Front door inside seal
4.
Inside handle escutcheon
5.
Step lamp
6.
Front door finisher
7.
Front door finisher bracket
8.
Front door inside handle
9.
Power window switch finisher
10. Power window switch
11. Door mirror remote control switch
: Clip
: Pawl
JMJIA1505ZZ
INT-12
< ON-VEHICLE REPAIR >
FRONT DOOR FINISHER
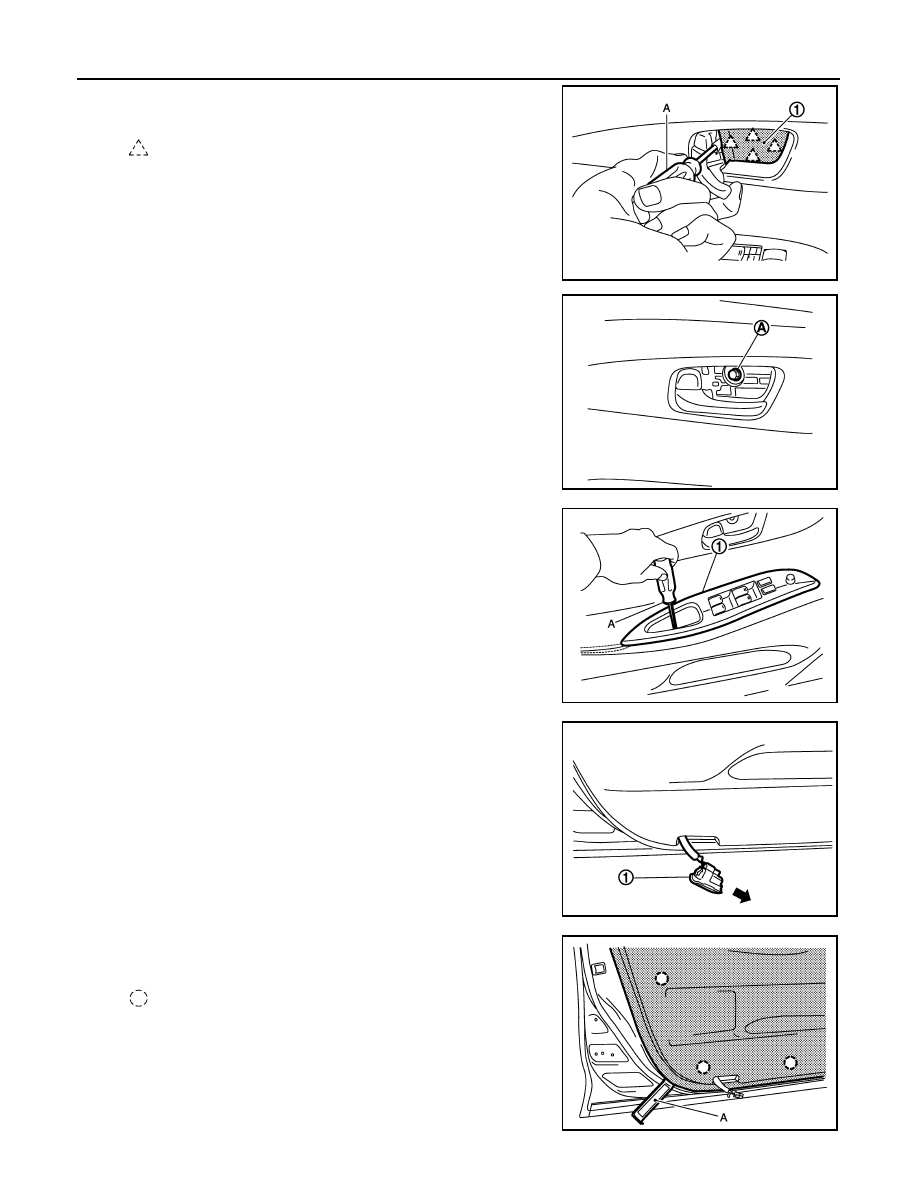
2.
Remove inside handle escutcheon (1) with a flatted-blade
screwdriver (A) wrapped in a tape as shown in the figure.
3.
Remove screw (A) located on the back side of inside handle
escutcheon.
4.
Remove power window switch finisher (1) fixing screw located
under the pull handle cover with a screwdriver (A).
5.
Remove step lamp (1) and then disconnect the harness connec-
tor.
6.
Insert a remover tool (A) between the door finisher and door
panel to disengage the clips.
CAUTION:
Insert a remover tool (A) into the part shown in the figure.
(Between the clips and the door panel)
: Pawl
JMJIA1506ZZ
JMJIA1507ZZ
JMJIA1508ZZ
JMJIA1510ZZ
: Clip
JMJIA1511ZZ
Нет комментариевНе стесняйтесь поделиться с нами вашим ценным мнением.
Текст