Infiniti EX35. Manual — part 967
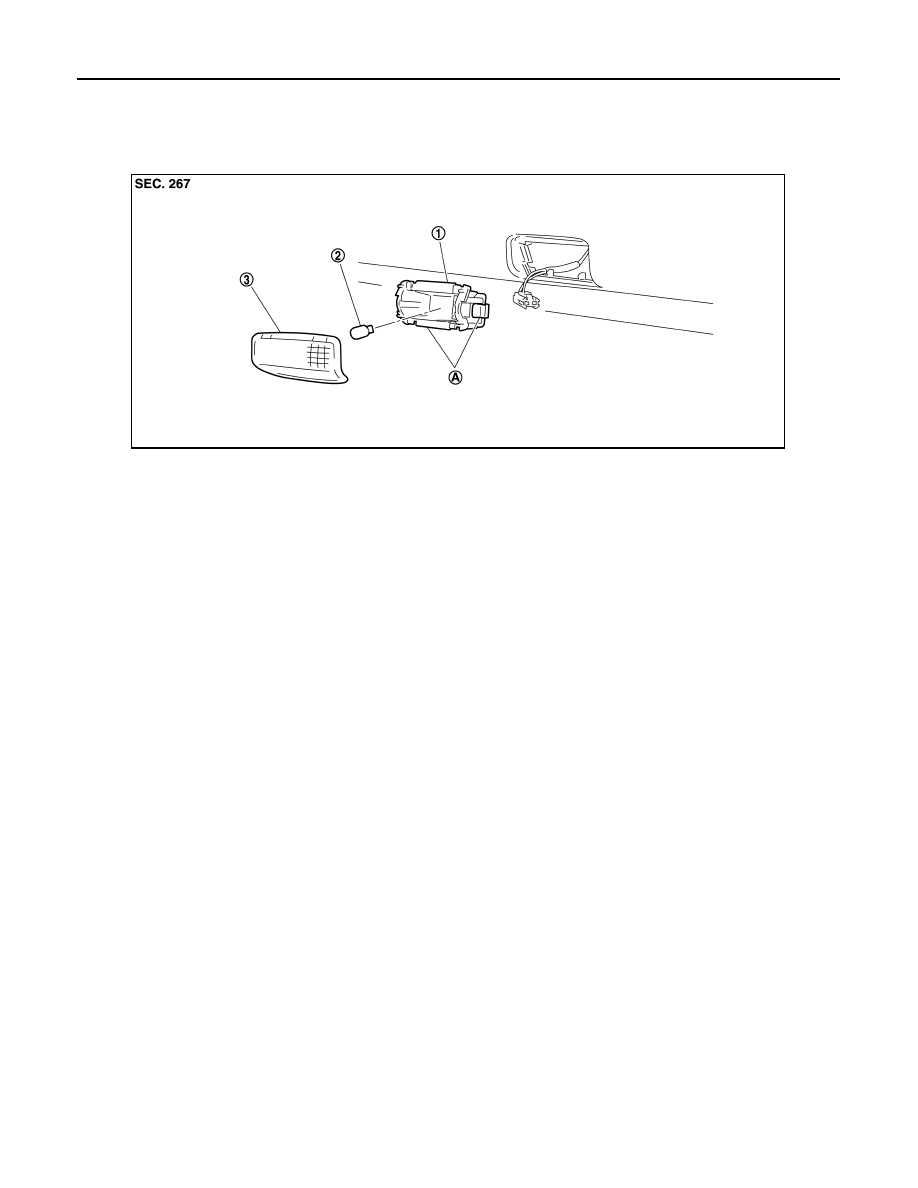
FOOT LAMP
INL-105
< ON-VEHICLE REPAIR >
C
D
E
F
G
H
I
J
K
M
A
B
INL
N
O
P
PASSENGER SIDE : Replacement
INFOID:0000000003552682
CAUTION:
• Disconnect the battery negative terminal or remove the fuse.
• Never touch the glass of bulb directly by hand. Keep grease and other oily matters away from it.
Never touch bulb by hand while it is lit or right after being turned off.
• Never leave bulb out of lamp reflector for a long time because dust, moisture smoke, etc. may affect
the performance of lamp. When replacing bulb, be sure to replace it with new one.
FOOT LAMP BULB (PASSENGER SIDE)
1.
Remove the instrument assist lower panel. Refer to
2.
Rotate the bulb socket counterclockwise and unlock it.
3.
Remove the bulb.
1.
Bulb socket
2.
Bulb
INL-106
< ON-VEHICLE REPAIR >
STEP LAMP
STEP LAMP
Exploded View
INFOID:0000000003135184
Removal and Installation
INFOID:0000000003135185
CAUTION:
Disconnect the battery negative terminal or remove the fuse.
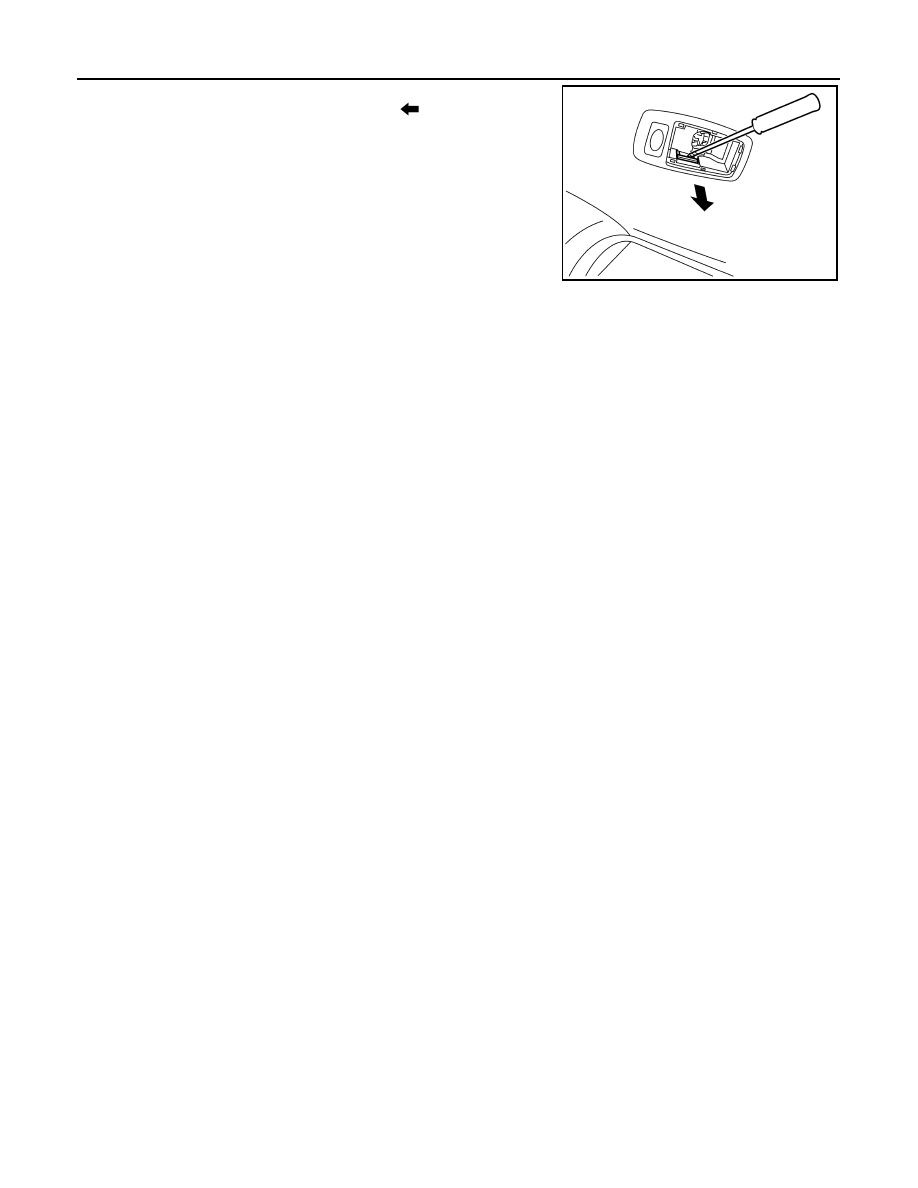
REMOVAL
1.
Insert any appropriate tool into the gap between the step lamp and the door trim. Remove the step lamp.
2.
Disconnect the step lamp connector.
INSTALLATION
Install in the reverse order of removal.
Replacement
INFOID:0000000003135186
CAUTION:
• Disconnect the battery negative terminal or remove the fuse.
• Never touch the glass of bulb directly by hand. Keep grease and other oily matters away from it.
Never touch bulb by hand while it is lit or right after being turned off.
• Never leave bulb out of lamp reflector for a long time because dust, moisture smoke, etc. may affect
the performance of lamp. When replacing bulb, be sure to replace it with new one.
STEP LAMP BULB
1.
Remove the step lamp.
2.
Remove the lens.
3.
Remove the bulb.
1.
Step lamp case
2.
Bulb
3.
Lens
A
Metal clip
JPLIA1058ZZ
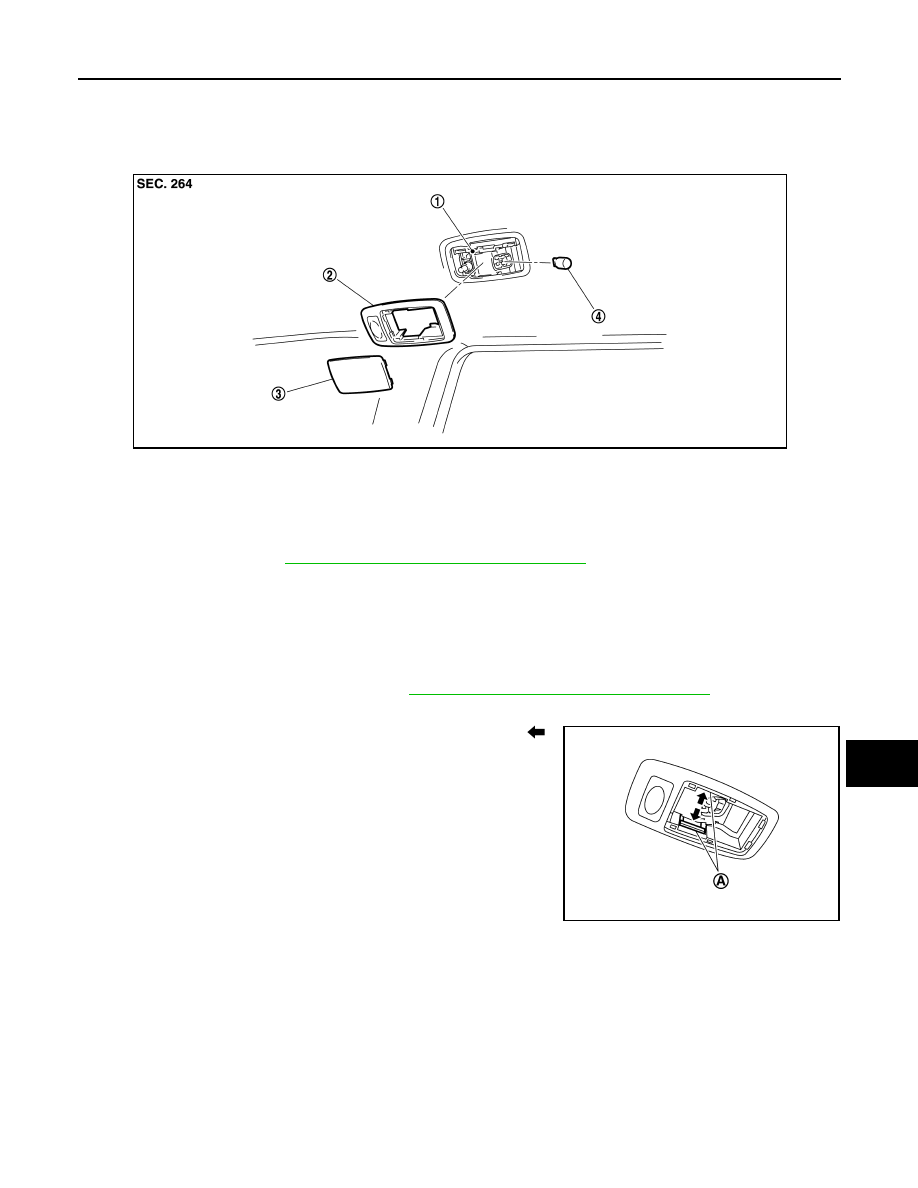
PERSONAL LAMP
INL-107
< ON-VEHICLE REPAIR >
C
D
E
F
G
H
I
J
K
M
A
B
INL
N
O
P
PERSONAL LAMP
Exploded View
INFOID:0000000003135187
NOTE:
Replace the personal lamp case as a set (right and left). After removing the headlining assembly, remove the
personal lamp case. Refer to
INT-26, "NORMAL ROOF : Exploded View"
Removal and Installation
INFOID:0000000003135188
CAUTION:
Disconnect the battery negative terminal or remove the fuse.
REMOVAL
1.
Remove the headlining assembly. Refer to
INT-26, "NORMAL ROOF : Exploded View"
2.
Insert any appropriate tool into the gap between the lens. Remove the lens.
3.
Press the both side pawls (A) to the arrow direction (
).
Remove the personal lamp finisher.
4.
Remove the personal lamp case from the headlining assembly.
NOTE:
Replace the personal lamp case as a set (right and left).
INSTALLATION
Install in the reverse order of removal.
NOTE:
The following is easier to install the personal lamp finisher.
1.
Personal lamp case
2.
Personal lamp finisher
3.
Lens
4.
Bulb
JPLIA0936ZZ
JPLIA0087ZZ
INL-108
< ON-VEHICLE REPAIR >
PERSONAL LAMP
• Press the personal lamp finisher to the headlining. Pull the per-
sonal lamp case pawl to the arrow direction (
) with any appropri-
ate tool.
Replacement
INFOID:0000000003135189
CAUTION:
• Disconnect the battery negative terminal or remove the fuse.
• Never touch the glass of bulb directly by hand. Keep grease and other oily matters away from it.
Never touch bulb by hand while it is lit or right after being turned off.
• Never leave bulb out of lamp reflector for a long time because dust, moisture smoke, etc. may affect
the performance of lamp. When replacing bulb, be sure to replace it with new one.
PERSONAL LAMP BULB
1.
Insert any appropriate tool into the gap between the lens. Remove the lens.
2.
Remove the bulb.
JPLIA0937ZZ
Нет комментариевНе стесняйтесь поделиться с нами вашим ценным мнением.
Текст