SsangYong Korando II (1996-2006 year). Manual — part 31
1B1 -- 96 M162 ENGINE MECHANICAL
DAEWOO MY_2000
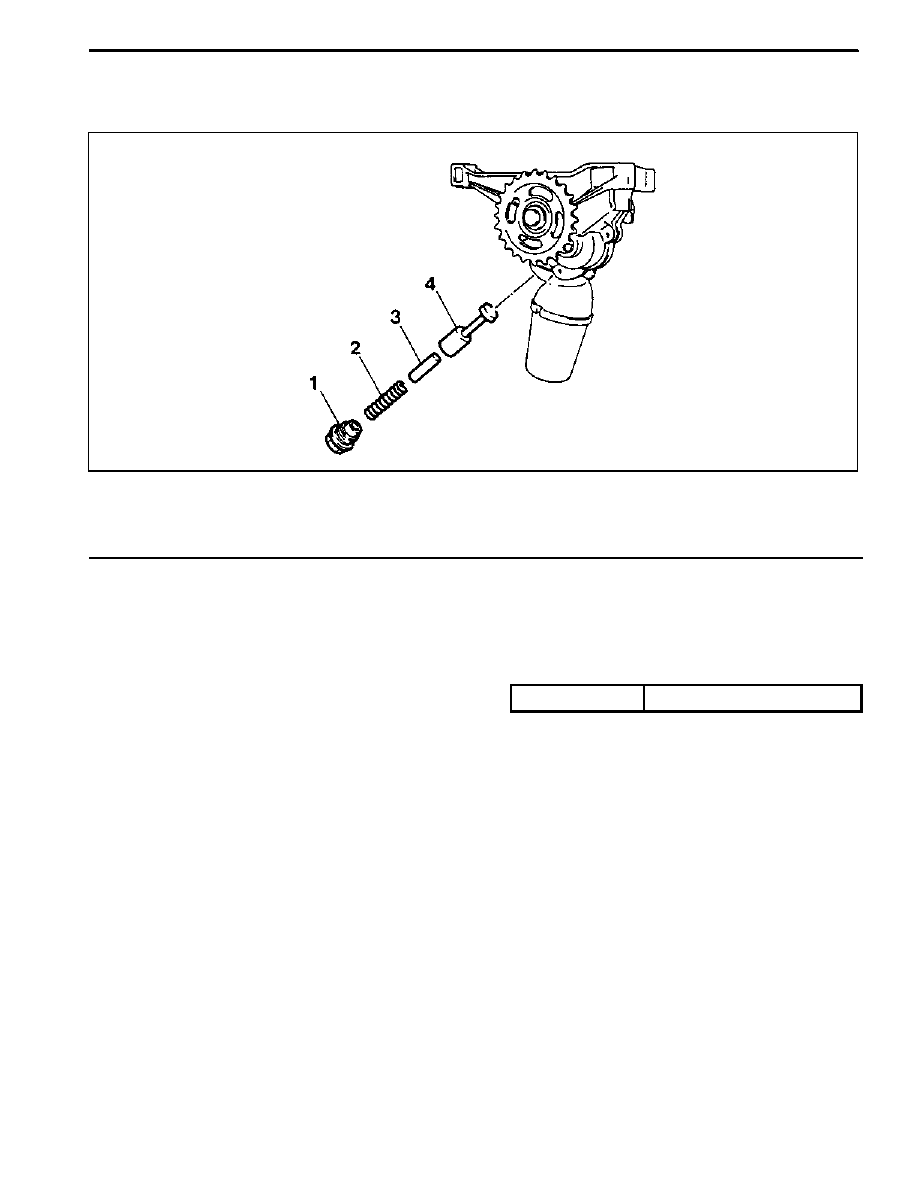
OIL PRESSURE RELIEF VALVE
Preceding Work: Removal of oil pan
1 Screw Plug
50 NSm (37 lb-ft)
. . . . . . . . . . . . . . . .
2 Compression Spring
3 Guide Pin
4 Piston
Removal & Installation Procedure
1. Remove the screw plug (1).
Installation Notice
Tightening Torque
50 NSm (37 lb-ft)
2. Remove the spring (2), guide pin (3) and the piston
(4).
3. Installation should follow the removal procedure in
the reverse order.
Notice: Don’t use the seal for the screw plug.
M162 ENGINE MECHANICAL 1B1 -- 97
DAEWOO MY_2000
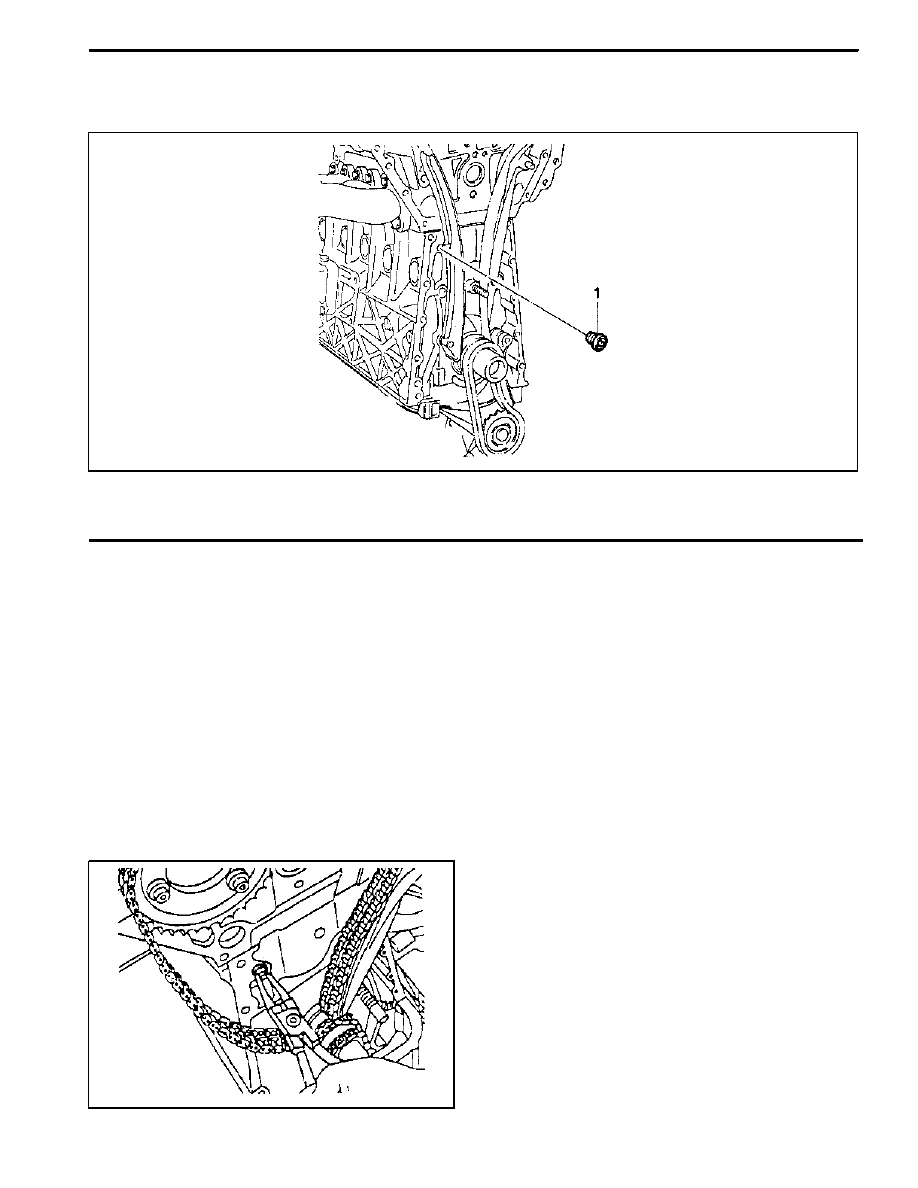
OIL NON--RETURN VALVE
Preceding Work: Removal of timing gear case cover
1 Oil Non--return Valve
Functions
The non--return valve prevents the oil in the chain ten-
sioner from drying up. In other words, it stops oil--return-
ing in order to prevent the oil in the chain tensioner from
getting dry. As a result, the chain tensioner can be acti-
vated with oil in itself.
Replacement Procedure
1. Remove the non--return valve using a pliers.
2. Insert new non--return valve with hand.
1B1 -- 98 M162 ENGINE MECHANICAL
DAEWOO MY_2000
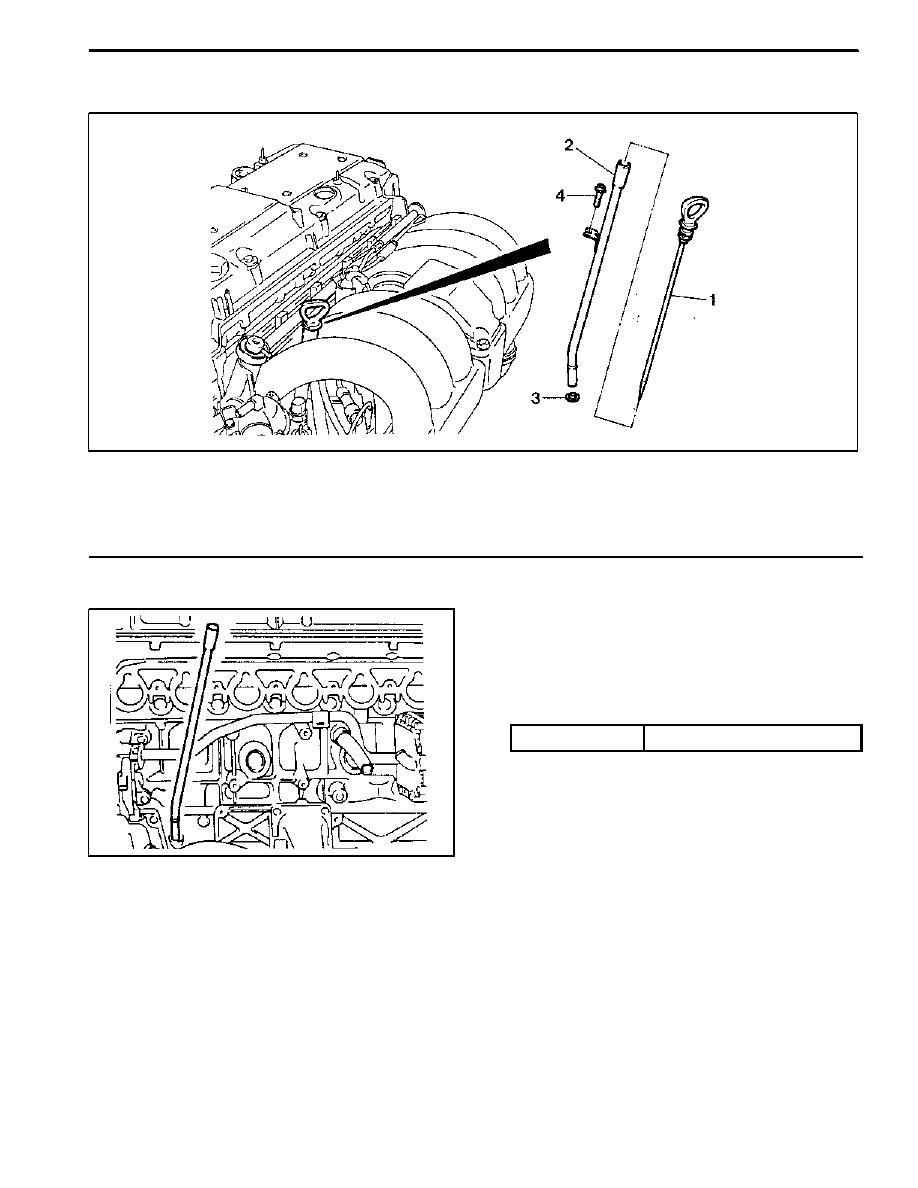
OIL DIPSTICK GUIDE TUBE
1 Oil Dipstick Level Gauge
2 Oil Dipstick Guide Tube
3 O--ring
4 Bolt (M6 x 12, 1 piece)
9--11 NSm (80--97 lb-in)
. . . . . . . . . . . . . . . . . . . . .
Removal & Installation Procedure
1. Pull out the oil dipstick level gauge (1).
2. Remove the bolt (4) in the upper intake manifold and
remove the oil dipstick guide tube.
Installation Notice
Tightening Torque
9 -- 11 NSm (80 -- 97 lb-in)
3. Install new O--ring to the dipstick guide tube.
4. Installation should follow the removal procedure in
the reverse order.
5. Check for leaks by starting the engine.
M162 ENGINE MECHANICAL 1B1 -- 99
DAEWOO MY_2000
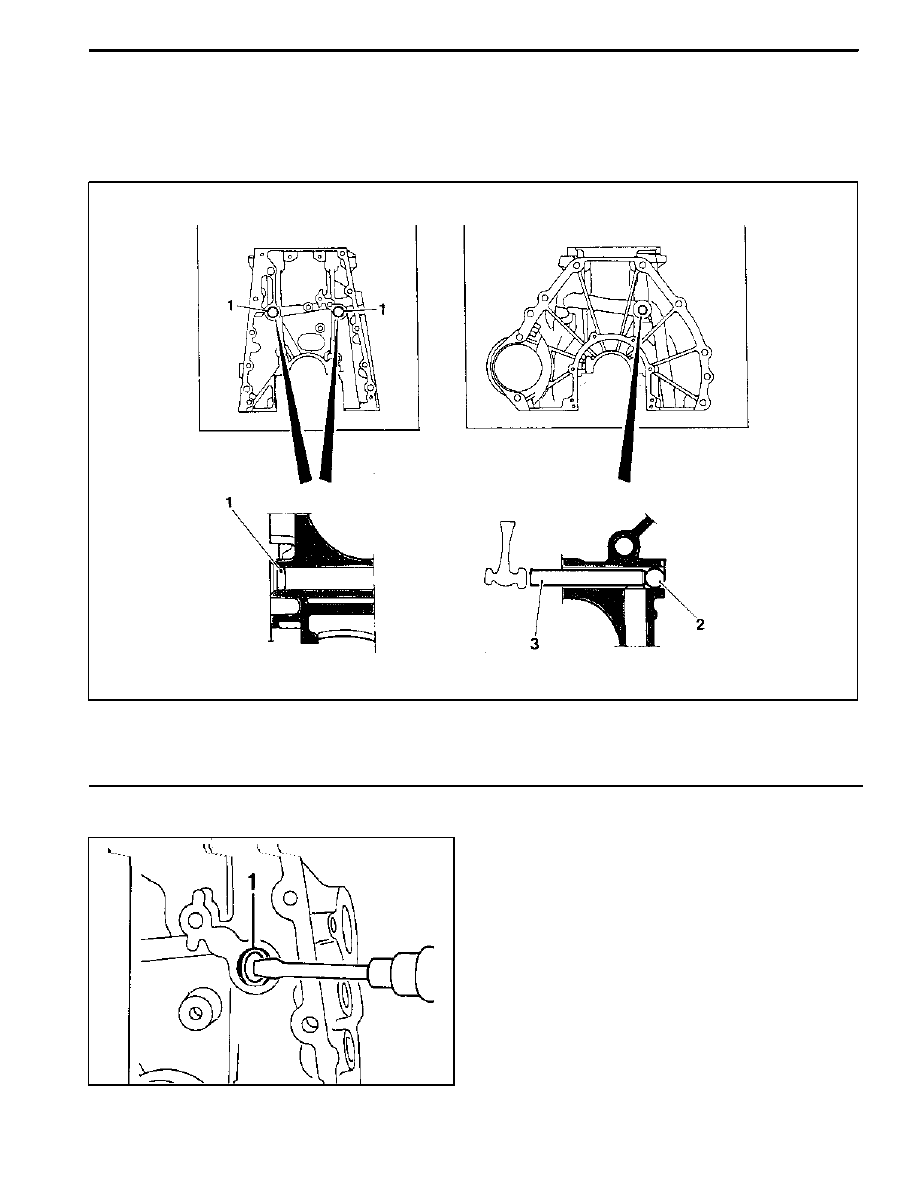
UNIT REPAIR
OIL GALLERY IN CRANKCASE
Preceding Work: Removal of crankshaft, removal of oil spray nozzle
1 Plug
2 Steel Ball
3 Round Bar
φ11 x 750 mm
. . . . . . . . . . . . . . . . . . .
Cleaning Procedure
1. Remove the plug (1) with a screwdriver.
2. Using a round bar (3) and hammer, remove the steel
ball (2).
3. Using the compressed air, blow into the oil galleries
and clean it off.
Нет комментариевНе стесняйтесь поделиться с нами вашим ценным мнением.
Текст