SsangYong Korando II (1996-2006 year). Manual — part 318

AUTOMATIC TRANSMISSION 5A-175
SSANGYONG MY2002
Rear Band Assembly
1. Check the rear band for any cracks or damage
along the lining and metal backing.
2. Install the reaction anchor strut into the main case,
without shims.
3. Carefully install the rear band into the transmission
case and ensure that it is properly fitted in the
case.
Notice: If fitting a new band, soak the new band in
automatic transmission fluid for a minimum of five
minutes prior to assembly.
4. Position the apply strut on the rear band then
engage the apply strut in the servo lever.
5. Install the cam plate and tighten the screws to
specification.
Installation Notice
Rear Servo Assembly
1. Check the servo piston ‘O’ rings and gasket for
any damage.
2. L u b r i c a t e t h e s e r v o p i s t o n ‘ O ’ r i n g s w i t h
automatic transmission fluid, and fit the ‘O’ rings
to the piston grooves.
3. Assemble the piston to the cover, ensuring that
‘ O ’ r i n g c o m p r e s s i o n i s a d e q u a t e b u t n o t
excessive.
4. Align the spring on the piston spigot, then position
the rear servo rod into the spigot.
5. Assemble the gasket to the cover and fit the
assembly to the case.
Notice: Do not use petroleum jelly on the gasket.
6. Apply additional Loctite 202 or equivalent as
required to the rear servo to case bolts. Install
the bolts and tighten to specification.
Installation Notice
KAA5A950
KAA5A960
KAA5A630
KAA5A990
Tightening Torque
30 - 35 N•m
(22 - 26 lb-ft)
Tightening Torque
16 - 22 N•m
(12 - 16 lb-ft)
5A-176 AUTOMATIC TRANSMISSION
SSANGYONG MY2002
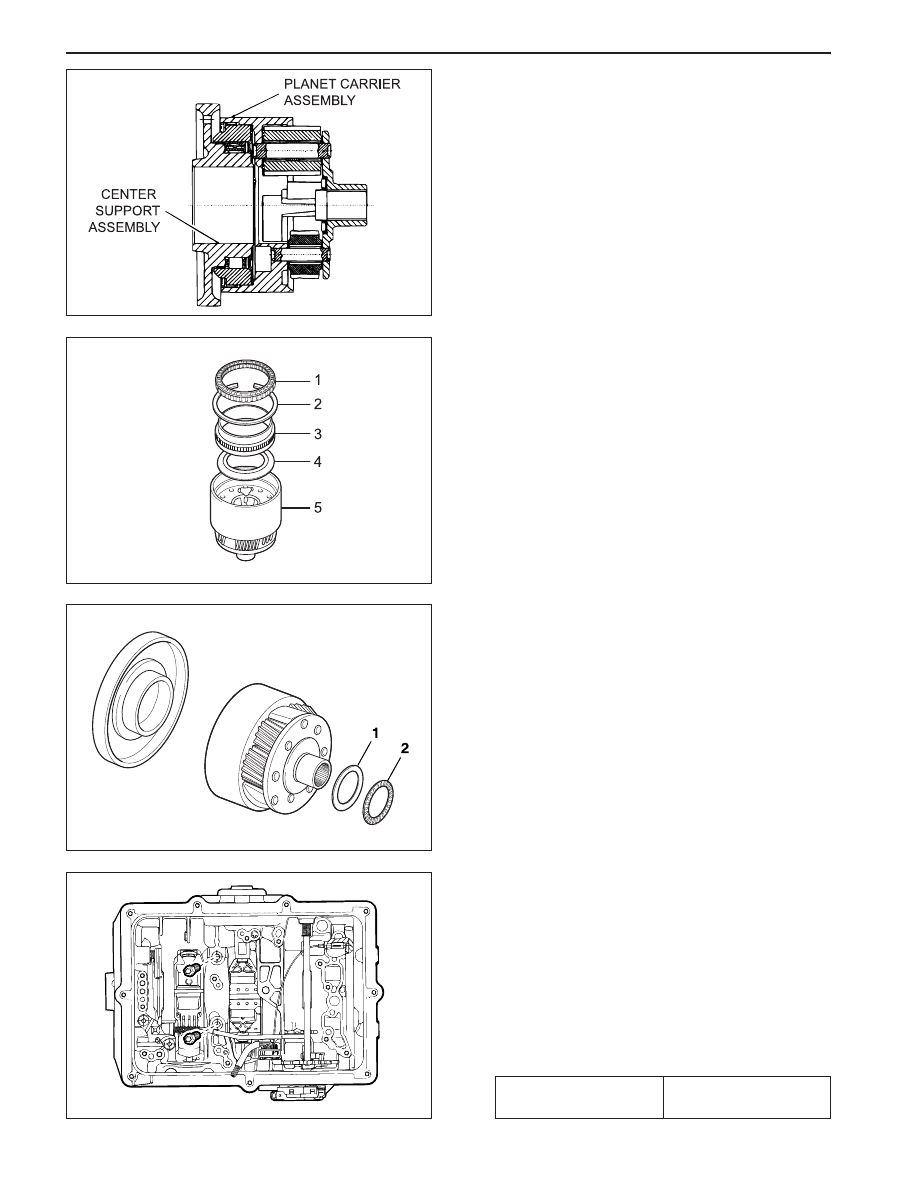
Planet Carrier Assembly and Centre Support
1. Check the carrier and planet assembly for any
damage or irregularity and ensure that all pinions
rotate freely and that the pinion end float is within
0.10 mm - 0.50 mm.
2. Install the One Way Clutch (OWC) retainer (1) to
the planet carrier with the inner edge pointing down-
wards. Inspect the OWC race and the sprag
assemblies for wear or damage. Replace if
necessary.
3. Install the outer (3) race in the drum. Press the
race to the bottom of the drum and install the
retaining circlip (2). Ensure the circlip is firmly
seated in its groove.
4. Install the OWC (1) into the outer race with the lip
edge uppermost. Lubricate the sprags with auto-
matic transmission fluid.
5. Check that the plugs are fitted to the centre
support, then assemble the centre support into
the OWC, ensuring that the support will rotate in
an anti-clock-wise direction only.
6. Lubricate the No. 9 needle bearing and washer
with petroleum jelly and fit them to the rear face
of the planet carrier.
7. I
n
s
t
a
l
l
t
h
e
KAA5A0A0
KAA5A760
KAA5A750
KAA5A560
Tightening Torque
20 - 27 N•m
(15 - 20 lb-ft)
AUTOMATIC TRANSMISSION 5A-177
SSANGYONG MY2002
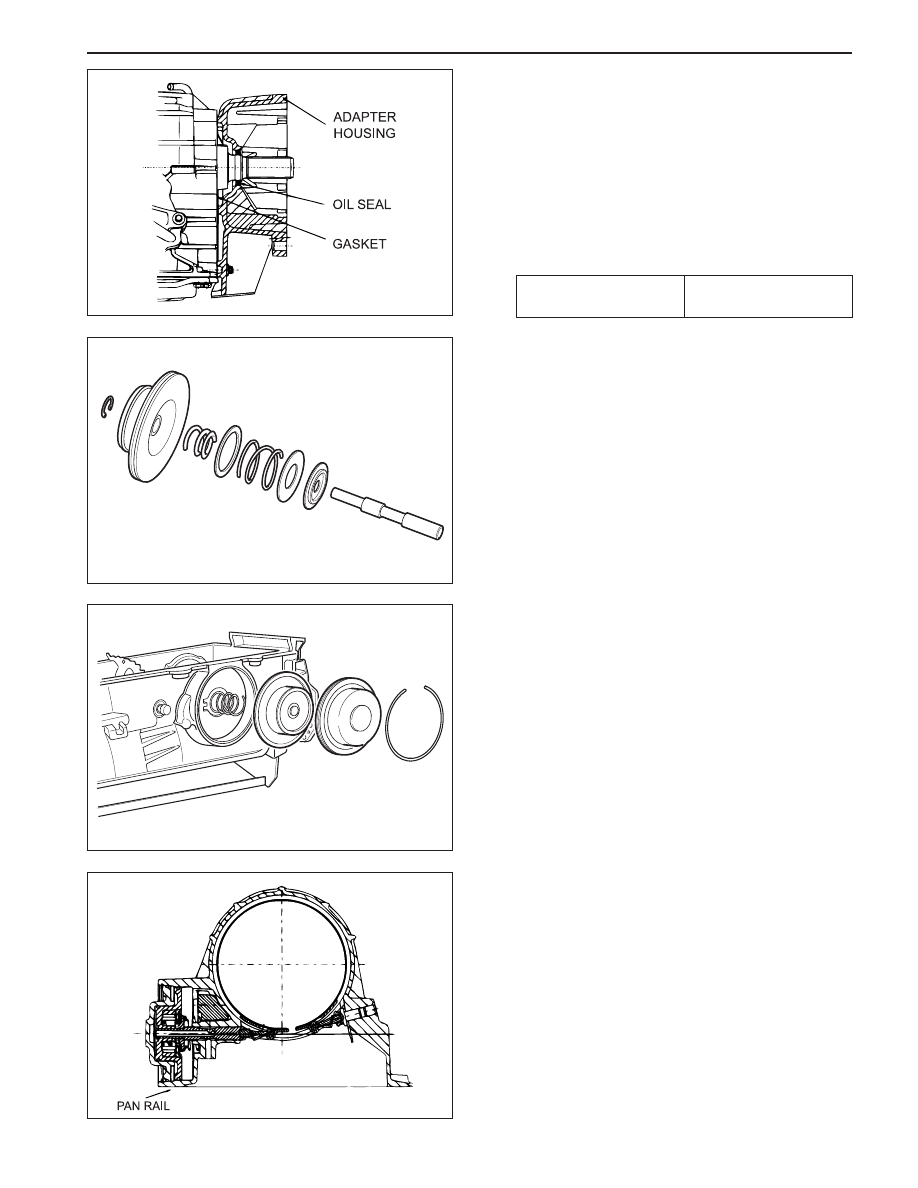
Adaptor Housing Assembly
1. Install a new seal to the adaptor housing.
2. Position a new gasket onto the adaptor housing.
Notice: Do not use petroleum jelly to hold the gasket
in position.
3. Apply additional Loctite 202 or equivalent as required
to the adapter housing bolts. Install the adaptor
housing and torque the bolts to specification.
Installation Notice
Front Servo Assembly
1. Lubricate the cover ‘O’ ring with automatic
transmission fluid and fit to the cover.
2. Lubricatethepiston‘O’ rings with automatic trans-
mission fluid and fit to the piston.
3. Assemble the piston, push rod, spring, belleville
washer, seat and retaining ring.
4. Fit the piston push rod assembly into the front
servo cover.
5. Install the front servo block and spring into the
case.
6. Install the front servo assembly into the case.
KAA5A0C0
KAA5A520
KAA5A0B0
Tightening Torque
30 - 35 N•m
(22 - 26 lb-ft)
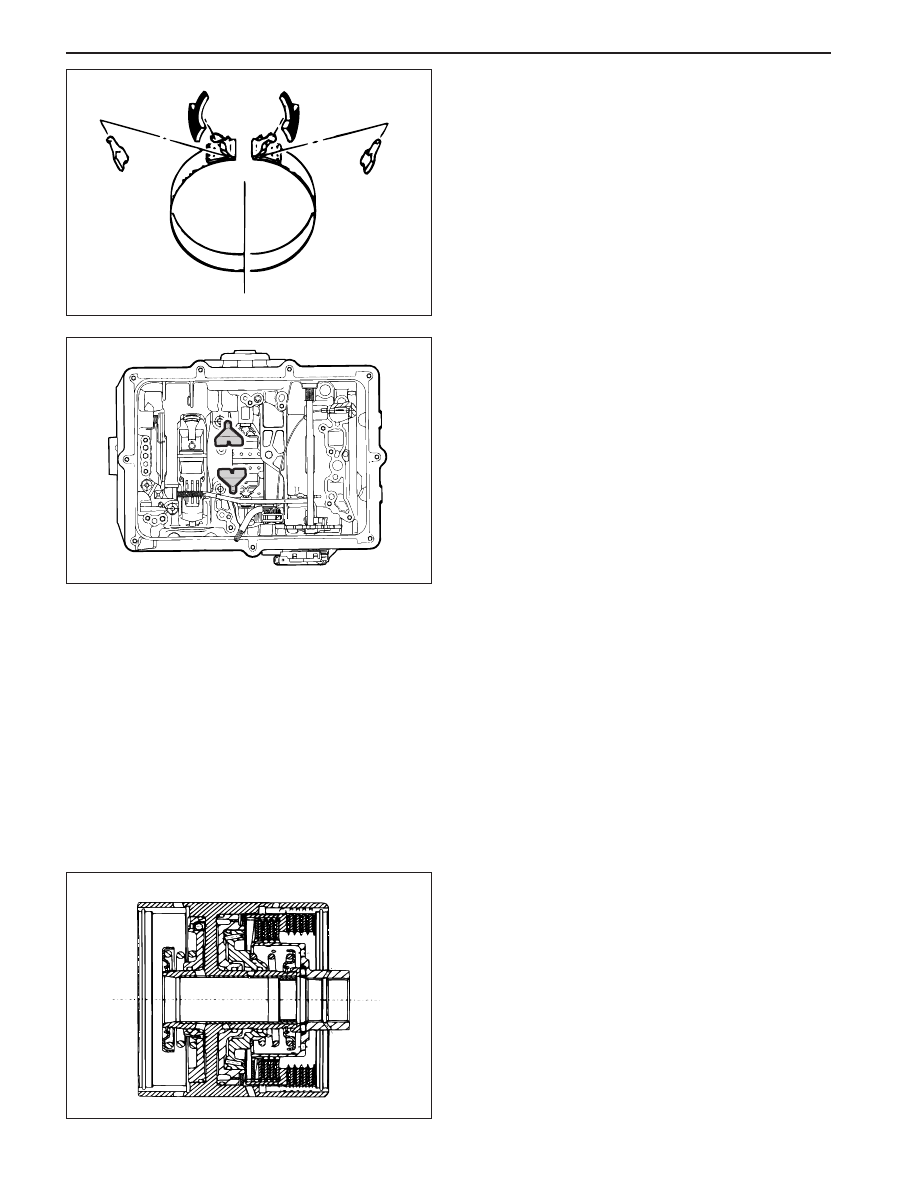
7. Compress the servo cover and fit the servo cover
retaining circlip, aligning the gap with the pan rail,
and ensuring that it is completely seated in its
groove.
Notice: Ensure that the front servo snap ring is
installed correctly. Orient the circlip with the gap at
the bottom, near the pan rail.
KAA5A0D0
5A-178 AUTOMATIC TRANSMISSION
SSANGYONG MY2002
4. Install the front band into the transmission case,
ensuring that it is properly seated in place.
Notice: If fitting a new band, soak the band in
automatic transmission fluid for a minimum of 5
minutes prior to assembly.
5. Position the reaction strut in its retaining clip and
engage it with the band and anchor strut.
6. Position the apply strut in its retaining clip and
engage it with the band and the servo piston rod.
C2/C4 Clutch Assembly
Tools Required
0555-336259 Clutch Spring Compressor
0555-336260 Clutch Pack Clearance Kit
Notice:
•
Check pistons for cracks.
•
Do not mix the clutch piston return springs.
•
Ensure that the snap rings are fitted correctly.
1. Check the feed orifices in the cylinder bore are clear
of obstructions.
2. Check the C2 piston bleed orifices are clear of
obstructions.
3. Lubricate the ‘O’ rings with Automatic Transmission
Fluid (ATF)
4. Fit the small ‘O’ ring onto the inner groove, and
the large ‘O’ ring onto the outer groove of the
piston.
Notice: ‘O’ rings must not be twisted in the grooves.
KAA5A0E0
KAA5A550
KAA5A0F0
Front Band Assembly
1. Install the reaction anchor strut to the case.
2. Check the band for all cracks or damage along its
lining and metal backing.
3. Position the strut retainers on the band.
Нет комментариевНе стесняйтесь поделиться с нами вашим ценным мнением.
Текст