SsangYong Korando II (1996-2006 year). Manual — part 316

AUTOMATIC TRANSMISSION 5A-167
SSANGYONG MY2002
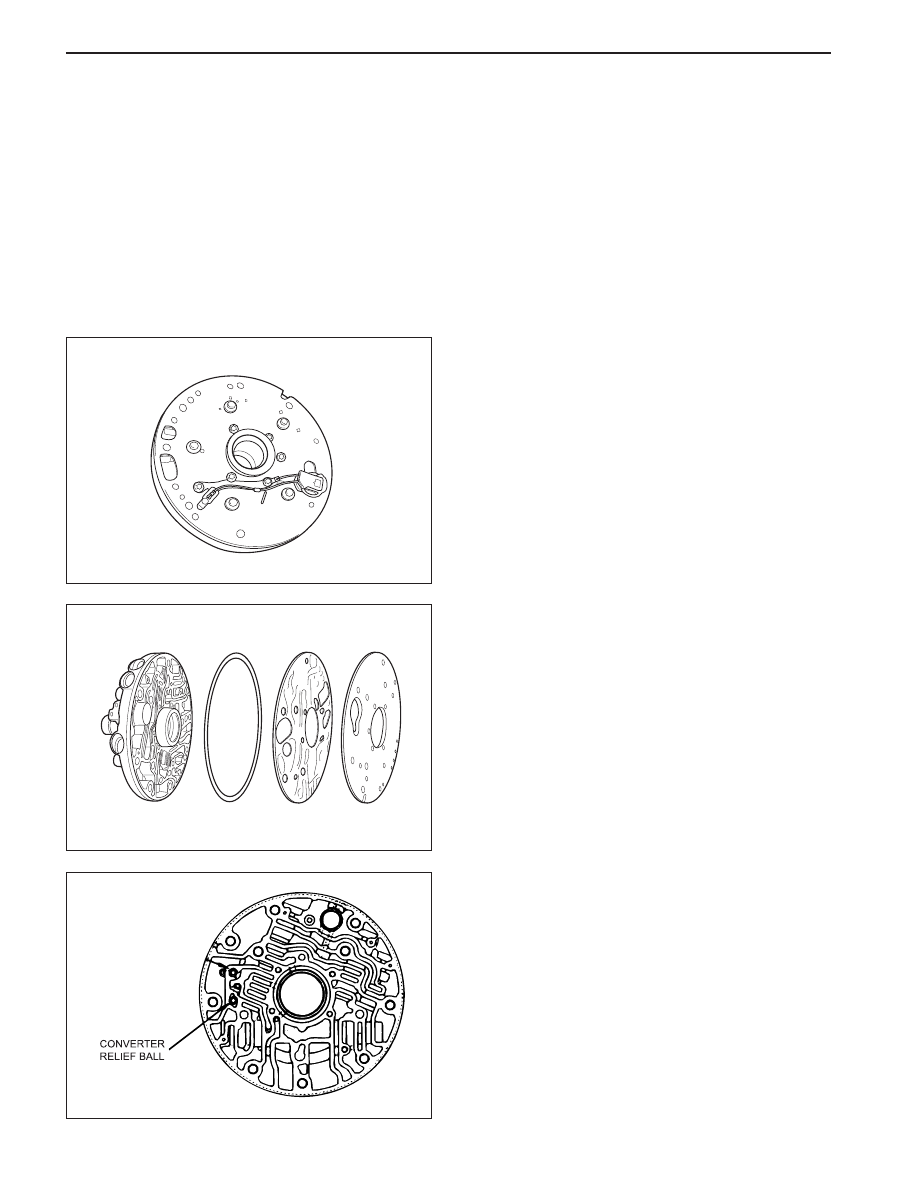
4. Mount the clutch assembly on clutch spring com-
pressor 0555-336259 and compress the piston re-
turn spring.
5. Remove the circlip and release the spring.
6. Remove the tool, circlip, keeper and spring.
Notice: Make sure that the spring keeper has not
been caught in the circlip groove, and that all spring
pressure has been released, before removing the tool.
7. Remove the sealing rings from the C3 clutch
cylinder.
8. To remove the clutch piston from the clutch cylinder,
apply air pressure to the port between the iron
sealing rings on the bearing journals of the cylinder.
9. Remove the reverse sun gear and C3 washer from
the cylinder.
Planet Carrier Assembly and Centre
Support
1. Remove the No. 9 (2) needle bearing and washer
(1) from the output shaft and the planet carrier.
2. Separate the centre support from the planet carrier
by rotating it anti-clockwise.
3. Lift the one way clutch (1) from the planet carrier
(5).
4. Remove the circlip (2) retaining the one way clutch
outer race (3) in the planet carrier and remove the
race.
5. Remove the one way clutch retainer (4) from the
planet carrier.
KAA5A750
KAA5A740
KAA5A730
KAA5A760
5A-168 AUTOMATIC TRANSMISSION
SSANGYONG MY2002
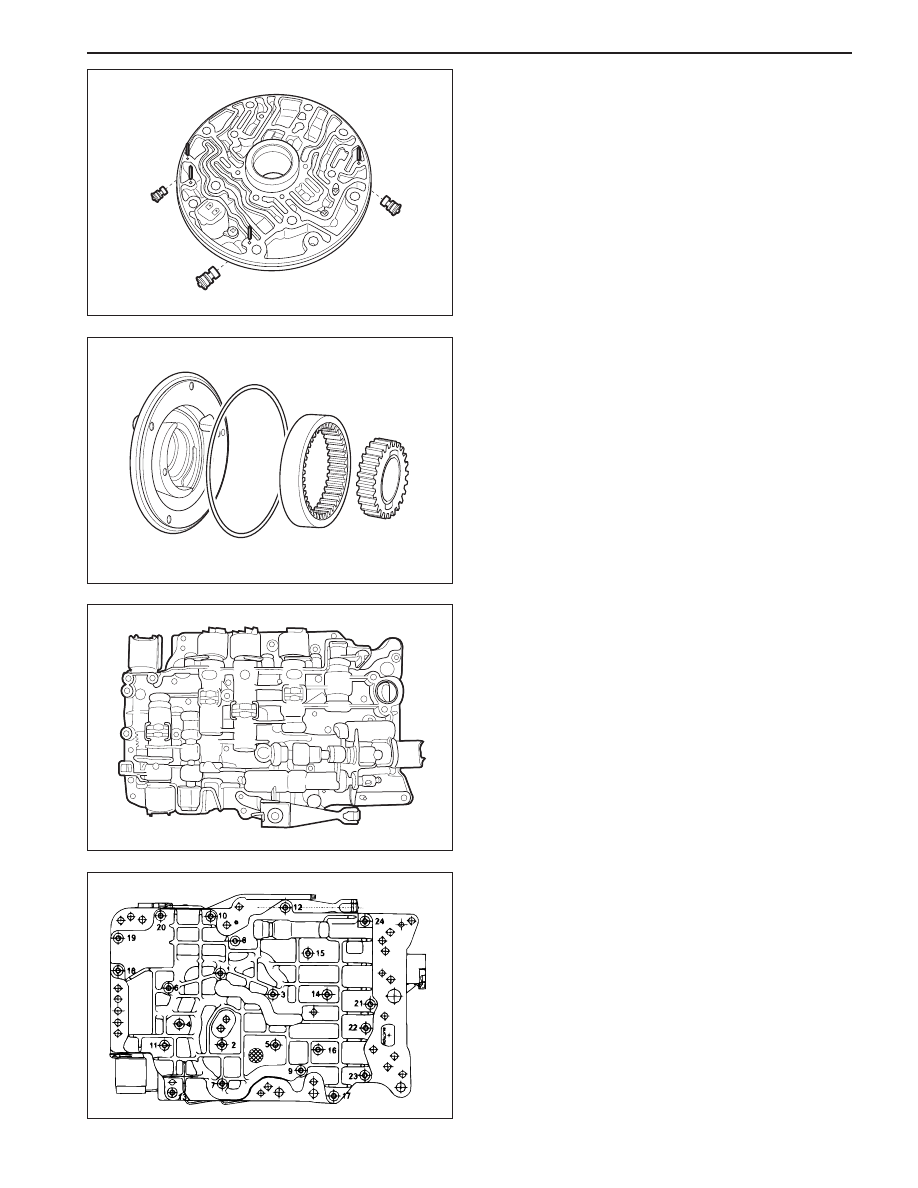
Pump
Notice: The following valves are housed in the pump
cover:
•
Solenoid 7
•
Converter clutch control valve
•
Converter clutch regulator valve
•
Primary regulator valve
1. Remove the wiring loom retainer plate and remove
solenoid 7 with a T30 Torx bit.
2. Remove the five washer head bolts from the cover
plate using a multi-point 8 mm socket.
3. Remove the five Torx head screws from the cover
plate with T30 Torx bit. Note that the long screw
holds the pump body to the pump body cover.
Notice: Do not strike the converter support tube to
loosen the pump body.
4. Separate the pump body from the pump cover.
5. Remove the cover plate, gasket and seal from the
cover.
6. Remove the ball check valve and one spring from
the pump cover.
KAA5A790
KAA5A780
KAA5A770
AUTOMATIC TRANSMISSION 5A-169
SSANGYONG MY2002
7. Depress the plug inward and remove the retaining
pin for each of the three valves.
Notice: Some of the valves and plugs are preloaded
by springs and may unexpectedly fall out of the
cover when the pins are removed.
8. Remove the four valves, plugs and springs.
9. Remove the pump gears from the pump body.
10. Remove the lip seal from the front of the pump
body.
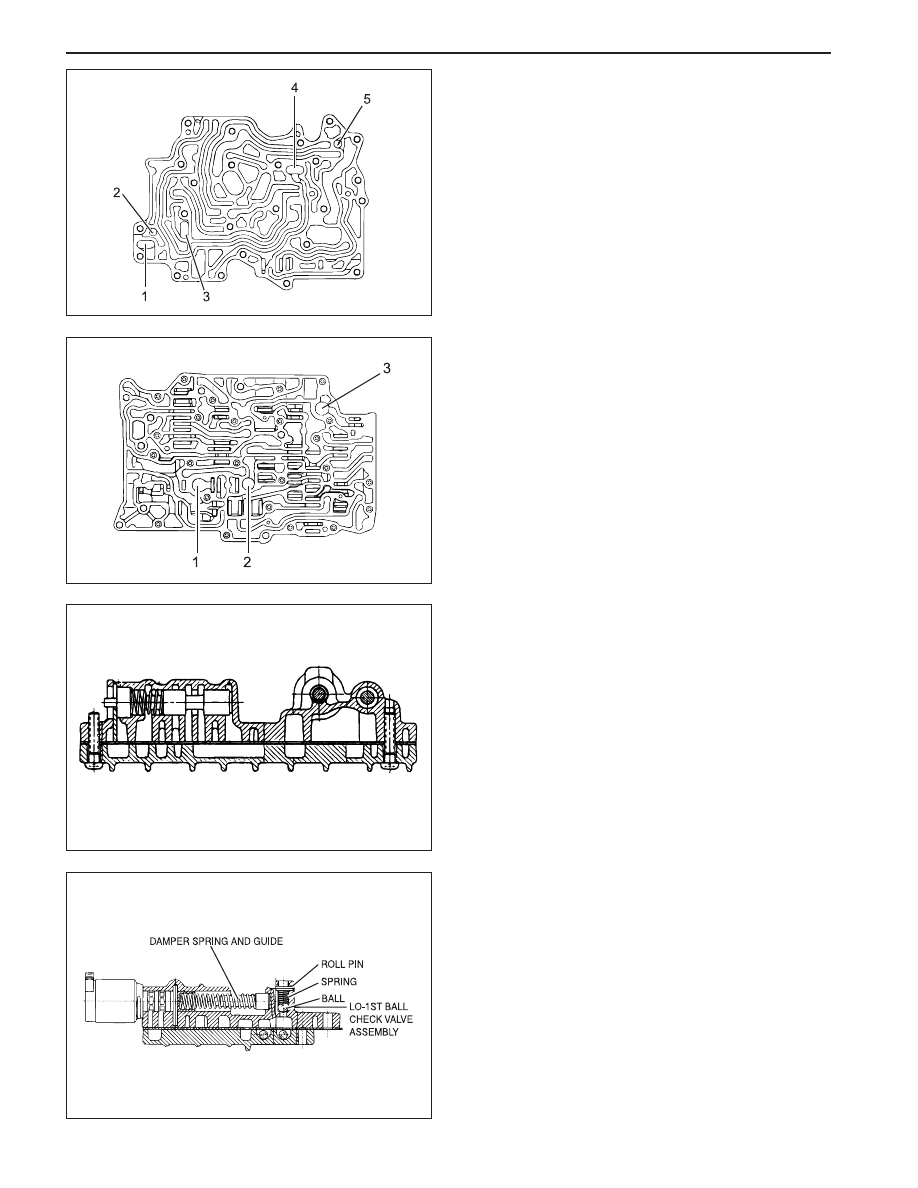
Valve Body
1. Remove the manual valve detent spring and
retain-er plate using a T40 Torx bit.
2. Slide the manual valve out of the lower valve body.
Notice: Be aware that the manual valve will fall out
of the valve body.
3. Take note of the angular relationship of the
solenoid terminals to the valve body and remove
the solenoids 1, 2, 3, 4, 5, 6 and valve assemblies.
Notice: Take care that the bracket is not separated
from the solenoid.
4. Place the valve body assembly on the bench with
the upper body uppermost.
5. Remove the 24 clamping screws with a No. 30
Torx bit. Separate the upper and lower valve
bodies by lifting the upper body and the separator
plate together.
6. Turn the upper body over and place it on the bench
with the separator plate uppermost.
KAA5A800
KAA5A810
KAA5A820
KAA5A830
5A-170 AUTOMATIC TRANSMISSION
SSANGYONG MY2002
7. Lift the separator plate and gaskets from the upper
valve body.
8. Remove the five nylon check balls exposed in the
valve body.
9. Remove the retaining plate, plug, spring and re-
verse lockout valve.
10. Remove the filter (1.3) and the large nylon check
ball (2) from the lower valve body.
11. Remove the retaining plates and pins from the 1 -
2, 2 - 3, 3 - 4, BAR and CAR valves. The pins can
be removed with a magnet.
Notice: Once the pins are removed, the plates are
loose in the valve body and will drop out when the
valve body is turned over.
12. Remove the 1 - 2, 2 - 3 and 3 - 4 shift valves.
13. Depress the 4 - 3 sequence valve plug and
remove the retaining plate.
Notice: The plug is preloaded by the spring and
may unexpectedly fall out of the valve body.
14. Remove the plug, spring and valve
15. Depress the solenoid 5 valve. Remove the
retaining in and remove the valve, damper guide
and spring.
Notice: The valve is preloaded by the spring and
may unexpectedly fall out of the valve body.
16. Depress the line pressure release valve, remove
the retaining pin, disc (if fitted), spring and valve.
17. Drive out the retaining pin and remove the spring
and ball check valve adjacent to the BAR valve.
KAA5A840
KAA5A850
KAA5A860
KAA5A870
Нет комментариевНе стесняйтесь поделиться с нами вашим ценным мнением.
Текст