SsangYong Korando II (1996-2006 year). Manual — part 220
SSAMGYONG MY2002
3A-16 FRONT AXLE
UNIT REPAIR
AXLE HOUSING
Preceding Work : Removal of the axle housing
KAA3A330
FRONT AXLE 3A-17
SSANGYONG MY2002
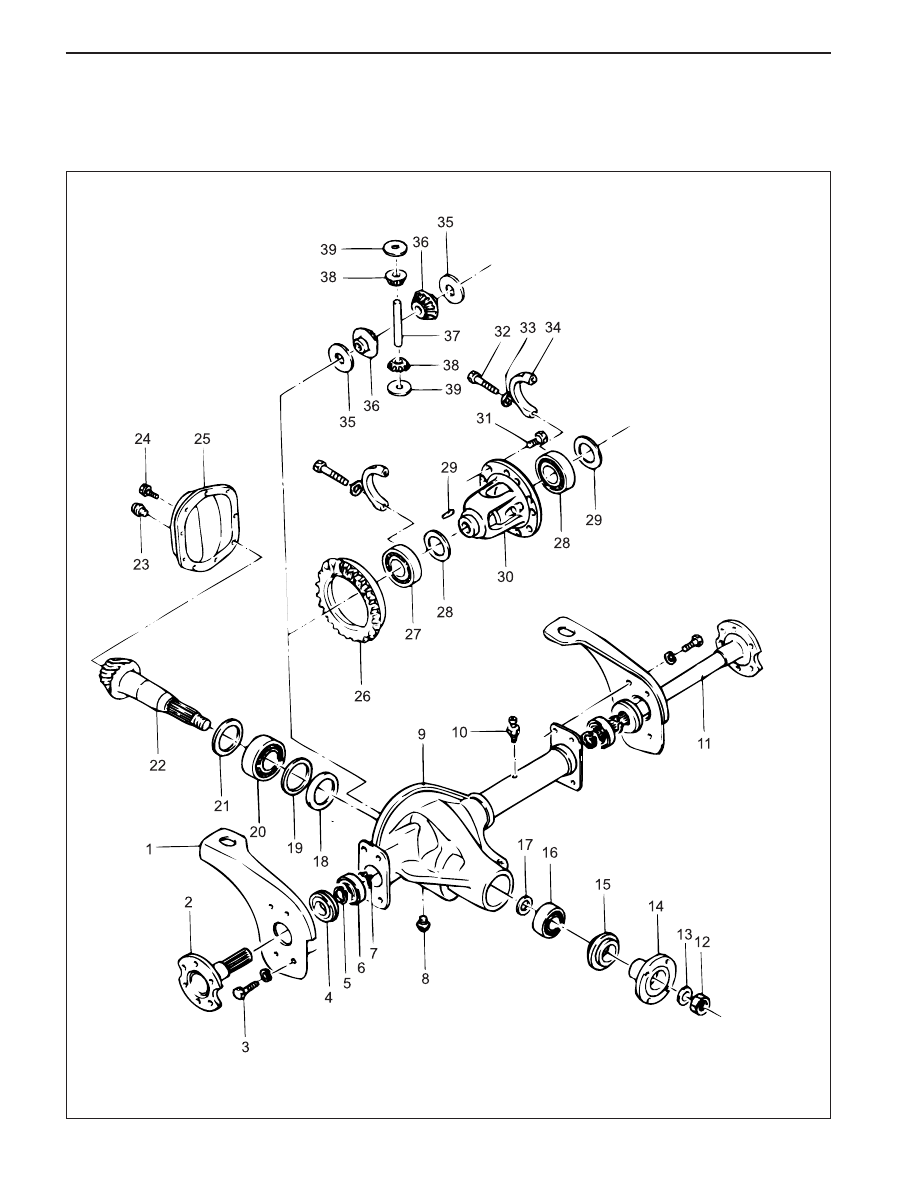
1 Front Axle Housing Mounting Bracket
2 Inner Shaft (Left)
3 Bolt . . . . . . . 55 - 65 N•m (41 - 48 lb-ft)
4 Oil Seal . . . . . . . . . . . . . . . .
. . Replace, Apply Grease to the Sealing Rib
5 Snap Ring
6 Bearing
7 Snap Ring
8 Oil Drain Plug . . . 28 - 41 N•m (21 - 30 lb-ft)
9 Front Axle Housing
10 Breather Nipple
11 Inner Shaft (Right)
12 Pinion Lock Nut .. 240 - 310 N•m (177 - 229 lb-ft)
13 Washer
14 Companion Flange
15 Oil Seal . . . . . . . . . . . . . . . .
. . Replace, Apply Grease to the Sealing Rib
16 Bearing
17 Shim
18 Bearing Baffle
19 Shim
20 Bearing
21 Oil Slinger
22 Drive Pinion
23 Oil Filler Plug . . . 28 - 41 N•m (21 - 30 lb-ft)
24 Bolt . . . . . . . 39 - 46 N•m (29 - 34 lb-ft)
25 Axle Housing Cover . . . . . . . . . . . .
. . Apply Liquid Gasket to the Contact Surface
26 Ring Gear
27 Bearing
28 Shim
29 Shaft Lock Pin
30 Differential Case
31 Bolt . . . . . . . 75 - 90 N•m (55 - 66 lb-ft)
32 Bolt . . . . . . . 48 - 69 N•m (35 - 51 lb-ft)
33 Washer
34 Bearing Cap
35 Thrust Washer
36 Side Gear
37 Differential Shaft
38 Differential Pinion
39 Thrust Washer
SSAMGYONG MY2002
3A-18 FRONT AXLE
;;;;;;;
;;;;;;;
;;;;;;;
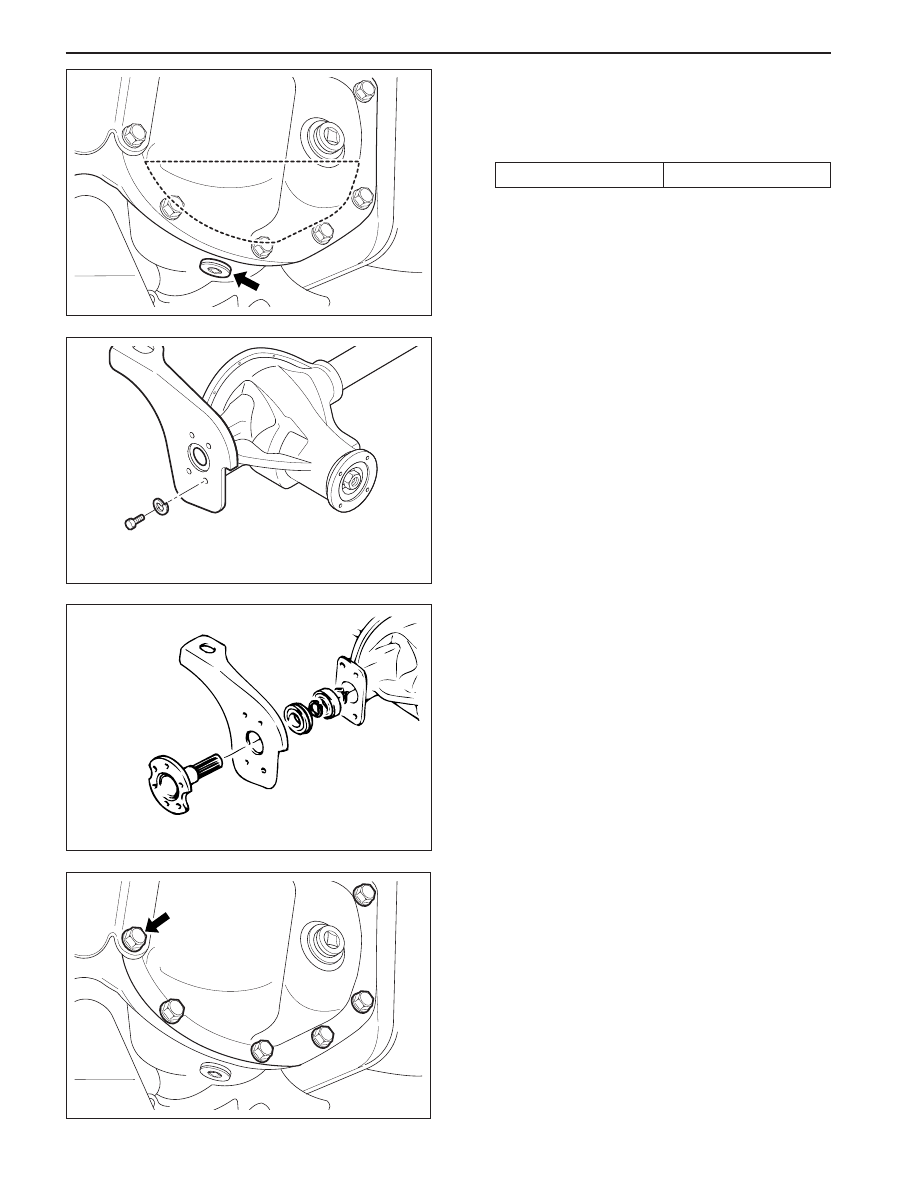
Disassembly Procedure
1. Remove the drain plug and drain the oil. Reinstall
the drain plug.
Installation Notice
2. Unscrew the axle housing and housing mounting
bracket bolts and remove the bracket and inner
shaft assembly.
3. Remove the bearing fixing snap ring of the inner
shaft and pull out the bearing. Separate the inner
shaft and the mounting bracket.
4. Remove the axle housing cover.
Notice: Clean the cover and housing contact
surfaces.
KAA3A340
KAA3A360
KAA3A350
KAA3A370
Tightening Torque
2.8 - 4.2 kgf•m
FRONT AXLE 3A-19
SSANGYONG MY2002
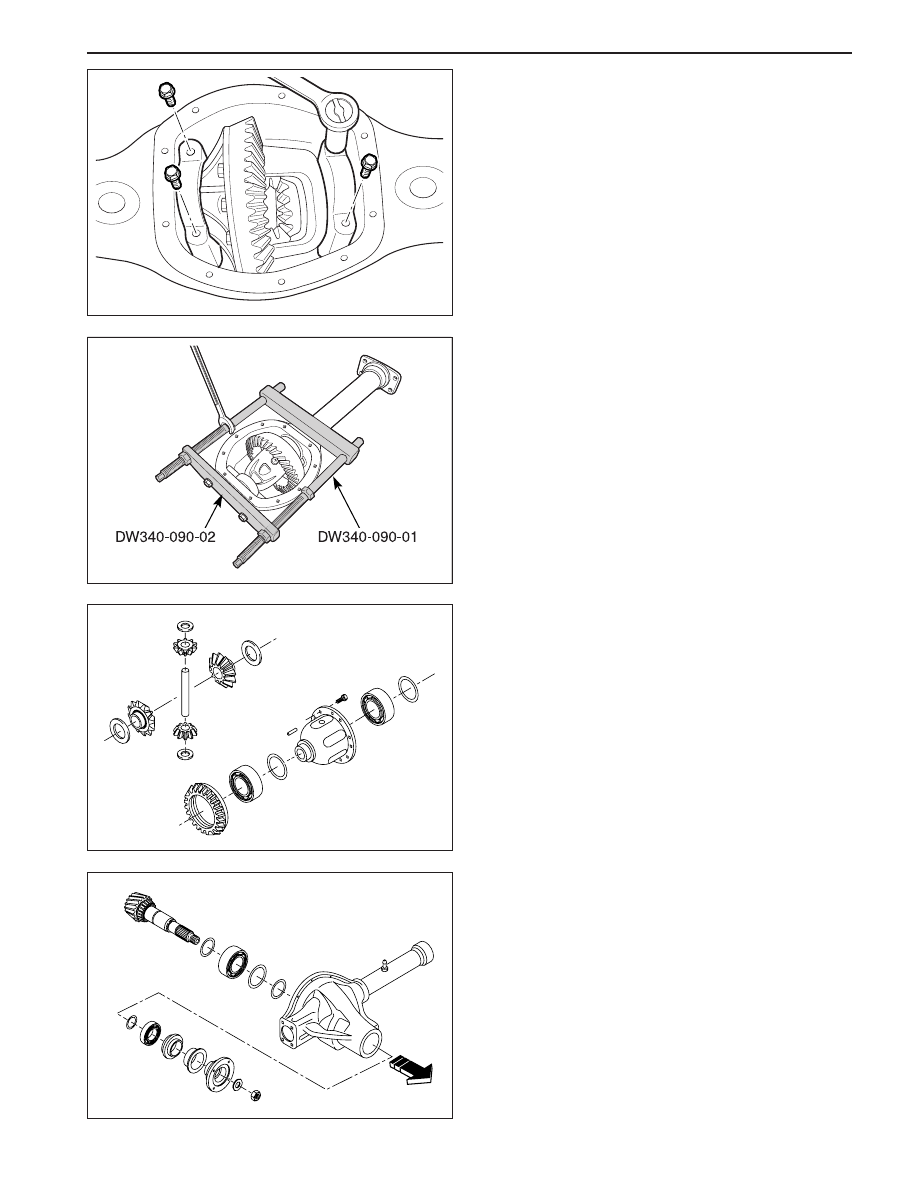
5. Unscrew the bearing cap bolts and remove the
bearing caps. Pull out the differential carrier
assembly.
Notice:
•
Place alignment marks on the bearing cap not
to change the caps before removal. When
pulling out the differential carrier assembly, be
careful not to damage the axle housing.
•
When adding fluid or making a complete fuid
change, always use front axle housing.
7. Disassemble the parts of the differential carrier
assembly.
8. Remove the drive pinion lock nut. Disassemble
the parts of the drive pinion.
KAA3A380
KAA3A410
KAA3A390
KAA3A400
6. Pull out the differential assembly using the
differential assembly remover/installer DW340-
090-01 and front differental assembly/installer
DW340-090-02.
Нет комментариевНе стесняйтесь поделиться с нами вашим ценным мнением.
Текст