SsangYong Musso. Manual — part 352
M162 ENGINE INTAKE & EXHAUST 1G1-7
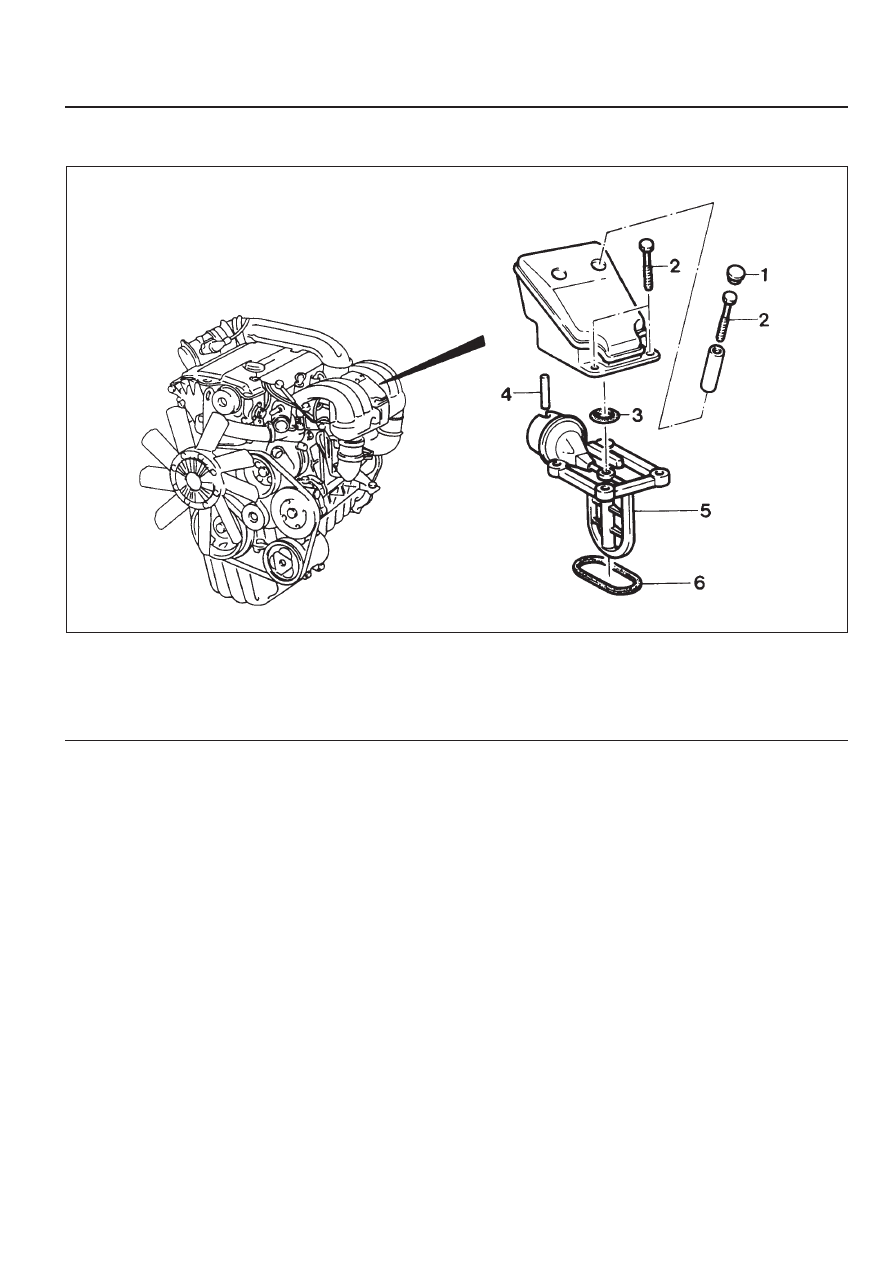
RESONANCE FLAP
1 Soft Cap (2)
2 Bolt (M6 x 25, 4 pieces) . . . . . . . 9-11 Nm
3 O-ring
Removal & Installation Procedure
1. Remove the 2 soft caps (1).
2. Remove the upper resonance flap coupling after removing
4 bolts (2).
Notice
Connect carefully the vacuum hose (4) for installation.
3. Check the O-ring (3) and replace it if necessary.
4. Remove the lower resonance flap (5).
5. Replace the gasket (6).
6. Installation should follow the removal procedure in the
reverse order.
4 Vacuum Hose
5 Resonance Flap
6 Gasket . . . . . . . . . . . . ... Replace
1G1-8 M162 ENGINE INTAKE & EXHAUST
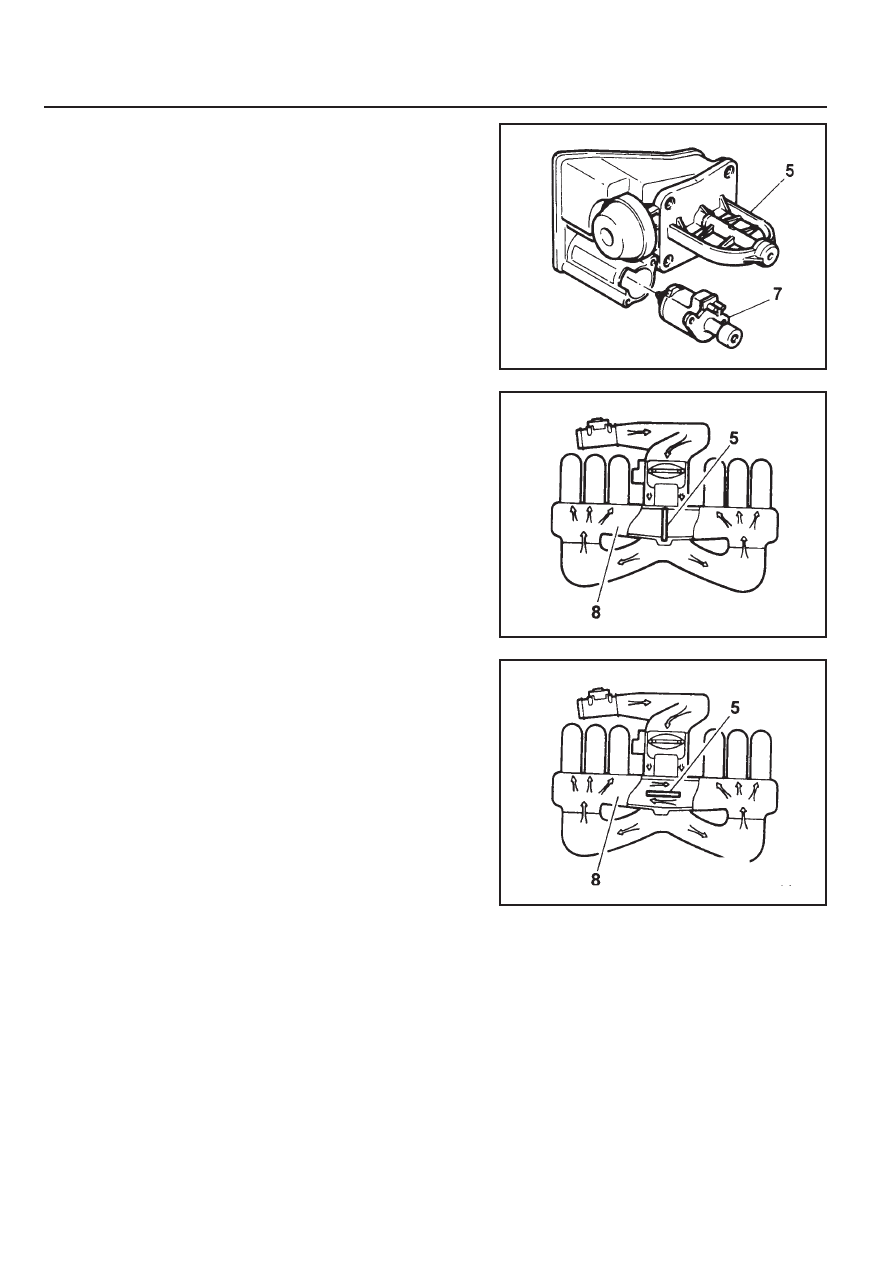
Function Description
A pneumatically actuated resonance flap (5) is located on the
intake manifold, and will be opened and closed by load, which
operates resonance flap according to engine and controlled
by ECU and rpm.
1. Resonance flap closed (at idle/partial load : less than
3,800/rpm)
The switch valve (7) will be adjusted by ECU and resonance
falp will be colosed. By increasing air flow passage through
dividing intaking air flow toward both air collection housing
(8). This leads to a signficant increase in the torque in the
lower speed range.
2. Resonance flap open (at full load : over 3,800/rpm)
The switch valve (7) will not be adjusted by ECU and
resonance falp (5) will be open. The colllected air in the air
collection housing (8) will not be divided and intaking air
passage will be shorten.
M162 ENGINE INTAKE & EXHAUST 1G1-9
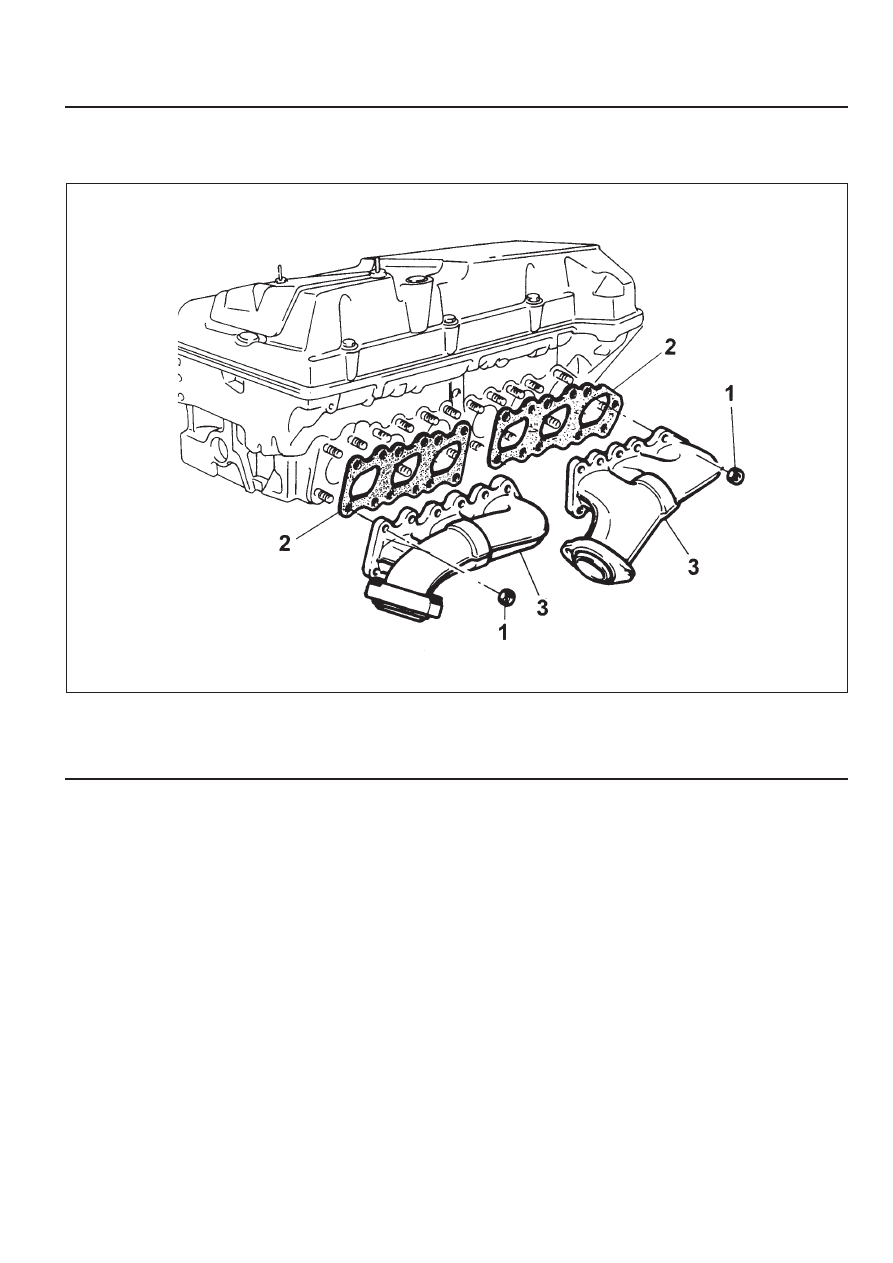
EXHAUST MANIFOLD
Preceding Work : Removal of air cleaner
1 Nut . . . . . . . . . . . . . ... 36-44 Nm
2 Gasket . . . . . . . . . . . . ... Replace
3 Exhaust Manifold
1G1-10 M162 ENGINE INTAKE & EXHAUST
Tools Required
103 589 01 39 00 Caulking Bolt
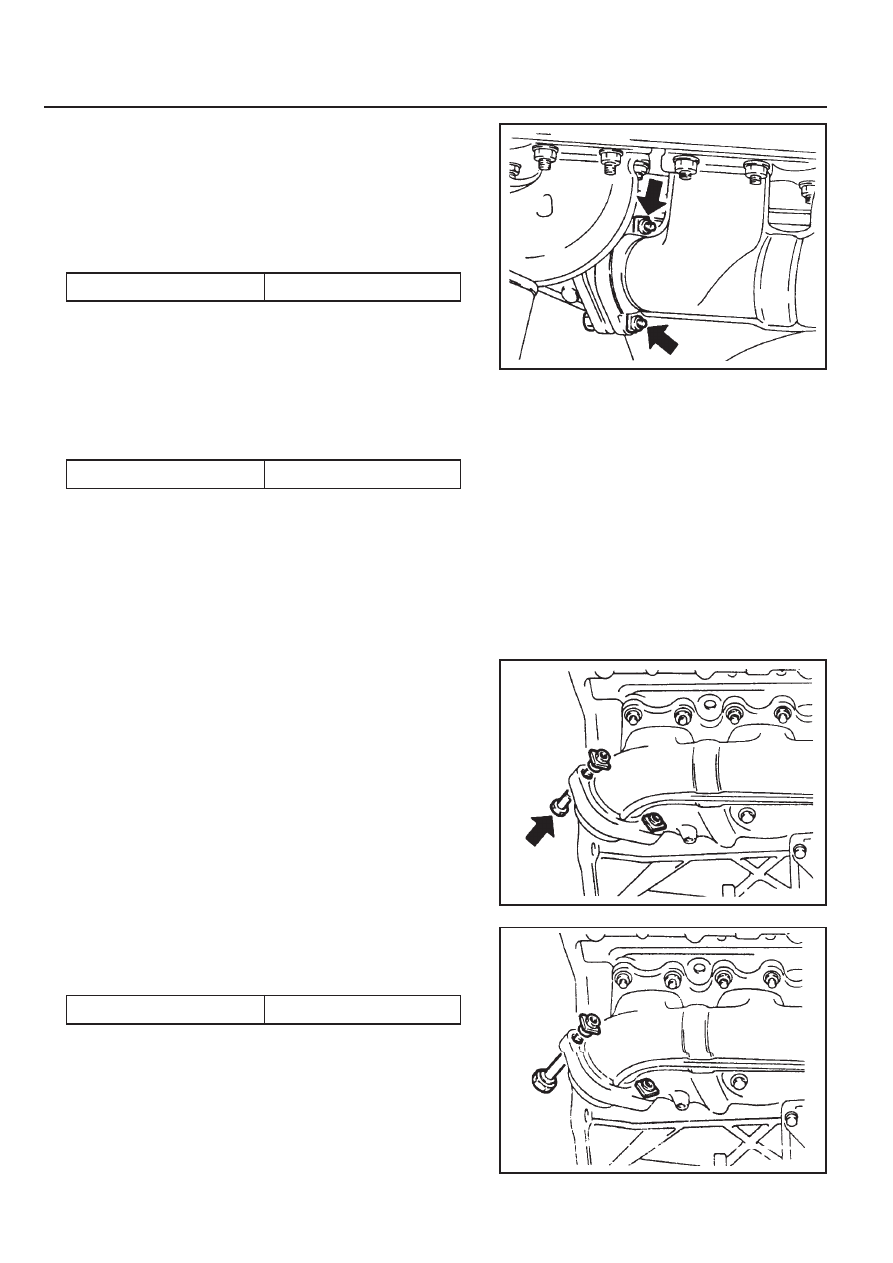
Removal & Installation Procedure
1. Remove the flange bolt from the exhaust manifold, and
disconnect the front exhaust pipe.
Installation Notice
Notice
Check for nut damages and replace the nut if necessary.
2. Remove the 23 nuts (1) from the stud bolt, and remove the
exhaust manifold.
Installation Notice
3. Replace the gasket (2).
4. Installation is reverse order of the removal.
Replacement of Rivet Nut
1. Pull out the rivet nut from the connecting point of the exhaust
manifold and the exhaust pipe using a proper bolt (arrow).
2. Insert a new rivet nut into the exhaust manifold hole, and
tighten with a special tool (Caulking Bolt).
Installation Notice
Caulking Bolt 103 589 01 39 00
Tightening Torque
30 Nm
Tightening Torque
26 - 34 Nm
Tightening Torque
30 Nm
Нет комментариевНе стесняйтесь поделиться с нами вашим ценным мнением.
Текст