Isuzu D-Max / Isuzu Rodeo (TFR/TFS). Manual — part 320
AUTOMATIC TRANSMISSION (AW30-40LE) 7A-129
REAR OIL SEAL (ADAPTER HOUSING, 4
×
×
×
×4)
REMOVAL
1. Remove the front and rear propeller shaft assembly
form the transfer case.
2. Remove the transfer case assembly from the
transmission case.
Refer to Section 4 “DRIVELINE/AXLE”.
3. Using a screwdriver, remove the rear oil seal.
240RY00003
INSTALLATION
1. Apply ATF to a new rear oil seal lip.
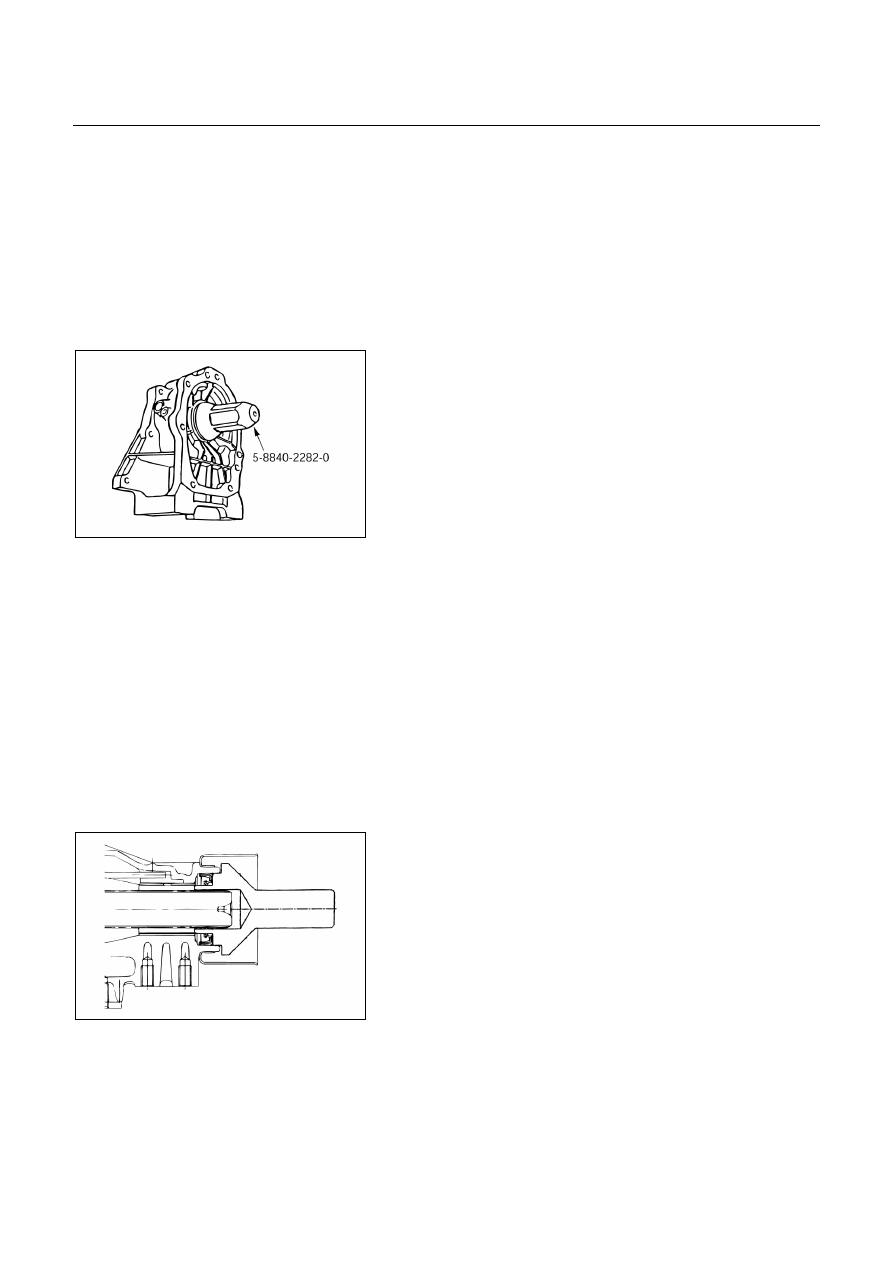
2. Using oil seal installer, install the rear oil seal to the
adapter housing.
Oil seal installer : 5-8840-2282-0
3. Install the transfer case assembly.
4. Install the front and rear propeller shaft assembly.
Torque:
Flange bolt : 63 N・・・・m (6.4 kg・・・・m/46 Ib・・・・ft)
Center bearing retainer bolt
: 69 N・・・・m (7.0 kg・・・・m/51 Ib・・・・ft)
REAR OIL SEAL (EXTENSION HOUSING,
4×
×
×
×2)
REMOVAL
1. Remove the rear propeller shaft assembly.
2. Using a screwdriver, remove the rear oil seal.
249L100005
INSTALLATION
1. Apply ATF to a new rear oil seal lip.
2. Using oil seal installer, install the rear oil seal to the
extension housing.
Oil seal installer : 5-8840-2702-0
3. Install the rear propeller shaft.
Torque:
Flange bolt : 63 N・・・・m (6.4 kg・・・・m/46 Ib・・・・in)
Center bearing retainer bolt
: 69 N・・・・m (7.0 kg・・・・m/51 Ib・・・・ft)
7A-130 AUTOMATIC TRANSMISSION (AW30-40LE)
TRANSMISSION REMOVAL AND INSTALLATION (UBS)
240R200031
AUTOMATIC TRANSMISSION (AW30-40LE) 7A-131
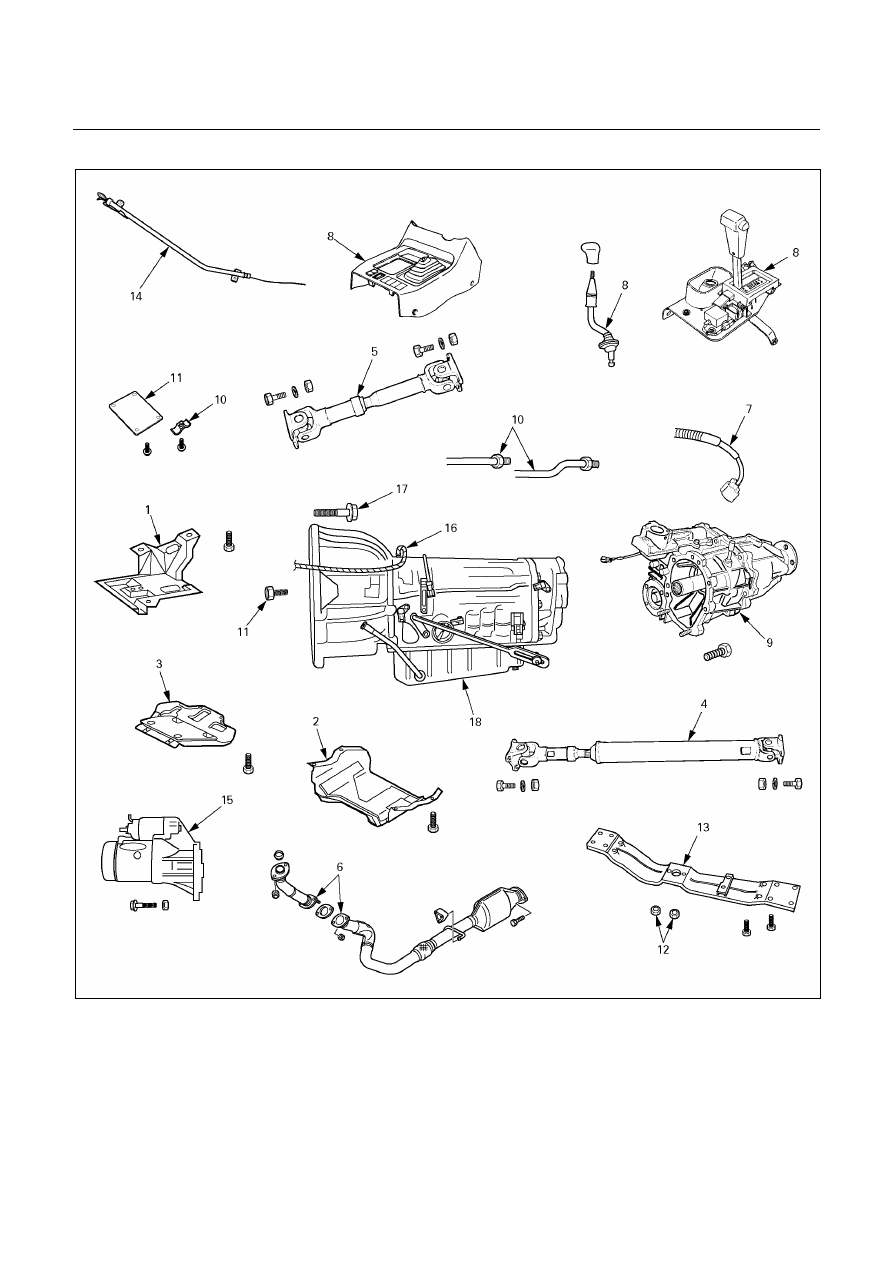
Removal Steps
11. Under cover and flex plate-torque
converter bolt
12. Rear mounting nut
13. 3rd crossmember
14. Oil level gauge and tube
15. Starter
16. Breather hose
17. Engine-transmission bolt
18. Transmission assembly
Installation Steps
1. Transfer
protector
2. Rear
sound
cover
3. Front sound cover
4. Rear propeller shaft
5. Front
propeller
shaft
6. Exhaust
pipe
7. Harness
connector
8. Front console, selector lever assembly,
and transfer control lever
9. Transfer case assembly
10. ATF cooler pipe and clamp
To install, follow the removal steps in reverse
order.
REMOVAL
Preparation:
・ Remove engine hood.
・ Disconnect negative (-) battery cable.
1. Transfer
protector
2. Rear
sound
cover
3. Front
sound
cover
4. Rear
propeller
shaft
5. Front propeller shaft
NOTE:
Apply alignment marks on the flange at both front
and rear sides.
6. Exhaust
pipe
・ Remove the 2nd front exhaust pipe from the 1st front
exhaust pipe and exhaust silencer.
7. Harness
connector
・ Disconnect the engine harness connectors from the
transmission side.
8. Front console, selector lever assembly, and
transfer control lever
・ Disconnect the transfer control lever knob.
・ Remove the front console.
・ Disconnect the harness connector.
・ Remove the transfer control lever.
・ Remove the selector lever assembly.
・ Disconnect the shift control rod from the selector
lever assembly.
7A-132 AUTOMATIC TRANSMISSION (AW30-40LE)
9. Transfer
case
assembly
・ Disconnect the breather hose from the transfer case.
・ Remove the transfer case assembly from the
transmission.
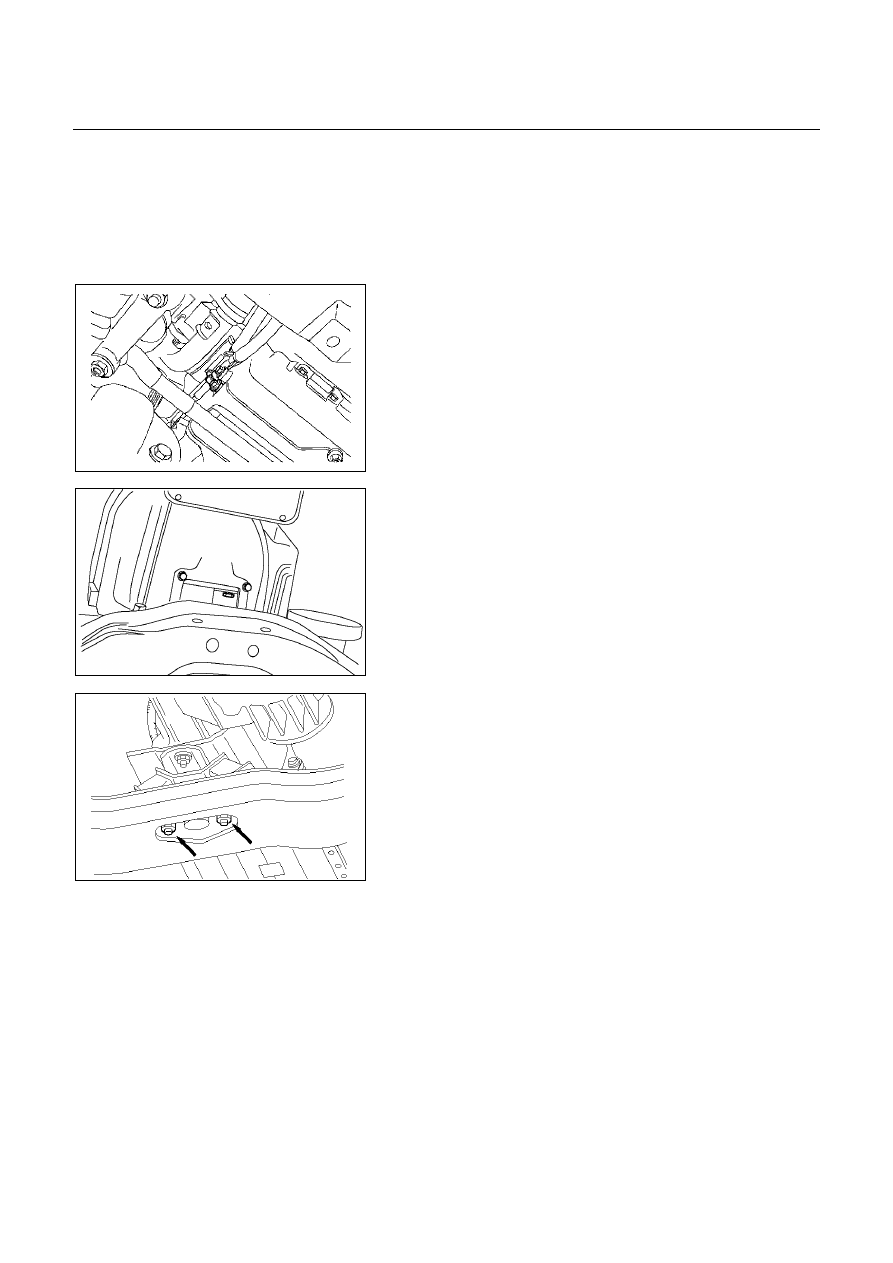
10. ATF cooler pipe and clamp
・
Disconnect two ATF cooler pipes from A/T side.
253RY00001
・ Remove oil pipe clamp from torque converter housing
side.
・ Loosen oil pipe clamp bolt at engine mount side.
240RY00026
11. Under cover and flex plate-torque converter bolt
・ Remove the under cover.
・ Turn the crankshaft to gain access to each bolt.
Remove the six torque coverter fixing bolts.
NOTE:
New fixing bolts should be replaced for
reassembly.
022RY00001
12. Rear mounting nut
・ Support transmission with a jack.
・ Remove two rear mounting nuts from the 3rd
crossmember.
13. 3rd crossmember
14. Oil level gauge and tube
15. Starter
・ Remove the mounting bolts, and pull the starter
toward the front of the vehicle.
Lay the starter alongside the engine.
16. Breather hose
17. Engine-transmission bolt
・ Remove engine-transmission fixing bolts.
・ Disconnect the breather hose from the breather hose
2 way.
Нет комментариевНе стесняйтесь поделиться с нами вашим ценным мнением.
Текст