Isuzu KB P190. Manual — part 516
6A-50 ENGINE MECHANICAL (C24SE)
Clean
Sealing surfaces.
013RW004
Installation
1. Apply a bead of Sealing Compound, TB120TC or
eguivalent to joint of oil pump.
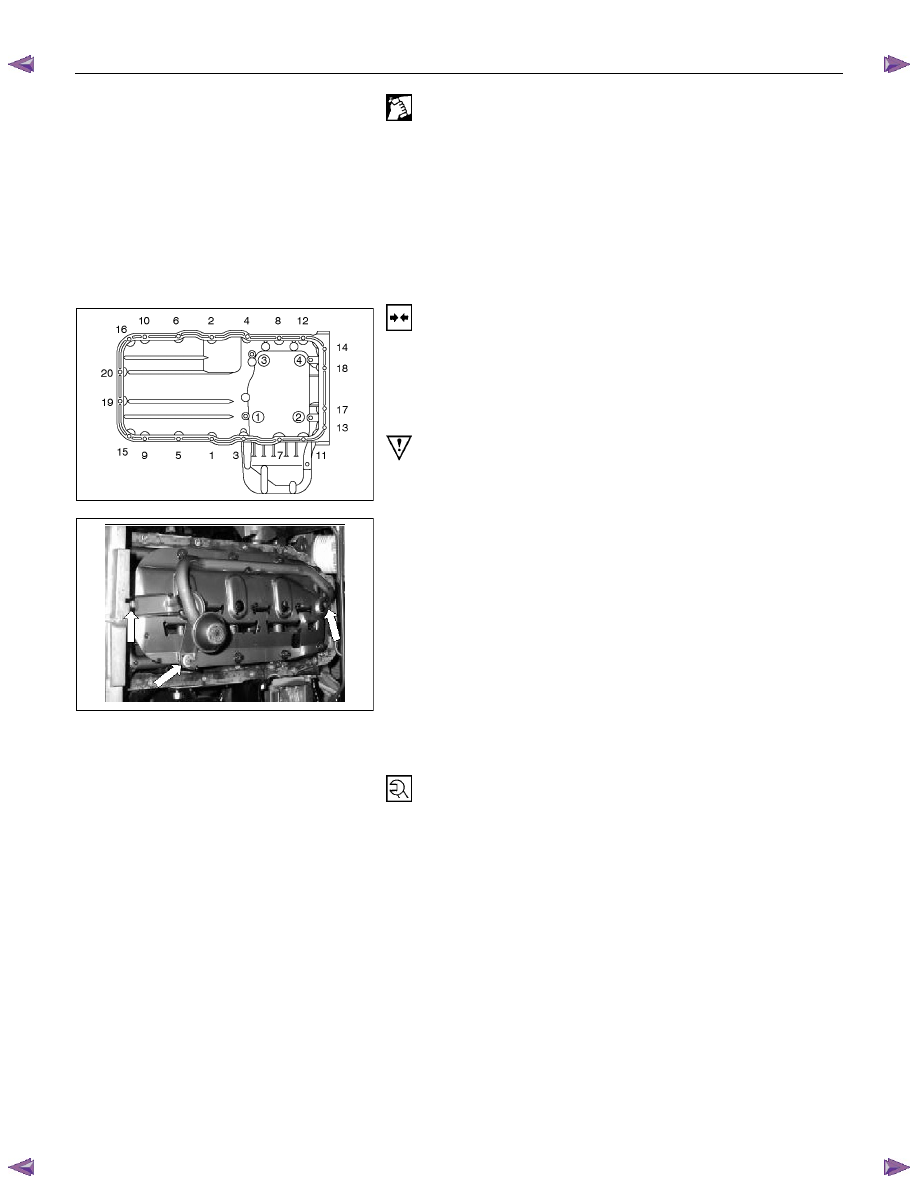
2. Apply the recommended light gasket to the oil pan fitting
surface as shown in the illustration.
3. Install the bearing bridge.
4. Install baffle plate, or reuse baffle plate.
Caution
Baffle plates can be retrofitted without difficulty - replace baffle
plate.
5. Install oil intake pipe to oil pump and oil intake pipe
bracket to cylinder block.
6. Install oil pan and new gasket to cylinder block and insert
bolts with Locking Compound 15 10 177 (90 167 347).
Maximum assembly time including torque check is 10
min.
7. Return the power steering unit (and front axle [4
×4 model
only]).
8. Install the crossmember.
Tighten (Torque)
Oil intake pipe to oil pump -8N
⋅m (0.8 kgf⋅m)
Oil intake pipe bracket to cylinder block - 6 N
⋅m (0.6 kgf⋅m)
Oil pan to cylinder block - 8 N
⋅m (0.8 kgf⋅m)
Bearing bridge to cylinder block – 8 N
⋅m (0.8 kgf⋅m)
ENGINE MECHANICAL (C24SE) 6A-51
OPERATIONS ON CRANK DRIVE
Con-Rod Bearing
Removal
1. Remove oil pan and bearing bridge according to the
corresponding operation.
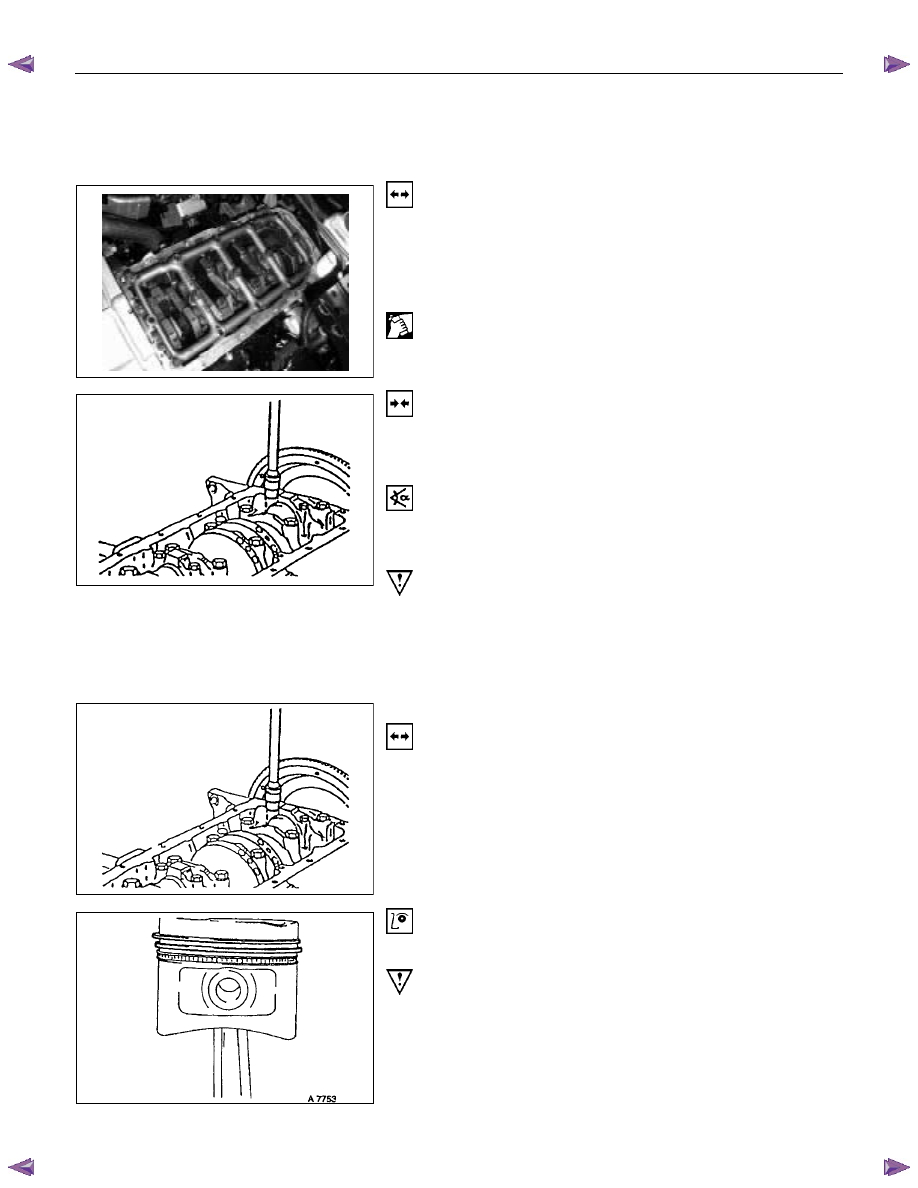
2. Remove con-rod bearing cap and con-rod bearing after
marking both sides.
Clean
Con-rod journal, con-rod bearing cap
Installation
1. Install new bearing shafts lightly coated with engine oil.
2. Install con-rod bearing cap.
Torque-Angle Method
Con-rod bearing cap to con-rod - 35N
⋅m (3.5 kgf⋅m) +45° to
60
°
Important!
Use new bolts.
3. Install oil pan and bearing bridge according to the
corresponding operation.
Piston with Con-Rod
Removal
1. Remove cylinder head and oil pan according to the
corresponding operations.
2. Remove piston with con-rod after marking con-rod
bearing cap.
Inspection
Remove and install all parts, if applicable.
Important!
Ring gap offset:
Piston rings - 180
°.
Oil scraper rings - 25 to 50 mm/1 to 2 in. from gap of
intermediate ring to the left and to the right.
6A-52 ENGINE MECHANICAL (C24SE)
Installation
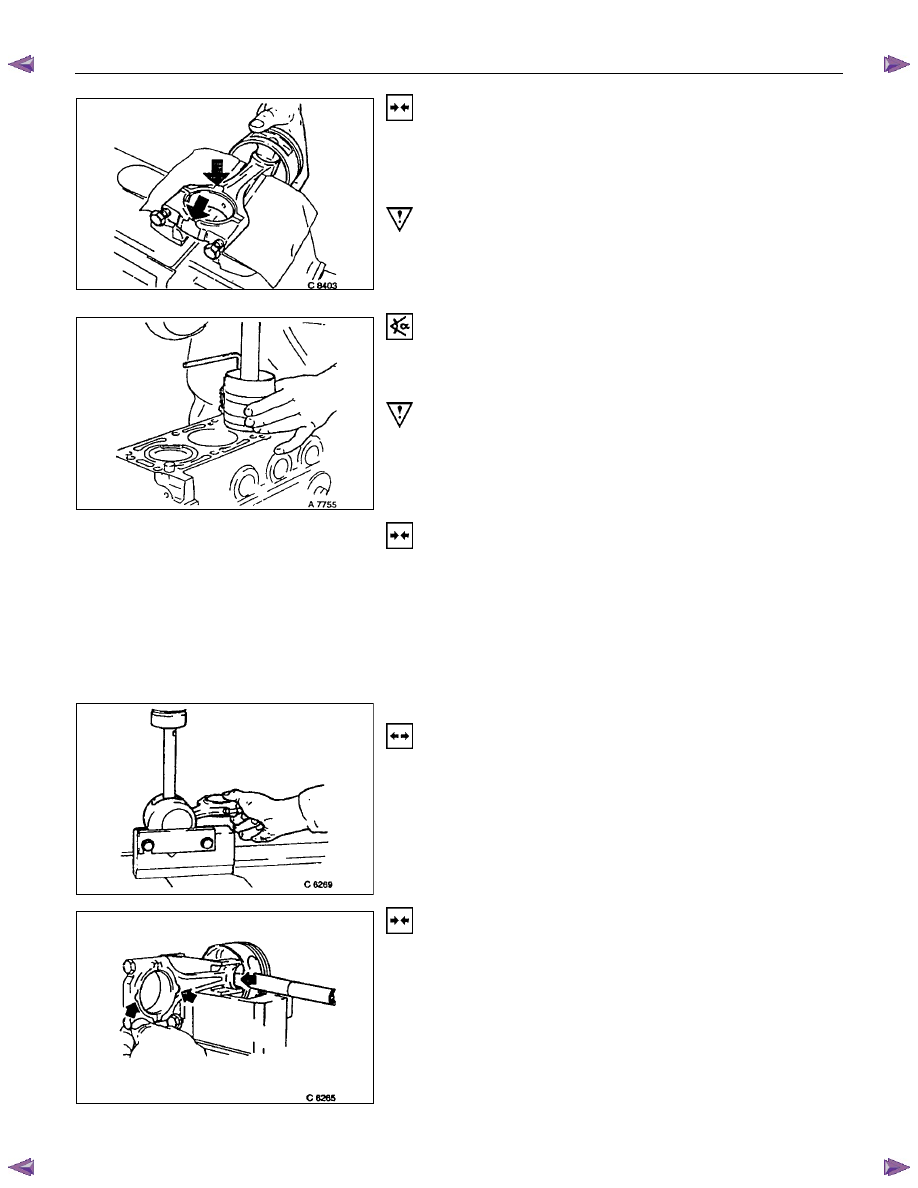
1. Install piston with con-rod by inserting with engine oil.
2. Coat piston rings with engine oil and compress with
piston ring compressor.
Important!
Installation position:
Arrow / notch on piston head on timing side of engine
Beads on con-rod on clutch side
Torque-Angle Method
Piston to cylinder block.
Con-rod bearing cap to con-rod-35N
⋅m (3.5 kgf⋅m) +45° to 60°
Important!
Use new bolts.
Installation
1. Install oil pan and cylinder head according to the
corresponding operations.
2. Install sealing Gasket or replace if damaged.
3. Install camshaft housing to cylinder head.
4. Install cylinder head according to the corresponding
operation.
Con-Rod
Removal
1. Remove piston with con-rod according to the
corresponding operation.
2. Disassemble con-rod piston assembly by pressing out
piston pin, using 5-8840-0468-0.
Installation
1. Slide guide drift (5-8840-0468-0) in horizontal position
through piston and con-rod as far as side plate stops.
2. Tighten bolts evenly so that the piston rests flush on the
rear plate.
3. Remove centre piece from guide drift and insert piston
bolts (lubricated) into guide drift.
ENGINE MECHANICAL (C24SE) 6A-53
4. Heat a new con-rod to 280
°C in the oil bath.
5. Install the con-rod to the piston and insert the piston pin.
Important!
Since the con-rods have no weight balancing studs, re-working
is not possible.
Exchange con-rods in sets only.
Installation position, beads on con-rod point to the flattening on
the piston pin eye.
Firmly seated piston pin cannot be pushed in. Carry out
installation quickly.
Piston Rings
Removal
1. Remove piston with con-rod according to the
corresponding operation.
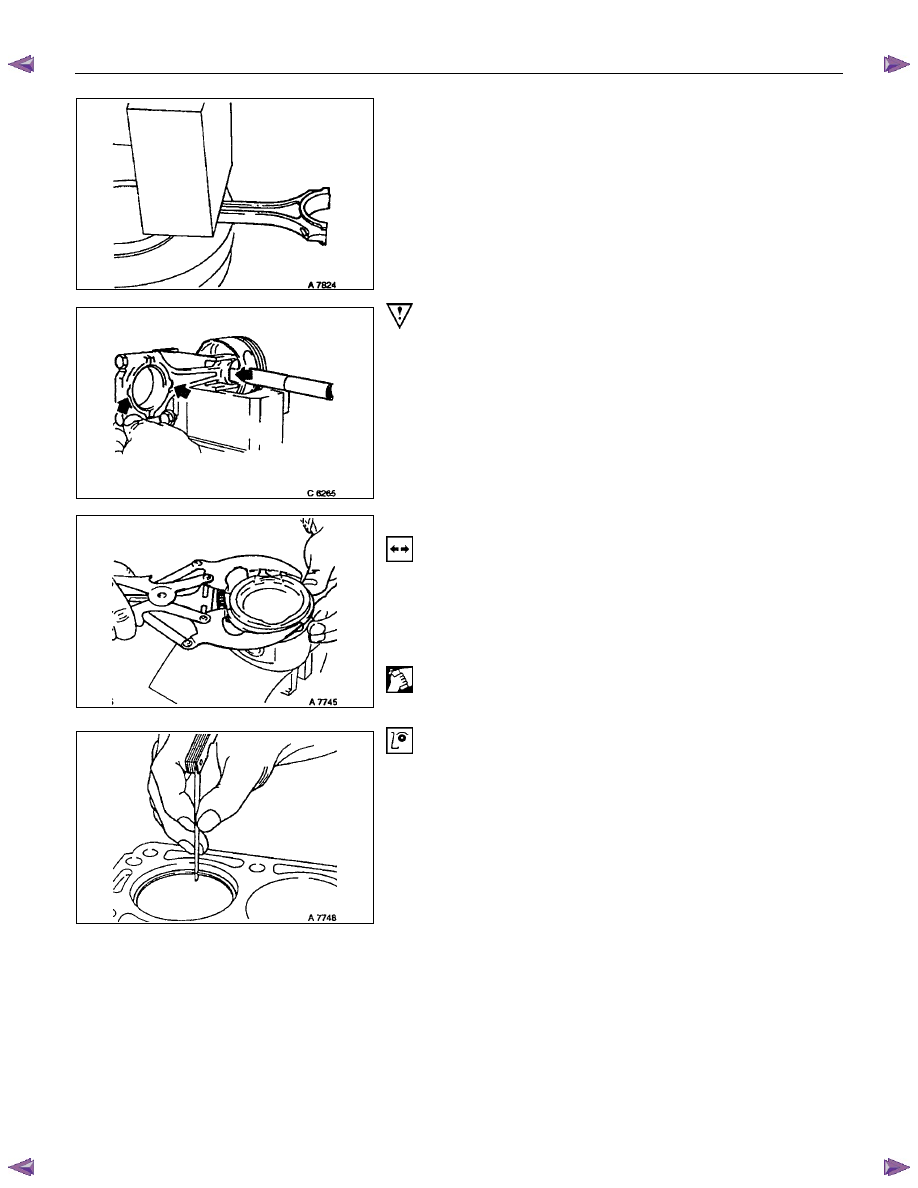
2. Remove piston rings using commercially available ring
installer or piston ring clamp pliers.
Clean
Piston ring grooves - ground piece of old piston ring
Inspection
Piston ring gap
For piston ring sizes, permissible piston ring gaps - see
"Technical Data"
Нет комментариевНе стесняйтесь поделиться с нами вашим ценным мнением.
Текст