Isuzu KB P190. Manual — part 517
6A-54 ENGINE MECHANICAL (C24SE)
RTW46ASH002401
Installation
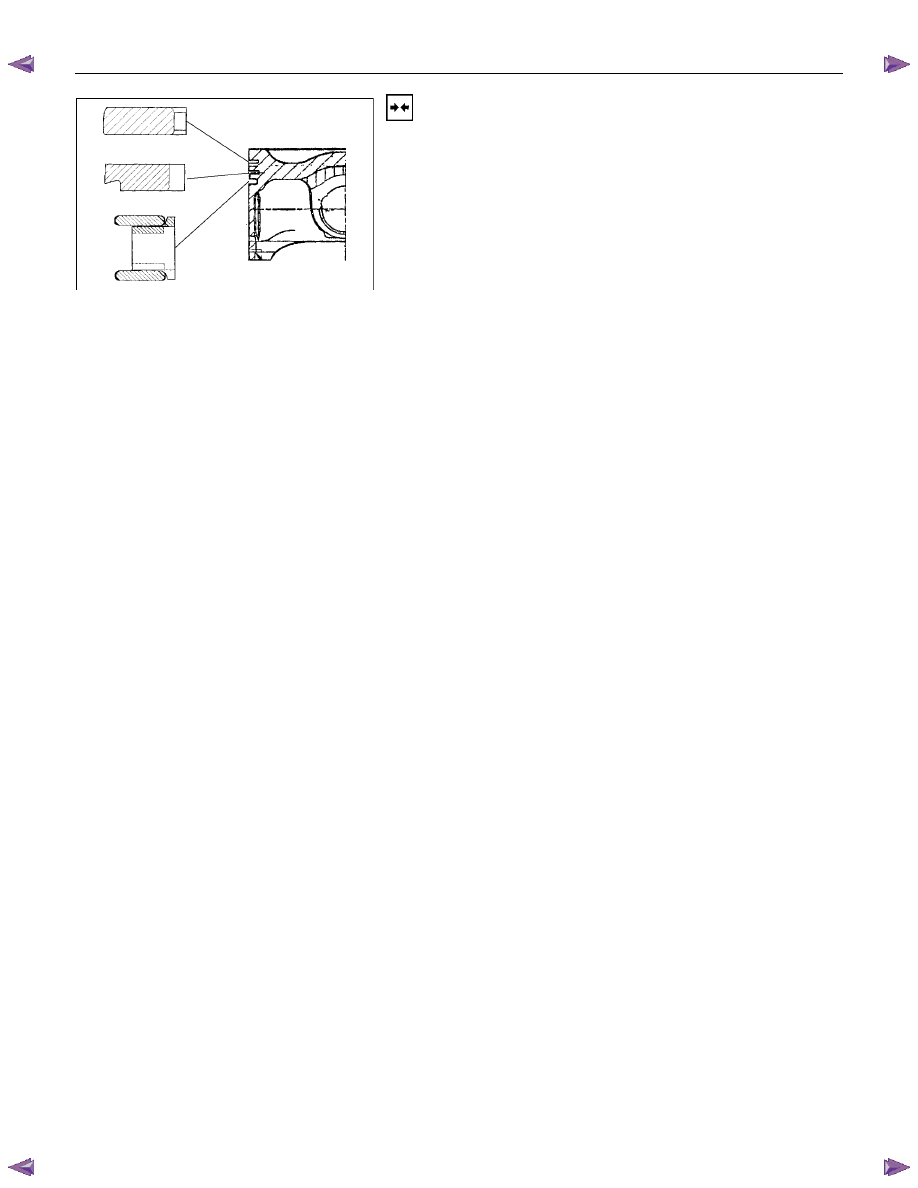
1. Install oil scraper ring.
2. Offset ring gaps of steel band rings each 25 to 50 mm/1
to 2in. to the left or right of the intermediate ring gap.
3. Install piston rings.
4. Offset ring gaps by approx. 180
°.
5. Install second piston ring with identification mark "TOP"
facing upwards.
6. Install piston with con-rod according to the corresponding
operation.
ENGINE MECHANICAL (C24SE) 6A-55
OPERATIONS ON REMOVED ENGINE
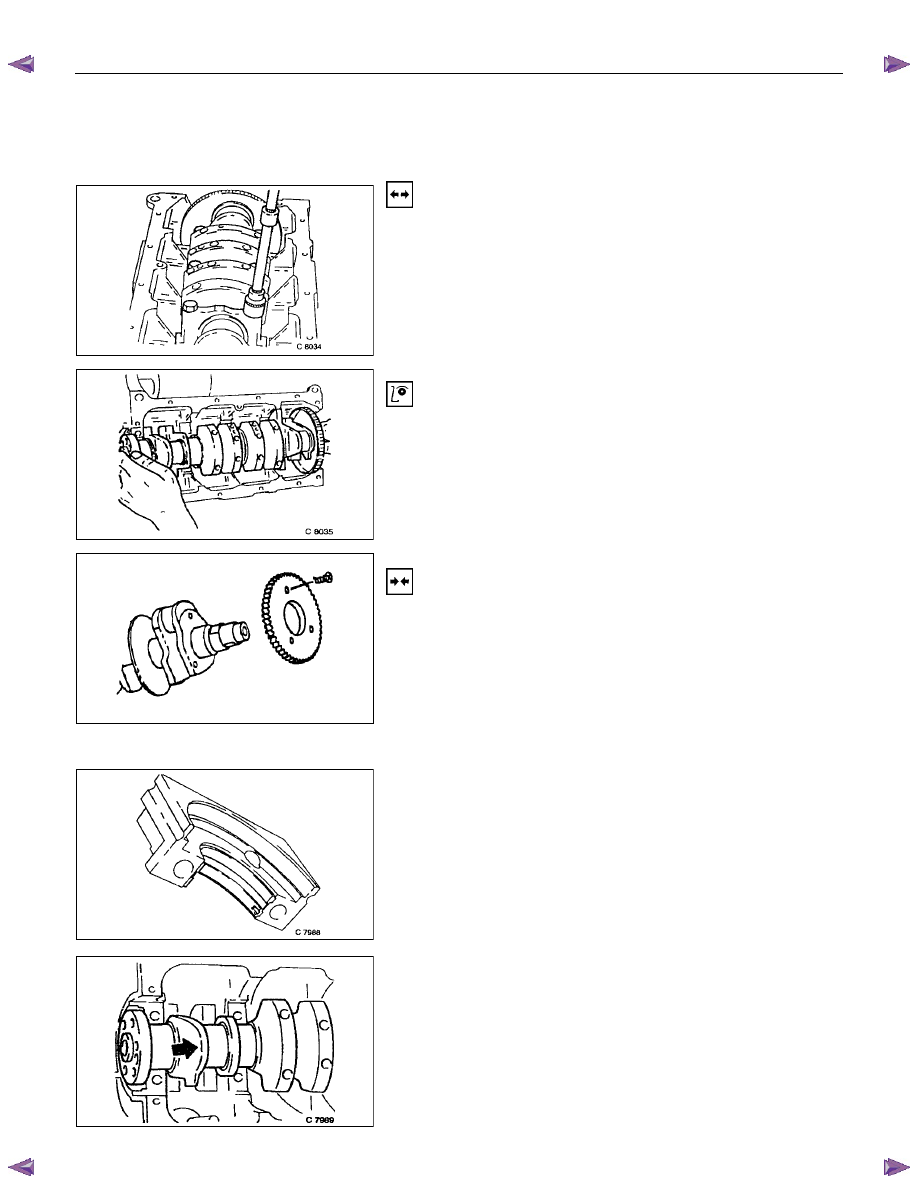
Crankshaft
Removal
1. Mount the engine on an engine overhaul stand with
appropriate adapters.
2. Remove the aggregates, flywheel/drive disc, oil pan,
bearing bridge and oil pump according to the
corresponding operation.
3. Mark the con-rod bearing cover.
4. Remove the crankshaft bearing cover.
5. Remove the crankshaft from cylinder block.
Inspection
Remove and install all parts if necessary.
Crankshaft pulse pickup sensor rotor inspection and repair.
Inspect the crankshaft pulse pickup sensor rotor for excessive
wear and damage.
Replace the crankshaft pulse pickup rotor if the inspection
results exceed wear and damage limits.
Installation
1. Install the crankshaft pulse pickup sensor.
Torque: 13N
!!!!m (1.3 kgf!!!!m)
2. Install new bearing shells into the cylinder block and
bearing cover.
3. Coat the bearing shafts with engine oil.
For oversizes-see “Technical Data”
4. Install a new crankshaft into the cylinder block.
Note
The sealing of the crankshaft can be corrected with light
blows with a rubber hammer on the crank arm (arrowed).

6A-56 ENGINE MECHANICAL (C24SE)
5. Apply a bead of sealant (TB-1207C or equivalent) in the
grooves of both bearing shells.
Important!
After installation of bearing cover, press in sealing compound
again from above, until compound emerges at the joints.
Torque - Angle Method
Bearing cover to cylinder block - 50 N
⋅m (5.1 kgf⋅m) +40° to
50
°
Con-rod bearing cover to con-rod - 35 N
⋅m (3.5 kgf⋅m) +45° to
60
°.
Use new bolts.
6. Install oil pump, oil pan, bearing bridge rear crankshaft
sealing, flywheel/drive plate, and aggregates according to
the corresponding operations.
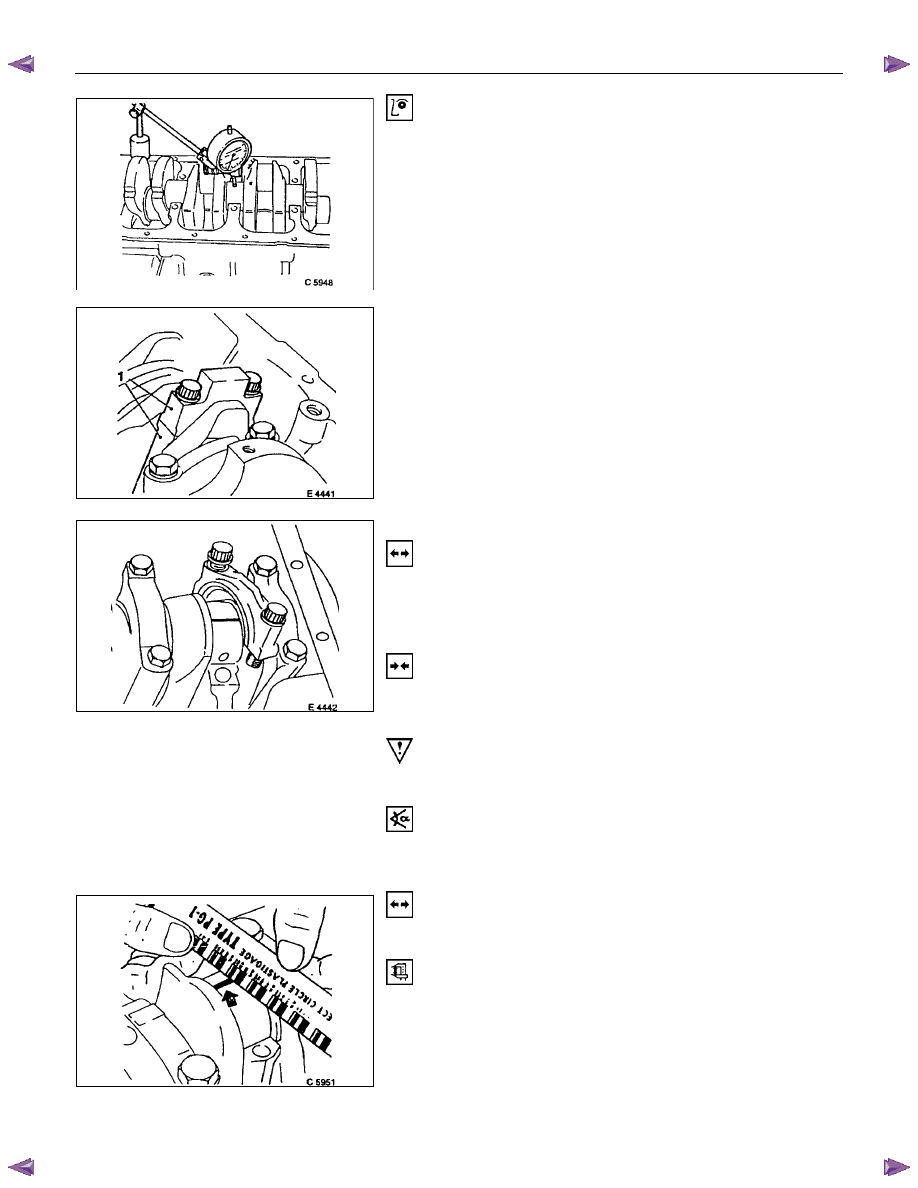
Inspection
Bearing play - bearing cover removed
Measure
With "Plastigage" (ductile plastic threads)
Cut threads to length of bearing width and lay axiaity between
crankshaft journal and bearing shell (arrowed).
Install bearing cover with correct torque.
Important!
Grease crankshaft journal and lubricate bearing shell slightly
so that the thread does not tear when the bearing cover is
moved.
Crankshaft
Inspection
End play when bearing shells are installed.
Front end contact surfaces of flywheel/flexible plate.
Permissible end play - see "Technical Data "
ENGINE MECHANICAL (C24SE) 6A-57
Inspection
Out-of-round (run-out)-middle bearing shell removed when
mounting on front and rear bearing.
Permissible out-of-round - see "Technical Data"
Bearing Free Play Measurement
Two methods for measuring bearing free play are described -
1. Plastigage method and 2. micrometer and gauge method.
The two procedures are suitable for measuring both con-rod
and main bearing free play.
For both methods ensure con-rod and main bearing caps are
identified (1) prior to removal as they are machine matched.
1.Plastigage Method
Removal
1. Remove bearing cap and shell.
2. Lightly coat journals and bearings with engine oil to
prevent Plastigage from tearing when cap is removed.
Installation
1. Lay a length of Plastigage across width of crank pin and
fit bearing cap and shell using old bolts at this stage.
Important!
Do not allow crankshaft to rotate.
Torque - Angle Method
Main bearing cap bolt - 60 N
⋅m (6.1 kgf⋅m) +40° + to 50°.
Con-rod bearing cap bolts - 35 N
⋅m (3.6 kgf⋅m) +45°.
Removal
1. Remove bearing cap and shell.
Measure
Width of Plastigage -use scale supplied with Plastigage.
If con-rod bearing clearance exceeds 0.031mm/0.001in or
main journal bearing clearance exceeds 0.04mm/0.02in. -
check crankshaft journal diameters - see corresponding
operation.
Replace bearing if crankshaft is within specification - see
"Technical Data"
Нет комментариевНе стесняйтесь поделиться с нами вашим ценным мнением.
Текст