Isuzu KB P190. Manual — part 980

Automatic Transmission – 4L60E – On-vehicle Servicing
Page 7C4–7
N O T E
This will also flush the cooler hose/line
assemblies and cooler with transmission fluid.
7
If the flow rate is satisfactory, reconnect the cooler inlet line to the transmission, refer to
3.17
Transmission Cooler Line/Hose Assemblies.
8
Lower the vehicle, check and top up the transmission fluid to the correct level as required, refer to
2.1 Transmission Fluid.
Flow Rate Test
Do not run the engine any longer than
absolutely necessary, as a fluid level too low
can cause aeration and foaming.
1
Ensure the transmission fluid is at the recommended level or slightly above, refer to 2.1
Transmission Fluid.
2
Disconnect the cooler inlet line at the transmission quick-connect fitting, refer to 3.17 Transmission Cooler
Line/Hose Assemblies.
3
Place a suitable size container underneath the disconnected cooler inlet line.
4
With the selector lever in the P position, start the engine and observe the fluid flow into the container after all the air
bubbles have ceased and a steady flow is evident. Measure the flow rate over 20 seconds and ensure it is within
the specification.
Transmission fluid flow rate specification per 20 Seconds:
Temperature:
Ambient. . . . . . . . . . . . . . . 0.7 Litres
86° – 93° C . . . . . . . . . . . . . .. 1.2 Litres
5
If the flow rate is less than the specification, the cause of the low flow rate must be located and rectified.
Possible cause could include:
•
restricted cooler within the radiator tank,
•
kinked or damaged transmission cooler hose/line assemblies, or
•
internal transmission fault such as a faulty pump.
6
Reinstall the cooler inlet line to the transmission quick-connect fitting, refer to 3.17
Transmission Cooler
Line/Hose Assemblies.
Automatic Transmission – 4L60E – On-vehicle Servicing
Page 7C4–8
3 Service
Operations
3.1
Fluid Change and Filter Replacement
To avoid personal injury take note of the
following:
• Avoid accidental hot oil spillage by
performing fluid change only when the
transmission fluid is cold.
• Wear safety glasses and gloves when
using compressed air and cleaning fluids.
Remove
1
Raise the vehicle and support in a safe manner, refer to 0A General Information.
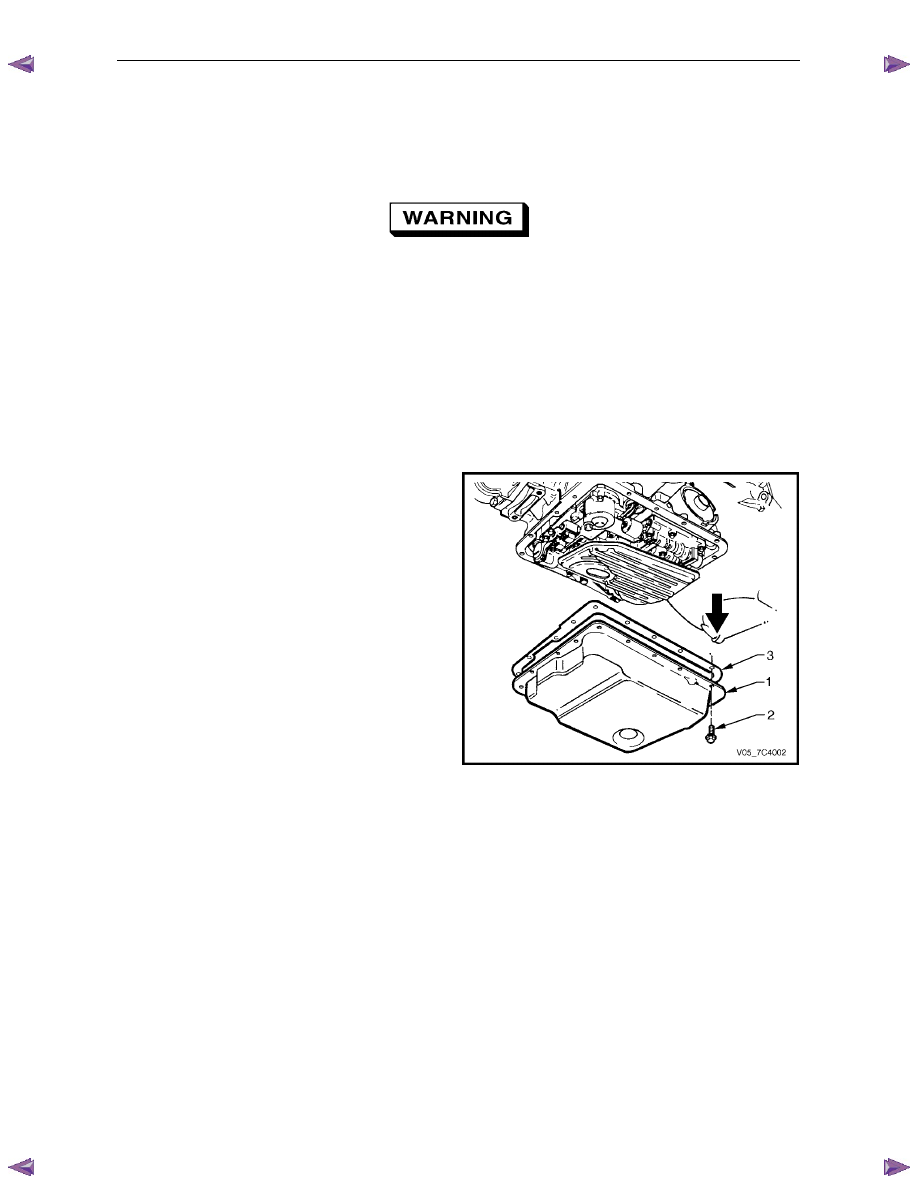
2
Clean all dirt from around the oil pan and the transmission case.
3
Place a suitable sized drain tray under the
transmission.
4
Hold the oil pan (1) in place and remove the oil pan
bolts (2) from the front and both sides.
N O T E
Leave the three rear oil pan bolts in place.
5
Loosen the three rear oil pan bolts by about 4 turns
each. While still supporting the oil pan, lightly tap the
sides with a rubber hammer to break the gasket (3)
seal.
6
Lower the front of the oil pan and drain the fluid into a
suitable container.
7
Remove the three remaining rear bolts and the oil pan
from the transmission.
8
Remove the oil pan gasket and discard.
Figure 7C4 – 2
Automatic Transmission – 4L60E – On-vehicle Servicing
Page 7C4–9
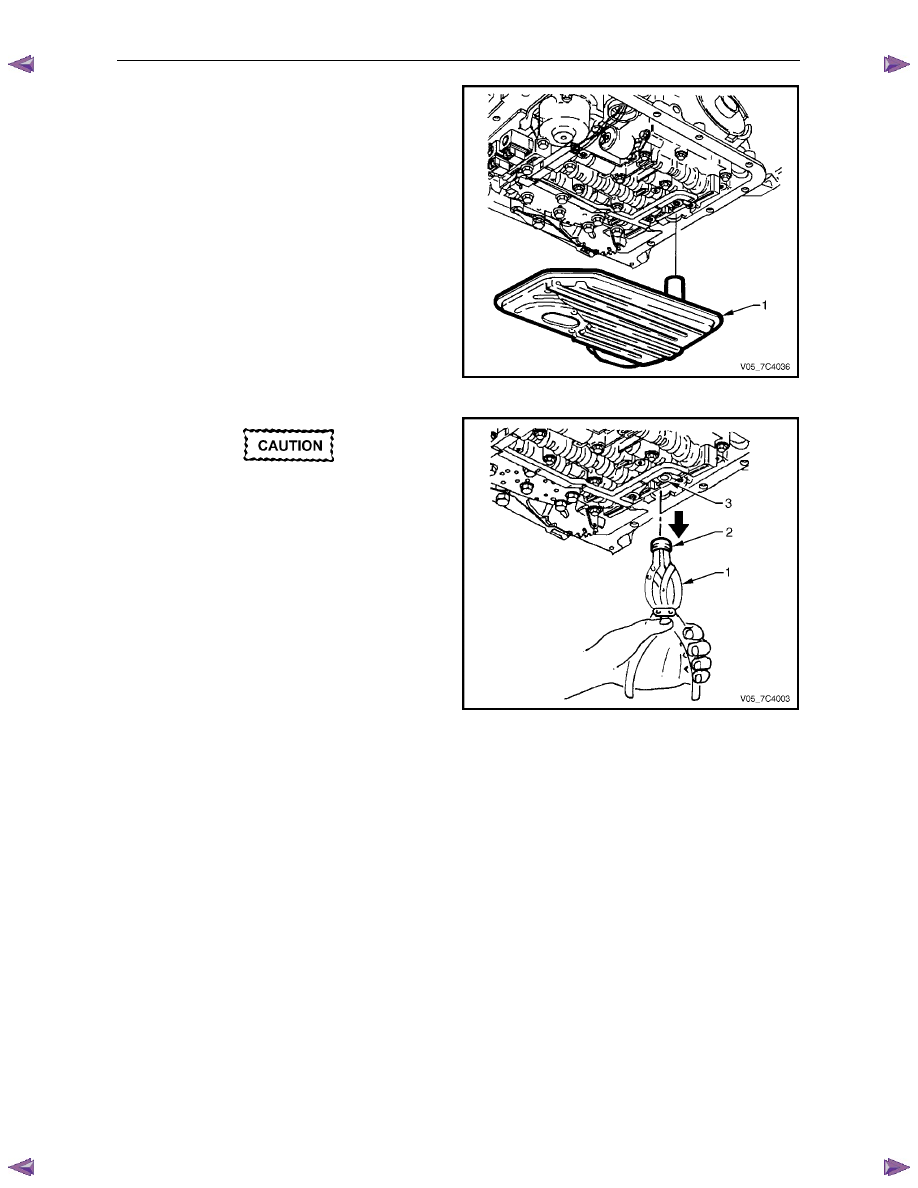
9
Remove the oil filter (1) by pulling down while twisting
the filter and remove it from the transmission.
10
Open the filter by prising the metal crimping away from
the top of the filter and pull it apart.
11
Inspect the filter material for particles that may indicate
evidence of a potential transmission problem.
Examples of the type of material are:
•
clutch friction material,
•
bronze slivers, indicating bush wear and
•
steel particles.
Figure 7C4 – 3
Take care not to scratch the oil pump bore,
as fluid leakage could occur from this point
or the pump may suck in air, causing the
fluid to aerate.
12
Using suitable circlip pliers (1) or a two legged puller
and slide hammer, remove the oil filter seal (2) taking
care not to scratch the oil pump bore (3) during the
process. Discard the seal.
Figure 7C4 – 4
Reinstall
1
Clean the oil pan in a commercially available cleaning fluid and blow dry using compressed air.
N O T E
Ensure all traces of the old gasket are removed
from the transmission and oil pan.
2
Wipe the transmission case gasket mating surface with a clean lint free cloth.
Automatic Transmission – 4L60E – On-vehicle Servicing
Page 7C4–10
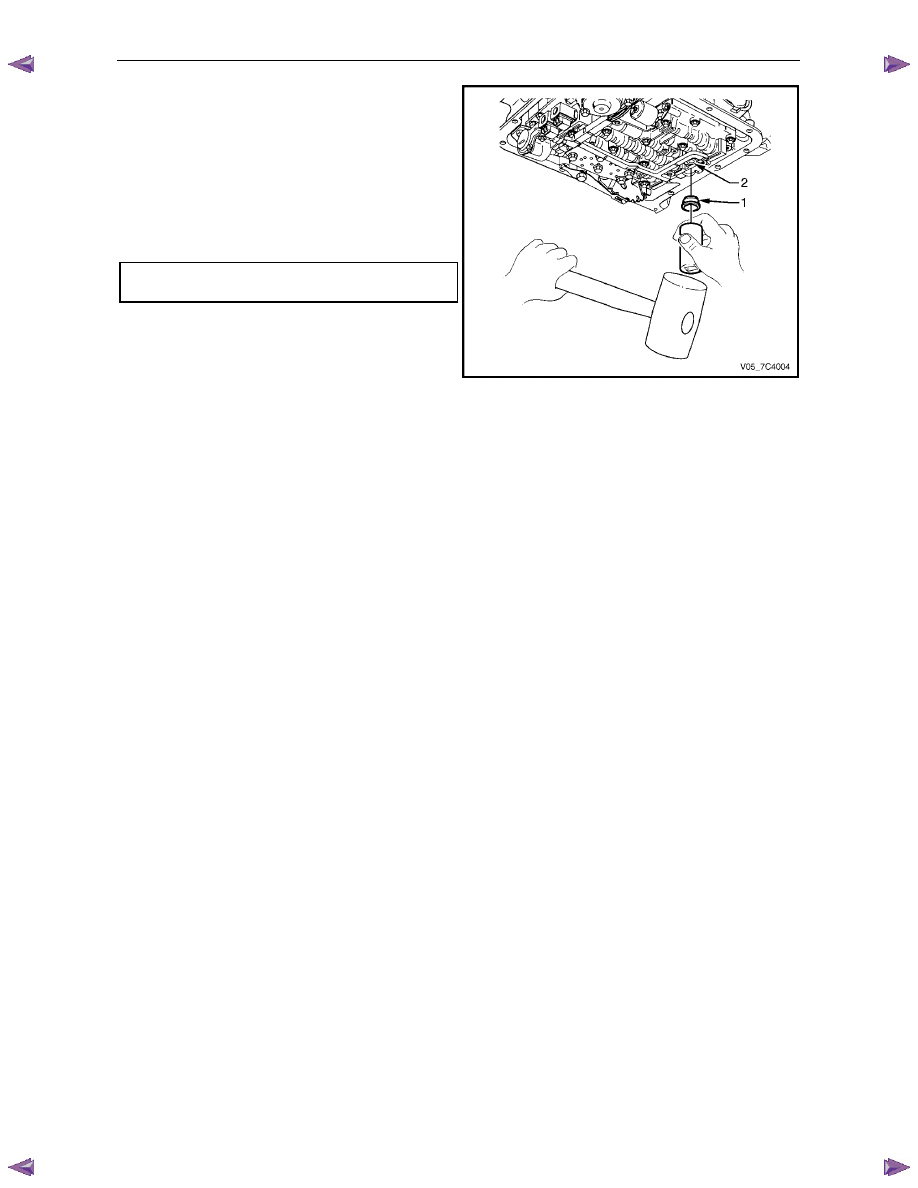
3
Lubricate a new oil filter seal (1) with clean
transmission fluid and install into the oil pump bore (2)
using a suitable sized socket or piece of tubing.
4
Install a new filter into the transmission case.
5
Check if the magnet is functional and located in the
designated position in the oil pan. Install a new gasket
and reinstall the oil pan.
6
Tighten the bolts attaching the oil pan to the correct
torque specification.
Oil pan attaching bolt
torque specification . . . . . . . . . . . 12.0 Nm
Figure 7C4 – 5
7
Lower vehicle and add approximately 4.8 litres of automatic transmission fluid.
8
Operate the vehicle for about 24 km or until normal transmission operating temperature is reached, refer to
2.1 Transmission Fluid.
9
Ensure there are no fluid leaks from the oil pan area, rectify as required.
10
Check and top up the transmission fluid to the correct level as required, refer 2.1
Transmission Fluid.
Нет комментариевНе стесняйтесь поделиться с нами вашим ценным мнением.
Текст