Isuzu KB P190. Manual — part 1281
8A-186 ELECTRICAL-BODY AND CHASSIS
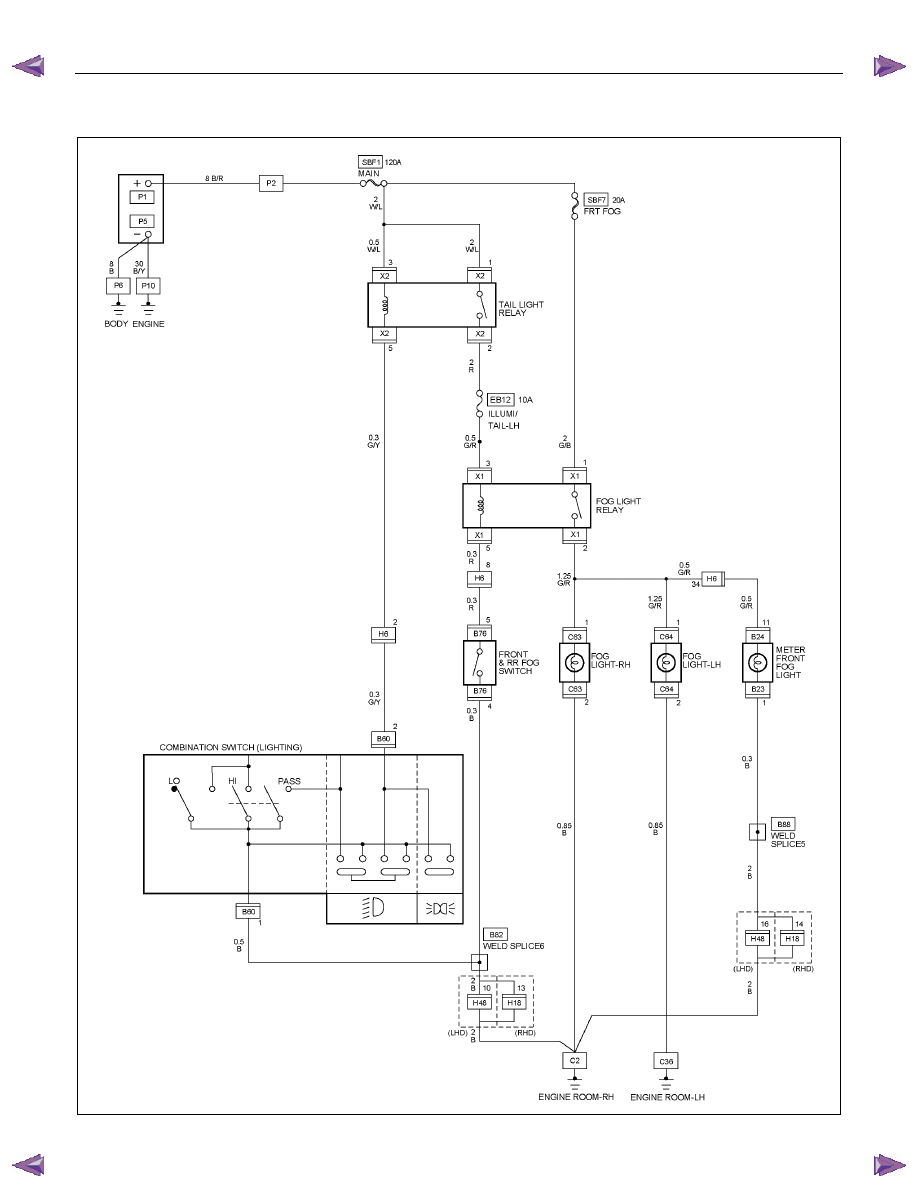
CIRCUIT DIAGRAM 4JJ1-TC/4JK1-TC (LHD) G.EXP
RTW78AXF022901
ELECTRICAL-BODY AND CHASSIS 8A-187
RTW780SH000601
FOG LIGHT (A type)
Removal
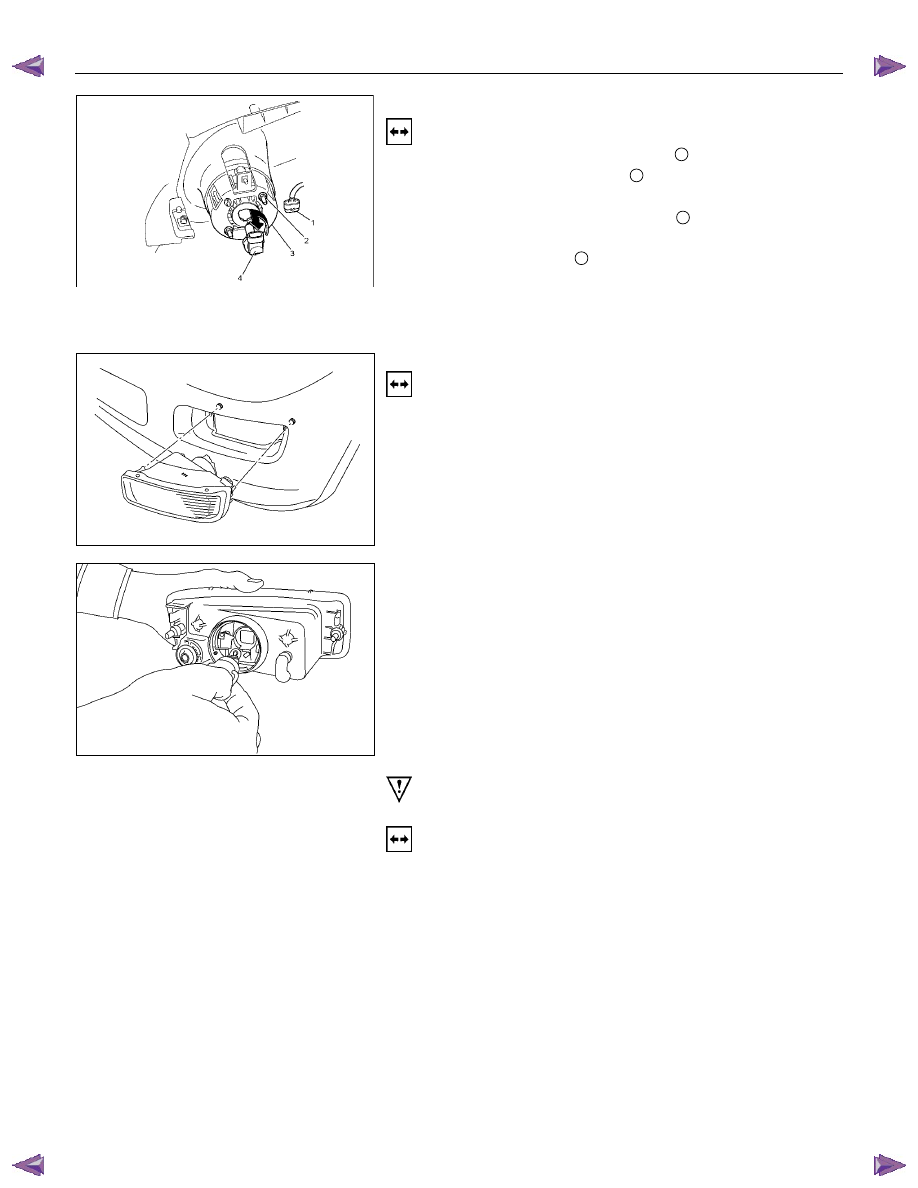
1. Disconnect the fog light connector
1
.
2. Remove two attaching nuts
2
.
3. Pull the fog light assembly toward the vehicle front to
remove it from the holding bracket
3
.
4. Remove the bulb with socket.
• Turn the socket
4
counterclockwise to remove it.
5. Remove the bulb.
• Release the lock spring.
• Pull out the bulb.
FOG LIGHT (B type)
Removal
1. Remove the radiator grille.
2. Remove the front bumper
3. Disconnect the fog light connector.
4. Remove the fog light.
5. Remove the bulb from the socket.
• Remove the cover by turning it counterclockwise out
side the lock spring.
• Remove the bulb.
Hold the bulb by the flange when replacing it.
Do not touch the bulb with your hands.
Installation
To install the fog light, follow the removal procedure in reverse
order.
Pay close attention to the important points mentioned in the
following paragraphs.
Bulb
Be absolutely sure that the fog light bulb is correctly installed.
This will prevent a poor contact and open circuit.
8A-188 ELECTRICAL-BODY AND CHASSIS
RTW780SH000801
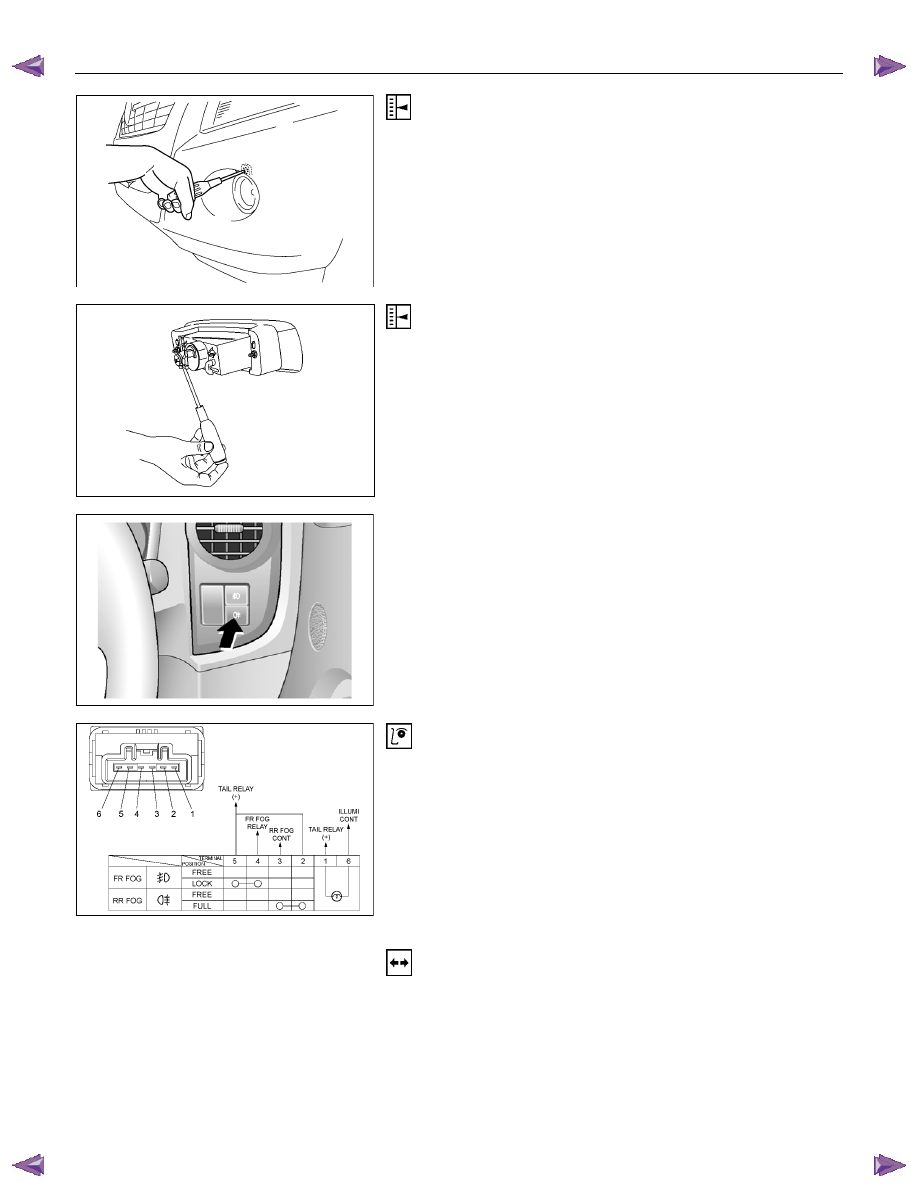
FOG LIGHT ADJUSTMENT (A type)
Vertical Adjustment
Turn the adjusting screw with a screwdriver to adjust the aim of
the fog light vertically.
FOG LIGHT ADJUSTMENT (B type)
Vertical Adjustment
Turn the adjusting screw with a screwdriver to adjust the aim of
the fog light vertically.
RTW78ASH000401
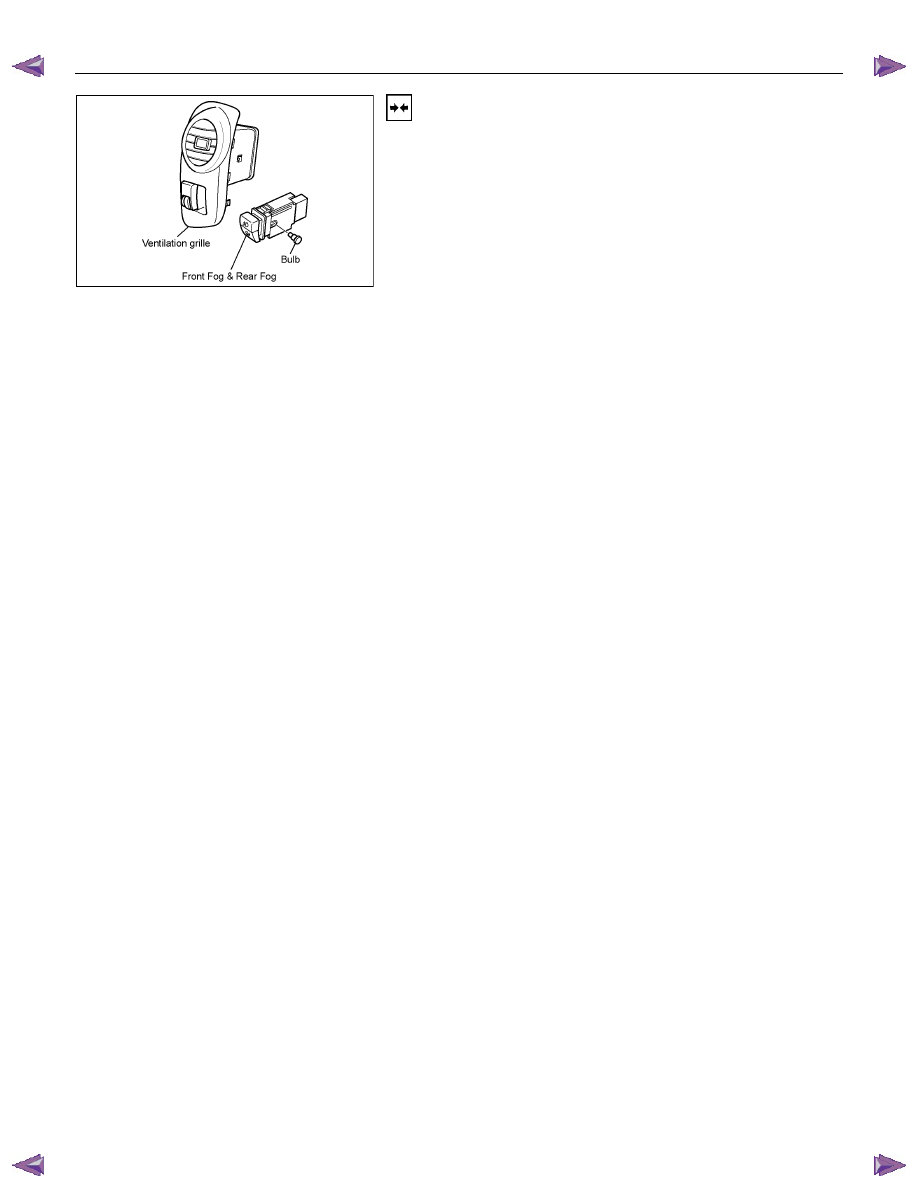
FRONT FOG & REAR FOG SWITCH
RTW48ASH000401
Inspection
Check to see if there is any continuity between the terminals of
the front fog light switch.
Replace the switch when the result of inspection is found
abnormal.
Removal
Preparation:
Disconnect the battery ground cable.
1. Ventilation grille
2. Harness connector
3. Front fog light & Rear fog light switch
To remove the switch, push the lock from the back side of
the cluster assembly.
4. Remove the bulb.
ELECTRICAL-BODY AND CHASSIS 8A-189
RTW78ASH000501
Installation
To install, follow the removal steps in the reverse noting the
following point.
1. Push in the switch with your fingers until it locks securely.
Нет комментариевНе стесняйтесь поделиться с нами вашим ценным мнением.
Текст