Suzuki Grand Vitara JB627. Manual — part 398
9H-2 Interior Trim:
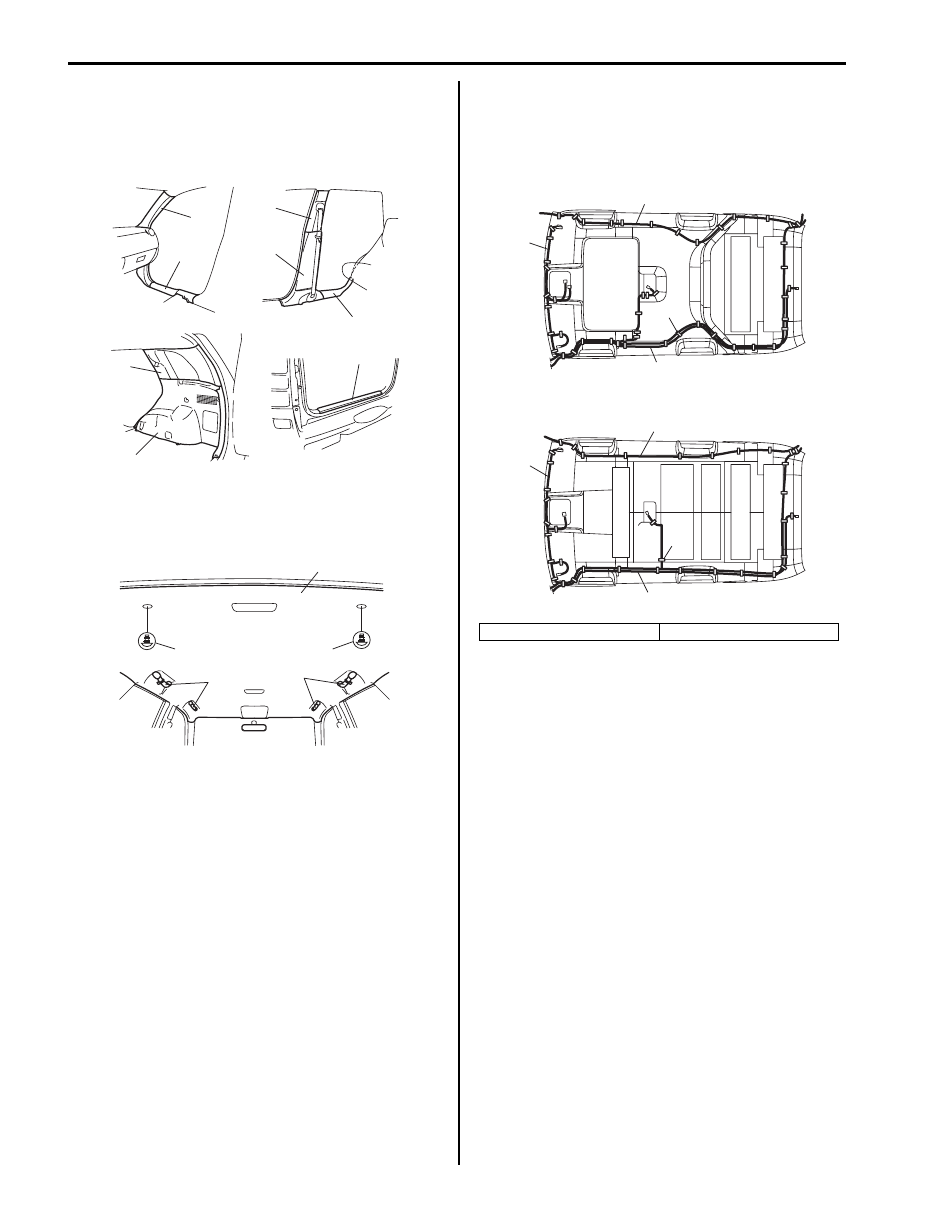
3) Remove front pillar upper trims (1), front and rear
side sill scuffs (2), center pillar inner lower trims (3),
center pillar inner upper trims (4), back panel trim
(5), rear quarter lower trims (6) and rear quarter
upper trims (7).
4) Remove assistant grip (1).
5) Remove head lining clips (2) and remove head lining
(3).
Installation
Reverse removal procedure noting the following.
• Set roof harness (1), rear washer hose (2) and
antenna feeder (3) to head lining with adhesive tape
(4) as shown.
1
2
2
4
5
3
6
7
I5JB0A980004-01
2
2
1
1
3
I5JB0A980005-01
[A]: Vehicle with sun roof
[B]: Vehicle without sun roof
1
4
2
1
2
3
4
[A]
3
[B]
I6JB01980001-01
Interior Trim: 9H-3
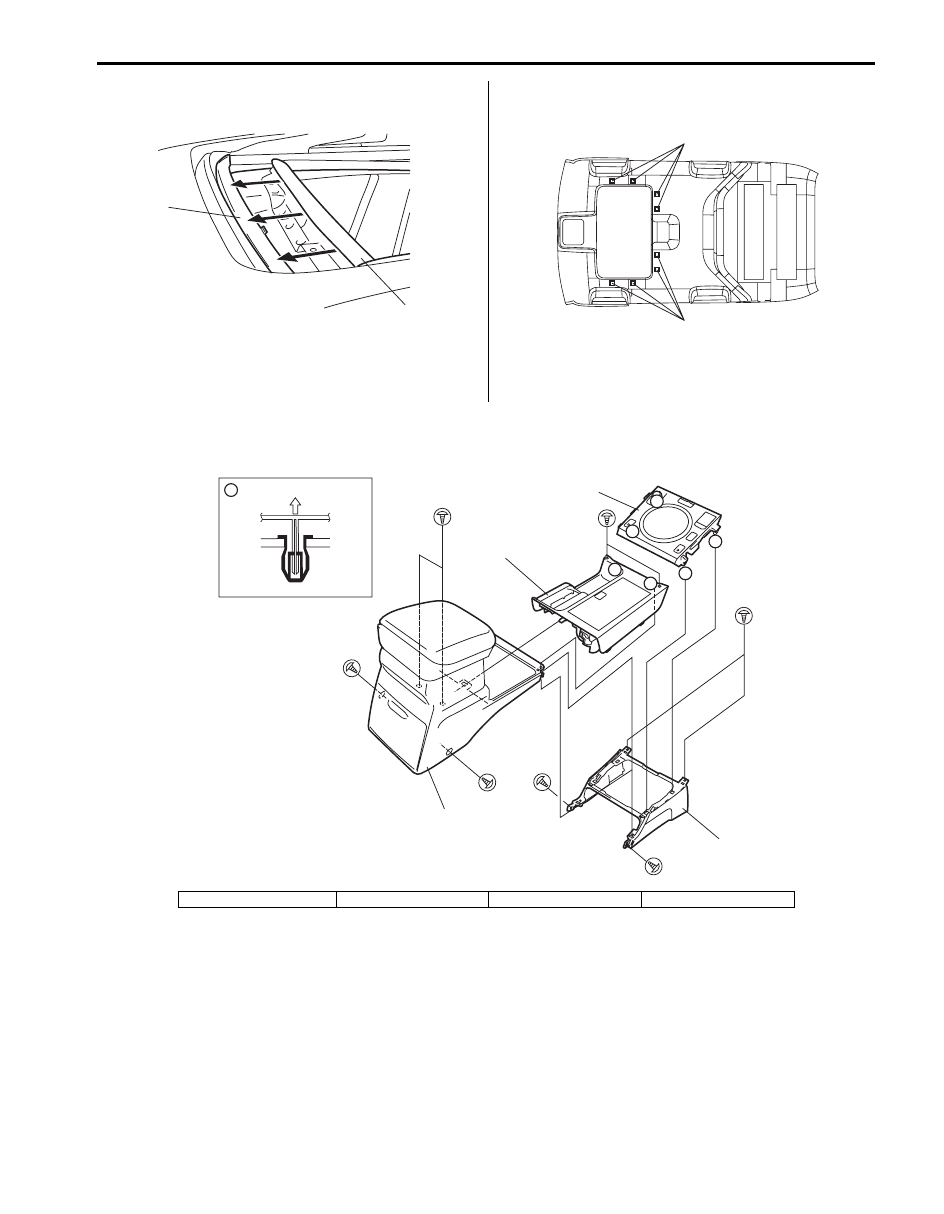
• For equipped with sun roof, hook on bracket (1) of
roof lining to sun roof housing (2).
• For equipped with sun roof, adhere fasteners (1) on
roof lining to fasteners of sun roof frame securely.
• For tightening torque of seat belt anchor bolt, refer to
“Front Seat Belt Components in Section 8A” and
“Rear Seat Belt Components in Section 8A”.
Console Box Components
S6JB0B9806003
1
2
I5JB0A980007-01
1
1
I5JB0A980010-01
A
A
A
A
A
A
A
1
2
3
4
I5JB0A980008-02
1. Front console box
2. Rear console box
3. Gear shift panel
4. Console rear panel
9I-1 Sun Roof / T-Top / Convertible Top:
Body, Cab and Accessories
Sun Roof / T-Top / Convertible Top
General Description
Power Sun Roof System Description
S6JB0B9901001
The controller is included in the sun roof motor unit.
The sun roof functions are controlled with the sun roof position data. Sun roof position and sliding direction are
detected by the controller referring to pulse signals from motor.
Initialization of the sun roof position data is required in the following situation to reset anti-pinching function: battery
cable or motor connector is disconnected since the sun roof position data is deleted without power supply to the motor.
Refer to “How to reactivate the system to prevent being pinched by the sunroof” in Sunroof section of Owner’s manual
to initialize the sun roof position data.
Diagnostic Information and Procedures
Power Sun Roof System Symptom Diagnosis
S6JB0B9904001
Repair Instructions
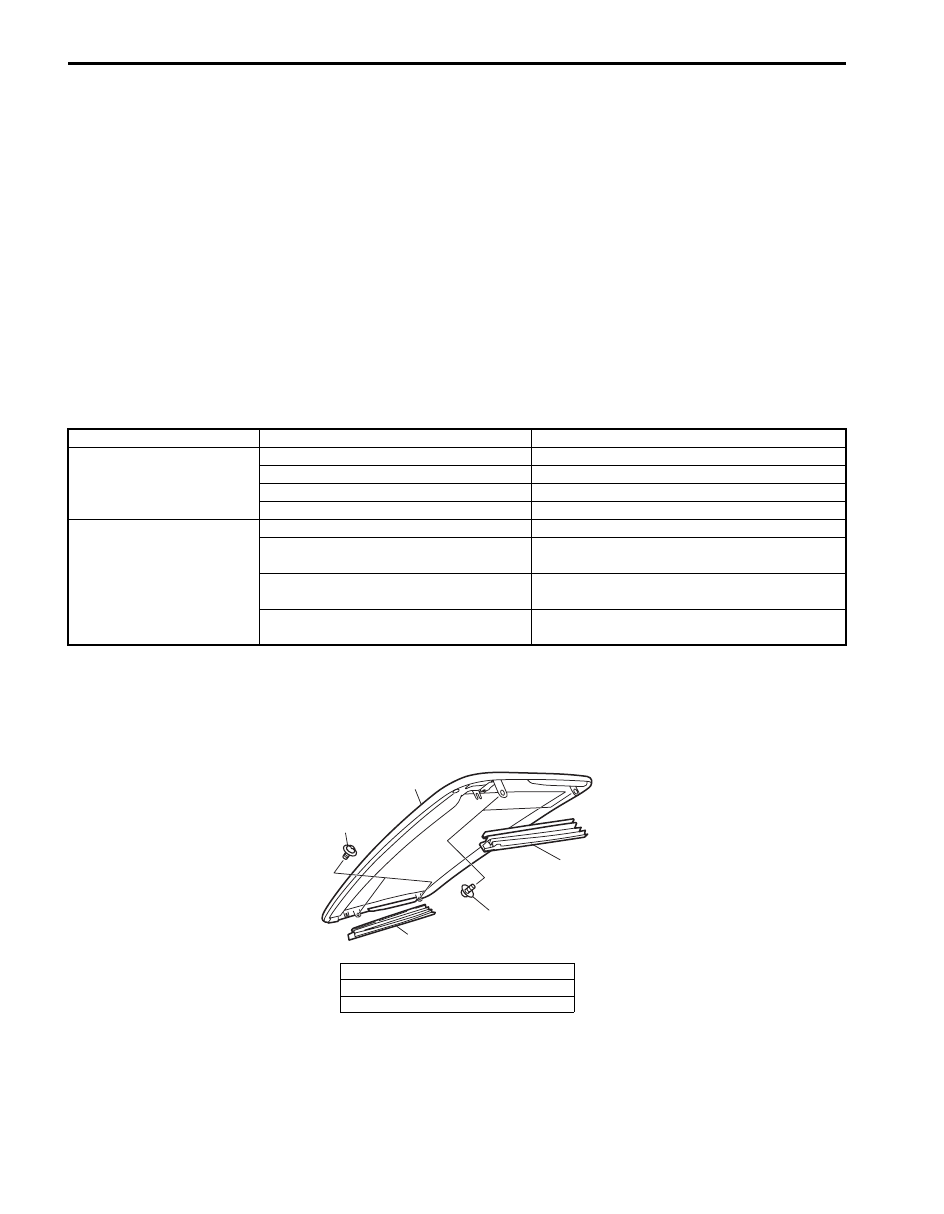
Sun Roof Glass Components
S6JB0B9906001
Condition
Possible cause
Correction / Reference Item
Sun roof does not operate
(sun roof motor runs OK)
Foreign object stuck in sun roof rail
Remove or clean stuck object.
Mis-installation of sun roof rail
Install correctly.
Conflicts of sun roof parts
Fix conflicts.
Mis-installation of sun roof drive cable
Install correctly.
Sun roof does not operate
(sun roof motor does not
run)
Circuit fuse blown
Replace fuse to check for short.
Sun roof switch faulty
Check sun roof switch referring to “Sun Roof
Switch Inspection”.
Wiring or grounding faulty
Check circuit referring to “Sun Roof System
Circuit and Motor Inspection”.
Sun roof motor faulty
Check sun roof motor referring to “Sun Roof
System Circuit and Motor Inspection”.
1. Sun roof glass
2. Bolt
3. Sun roof cover
1
2
3
2
3
I5JB0A990001-01
Sun Roof / T-Top / Convertible Top: 9I-2
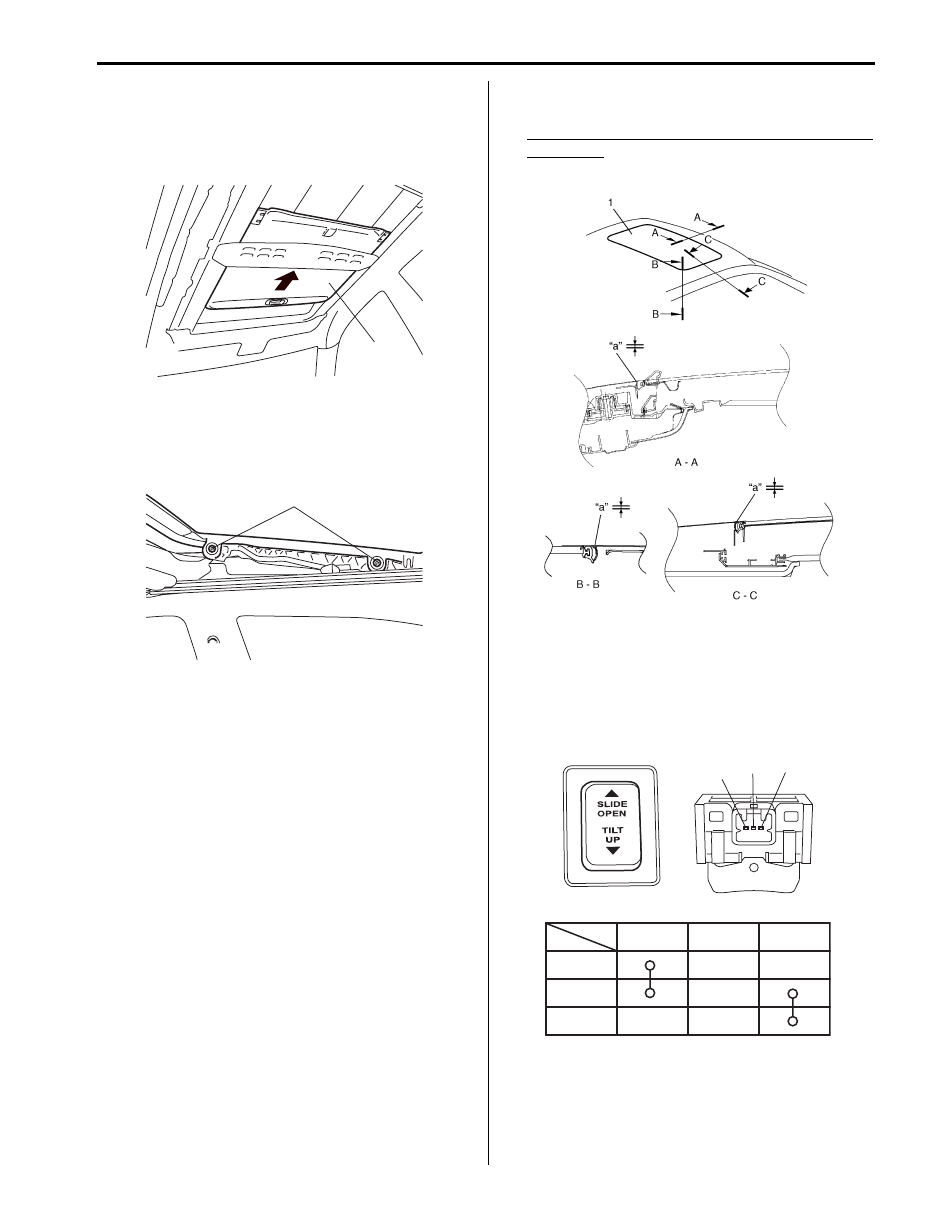
Sun Roof Glass Removal and Installation
S6JB0B9906002
Removal
1) Open sunshade (1) fully and tilt up sun roof.
2) Disconnect negative (–) cable at battery.
3) Remove sun roof covers.
4) Remove sun roof glass by removing bolts (TORX
®
T25) (1).
Installation
For installation, reverse removal procedure, noting the
following points.
1) Tighten glass fixing bolts temporarily.
2) Initialize sun roof position data referring to Owner’s
Manual.
3) Position sun roof glass by closing sun roof glass
completely.
4) Tighten glass fixing bolts after sun roof glass
adjustment referring to “Sun Roof Glass
Adjustment”.
Sun Roof Glass Adjustment
S6JB0B9906003
1) Loosen sun roof glass fixing screws (at 4 locations)
and move sun roof glass (1) up and down 2 to 3
times. In this way, sun roof glass can be positioned
in both vertical and horizontal directions by elasticity
of sun roof weather strip.
2) Position sunroof glass by such dimensions with
respect to roof panel surface as specified below.
Sun roof glass position (between glass roof and
roof panel)
“a”: 0 mm (0.0 in.)
3) After installing all parts and adjusting properly, check
sunroof for proper operation (open, close and up).
Sun Roof Switch Inspection
S6JB0B9906004
Check switch for continuity between terminals as shown
below.
1
I5JB0A990002-01
1
I5JB0A990003-01
I5JB0A990004-01
SLIDE
OPEN
N
TILT
UP
1
2
3
Switch
Terminal
1
2
3
I5JB0A990005-01
Нет комментариевНе стесняйтесь поделиться с нами вашим ценным мнением.
Текст